Table of Contents
Advertisement
Quick Links
Advertisement
Table of Contents

Related Manuals for Furrion FEHT32N8D


Summary of Contents for Furrion FEHT32N8D
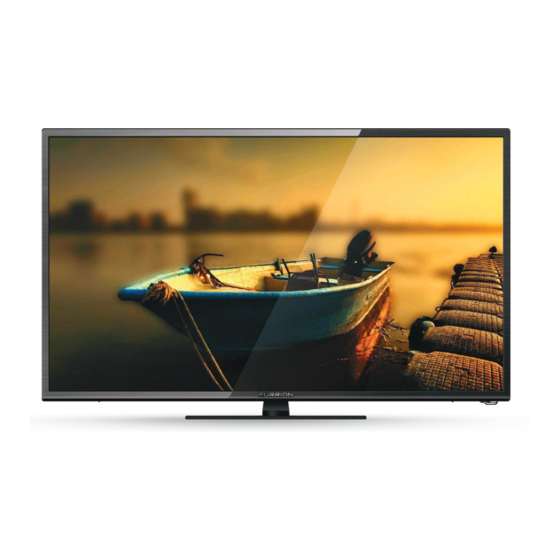
- Page 1 LED HD TV Owner’s Manual Model: FEHT32N8D...
-
Page 2: Welcome
Welcome Thank you and congratulations for purchasing this Furrion® LED HD TV. Before placing your new appliance into operation, please read these operating instructions carefully. This in- struction manual contains important information for safe use, installation and maintenance of the appliance. -
Page 3: Table Of Contents
Contents Welcome .....................1 Contents .....................2 Safety Warnings ..................3 Important Safety Instructions ......................3 Safety Precautions ........................... 5 Function Overview ..................7 Control Panel ............................. 7 Rear Panel ..............................8 Remote Control ............................9 About Your LED HD TV ................11 Features ............................... 11 Power Source ............................ -
Page 4: Safety Warnings
Safety Warnings 9. Protect the power cord from being walked CAUTION on or pinched, particularly at plugs, convenience receptacles, and the point RISK OF ELECTRIC SHOCK where they exit from the apparatus. DO NOT OPEN 10. Only use attachments/accessories specified by the manufacturer. - Page 5 Safety Warnings product. Condensation may also form during the summer 18. When replacement parts are required, be if the unit is exposed to the breeze from an air sure the service technician uses replacement conditioner. In such cases, change the location parts specified by the manufacturer or those of the unit.
-
Page 6: Safety Precautions
Adjust only those controls that are covered in the instructions, as improper changes or modifications not expressly approved by Furrion Notes when mounting the LED TV could void the user’s warranty. on the wall... - Page 7 Also, this would damage the product seriously. Accordingly, Furrion accepts no responsibility or liability for any injuries or property damage resulting from the improper installation.
-
Page 8: Function Overview
Function Overview Control Panel VOL+ Press to increase the volume VOL- Press to decrease the volume Press to skip to the next channel Press to skip to the previous channel MENU Press to enter the main menu SOURCE Press to select the input source POWER Press to switch the TV on/off... -
Page 9: Rear Panel
DVD Player, Games Console, Cable Box or other HDMI device. VGA IN CEC Consumer Electronics Control When connected to the CEC compatible Furrion Entertainment HDMI 3 IN PC AUDIO Systems or other CEC Compatible devices, the TV links with the system to give extra functionality. -
Page 10: Remote Control
Remote Control Button Function Switches to TV mode Selects Furrion Fireplace remote FIREPLACE control functions. STEREO * Please refer to your Furrion FIREPLACE Fireplace manual for more information. Press to turn the TV/Entertainment 9/AF System on/off - / -- 0/TA... - Page 11 Function Overview Button Function Button Function NICAM / Cycles through NICAM sound Press to scan radio stations: A brief AUDIO modes press searches through each stored station. Press & hold to scan and Toggles random playback mode / APS store the 6 strongest stations. on &...
-
Page 12: About Your Led Hd Tv
About Your LED HD TV Features Integrated Digital Tuner - You can view digital broadcasts without using a Digital TV Set-Top Box. Closed Caption Decoder With Full Text Mode - Displays text captions or full screen text on the screen for hearing impaired viewers. Picture Adjustments Using The Remote Control - The On-Screen display allows precise remote control adjustment of BRIGHTNESS, CONTRAST, COLOR, TINT and SHARPNESS. -
Page 13: Before Operation
Before Operation What’s in the Box 2. Install two AAA batteries. Thanks for purchasing this Furrion LED HD TV. This manual will help you set up and begin using your TV. Please read this manual thoroughly and keep this manual in a safe place for future reference. -
Page 14: Getting Started
Getting Started The First Time Setup window appears the first 3. Use key to highlight Start. Press OK time you turned on the TV. It will assist you to to start memorizing all the channels configure the TV and scan for available channels. available in your area. -
Page 15: Change Settings
Change Settings Picture Menu Picture Press to select Standard / Mild / 1. Press MENU button to display the main Personal / Dynamic. Picture Mode menu. * You can press P.MODE button on the remote control to change the picture 2. -
Page 16: Sound Menu
Change Settings 1. Use key to highlight the option you Advanced Settings want to reset. 2. Press to adjust the settings. Set options to reduce video noise. Press to select Off / Weak / 3. Press MENU to return to the previous menu Medium / Strong. -
Page 17: Channel Menu
Change Settings EQ Setting: Channel Menu Adjust the curve of 7 bands equalizer. 1. Press MENU button to display the main 1. Use key to highlight the EQ Setting. menu. 2. Press OK or to enter the EQ Setting menu. 2. -
Page 18: Auto Scan
Channel Auto Scan Manual Scan Auto Channel Update Off Channel Edit Change Settings Favorite Manager Signal Information Manual Scan Auto Scan: Digital Manual Scan Manual Scan Move MENU: Return EXIT: Exit Analog Manual Scan Search for the channels automatically. Digital See “Digital Manual Scan”... -
Page 19: Channel Edit
Digital Manual Scan Analog Manual Scan Digital Scan AnalogScan 44.25MHz Start Channel to Save CH001 Frequency 104.50 MHz Change Settings Color System Auto Strength Sound System Auto Off Start backwardd/forward Analog Manual Scan: ● Press Green button on the remote control to Channel Edit key to highlight the Analog 1. -
Page 20: Lock System Menu
Channel Edit MediaCorp HD1 801 TF1 Change Settings NRJ12 803 TPS STAR Eurosport France Signal Information: MENU: Return EXIT: Exit Dolby D 5.1 Demo Lock System key to highlight the Signal 1. Use Delete Skip Move Press 0~9 number keys to enter the Information. -
Page 21: Setup Menu
Change Settings Setup Menu Setup Select an OSD menu language. 1. Press MENU button to display the main Default is English. Press OSD Language select English/French/Spanish/ menu. Setup Portuguese. 2. Use key to highlight Setup menu, OSD Language English Audio Languages See “Audio Languages”... -
Page 22: Time Settings
Move MENU: Return EXIT: Exit Change Settings Subtitle Off Mode Subtitle Primary Language English Subtitle Secondary Language English Teletext: Hearing Impaired Off Audio Languages Audio Languages Teletext broadcasts pages of information and Audio Primary Press to select the desired English Audio Primary Language entertainment to specially equipped television Language... - Page 23 Move Adjust MENU: Return EXIT: Exit Move Adjust MENU: Return EXIT: Exit Change Settings Time Settings HDMI CEC Control 10 Seconds OSD Timer HDMI CEC Control Sleep Timer Off Off Auto Sleep 4 hours CEC Menu Control Time Zone Device List Time Move Adjust...
- Page 24 Change Settings Scheduled Record - Group 1 Setting Status Setting Is Not In Use Frequency Off Channel Start Time 2004-7-28 1 8 : 4 4 Adjust 4. Press to select Device List, then press End Time 2007-7-28 Adjust OK to enter and show the detail info of the 1 8 : 1 4 connected device.
- Page 25 Change Settings SCHEDULED VIEWING OF TV PROGRAMS. 1. This function allows users to create a program schedule where the TV will automatically change channels for viewing at the programmed times. NOTE: This function will not record TV programs. 2. To use this function press the EPG button on the remote, navigate to the desired program, then press the “BLUE”...
-
Page 26: Usb Operation
USB Operation Music Make sure a flash drive is inserted into the USB port before entering the USB mode. 1. Press SOURCE button and select MEDIA. 1. Use key to select Music. Press OK to Press OK to enter. enter. 2. -
Page 27: Movie
USB Operation Movie Text 1. Use key to select Movie. Press OK to 1. Use key to select Text. Press OK to enter. enter. 2. Use key to navigate the files or 2. Use key to navigate the files or folders saved in the flash drive, press OK to folders saved in the flash drive, press OK to enter. -
Page 28: Trouble Shooting
Trouble Shooting Problem Solution/Issue ● Make sure the power cord is plugged in. ● TV does not Try another AC outlet. operate ● Power is off, check fuse or circuit breaker. ● Unplug unit for an hour, then plug it back in. ●... -
Page 29: Specifications
Dimension without Stand (L*H*W) Dimension with Stand (L*H*W) Max Resolution 29/” x 17/” x 3/” 29/” x 18/” x 7/” FEHT32N8D 1366 x 768 @ 60Hz HD (737.2 x 443.5 x 83mm) (738 x 479 x 190mm) INPUT & OUTPUT CONNECTIONS... - Page 32 Furrion Innovation Center & Institute of Technology ● 52567 Independence Ct., Elkhart, IN 46514, USA ● Toll free:1-888-354-5792 ● Email: support@furrion.com © 2007-2017 Furrion Ltd. Furrion is trademark licensed for use by Furrion Ltd. and registered in the U.S. and other countries. FURRION.COM...
Need help?
Do you have a question about the FEHT32N8D and is the answer not in the manual?
Questions and answers