Download Print this page
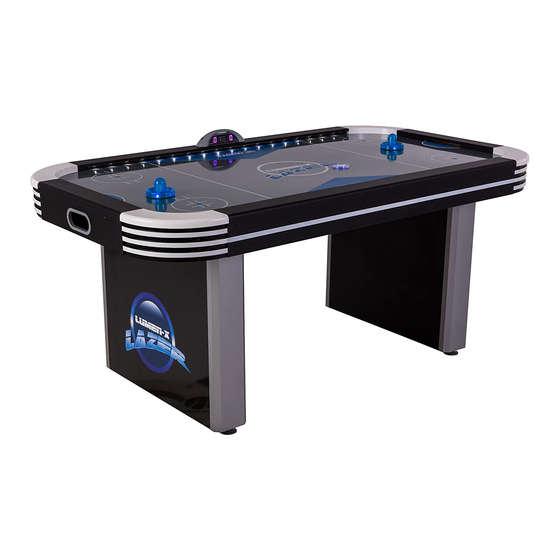
Triumph LUMEN-X LAZER Assemble Instruction

Triumph LUMEN-X LAZER Assemble Instruction

Air hockey table

Advertisement

Quick Links

W
e
s
r t
v i
e
o t
a
n
d
f
e r
e
f o
m
y
o
u
gameroom
P
e l
a
s
e
h
W
h
e
n
c
o
n
a t
t c
n i
g
a
p
p
c i l
a
b
e l
, )
a
n
d
p
o l
c
a
e t
d
o
n
h t
e
p
o r
Y
o
r u
M
o
d
l e
N
u
m
b
2 - 45-6800W/F -
Dat e Code:
Purchase Date:
PLEASE RETAIN THIS INSTRUCTION MANUAL FOR FUTURE REFERENCE
All Rights Reserved
©
2
0
16
E
c s
a
a l
d
e
S
p
r o
e
n
s
u
e r
h t
t a
a
n
u
a f
t c
r u
n i
g
h
a
v
e
a
n
y
p
o r
D
O
N
O
T
R
E
T
p
e l
a
s
e
c
- 1
888-996-2729
F
A
: X
- 1
@
C
u
s
o t
m
E
a
v
e
y
o
r u
dat e code
E
c s
a
a l
d
e
S
p
r o
s t
a
t r
n
u
m
b
r e
f i
e r
q
d
u
c
, t
p
a
k c
a
g
n i
, g
45-6800W/F
r e
s t
o
r u
p
o r
d
u
c
s t
d
e
e f
c
s t
r o
m
b
e l
m
s
i w
h t
y
U
R
N
T I
T
O
T
o
n
a t
t c
u
s
o t
f l l
6 8
- 6
7 8
s e
a c
a l
e d
O
r
w
i r
e t
t
: o
E
c s
a
a l
d
e
S
p
r o
s t
r e
S
e
v r
c i
e
D
e
p
a
. P
O
.
B
o
x
8
8
9
v
a
n
v s
l l i
, e
N I
4
7
7
0
w
h
e
n
p
e l
a
s
e
p
o r
v
d i
e
y
u
e
t s
n i
g
a
e r
p
a l
c
e
a
n
d
n i
h t
s i
o
w
n
e
- HL
1
a
e r
f o
h t
e
h
g i
i
s s
n i
g
p
r a
. s t
o
r u
n
e
w
p
o r
d
H
E
S
T
O
R
E
,
e r
e
@
:
- 3
5 3
1 3
p s
r o
. s t
t r
m
e
t n
6
n i
q
u
r i
n i
g
a
b
o
t u
o
r u
m
o
d
e
n l
u
m
b
e
m
e
t n
p
a
. t r
T
h
e
s
s r
m
a
n
u
a
. l
F
r o
C
u
s
o t
m
r e
S
e
v r
h
e
t s
q
u
l a
y t i
H
o
w
e
v
e
, r
f i
u
c
, t
o c
m
p
a
t r
. s
, r
date code (if
e
n
u
m
b
e
s r
a
e r
c i
e
C
l l a
- 1
888-996-2729

Advertisement

loading

Summary of Contents for Triumph LUMEN-X LAZER

  • Page 1 y t i . s t f l l 888-996-2729 gameroom . s t l l i dat e code date code (if c i l . t r 45-6800W/F 2 - 45-6800W/F - - HL Dat e Code: Purchase Date: PLEASE RETAIN THIS INSTRUCTION MANUAL FOR FUTURE REFERENCE All Rights Reserved ©...
  • Page 2 IMPORTANT! READ EACH STEP IN THIS MANUAL BEFORE YOU BEGIN THE ASSEMBLY. TWO ADULTS ARE REQUIRED TO ASSEMBLE THIS 72” LUMEN-X LAZER AIR HOCKEY TABLE Tools Required: T1 - Allen Wrench (Included) Phillips Screwdriver Furniture Polish and Cloth Assembly Tips Make sure you understand the following tips before you begin to assemble your hockey table.
  • Page 3 IMPORTANT SAFETY INSTRUCTIONS READ ALL INSTRUCTIONS Read all instructions-All the safety and operating instructions should be read carefully before the hockey game is played. Caution-This is not a toy and is intended for use by or under the supervision of adults. Adults should review safety guidelines with children to avoid possible risk of electric shock or other injuries.
  • Page 4: Hardware Identifier

    HARDWARE IDENTIFIER (To Scale) H2 - 8.5 mm x 22 mm H1 - 8 mm x 28 mm H3 - 3.5 mm x 12 mm H4 - 3.5 mm x 28 mm Allen Head Bolt Flat Washer Phillips Round Phillips Round (12 pcs) (12 pcs) Head Screw...
  • Page 5 PARTS IDENTIFIER (Not to Scale) P1 - Air Hockey Cabinet P2 - Right Leg P3 - Left Leg (1 pc) (2 pcs) (2 pcs) (Packed (Packed under table) under table) Graphic Artwork P4 - End Leg Panel P5 - End Leg Panel P6 - Leg Leveler with Graphic Artwork without Graphic Artwork...
  • Page 6: Parts Required

    PARTS REQUIRED: 12 pcs - H1 Allen Head Bolt 2 pcs - P2 Right Leg 12 pcs - H2 Flat Washer 2 pcs - P3 Left Leg 1 pc - P1 Air Hockey Cabinet 1 pc - T1 Allen Wrench STEP 1: Leave P1 Air Hockey Table Cabinet face down in carton to assemble.
  • Page 7 PARTS REQUIRED: 24 pcs - H3 Phillips Round Head Screw 2 pcs - P4 End Leg Panel with Graphic Artwork 2 pcs - P5 End Leg Panel without Graphic Artwork 4 pcs - P6 Leg Leveler STEP 2: Install P4 End Leg Panels with Graphic Artwork and P5 End Leg Panels without Graphic Artwork to Legs using H3 Phillips Round Head Screws as shown in FIGURE 2.
  • Page 8 PARTS REQUIRED: 2 pcs - H4 Phillips Round Head Screw 1 pc - P7 Electronic Scorer 1 pc - A5 A/C Adapter STEP 3: First, feed the P7 Electronic Scorer plug through hole on one side of the long top apron as shown in FIGURE 3.
  • Page 9 LED PUCK BATTERY CHANGE INSTRUCTION STEP ONE: STEP TWO: IF BATTERY HOLDER BRACKET Remove screws and back Remove CR2016 Lithium MOVES, RE-INSTALL IT TO LED PUCK AS SHOWN IN DIAGRAM. cap from LED Puck using Small Battery 3V from LED Puck. Phillips Screwdriver (not provided).
  • Page 10 Replacement of LED Rail Lights STEP ONE : If the LED Rail lights need to be replaced on the P7 Electronic Scorer side, carefully unplug the connector of P7 Electronic Scorer from the C2 Main Electronic Unit first. Unscrew C9 wing Bolts and then unplug the LED Rail Lights A.
  • Page 11: Product Parts List

    Congratulations! You have now assembled your hockey table. Please note the Care and Use instructions below to insure many years of trouble free use of your hockey table. CARE AND USE OF YOUR HOCKEY TABLE . 1 Use only a suitable 120v AC household outlet, and insure the cord is not a trip hazard. For long life and best play from your air hockey table, apply spray furniture polish to clean cloth and wipe down the playfield with air motor running to make the pucks slide faster before first play and frequently thereafter.
  • Page 12: 90-Day Limited Warranty

    90 DAY LIMITED WARRANTY This consumer warranty extends to the original consumer purchase of any ESCALADESPORTS Product (hereinafter referred as the "Product"). WARRANTY DURATION: This Product is warranted to the original consumer purchase of a pe- riod of 90 days from the original purchase. WARRANTY COVERAGE: ESCALADE SPORTS warrants to the original Consumer Purchaser that any Product of its manufacture is free from defects in material and workmanship when used for the intended purpose under normal use and conditions.

This manual is also suitable for:

45-6800f45-6800w