Subscribe to Our Youtube Channel
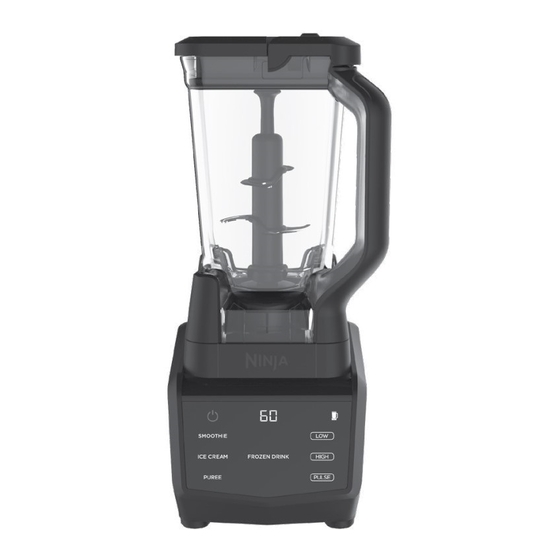
Summary of Contents for Ninja Smart Screen Blender DUO
- Page 1 CT661V OWNER’S GUIDE Smart Screen™ Blender DUO® with FRESHVAC™ Technology ninjakitchen.com...
-
Page 2: Table Of Contents
CONTENTS Ninja® Smart Screen™ Kitchen System with FRESHVAC™ Technology Important Safeguards � � � � � � � � � � � � � � � � � � � � � � � � � � � � � � � � � � 4 Getting to Know Your Ninja®... -
Page 3: Important Safeguards
Read all instructions before using your 12 This appliance has a polarized 19 DO NOT attempt to sharpen blades. NINJA SMART SCREEN™ BLENDER DUO® WITH FRESHVAC™ TECHNOLOGY plug (one prong is wider than 20 DO NOT allow the unit or the cord the other). -
Page 4: Blender Duo® With Freshvac™ Technology
HOUSEHOLD USE ONLY • READ ALL INSTRUCTIONS BEFORE USE 46 DO NOT operate pump Read all instructions before using your 40 Remove the Pro Extractor Blades® NINJA SMART SCREEN™ BLENDER DUO® WITH FRESHVAC™ TECHNOLOGY during blending. Assembly from the Single-Serve Cup upon completion of blending. -
Page 5: Getting To Know Your Ninja® Smart Screen™ Blender Duo® With Freshvac™ Technology
GETTING TO KNOW YOUR NINJA® SMART SCREEN™ BLENDER DUO® WITH FRESHVAC™ TECHNOLOGY PARTS WELCOME! MAIN UNIT FreshVac Pump Congratulations on your purchase. Use this instruction Twist-Off Reservoir manual to learn about the great Cup FreshVac Tab features of your Ninja Smart Flip &... -
Page 6: Before First Use
CONTROL PANEL BEFORE FIRST USE INSTALLING THE BATTERIES WHAT IS AUTO-IQ® TECHNOLOGY? IMPORTANT: Review all warnings Intelligent pre-set programs combine unique blending and pausing patterns Unscrew the FreshVac™ Pump’s that do the work for you. Once a pre-set program is selected, it will start on pages 4-7 before proceeding. -
Page 7: Vacuum Blending With The Freshvac Pitcher
VACUUM BLENDING WITH THE FRESHVAC™ PITCHER IMPORTANT: Review all warnings on pages 4-7 before proceeding. IMPORTANT: As a safety feature, if the pitcher and lid are not properly installed, the timer will display “ ” and the motor will be disabled. If this happens, repeat step 4 on page 13. - Page 8 VACUUM BLENDING WITH THE FRESHVAC™ PITCHER - CONT� IMPORTANT: Review all warnings on pages 4-7 before proceeding. TIPS: • If the stacked blade assembly is not fully seated, you will not be able to install and lock the lid. • To learn more about the programs that work with your FreshVac Pitcher, refer to page 11.
- Page 9 VACUUM BLENDING WITH THE FRESHVAC™ PITCHER - CONT� IMPORTANT: Review all warnings on pages 4-7 before proceeding. IMPORTANT: As a safety feature, if the pitcher and lid are not properly installed, the timer will display “ ” and the motor will be disabled.
- Page 10 VACUUM BLENDING WITH THE FRESHVAC™ PITCHER - CONT� IMPORTANT: Review all warnings on pages 4-7 before proceeding. Fig. 1 Fig. 3 Fig. 4 Fig. 2 15 To release the vacuum seal, gently 16a To pour out thinner mixtures, 16b For thicker mixtures that cannot 17 Unplug the unit when finished.
-
Page 11: Vacuum Blending With The Single-Serve Freshvac Cup
VACUUM BLENDING WITH THE SINGLE-SERVE FRESHVAC™ CUP 6 When vacuum sealing is complete, IMPORTANT: Review all warnings the pump will shut off automatically on pages 4-7 before proceeding. and the green light on the pump will illuminate. 7 To release the pump from the cup, Vacuum blending recommended press the pump release button on for extractions, smoothies, soups, dips,... - Page 12 VACUUM BLENDING WITH THE SINGLE-SERVE FRESHVAC™ CUP - CONT� IMPORTANT: Review all warnings on pages 4-7 before proceeding. TIPS: • To learn more about the programs that work with your Single-Serve Cup, refer to page 11. NOTE: Pre-set programs have pauses and changes in speed throughout the cycle.
-
Page 13: Care & Maintenance
CARE & MAINTENANCE TROUBLESHOOTING GUIDE CLEANING 3 Wipe pump clean with a soft cloth. WARNING: To reduce the risk of shock and unintended operation, 4 Reattach twist-off reservoir to pump. Separate all parts. turn power off and unplug unit before troubleshooting� 2 Wash all containers in warm, soapy STORING water with a soft cloth. -
Page 14: Replacement Parts
Please visit registeryourninja.com or call 1-877-646-5288 to register your new on what are classified as wearable and non-wearable parts, visit ninjakitchen.com/warranty. Ninja® product within ten (10) days of purchase. You will be asked to provide the store name, date of purchase, and model number along with your name This warranty gives you specific legal rights, and you may also have other rights that vary from state to state. - Page 15 Illustrations may differ from actual product. We are constantly striving to improve our products; therefore the specifications contained herein are subject to change without notice. AUTO-IQ, DUO, NINJA, and PRO EXTRACTOR BLADES are registered trademarks of SharkNinja Operating LLC. FRESHVAC and SMART SCREEN are trademarks of SharkNinja Operating LLC.


Need help?
Do you have a question about the Smart Screen Blender DUO and is the answer not in the manual?
Questions and answers