Table of Contents
Advertisement
Advertisement
Table of Contents

Related Manuals for Atlas Copco RE Qualifier II

Summary of Contents for Atlas Copco RE Qualifier II
-
Page 3: Table Of Contents
RE Qualifier System Manual TABLE OF CONTENTS Quick Start Guide ................1 Introduction ..................3 Main Screen ..................3 Passwords ..................5 AutoCal™ ..................6 Viewing A Run ................8 Resetting the Batch ...............10 More Options ................11 Editing Parameter Sets ..............12 Selecting a New Parameter ............15 Globalizing a Parameter ...............16 Editing I/O Options ...............17 Editing the Time and Date ............19... -
Page 4: Quick Start Guide
RE Qualifier System Manual Quick Start Guide Step 1: Power up the unit and wait for the MAIN screen to appear. Once it is in view, press the AUTO CAL soft-key. Step2: Enter the password to access pro- gramming functions. All units ship from the factory with a default password of 0 1 0 4. - Page 5 RE Qualifier System Manual Step 7: Once the MORE OPTIONS screen is in view, press ‘1’ on the keypad in order to EDIT THE PARAME- TER. Step 8: Select the current parameter by pressing the number on the key- pad adjacent to the desired param- eter.
-
Page 6: Introduction
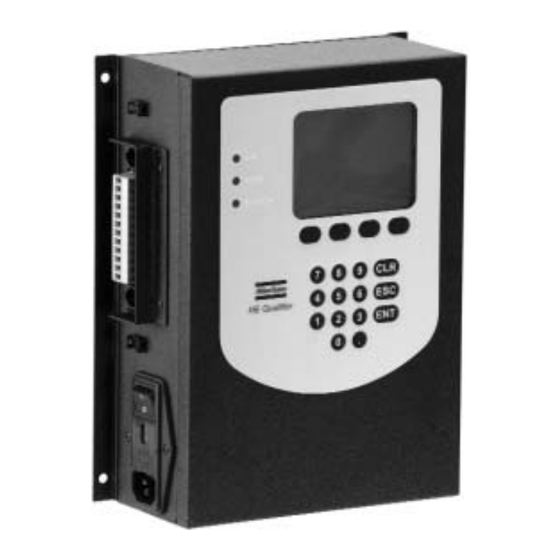
This document is an operations guide for the Atlas Copco RE Qualifier II. The RE Qualifier monitors a pneumatic signal from inside any Atlas Copco tool equipped with an RE port. By ana- lyzing the pneumatic signal, the RE Qualifier can aid in the manu-... - Page 7 RE Qualifier System Manual cates that the maximum run timer was violated. The status No Clutch informs the user that the tool’s clutch did not complete the fastening process. The box labeled TOTAL displays the number of batches that have been completed since the last reset.
-
Page 8: Passwords
RE Qualifier System Manual Passwords Users will be prompted to enter a password any time the unit is locked and a programming function is accessed. All units are shipped with the initial pass- word set to 0 1 0 4. Once prompted to enter a password, use the keypad to enter the four digit code. -
Page 9: Autocal
RE Qualifier System Manual AutoCal™ The RE Qualifier has been programmed to automatically recog- nize the pneumatic signature from several different types of tools. In order to calibrate the RE Qualifier using this feature, press the AutoCal™ soft-key while the unit is showing the main screen. If the unit is locked, enter the password when prompted for it. - Page 10 RE Qualifier System Manual At the end of the fastening sequence, release the tool and press the NEXT soft-key. The RE- Qualifier will try to set-up it’s calibration parameters using the pneumatic signature from the last run. Once the calibration attempt is complete, the RE Qualifier will inform the user if the cal- ibration was successful or...
-
Page 11: Viewing A Run
RE Qualifier System Manual Viewing A Run Each time a fastening process occurs, the RE Qualifier captures the analog information associated with the pneumatic signal. The RE Qualifier can hold up to ten seconds worth of analog information. This analog signature can be viewed with the current parameter set overlaid on top of it. - Page 12 RE Qualifier System Manual Once the pressure rises above the clutch level, the RE Qualifier assumes that the clutch has turned the tool off. The vertical lines on top of the graph represent timers. The line labeled Ts represents the point at which minimum run timer and the maximum run timer start.
-
Page 13: Resetting The Batch
RE Qualifier System Manual Resetting the Batch In order to reset the count to zero from the main screen, press the RESET BATCH soft-key. A second screen will appear which reads, “Press ‘ENT’ to RESET BATCH. Press ‘ESC’ to cancel and return”. If the user presses the ENTER (labeled ENT) button at this point, the batch count... -
Page 14: More Options
RE Qualifier System Manual More Options In order to access the rest of the functions, press the MORE soft- key while the main screen is visible. A list of nine additional func- tions will appear similar to the picture on the left. In order to access any of the functions on the list, press the number on the keypad... -
Page 15: Editing Parameter Sets
RE Qualifier System Manual Pressing ‘9’ allows the user to adjust the LCD’s brightness and contrast. Users may also return to the main screen by pressing either the RETURN or LOCK AND RETURN soft-keys. Editing Parameter Sets Choosing ‘1. Edit Parameter’ from the MORE OPTIONS menu allows access to timers, pressure levels, totals, and... - Page 16 RE Qualifier System Manual parameter sets A through H. Pressing ‘ESC’ at the SELECT PARAMETER screen will return the program to the MORE OPTIONS screen. Once one of the eight parameters is selected by pressing one of the associated numeric keys, that parameter will appear. Each listing in the parameter set will have a number associated with it, a title, and then a...
- Page 17 RE Qualifier System Manual Timer Max is the maximum time the pressure level can be above the Run Start level prior to the signal rising above the Clutch Level. Timer Max is the maximum time for the fastening process. Time Clutch is the minimum time that the pressure level must be above the Clutch Level setting at the end of a fastening.
-
Page 18: Selecting A New Parameter
RE Qualifier System Manual Selecting a New Parameter Selecting ‘2’ SELECT PARAMETER from the MORE OPTIONS menu allows the user to choose a new parameter. This only works if the dip-switch is set so that parameter selection is done through the keypad. After ‘2’... -
Page 19: Globalizing A Parameter
RE Qualifier System Manual Globalizing a Parameter Selecting ‘3’ GLOBALIZE PARAMETER from the MORE OPTIONS menu allows the user to choose the parameter that will be copied into all of the other parameters. After ‘3’ is pressed and released, the SELECT PARA- METER screen appears. -
Page 20: Editing I/O Options
RE Qualifier System Manual Editing I/O Options Selecting ‘4’ EDIT I/O OPTIONS from the MORE OPTIONS menu allows the user to program features that relate to the input and output structure. After ‘4’ is pressed and released, the EDIT I/O OPTIONS screen appears. - Page 21 RE Qualifier System Manual Numbers 5 and 6 relate to how parameters are selected by an external device. If number 5 is selected, only 4 parameters can be accessed externally. The table below shows the relationship between the parameters and how they are selected using the inputs.
-
Page 22: Editing The Time And Date
RE Qualifier System Manual Editing the Time and Date Selecting ‘5’ EDIT TIME/DATE from the MORE OPTIONS menu allows the user to edit the time and date. After ‘5’ is pressed and released, the EDIT TIME/DATE screen appears. Pressing the number on the screen that is associated with the desired time/date value alters that value. -
Page 23: Resetting The Total And/Or Batch
RE Qualifier System Manual A screen that states, “Edit Time/Date .. Turn Unit Off And On Again To Complete Time/Date Write” will appear. The RE Qualifier will not proceed to any other screen until it has been powered down and the powered back up again. This power down and re-initializing is essential to writing the new time and date. -
Page 24: Viewing Past Statuses
RE Qualifier System Manual Viewing Past Statuses Selecting ‘7’ VIEW STATUSES from the MORE OPTIONS menu allows the user to view the statuses that have been generated in the past along with a time and date stamp. After ‘7’ is pressed and released, the VIEW STATUS- ES screen appears. -
Page 25: Choosing A New Password
RE Qualifier System Manual Choosing a New Password Selecting ‘8’ EDIT PASSWORD from the MORE OPTIONS menu allows the user to choose a new password. After ‘8’ is pressed and released, the EDIT PASS- WORD screen appears. The user may type a new four digit password. -
Page 26: Adjusting The Display
RE Qualifier System Manual Adjusting the Display Selecting ‘9’ ADJUST DISPLAY from the MORE OPTIONS menu allows the user to make adjustments to the brightness and contrast of the display. Once ‘9’ has been pressed and the ADJUST LCD screen is in view, the brightness of the screen can be controlled by pressing keys ‘1’... -
Page 27: I/O Structure
RE Qualifier System Manual I/O Structure RS-232 Connector The RS-232 Connector is used to communicate with external seri- al devices (like a computer). The connector is a standard RJ-11 connector. Pin 1 on the connector is the top-most pin as pictured in the fig- ure to the left. -
Page 28: Remote Transducer Connector
RE Qualifier System Manual A series of jumpers control how the relays function. There is one jumper for each relay (JP8-JP10). These jumpers will allow each relay to either be normally open or normally closed. Relays may be wetted with +24VDC or be dry contacts depending upon the setting of jumper JP5. -
Page 29: Dip-Switch Settings
RE Qualifier System Manual Dip-Switch Settings Dip-Switch The dip-switch (located in the corner on the CE2731 board) controls certain aspects of the units functionality. Those functions are listed below. Position 1. Parameter Selection Software Select External Input Selection 2. No Function 3. -
Page 30: Part Numbers
RE Qualifier System Manual Part Numbers Model Part Number RE Assembly Qualifier II with Standard Cable Transducer 9810 7050 80 RE Assembly Qualifier II with Coil Cable Transducer 9810 7050 82 RE Assembly Qualifier II, No Transducer 9810 7050 84 Standard Cable Transducer 9810 7050 86 Coil Cable Transducer... - Page 32 D022502 Copyright © 2002 C.E. Electronics, Inc. All Rights Reserved...
Need help?
Do you have a question about the RE Qualifier II and is the answer not in the manual?
Questions and answers