
Subscribe to Our Youtube Channel
Related Manuals for Clark PWX 30-40


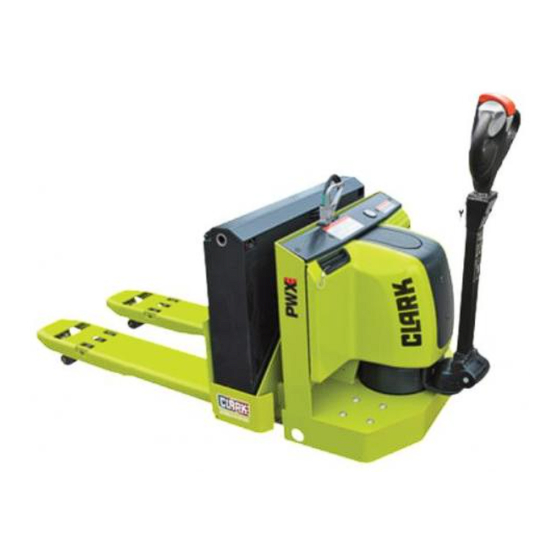
Summary of Contents for Clark PWX 30-40
- Page 1 PWX 30-40 HWX 30-40 Operator's Manual Do not remove this manual OM-746 from the truck.
- Page 2 Do not expose this manual to hot water or steam. WARNING California Proposition 65 This product contains and emits chemicals known to the State of California of cause cancer, birth defects and other reproduction harm. © 2018 Clark Material Handling Company...
- Page 3 Operator's Manual You must be trained and authorized to operate a lift truck. YOU can prevent accidents First: Learn safe operating rules and your company rules. Next: Read your Operator's Manual. If you do not understand it, ask your supervisor for help. Learn about the unit you operate.
-
Page 4: A Message To Clark Lift Truck Operators
They require specifi c instructions and rules for safe operation and maintenance. Safe operation of lift trucks is of primary importance to CLARK. Our experience with lift truck accidents has shown that when accidents happen and people are killed or injured, the causes are: •... - Page 5 (or need refresher training) operating or inspecting your lift truck, ask your supervisor. CLARK lift trucks are built to take hard work, but not abuse. They are built to be dependable, but they are only as safe and effi cient as the operator and the persons responsible for maintaining them.
-
Page 7: Table Of Contents
Contents of this Manual A Message to CLARK Lift Truck Operators ....ii Introduction ..............vi How to Use this Manual ........viii Safety Signs and Safety Messages ......x Section 1. General Safety Rules .......1-1 Section 2. Operating Hazards ........2-1 Section 3. -
Page 8: Introduction
This manual familiarizes you with safety, operating, and maintenance information about your new lift truck. It has been specially prepared to help you use and maintain your CLARK lift truck in a safe and correct manner. Your CLARK lift truck has been designed and built to be as safe and effi... - Page 9 “Drivers Daily Checklist.” Planned Maintenance In addition to the daily operator inspection, CLARK recommends that a planned maintenance and safety inspection program (PM) be performed by a trained and authorized mechanic on a regular basis. The PM will provide an opportunity to make a thorough inspection of the safety and operating condition of your lift truck.
-
Page 10: How To Use This Manual
Also, the Index helps you locate information about various topics. NOTICE: The descriptions and specifi cations included in this manual were in effect at the time of printing. CLARK Material Handling Company reserves the right to make improvements and changes in specifi ca- tions or design, without notice and without incurring obligation. - Page 11 If the truck you operate is not equipped with a manual, ask your supervisor to obtain one and have it attached to the truck. And, remember, your CLARK dealer is pleased to answer any questions about the operation and maintenance of your lift truck and will provide...
- Page 12 If warning decals are damaged, they must be replaced. Contact your CLARK dealer for replacements. NOTICE This message is used when special information, instruc- tions or identifi...
- Page 13 General Safety Rules Contents Daily Inspection ............1.2 Do's and Don'ts ............1.3 No Riders ..............1.4 Pedestrians ..............1.5 Grades ................ 1.6 Travel ................1.7 Pinch Points ............... 1.8 Parking ................ 1.9...
-
Page 14: Daily Inspection
General Safety Rules Daily Inspection Operator’s Daily Checklist Date: Check each Item Before Start of Each Shift Check one: Gas/LPG/Diesel Truck Electric Sit-down Electric Stand-up Electric Pallet Truck Serial Number: Operator: Supervisor's OK: Hour meter reading: Check each of the following items before the start of each shift. Let your supervisor and/or maintenance department know of any problem. DO NOT OPERATE A FAULTY TRUCK. -
Page 15: Do's And Don'ts
General Safety Rules Do's and Don'ts Don't mix drugs or alcohol with your job. OM0001 Do watch for pedestrians. OM0002 Don't block safety or emergency equipment. OM0003 Do wear safety equipment when required. OM0004 Don't smoke in "NO SMOKING" areas or when refueling. -
Page 16: No Riders
General Safety Rules No R iders WARNING Always walk with PWX model truck. Never attempt to ride. WARNING The operator must be the only rider on the HWX model trucks. Never carry passengers. -
Page 17: Pedestrians
General Safety Rules Pedestrians IMPORTANT • Watch where you are going. • Look in the direction of travel. • Pedestrians may use the same roadway you do. • Sound your horn at all intersections or blind spots. • Watch for people in your work area even if your truck has warning lights or alarms. -
Page 18: Grades
General Safety Rules Grades Always keep forks downgrade with or without a load and in the raised position when working on a grade. Do not ride HWX model on a grade. Trucks designed to travel up a 5% maximum grade with load. WARNING Never turn on a grade, either loaded or unloaded. -
Page 19: Travel
General Safety Rules Travel Always carry a load in the raised position. Enter confi ned areas such as semi-trailers, trucks and boxcars or eleva- tors with load end of the truck fi rst. This will minimize the maneuvering necessary to exit. If load blocks your view while traveling in reverse, make sure path is clear of personnel and obstructions. -
Page 20: Pinch Points
General Safety Rules Pinch Points WARNING Never allow anyone to reach under or around the edge of the truck. Be especially careful not to put any portion of your body under the load forks. Keep your feet clear of the truck when traveling. -
Page 21: Parking
General Safety Rules Parking Wheel Block Park trucks in designated parking areas only. Do not obstruct traffi c lanes or aisles. Lower forks to fl oor. Place control handle in full turn and raise handle to "up" position to apply brake. Turn key switch off and remove key. - Page 22 General Safety Rules 1.10...
- Page 23 Operating Hazards Contents Fast Turns ..............2.2 Corner Cutting ............2.2 Loose Loads ............... 2.3 Long and Wide Loads ..........2.3 Dock or Trailer Drop offs ........... 2.4 Trailer Creep ............... 2.4 Debris on Floor ............2.5 Damaged Pallets and Skids ........2.6 IMPORTANT The operation of lift trucks involves many hazardous situ- ations.
-
Page 24: Fast Turns
Fast Turns WARNING Slow down on turns. An empty truck can tip over easier than a loaded truck. Corner-Cutting WARNING Always use caution when making a turn into an aisle. The load wheels do not follow the turn path of the drive wheel and will tend to "cut"... -
Page 25: Loose Loads
Loose Loads WARNING Falling loads can seriously injure yourself or others. Never carry uneven material. Stack loose material evenly. Long or Wide Loads WARNING Long or wide loads are less stable and may strike objects or per- sons in their path. Watch load clearance, move slowly and turn carefully. -
Page 26: Dock Or Trailer Drop Offs
Dock or Trailer Drop-Offs, Trailer Creep WARNING Talk to the truck driver yourself and make sure he/she does not move the trailer until you are done! The lift truck operator must make sure the driver applies the trailer brakes and chocks trailer wheels. -
Page 27: Debris On Floor
Debris on Floor SAND GRAVEL WEAK FLOORS WARNING Oil, water, sand, mud, wood, gravel and other materials will make the fl oor slippery, uneven and dangerous. Be careful when cross- ing these areas. WARNING Know the weight of your truck and load. Especially when using elevators. -
Page 28: Damaged Pallets And Skids
Damaged Pallets and Skids OM0011 WARNING Do not move or store materials on damaged or poorly maintained pallets and skids. Items can fall through or off them causing severe injury or death. - Page 29 Know Your Truck Contents Component Location (PWX Model) ........3.2 Component Location (HWX Model) ........3.3 Operator's Controls (PWX Model) ........3.4 Operator's Controls (HWX Model) ........3.5 Maintenance Component Location (PWX Model) ..3.6 Maintenance Component Location (HWX Model) ..3.7 System Description ............3.8 Nameplate Description ..........3.10 Warning Decals ...............
-
Page 30: Component Location (Pwx Model)
Component Location-PWX 1. Steering and Brake 2. Truck Data Plate 3. Load Wheels 4. Drive Wheel 5. Load Forks 6. Covers 7. Battery 8. Hour Meter 9. Operator's Manual 10. Warning Decals 11. Key Switch... -
Page 31: Component Location (Hwx Model)
Component Location-HWX 1. Steering and Brake 2. Control Handle 3. Operator Hand Rail 4. Truck Data Plate 5. Load Wheels 6. Drive Wheel 7. Load Forks 8. Covers 9. Rider Platform 10. Battery 11. Stability Casters 12. Hour Meter 13. Coast Control (option) 14. - Page 32 Operator Controls-PWX 1. Steering and Brake Control Handle 2. Lower Control Button 3. Lift Control Button 4. Speed Button (Rabbit) 5. Horn Button 6. Emergency Reverse Switch 7. Forward/Reverse Control (Butterfl y)
- Page 33 Operator Controls-HWX 1. Steering and Brake Control Handle 2. Lower Control Button 3. Lift Control Button 4. Speed Button (Rabbit) 5. Horn Button 6. Emergency Reverse Switch 7. Forward/Reverse Control (Twist Grip) 8. Coast Control...
-
Page 34: Maintenance Component Location (Pwx Model)
Maintenance Component Location PWX 1. Battery 2. Traction Control Panel 3. Hydraulic Unit 4. Brake 5. Drive Motor 6. Drive Unit 7. Lubrication Fittings... -
Page 35: Maintenance Component Location (Hwx Model)
Maintenance Component Location HWX 1. Battery 2. Traction Control Panel 3. Hydraulic Unit 4. Brake 5. Drive Motor 6. Drive Unit 7. Lubrication Fittings... -
Page 36: System Description
System Description Control Handle • Controls travel direction and speed, lift and lower, horn, braking and steering. • Twist grip or butterfl y type speed control for left or right hand op- eration. • Up or down brake application. • Safety reversing switch on end of control handle. •... - Page 37 7" or 13.6" wide battery compartments, SB-175 amp grey connector, high visibility Clark green and black fi nish. Additional HWX features include spring loaded stability casters, operator platform with non-skid metal surface, and operator hand rail with center mounted control buttons.
-
Page 38: Nameplate Description
• System voltage. • Battery ampere-hour rating. IMPORTANT When attachments are added or if the truck is modifi ed, the ca- pacity of the truck may be affected. Contact your authorized Clark dealer for a new nameplate showing the revised capacity. 3.10... - Page 39 Warning Decal Here are examples of decals which give important information about operation and safety. OSHA and ANSI require you to replace them if they are missing or unreadable. Get familiar with them and follow the instructions. If you don’t understand them, ask your supervisor for help.
-
Page 40: Warning Decals
Warning Decals No Riding Decal This safety decal is placed on the top cover to warn of the danger of injury by attempting to ride PWX model trucks. Always walk with PWX model truck. No Passenger Decal This safety decal is placed on the top cover to warn of the danger of injury by attempting to ride as a passenger on HWX model... - Page 41 Operating Procedures Contents Beginning Truck Operation ..........4.2 Travel Control ..............4.3 HWX High Speed Control ..........4.3 Emergency Reversal Switch .......... 4.4 Horn Control ..............4.4 Lift & Lower Control (PWX Model) ......... 4.5 Lift & Lower Control (HWX Model) ......... 4.5 Braking ................
-
Page 42: Beginning Truck Operation
Beginning Operation Remove chocks from drive wheel. Plug in battery connector. Lower control handle to comfortable operating position and swing handle in line with intended path of forward or reverse travel. Insert key and turn clockwise to "on" position. Check to make sure your path of travel is clear of people or obstructions. -
Page 43: Travel Control
Travel Control PWX Travel Control Rotate the direction/speed control as shown to travel forward. Rotate the direction/speed in the opposite direction to travel in reverse. ("Re- verse" is defi ned as the direction in which the forks point.) Truck speed increases the further you rotate the direction/ speed control. -
Page 44: Emergency Reversal Switch
Emergency Reversal Switch When the emergency reversal switch strikes an object or a per- son, or is held in by the operator, the truck automatically propels itself in the "reverse" direction. ("Reverse" is defi ned as the direc- tion in which the forks point.) When the switch no longer con- tacts the person or object, the switch pops up and the truck re-... - Page 45 Lift/Lower Controls PWX Lift / Lower Control • Press the "lift" con- trol to raise the load forks. • Press the "lower" control to lower the load forks. HWX Lift / Lower Control • Press the "lift" con- trol to raise the load forks.
-
Page 46: Braking
Braking and Plugging Brake On Brake Off Brake On Lowering the control handle to the operating position disengages the brake. Pushing the control handle to the "up" position or pulling the control handle to the "down" position applies the electronic brake and shuts off the drive motor. -
Page 47: Load Handling
Load Handling • Lower forks completely before entering load. • Center forks with load as you approach. • Enter load as far as possible. • Make sure the lifting area is clear before lifting load. • Raise forks completely before moving truck. •... -
Page 48: Coast Control (Option)
Optional Coast Control Coast Buttons The coast control deactivates the electronic brake and enables the truck to be "jogged" with coast buttons. It is not necessary to move the control handle from the vertical position. • To activate coast, press the two coast buttons at the same time. Hold for two (2) seconds. -
Page 49: Parking
Parking 1. Park truck in designated parking area. 2. Lower forks to fl oor. 3. Place control handle in full turn and raise handle to "up" position to apply brake. 4. Turn key switch to "off" position and remove key. 5. - Page 50 4.10...
- Page 51 Daily Inspection Contents Daily Inspection Sheet ............ 5.2 Operator Repairs ............. 5.2 Horn .................. 5.3 Emergency Reversal Switch .......... 5.3 Horn Control ..............4.4 Travel Control ..............5.4 Lift and Lower Controls ..........5.5 Brake ................5.6 Coast Control (Option) ............ 5.6 Wheels and Tires .............
-
Page 52: Daily Inspection Sheet
Brakes: linkage, reservoir fluid level, leaks debris on floor Explanation of problems marked above: As an aid in carrying out this inspection, CLARK has prepared a form called "Driver’s Daily Check List." Copies of this form may be obtained from your CLARK dealer. We recommend that you use this form to make a daily record of your inspection and truck condition. -
Page 53: Horn
Horn - Emergency Reversal Switch Check the horn. Make sure the horn works properly. Emergency Reversal Switch Check the emergency reversal switch. It should depress easily and pop back out on its own. Position the control handle to release the brake. -
Page 54: Travel Control
Travel Control Check travel control. Operate truck in both forward and reverse direc- tions. The direction/speed control must return to neutral position when released. Operator Hand Rail (HWX model only) On the HWX, test the high-speed High Speed control: While riding the truck, ro- Control tate the direction/speed control to full forward speed. -
Page 55: Lift And Lower Controls
HWX Lift and Lower Controls Check the lift/lower control buttons. The control buttons must return to the "off" position when released. The hydraulic lift pump motor should stop when maximum lift height is reached. -
Page 56: Brake
Braking Brake On Brake Off Brake On Check the brake. The brake should be applied with the control handle in the fully raised and fully lowered positions. The drive motor should stop when the brake is applied. Optional Coast Control (HWX Models) Coast Buttons The coast control deactivates the electronic brake and enables the... -
Page 57: Wheels And Tires
Wheels and Tires Check condition of wheels and tires. Remove any embedded objects. Report excessive wear, breaks, "chunking out", or bond failure. Check lug nuts for proper torque. Watch for loose wheel bearings. Maintenance Problems Do not operate a truck that has a maintenance problem. Park the truck properly and remove the key, if equipped. -
Page 59: Notice
Planned Maintenance Contents Daily Inspection Points ........... 6.2 Typical Operating Conditions ........6.2 Maintenance and Lubrication Schedule ......6.3 Safe Maintenance Practices ........... 6.4 Safety Standards ............. 6.7 Battery Maintenance ............6.8 Battery Handling .............. 6.9 Battery Charging ............6.10 Battery Removal ............ -
Page 60: Typical Operating Conditions
Time intervals between maintenance are largely determined by oper- ating conditions. The intervals specifi ed in the following table are for normal operation. For more severe operation, the maintenance inter- vals should be shortened accordingly. Contact you CLARK dealer for recommendations. Normal Operation: Basically, eight hour material handling in clean buildings with smooth level fl... - Page 61 Recommended Planned Maintenance Intervals A = 8-10 hours daily B = 50-250 hours or every month C = 450 - 500 hours or every 3 months D = 900 - 1000 hours or every 6 months E = 2000 hours or every year Planned Maintenance and Lubrication Check truck for obvious damage and leaks •...
-
Page 62: Safe Maintenance Practices
/ maintenance operations. When in doubt of any inspection / maintenance procedures, please contact your local CLARK dealer. 1. Powered industrial trucks can become hazardous if maintenance is neglected. Therefore, suitable maintenance facilities, trained personnel and procedures shall be provided. - Page 63 Safe Maintenance Practices 9. Before Starting to Drive the Truck: • Remove drive wheel chocks. • Plug-in battery connector. • Lower and turn control handle to operating position. • Insert key (if equipped) and turn to "on" position. • Make sure path of travel is clear. •...
- Page 64 Always use genuine CLARK or CLARK - approved parts. IMPORTANT Your new CLARK lift truck has been built to meet all ap- plicable mandatory requirements of ANSI / ITSDF B56.1 Safety Standard for Powered Industrial Trucks. Each truck also includes certain safety devices-such as horn and overhead guard-as standard equipment.
-
Page 65: Safety Standards
General Industry Standards, OSHA 2206: OSHA Safety and Health Standards (29 CFR 1910), Subpart N - Materials Handling and Storage, Section 1910.178 Powered Industrial Trucks. For sale by: Superintendent of Documents, U.S. Government Printing Of- fi ce, Washington, D.C. 20402 or contact your CLARK dealer. -
Page 66: Battery Maintenance
Battery Maintenance Battery charging installations must be located in areas designated for that purpose. These areas must be kept free of all nonessential com- bustible materials. Facilities must be provided for: • Flushing spilled electrolyte. • Fire protection. • Protecting charging apparatus from damage by trucks. •... -
Page 67: Battery Handling
Battery Handling 1. Change (remove) or service storage batteries only in an area des- ignated for this purpose. 2. Be sure this area has provisions to fl ush and neutralize spillage, to ventilate fumes from gassing batteries, and for fi re protection. 3. -
Page 68: Battery Charging
Battery Charging 6. Chain hoists or power battery hoists must be equipped with load chain containers to accumu- late the excess lifting chain. 7. Keep all tools and other metallic objects away from terminals. WARNING BATTERY SERVICE must be done by trained and authorized personnel. -
Page 69: Battery Removal
Battery Removal from Truck 3. If batteries discharge rapidly during normal operation or do not charge to the correct specifi cations, contact a qualifi ed battery service technician to check the battery for you. Do not add elec- trolyte or attempt to service the battery. Battery Removal from Truck 1. -
Page 70: Battery Cleaning And Care
Refer to the battery manufacturer or supplier for their recommended battery maintenance and care procedures. BATTERY SAVER and CLEANER, CLARK Part No. 886398, may be used to clean and protect the truck battery. New Truck Batteries: Apply a light coat of BATTERY SAVER and CLEANER to entire surface of battery. -
Page 71: Battery Life
Battery Care How to Get Maximum Battery Life 1. Follow normal battery maintenance procedures, re-charging be- fore 80% discharged and with periodic equalizing charges. 2. Don’t add acid to a battery. Only a person trained and qualifi ed to do battery maintenance should determine if this is necessary. 3. - Page 72 6.14...
-
Page 73: Section 7. Towing
TOWING IMPORTANT Pull a disabled truck by hand to a service area. CAUTION Do not tow or push the truck with another vehicle. -
Page 75: Section 8. Specifi Cations
Hydraulic Unit MS-68 Hydraulic fl uid CLARK P/N 1800236 Drive Unit MS-276A CLARK P/N 2776236 Fluid Capacities Hydraulic Unit 1.5 qts (nominal) Drive Unit 2 -2.5 qts (nominal) General Purpose Grease Clark Specifi cation MS-107C, use grade NLGI #2 per MS-107C... - Page 77 Important Serial Numbers (if applicable) Truck: ______________________________________________ Hydraulic Pump: _____________________________________ Hydraulic Pump Motor: ________________________________ Traction Motor: ______________________________________ Steer Motor: _________________________________________ Pump Controller: _____________________________________ Traction Controller: ___________________________________ Expansion Controller Module: ___________________________ Steer Unit: __________________________________________ Drive Unit: __________________________________________...
- Page 78 Additional copies of this manual may be purchased from YOUR AUTHORIZED CLARK DEALER 700 Enterprise Drive Lexington, KY. 40510 Printed in USA...
Need help?
Do you have a question about the PWX 30-40 and is the answer not in the manual?
Questions and answers