Table of Contents
Advertisement
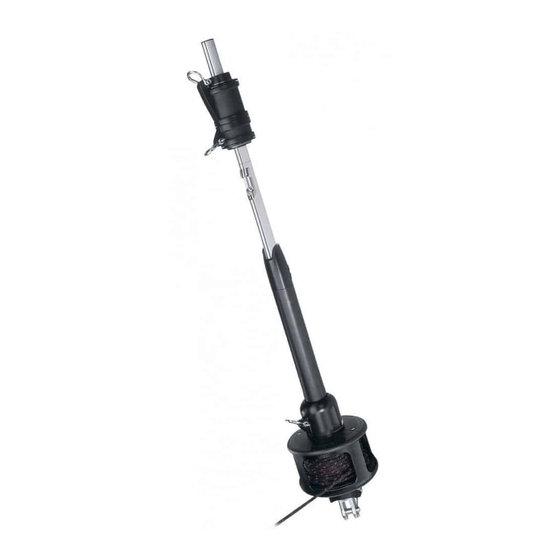
MKIV JIB REEFING & FURLING
Installation Manual - Intended for specialized personnel or expert users
Please read these instructions carefully before installing, servicing, or operating the equipment.
This manual may be modified without notice. See: www.harken.com/manuals for updated versions.
Unit 1
Preassembly
Clean/Inspect
PLEASE SAVE THESE INSTRUCTIONS
4417 12/18
2
3
4
5
6
7
8
9
10
11-17
17
18
19
20-21
22-23
24
25
26
27
28
29
29-30
30
31
32
32
32
33
33
34-35
Advertisement
Table of Contents

Related Manuals for Harken MKIV


Summary of Contents for Harken MKIV
-
Page 1: Table Of Contents
Maintenance Clean/Inspect Replace Line Storage/Remove Furler Troubleshoot Online Warranty/Product Registration Appendix 34–35 Please read these instructions carefully before installing, servicing, or operating the equipment. This manual may be modified without notice. See: www.harken.com/manuals for updated versions. PLEASE SAVE THESE INSTRUCTIONS... -
Page 2: Safety Precautions/Parts Descriptions
The user must have appropriate training in order to use this product. Harken accepts no responsibility for damage or harm caused by not observing the safety requirements and instructions in this manual. See limited warranty, general warnings, and instructions in www.harken.com/manuals. -
Page 3: Sizing Check
WARNING! Do not drill boat's chainplate or toggle. This may result in rig failure. Use the correct size toggle and clevis pin. 2. Harken does not recommend drilling boat’s chainplate or toggle. In some cases bushings are available to fit boats with smaller clevis pin sizes. -
Page 4: Parts
6 mm Bow shackles Quantity Description HFG739 Red Loctite (for foil screws) ® 1 Each 2.5, 4, 5 mm Hex keys HFG725 Injector, 1 oz. 5200 Adhesive (HFG722) MKIV Unit 1 Loctite is a registered trademark of Henkel AG & Company KGaA. -
Page 5: Rigging Parts Check/Tools
4. Rod rigging requires Harken rod adapter stud. 5. Order Harken 7404 Lead Block Kit and one additional 7403 if necessary. Fits 1" (25 mm) stanchions. ALL UNITS ROD RIGGING... -
Page 6: Dimensions/Sailmaker's Instructions
Add 13 " to 6 (343 mm to 162mm) 5" (129 mm)** " 5/8" (15.9 mm) Clevis Pin Add 11 " to 4 " (286 mm to 111 mm) Toggle Used " (12.7 mm) " (15.9 mm) MKIV Unit 1... -
Page 7: Toggle Deductions/Stay Into Foil Options
® 3. Rod adapter nosepiece for Harken rod adapter stud: Threaded nosepiece must have a positive lock as well as adhesive. Use Harken stud with cotter pins (see page 19). WARNING! Using a threaded nosepiece with only adhesive at the upper rod eye terminal may result in headstay system failure. -
Page 8: Top Foil Length
Note: If long link plate is shortened, dimension must be changed or foil will be too short. Measure distance from crosspin down to where clevis pin attaches toggle to boat and use this dimension in G above. MKIV Unit 1... -
Page 9: Short Top Foil
"–3" (90–75 mm) Do not use plastic bushing above Under 1" (25 mm) Eliminate top foil and run foil higher top connector. Cut connector right at cross formed by in drum assembly. glue dispersion channels. Use single foil screw in top foil only. MKIV Unit 1... -
Page 10: Confirm Foil Length
Confirm Foil Length Confirm foil length by laying foils alongside stay with turnbuckle components. Pull stay out so it is straight. Attach Harken toggle to bottom of stay. Make sure toggle straps are straight. Adjust turnbuckle so that length of stay with Harken toggle will fit boat. - Page 11 Tip: Mark top foil to distinguish from cutoff piece. Scribe line on top of foil to mark drill holes. Lay top foil alongside cut-off piece and use a flat metal object (i.e. metal ruler) to scribe top line of foil. MKIV Unit 1...
- Page 12 1" (25 mm) Drill two (2) 1/8" (3.2 mm) holes for trim cap. Lay top foil in line with others. Slide stay into top foil and down the line of foils or slide each foil up stay. MKIV Unit 1...
- Page 13 Tip: With foil screw holes up as shown below, place longer half of bushing with hook on upper half. MKIV Unit 1 Loctite is a registered trademark of Henkel AG & Company KGaA.
- Page 14 Top Foil/Connectors Slip 7" (177.8 mm) connector on wire, mating hook of plastic bushing with connector. Put a drop of red Loctite into screw holes. ® MKIV Unit 1 Loctite is a registered trademark of Henkel AG & Company KGaA.
-
Page 15: Assembly Foils/Connectors
As sealant runs down towards plunger an air pocket will form near tip. Push plunger to evacuate air. You are now ready to begin injecting adhesive. MKIV Unit 1... - Page 16 If not, apply to screw. Red Loctite ® Use bushings, connector, wedge and adhesive in other screw hole and insert into other foil. Use 1/3–1/2 ml of adhesive. MKIV Unit 1 Loctite is a registered trademark of Henkel AG & Company KGaA.
-
Page 17: Halyard Swivel
Continue assembly. Use 10.75" (273 mm) bottom connector to assemble bottom foil. Slide halyard swivel onto foil above feeder window. Make sure taller “half” is up as shown. MKIV Unit 1 Loctite is a registered trademark of Henkel AG & Company KGaA. -
Page 18: Drum Assembly
Assembly Drum Assembly Loosen foil clamp screws at top of drum assembly. Slide drum assembly onto foils. Tip: Face clamp downward so it clears foil notches during installation. MKIV Unit 1... -
Page 19: Rod Rigging
Insert two cotter pins and spread. Clean excess Loctite ® from terminal body using special care to ensure that there is no red Loctite ® threaded stud. MKIV Unit 1 Loctite is a registered trademark of Henkel AG & Company KGaA. -
Page 20: Turnbuckle/Toggle
Assembly Attach Turnbuckle/Toggle Assemble turnbuckle and attach Harken toggle. Note: If using Sta-Lok or Norseman ® ® stud, you must use a washer above stud as shown below. Washer Turnbuckle Clevis Pin Toggle Crosspin Clevis Pin Make sure shallow jaw is up. - Page 21 WARNING! Stay must attach to toggle. Do not attach stay to crosspin at drum assembly because crosspin and plates may fatigue and break. Stay attached to toggle MKIV Unit 1 Loctite is a registered trademark of Henkel AG & Company KGaA.
-
Page 22: Final/Feeder
Clevis Pin Crosspin at 90° to Clevis Pin 7311.20 5/8 stud/jaw toggle Check foil height at top, set, and secure using hex key. See tip on next page. MKIV Unit 1... - Page 23 Tighten screw. Note: Screw will turn with some difficulty. It is plastic coated to prevent loosening due to vibration. Important! When removing screw, loosen no more than one full turn. Slide screw up and remove feeder. MKIV Unit 1...
-
Page 24: Commissioning Turnbuckle
Lift foils so top is " (16 mm) below upper terminal. WARNING! Stay must attach to toggle. Do not attach stay to crosspin at drum assembly because crosspin and plates may fatigue and break. Crosspin 7311.20 5/8 stud/jaw toggle MKIV Unit 1... -
Page 25: Line To Cockpit
Use #10 (5 mm) fasteners. 7402 RATCHET Drum Full STANCHION Note: As furling line lead changes, make sure line (sail unfurled) BLOCK doesn’t chafe against line guard. Rotate line guard Drum Empty if necessary. (sail furled) STERN MKIV Unit 1... -
Page 26: Halyard Wrap/Prevent Halyard Wrap
Test furler at dock, but if water is smooth an incorrect lead angle may not be apparent. Halyard wraps usually occur in wave action when lead angle is not correct. The 8–10° angle shown at right is critical. MKIV Unit 1... -
Page 27: Pendant/Halyard Restrainer/ Halyard Tension
If your boat needs a Halyard Deflector, use Part No. 7302 or a Halyard Restrainer, use Harken Part No. 944. Restrainer should be mounted as high as possible on face of mast. Position restrainer so that foils will not hit it when under load. -
Page 28: Operation
They permit a very tight headstay to be eased when boat is not in use. For best performance, consider adding a backstay adjuster; either a block and tackle, a mechanical adjuster like those offered by Harken, or a hydraulic adjuster. Remember to keep headstay tight for best performance when furling or reefing. -
Page 29: Raise Sails
Consult the Troubleshooting Guide on Page 33. Do not use a winch to force a system to turn. If you are certain that the system is operating properly, you may use a winch to make furling easier. MKIV Unit 1... -
Page 30: Secure Sail
Untie jib sheets and keep sail couple of wraps of line. completely rolled. Secure with Retie sheets. Add more wraps of line Turn spool to add a sail tie. on spool. couple of wraps of line. MKIV Unit 1... -
Page 31: Race Conversion
2 screws on bottom of guard assembly and remove two halves. Be careful— screws are not captive. 3) Use a 2.5 mm hex key to loosen four screws in plastic cover and flange. MKIV Unit 1 STA-LOK is a registered trademark of STA-LOK Terminals Ltd. -
Page 32: Maintenance
In order to prevent foils from locking against upper stay terminal when backstay is released, loosen foil clamp screws and lower foil before loosening backstay. McLube is a registered trademark of McGee Industries, Inc MKIV Unit 1 STA-LOK is a registered trademark of STA-LOK Terminals Ltd. -
Page 33: Troubleshoot
Line is not led through windows. Pull line through enclosed window. Line jams between guard and plastic spool plate. Warranty Online Product Registration www.harken.com/manuals www.harken.com/FurlingWarranty or call, write, email or fax Harken, Inc., Pewaukee, WI USA MKIV Unit 1... -
Page 34: Appendix
MKIV Unit 1 Parts List Description Order Part No. HFS980 Top Cover Assembly w/Screws HFG686 Top Cover H-35665D H-35665D Top Cover Screw (M4 x .7 x 10MM) HFS980 Bottom Flange Assembly w/Screws HFG687 Flange H-35600C HFS980 Bottom Flange Screw (M4 x .7 x 10MM) - Page 35 Troubleshoot Warranty 7404 Appendix Please read these instructions carefully before installing, servicing, or operating the equipment. This manual may be modified without notice. See: www.harken.com/manuals for updated versions. PLEASE SAVE THESE INSTRUCTIONS Clevis Pin ( " x .9" 18-8) HFG467...
- Page 36 Main Office and Harken Brandstore: Västmannagatan 81B SE-113 26 Stockholm Sweden Telephone: (46) 0303 61875 • Fax: (46) 0303 61876 Mailing address: Harken Sweden AB, Box 64, SE -440 30 Marstrand Web: harken.se • Email: harken@harken.se Harken UK, Ltd. Bearing House, Ampress Lane, Lymington, Hampshire S041 8LW, England Telephone: (44) 01590-689122 •...
Need help?
Do you have a question about the MKIV and is the answer not in the manual?
Questions and answers