Table of Contents
Advertisement
Advertisement
Table of Contents

Related Manuals for SKY-WATCHER AZGTi


Summary of Contents for SKY-WATCHER AZGTi
- Page 1 INSTRUCTION MANUAL AZGTi Mount Copyright © Sky-Watcher...
-
Page 2: Table Of Contents
Parts Diagram PART I : SETTING UP THE AZGTi MOUNT 1.1 Setting up on a Skywatcher Tripod ................4 1.2 Attaching the AZGTi Mount to a camera tripod ..........5 1.3 Installing the Telescope....................5 PART II : ELECTRONIC CONTROL INTERFACE 2.1 Control Panel ......................6 2.2 Panel Interface Components ...................6... -
Page 3: Parts Diagram
Parts Diagram Dovetail Bubble Level Locking Knob Altitude Clutch Wheel Dovetail Groove Saddle Battery Compartment for 8x AA Batteries Azimuth Clutch Knob Power Switch SNAP port External Power Hand controller LED Indicator port 3/8” socket... -
Page 4: Part I : Setting Up The Azgti Mount
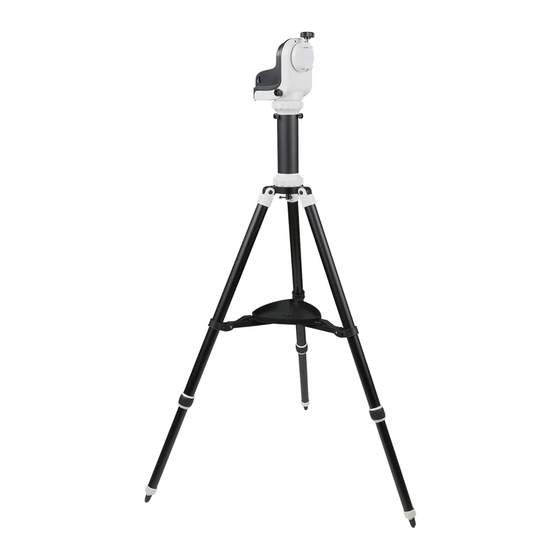
If using a short tube telescope, which does not hit the tripod legs when it points high up, with the AZGTi mount, the mount can be installed onto the tripod directly. Align the 3/8” socket at the base of the mount with the locking bolt on the tripod head. Lock the mount on the tripod by tightening the bolt (Fig. -
Page 5: Attaching The Azgti Mount To A Camera Tripod
PART I: SETTING UP THE AZGTi MOUNT If using a long tube telescope with AZGTi mount, an extension pier should be inserted be- tween the tripod and the AZGTi mount to prevent the telescope from hitting the tripod legs when it points high up(Fig. -
Page 6: Installing The Telescope
PART I: SETTING UP THE AZGTi MOUNT 1.3 Installing The Telescope Doveltail Locking Knob Loosen Tighten Saddle Dovetail Groove Altitude Clutch Wheel Loosen Tighten Fig. 1.3a Fig. 1.3b Loosen the altitude clutch wheel and rotate the saddle until the dovetail groove is horizon-... -
Page 7: Part Ii : Electronic Control Interface
PART II : ELECTRONIC CONTROL INTERFACE 2.1 Control Panel The control panel of the AZGTi mount is shown below: Hand Control Power SNAP Fig. 2.1 2.2 Panel Interface Components: POWER: This is an input for external power to avoid running on the 8 AA batteries in the AZGTi mount battery compartment. -
Page 8: Pinout Of The Interfaces
PART II: ELECTRONIC CONTROL INTERFACE 2.3 Pinout of The Interfaces: Note: The SNAP port provides two trigger signals Internal Circuit to the stereo plug. For a camera which only needs a shutter-release signal, either trigger Optoisolator TRIGGER Control Signal signals will work. For a camera which requires an extra “Focus”... -
Page 9: Part Iii : Using The Azgti Mount
PART III : USING THE AZGTi MOUNT 3.1 Manually Rotating The Mount Refer to the following diagrams: Tighten Loosen Tighten Loosen Fig. 3.1a Fig. 3.1b Loosen the Alt clutch wheel to manually rotate the telescope vertically. Loosen the Azimuth adjustment knob to manually rotate the telescope horizontally. -
Page 10: Freedom Find Function
3.5 Freedom Find Function The AZGTi mount is equipped with auxiliary encoders on both the azimuth axis and altitude axis. Therefore, the mount can keep track of its current position even when a user unlocks the clutches and rotates the mount in azimuth axis and altitude axis manually. -
Page 11: Appendix I : Specifications
APPENDIX I : SPECIFICATIONS Dimensions: Mount Tripod Specifications: Product Name AZGTi Mount Mount Type Altitude-azimuth Mount Payload 5 kg Mount’s Weight 1.3 kg Tripod + Extension Pier Weight 1.9 kg + 0.5kg Power Requirement DC7.5~14V, 0.75A Motor DC Servo Motor... - Page 12 AZGTi Mount AZGTi-F-V1.02-EN © 2018, Sky-Watcher, All Rights Reserved Apple, the Apple logo, iPhone, and iPod touch are trademarks of Apple Inc., registered in the U.S. and other countries. App Store is a service mark of Apple Inc. Android, Google Play and the Google Play logo are trademarks of Google Inc.
Need help?
Do you have a question about the AZGTi and is the answer not in the manual?
Questions and answers