Table of Contents
Advertisement
Advertisement
Table of Contents

Related Manuals for SKY-WATCHER AZ-EQ6 GT


Summary of Contents for SKY-WATCHER AZ-EQ6 GT
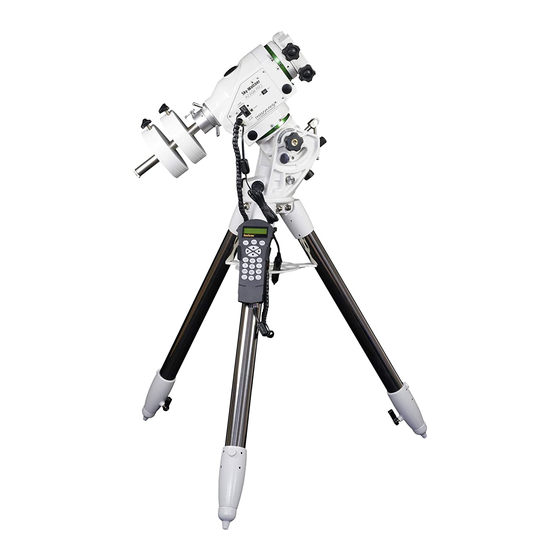
- Page 1 INSTRUCTION MANUAL AZ-EQ6 GT Mount 310113V1 Copyright © Sky-Watcher...
-
Page 2: Table Of Contents
2.1 Manually Rotating the Mount ..................7 2.2 Using the Dials ......................7 2.3 Adjusting the R.A. Axis’s Elevation .................8 2.4 Setting the AZ-EQ6 GT Mount to Alt-azimuth Mode ..........9 2.5 Installing a Secondary Telescope .................10 PART III : POLAR ALIGNMENT 3.1 Preparation ......................12 3.2 Alignment ......................13... -
Page 3: Part I : Setting Up The Az-Eq6 Gt Mount
Extend the legs to desired height, make sure the tripod top is level and then lock the clamps. clamp Fig. 1.1 1.2 Putting On the AZ-EQ6 GT Mount Loosen the two azimuth adjustment knobs on the AZ-EQ6 GT mount until there is sufficient (Fig. 1.2a) space between the two knob screws. Dowel Primary... -
Page 4: Attaching The Accessory Tray And The Hand Controller Holder
1.3b) Warning: The accessory tray will ensure the tripod legs remain firmly expanded, which will prevent the tripod from accidentally toppling over. When using the AZ-EQ6 GT mount, an ac- cessory tray should always be used to ensure stability. Bubble... -
Page 5: Installing The Counterweights
Remove the threaded cap from the end of the counterweight rod. The AZ-EQ6 GT mount comes with a 150mm counterweight rod extension, which can be installed at this point if necessary. Ensure the extension is tightly secured before installing (Fig. -
Page 6: Balancing The Mount
PART I: SETTING UP THE AZ-EQ6 GT MOUNT Release the Dec. clutch wheel and rotate the Dec. axis until the two knobs on the dual-fit saddle are facing upward and the dovetail groove is leveled. Tighten the Dec. clutch again. -
Page 7: Part Ii : Using The Az-Eq6 Gt Mount
Both the R.A. Clutch and the Dec. clutch should be tightened when driving the mount with the internal motors. 2.2 Using the Dials As displayed below, the AZ-EQ6 GT mount features a R.A dial and a Dec. dial. Locking Screw... -
Page 8: Adjusting The R.a. Axis's Elevation
PART II: USING THE AZ-EQ6 GT MOUNT Once the dials are calibrated, the mount can either be motor-driven or moved manually to specified coordinates by referring to the dial readings. The R.A. dial features three different scales: the upper scale is used to indicate the right ascension in Equatorial mode when mount is operating in the Southern Hemisphere;... -
Page 9: Setting The Az-Eq6 Gt Mount To Alt-Azimuth Mode
Engage the two fork tightening knobs. Note: It is normal to have slight elevation play on the AZ-EQ6 GT mount. The mount depends on the gravity of its payload and its own weight to stay firm. Because of this, it is recommended to end the elevation adjustment with an upwards movement. -
Page 10: Installing A Secondary Telescope
Re-load the mount again by installing the counterweight at the marked position. 2.5 Installing a Secondary Telescope A secondary telescope saddle can be installed at the end of the AZ-EQ6 GT mount’s counter- weight rod for the mounting of a secondary telescope. - Page 11 PART II: USING THE AZ-EQ6 GT MOUNT Use a 5mm Allen wrench to secure the saddle to the counterweight rod with the Allen (Fig. 2.5b). Also tighten the Allen screw on the silver screw in the central hole of the saddle ring with the same wrench.
-
Page 12: Part Iii : Polar Alignment
Prior to operating the AZ-EQ6 GT in Equatorial mode, it must be polar-aligned. 3.1 Preparation Setup the EQ6 GT mount (Refer to PART I : SETTING UP THE AZ-EQ6 GT MOUNT). It is rec- ommended to load the mount with the telescope and counterweights prior to polar align- ment. -
Page 13: Alignment
PART III: POLAR ALIGNMENT 3.2 Alignment Jackscrew Azimuth adjustment knobs Fig. 3.2a Fig. 3.2b Once the mount is powered up and the polar scope is illuminated, the pattern in the above figure should be visible in the field of view (FOV) of the polar scope. If the image (Fig. -
Page 14: The Orientation Of The Polaris
PART III: POLAR ALIGNMENT 3.3 The Orientation of the Polaris: As the Polaris is not located exactly at the North Celestial Pole, we can see it orbits the North Fig. 3.2a Celestial Pole in a polar scope. The large circle seen in the center of the pattern in a representation of the Polaris’... - Page 15 PART III: POLAR ALIGNMENT If the object remains at the center of the reticle in the polar scope after the rotation, then it means the polar scope has been aligned to the R.A. axis and no calibration is needed. If the target deviated from the reticle, then use a 1.5mm Allen wrench to adjust the three (Fig.
-
Page 16: Part Iv : Electronic Control Interface
PART IV : ELECTRONIC CONTROL INTERFACE 4.1 Control Panel The control panel of the AZ-EQ6 GT is shown below: Fig. 4.1 4.2 Panel Interface Components: POWER: This is an outlet from which the mount and the hand control get power supply. -
Page 17: Pinout Of The Interfaces
“Focus” signal ahead of the shutter-release signal, both signals should be connected properly. • The camera control cable shipped with the AZ-EQ6 GT mount is for a Canon EOS series DSLR camera. Cable for other cameras is optional and can be ordered separately. 4.4 Power Supply Requirements •... -
Page 18: Part V : Other Az-Eq6 Gt Mount Features
This feature can be enabled or disabled on the SynScan hand controller. 5.2 Permanent Periodic Error Correction The AZ-EQ6 GT mount is equipped with an index on its R.A. worm thus the motor controller can keep tracking the current position of the worm. After a proper PEC training routine, in which... -
Page 19: Appendix I : Specifications
APPENDIX I : SPECIFICATIONS Dimensions: 45° Equatorial Mode Alt-azimuth Mode Specifications: Product Name AZ-EQ6 GT Mount Mount Type German Equatorial / Alt-azimuth Dual Mode Payload 20kg (Counterweights excluded) Latitude Adjustment Range 10º to 75º, 90º Azimuth Adjustment Range About ±9 º... - Page 20 AZ-EQ6 GT Mount...
Need help?
Do you have a question about the AZ-EQ6 GT and is the answer not in the manual?
Questions and answers