Unitec Wash Select II Operation Manual
Hide thumbs
Also See for Wash Select II:
- Operation manual (125 pages) ,
- Retrofit installation manual (16 pages)

Related Manuals for Unitec Wash Select II


Summary of Contents for Unitec Wash Select II
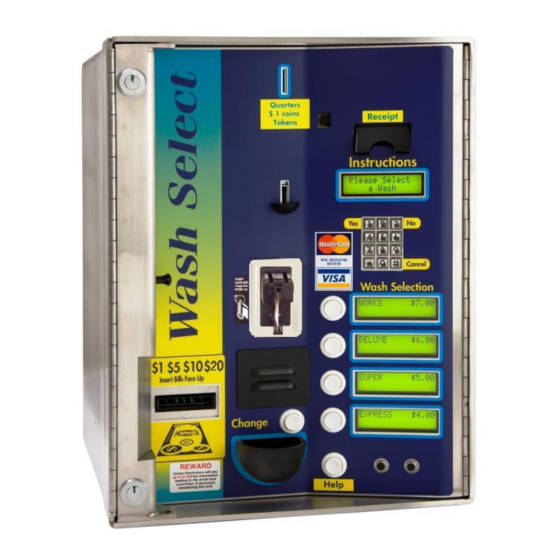
- Page 1 Wash Select II and Wash Select II POS Operations Manual Unitec www.StartwithUnitec.com (443) 561-1200...
- Page 2 Incorporated. T R A D E M A R K S Enterlink, Wash Select II, Wash Select II POS, VIP Wash Pass, Customized VIP Wash Pass, VIP Wash Coupons, Unitec, and the Unitec Logo are trademarks, service marks, or registered trademarks of Unitec, Incorporated.
- Page 3 11/2007 Lower case characters added to text editing: Section 2.7, page 46 Pay Fleet Account support added to WashPay-integrated units: Section 2.3.7 5.30 6/2007 Wash Select II to WashPay Integration: Section 2.3.20, page 27 5.11 4/2007 Bug fixes 5.10 10/2006 New items added: Split Tender for GiveX card: Section 2.3.19, page 29...
- Page 4 W A S H S E L E C T [ T H I S P A G E I N T E N T I O N A L L Y L E F T B L A N K ] Document Number: WS21002 Document Title:...
- Page 5 W A S H S E L E C T Wash Select II Menu Tree Version 5.55 Reporting Menu Diagnostics Menu Cust Interface Menu Print Configuration Test Outputs Customer Stacking View Configuration Cycle Outputs Forced Selection Print Accounting Test Inputs...
- Page 6 W A S H S E L E C T [ T H I S P A G E I N T E N T I O N A L L Y L E F T B L A N K ] Document Number: WS21002 Document Title:...
-
Page 7: Table Of Contents
W A S H S E L E C T Table of Contents System Overview ..........................1 Introduction to the Wash Select II ..................1 Setup and Operate Modes..................... 1 Customer Interface ........................ 2 Wash Select II Features ......................2 1.4.1... - Page 8 2.3.18 POS Auth Timeout ......................26 2.3.19 Set Network Parameters (Credit Mode 5 Only) ..............26 2.3.20 Wash Select II to WashPay Integration (Credit Mode 6 Only) ........... 27 2.3.21 Split Tender ........................28 2.3.22 Credit Sales Tax ........................ 28 Diagnostics Menu ........................
- Page 9 W A S H S E L E C T 2.6.4 Set Greeting Repeat Delay ....................43 2.6.5 Printing Message List ......................43 2.6.6 Viewing Current Message List ................... 43 Text Messages Menu ......................44 2.7.1 Configure Receipt Header Message ................. 44 2.7.2 Configure Second Line of Wash Display ................
- Page 10 Internet Credit and Remote Reporting ................76 2.13.2 Configure Remote Reporting ..................... 76 2.13.3 Using HyperTerminal to Access the Wash Select II ............78 2.13.4 Adding a Connection to HyperTerminal ................78 2.13.5 Dialing and Connecting to a Site ..................79 2.13.6...
- Page 11 System Settings Affecting Proximity Sensor Operations ..........134 Coin Hopper and Assembly ....................134 3.8.1 Filling the Hopper ......................134 3.8.2 Removing the Hopper from the Wash Select II ............... 135 3.8.3 Cleaning and General Maintenance ................135 3.8.4 System Settings Affecting Coin Hopper Operations ............135 Card Reader ........................
- Page 12 3.12.2 System Settings Affecting Modem Operation ..............140 Appendix A. Paging Access Numbers ..................141 Appendix B. Wash Select II Accounting Report ................. 143 Appendix C. POS4000 Accounting Report .................. 151 Appendix D. Circuit Board Connections ..................165 Appendix E.
- Page 13 Figure 5. Alternate Keypad Functions .................... 54 Figure 6. Blue Service Button Location ..................91 Figure 7. Wash Select II Internal Component Locations ............. 101 Figure 8. Locating the EPROM and Reset System Memory Button ..........102 Figure 9. Mars Bill Validator/Stacker .................... 104 Figure 10.
- Page 14 Table 30. System Settings Affecting Thermal Printer Operations ..........139 Table 31. Modem Related System Settings ................. 140 Table 32. POS4000 – Wash Select II Accounting Reports ............161 Table 33. Wash Select II Token Values ..................186 Table 34. Canadian IDX Program Configuration ................. 187 Table 35.
-
Page 15: System Overview
CPU board which is located on the inside right wall of the Wash Select II case. While in “Setup” mode, the Wash Select II can be programmed and reports can be viewed using the main display screen or printed using the optional thermal receipt printer. -
Page 16: Customer Interface
Within these basic parameters, there are many options available for you to program to customize your individual customer’s wash experience. 1.4 Wash Select II Features The Wash Select II car wash entry system provides the features you need in order to most fully profit from your car wash. 1.4.1 Standard Features... -
Page 17: Optional Features
W A S H S E L E C T 1.4.2 Optional Features In addition to standard features, the functionality of the Wash Select II can be expanded with the purchase of additional optional features: WashPay Integration – This option allows unlimited house accounts, remote management and reporting via the Internet, and much more. - Page 18 (numeric, text or voice/tone). The paging option requires you to have purchased the Paging option or the Credit option. When equipped with the Paging option, the Wash Select II can send an error message to your pager or cell phone.
-
Page 19: System Configuration And Operation
P r i n t i n g a C o n f i g u r a t i o n R e p o r t Using the toggle switch at the top of the CPU board, place the Wash Select II in setup mode by moving the switch toward the back of the Wash Select II case. -
Page 20: Accounting Report
P r i n t i n g a n A c c o u n t i n g R e p o r t Using the toggle switch at the top of the CPU board, place the Wash Select II in setup mode by moving the switch toward the back of the Wash Select II case. -
Page 21: Fleet Accounts And Coupons Menu
This feature also allows you to program the Wash Select II to only apply the coupon discount to specific wash packages (e.g. the coupon will give the fleet customer $2.00 off a Super or Deluxe wash package, but not a Basic wash package). -
Page 22: Editing Accounts
The following steps will guide you through the process of editing an account. Using the toggle switch at the top of the CPU board, place the Wash Select II in setup mode by moving the switch toward the back of the Wash Select II case. -
Page 23: Adding Uses Or Dollar Amounts To Accounts
2.2.3 Adding Uses or Dollar Amounts to Accounts Using the toggle switch at the top of the CPU board, place the Wash Select II in setup mode by moving the switch toward the back of the Wash Select II case. -
Page 24: Delete An Account
S E L E C T 2.2.4 Delete an Account Using the toggle switch at the top of the CPU board, place the Wash Select II in setup mode by moving the switch toward the back of the Wash Select II case. -
Page 25: Print Selected Fleet Account
2.2.6 Print Selected Fleet Account Using the toggle switch at the top of the CPU board, place the Wash Select II in setup mode by moving the switch toward the back of the Wash Select II case. (The CPU board is located on the inside right wall of the Wash Select II case.) Using the (3) key to scroll forward and the (1) key to scroll back, scroll through the main menu until the "Fleets &... -
Page 26: Print Transaction History
I n d i v i d u a l A c c o u n t s Using the toggle switch at the top of the CPU board, place the Wash Select II in setup mode by moving the switch toward the back of the Wash Select II case. -
Page 27: Create/Edit A Profile
Using the toggle switch at the top of the CPU board, place the Wash Select II in setup mode by moving the switch toward the back of the Wash Select II case. -
Page 28: Create Fleet Accounts From Profiles
2.2.12 Create Fleet Accounts From Profiles Using the toggle switch at the top of the CPU board, place the Wash Select II in setup mode by moving the switch toward the back of the Wash Select II case. (The CPU board is located on the inside right wall of the Wash Select II case.) Using the (3) key to scroll forward and the (1) key to scroll back, scroll through the main menu until the "Fleets &... -
Page 29: View Current Profiles
2.2.13 View Current Profiles Using the toggle switch at the top of the CPU board, place the Wash Select II in setup mode by moving the switch toward the back of the Wash Select II case. (The CPU board is located on the inside right wall of the Wash Select II case.) Using the (3) key to scroll forward and the (1) key to scroll back, scroll through the main menu until the "Fleets &... -
Page 30: Erase All Fleets
2.2.16 Erase All Fleets Using the toggle switch at the top of the CPU board, place the Wash Select II in setup mode by moving the switch toward the back of the Wash Select II case. (The CPU board is located on the inside right wall of the Wash Select II case.) Using the (3) key to scroll forward and the (1) key to scroll back, scroll through the main menu until the "Fleets &... -
Page 31: Credit Mode
Use the following steps to place the Wash Select II in the proper operating mode. Using the toggle switch at the top of the CPU board, place the Wash Select II in setup mode by moving the switch toward the back of the Wash Select II case. -
Page 32: Remote Setup
Follow the steps below to place your unit in Remote Setup mode. Using the toggle switch at the top of the CPU board, place the Wash Select II in setup mode by moving the switch toward the back of the Wash Select II case. - Page 33 W A S H S E L E C T Using the (3) key to scroll forward and the (1) key to scroll back, scroll through the main menu until the "Credit System" option is displayed. Press the (*) key to enter.
-
Page 34: Clearing The Transaction History
Follow the steps below to clear your “Credit Transaction History”: Using the toggle switch at the top of the CPU board, place the Wash Select II in setup mode by moving the switch toward the back of the Wash Select II case. -
Page 35: Pay Fleet Account
Using the toggle switch at the top of the CPU board, place the Wash Select II in setup mode by moving the switch toward the back of the Wash Select II case. -
Page 36: Credit + Coupon
Follow the steps below to enable the “Credit + Coupon” feature. Using the toggle switch at the top of the CPU board, place the Wash Select II in setup mode by moving the switch toward the back of the Wash Select II case. -
Page 37: Clear A Batch
This function is used to clear the local DataTran batch, should it become full and prevent the processing of transactions. 1. Using the toggle switch at the top of the CPU board, place the Wash Select II in setup mode by moving the switch toward the back of the Wash Select II case. -
Page 38: Automatic Batching
Wash Select II will open and close a batch every night at 11:00 p.m (11:45 if Credit Mode is 5). If the Wash Select II is off at that time, the batches will be attended to the next time the Wash Select II is turned on. -
Page 39: Accept Propriety
This feature allows you to choose whether the Wash Select II should accept proprietary card swipes. If enabled, the Wash Select II will take the data from any card swiped and pass it on to the modem or authorization device. (Be sure that your credit network is equipped to be able to authorize proprietary cards before enabling this setting). -
Page 40: Pos Auth Timeout
IP addresses are entered in four groups (called “octets”) of up to three digits each, separated by decimal points. To enter a decimal point at the Wash Select II, use the wash select button beside the Wash 3 display (second display from the top). -
Page 41: Wash Select Ii To Washpay Integration (Credit Mode 6 Only)
CAT5E Ethernet cable will be connected from the expansion board to the router in the office/C-store. Then complete the following steps: 1. Using the toggle switch at the top of the CPU board, place the Wash Select II in setup mode by moving the switch toward the back of the Wash Select II case. -
Page 42: Split Tender
GiveX card will be reversed and credited back to the GiveX account. Using the toggle switch at the top of the CPU board, place the Wash Select II in setup mode by moving the switch toward the back of the Wash Select II case. -
Page 43: Diagnostics Menu
Wash Select II system components. 2.4.1 Testing Output Relays In this sub-menu, you may turn each of the Wash Select II outputs on or off. To test the output relays: Using the toggle switch at the top of the CPU board, place the Wash Select II in setup mode by moving the switch toward the back of the Wash Select II case. -
Page 44: Cycling Output Relays
Auxiliary 4 – spare output on display I/O board for external fleet card 2.4.2 Cycling Output Relays This function will cycle through all Wash Select II outputs. For a list of the outputs, see Section 2.4.1 above. Follow the steps below to cycle output relays: Disconnect the Wash Select II unit from the car wash equipment prior to running this ... -
Page 45: Testing Coin And Bill Pulse Relays
To enter the “Test Bills/Coins” menu, follow the steps below. Using the toggle switch at the top of the CPU board, place the Wash Select II in setup mode by moving the switch toward the back of the Wash Select II case. -
Page 46: Test Coin Dispenser
Use of this function will not affect the accounting report. To use this function follow the steps below. Using the toggle switch at the top of the CPU board, place the Wash Select II in setup mode by moving the switch toward the back of the Wash Select II case. -
Page 47: Testing The Magnetic Card Reader
Follow the steps below to test the magnetic stripe tracks: Using the toggle switch at the top of the CPU board, place the Wash Select II in setup mode by moving the switch toward the back of the Wash Select II case. -
Page 48: Testing The Thermal Printer
This command will display the type and status of the card you are swiping. Follow the steps below: Using the toggle switch at the top of the CPU board, place the Wash Select II in setup mode by moving the switch toward the back of the Wash Select II case. -
Page 49: Testing The Standard Keypad
CPU board. 2.4.8 Testing the Standard Keypad Using this function will allow you to test the Wash Select II keypad. To test the keypad, follow the steps below. Using the toggle switch at the top of the CPU board, place the Wash Select II in setup mode by moving the switch toward the back of the Wash Select II case. -
Page 50: Testing The Buttons
This function will allow you to test the four wash buttons and the change button. The following steps will assist in testing the buttons. Using the toggle switch at the top of the CPU board, place the Wash Select II in setup mode by moving the switch toward the back of the Wash Select II case. -
Page 51: Get Network Info
“Test Modem” command, and comparing the results. Using the toggle switch at the top of the CPU board, place the Wash Select II in setup mode by moving the switch toward the back of the Wash Select II case. -
Page 52: Pos/485 Loop Back
(The board is located at the top left of the CPU board next to connector J22.) Using the toggle switch at the top of the CPU board, place the Wash Select II in setup mode by moving the switch toward the back of the Wash Select II case. -
Page 53: Wash Setup Menu
To program the wash prices follow the steps below. Using the toggle switch at the top of the CPU board, place the Wash Select II in setup mode by moving the switch toward the back of the Wash Select II case. -
Page 54: Option Prices
When you have finished entering the Wash Name, press the enter (*) key. Figure 3. Alternate Keypad Functions Using the toggle switch at the top of the CPU board, place the Wash Select II in setup mode by moving the switch toward the back of the Wash Select II case. -
Page 55: Option Names
To program the option prices, follow the steps below. Using the toggle switch at the top of the CPU board, place the Wash Select II in setup mode by moving the switch toward the back of the Wash Select II case. -
Page 56: Record Messages
2.6.3 Set Greeting Start Delay This function is used to set the amount of time that the Wash Select II will wait to activate the greeting message after the Proximity sensor detects the presence of a vehicle. This delay is usually set to give the customer enough time to roll down the window once they have stopped in front of the Wash Select II. -
Page 57: Set Greeting Repeat Delay
Using the toggle switch at the top of the CPU board, place the Wash Select II in setup mode by moving the switch toward the back of the Wash Select II case. -
Page 58: Text Messages Menu
/header messages on the receipt. To program these messages: Using the toggle switch at the top of the CPU board, place the Wash Select II in setup mode by moving the switch toward the back of the Wash Select II case. -
Page 59: Configure Second Line Of Wash Display
2.7.2 Configure Second Line of Wash Display The Wash Select II allows you to edit the second line of the wash displays. This line allows 16 spaces that may be customized. This is useful for giving a brief explanation of each wash as well as for advertising coupon specials. -
Page 60: Option Prompt
To customize the text of the Option Prompt: Using the toggle switch at the top of the CPU board, place the Wash Select II in setup mode by moving the switch toward the back of the Wash Select II case. -
Page 61: Wash Interface Menu
2.8.1 Enable Relay Stacking Relay stacking is the ability for the Wash Select II to hold all arming signals while the wash is in use. Most car wash systems will work with (or prefer to work with) Relay Stacking enabled. -
Page 62: Configure The Wash Relay Pattern
Use the steps below to assist you when enabling this feature. Using the toggle switch at the top of the CPU board, place the Wash Select II in setup mode by moving the switch toward the back of the Wash Select II case. -
Page 63: Enable Automatic Out-Of-Service Detection
Wash 1 name 2.8.4 Enable Automatic Out-Of-Service Detection If the car wash goes down, the Wash Select II can be informed to let customers know that the wash is down. The Wash Select II supports the detection of an Out-of-Service condition on the Wash-in-Use input. -
Page 64: Wash Handshaking
W A S H S E L E C T Using the toggle switch at the top of the CPU board, place the Wash Select II in setup mode by moving the switch toward the back of the Wash Select II case. -
Page 65: Oos Timer
Once the coin box has gone out of service, it will display the standard Out of Service message. If the Wash Select II goes Out of Service while it contains credit in escrow, a voucher will be printed for the customer. -
Page 66: Tunnel Wash Settings
“Unattended,” customers will not automatically receive a receipt. Using the toggle switch at the top of the CPU board, place the Wash Select II in setup mode by moving the switch toward the back of the Wash Select II case. -
Page 67: Combo Mode
W A S H S E L E C T Using the toggle switch at the top of the CPU board, place the Wash Select II in setup mode by moving the switch toward the back of the Wash Select II case. -
Page 68: Edit Combo Names
Figure 5. Alternate Keypad Functions To change the Combo names: Using the toggle switch at the top of the CPU board, place the Wash Select II in setup mode by moving the switch toward the back of the Wash Select II case. - Page 69 S E L E C T To enable Optioning: Using the toggle switch at the top of the CPU board, place the Wash Select II in setup mode by moving the switch toward the back of the Wash Select II case.
-
Page 70: Remote Code Pos4000 Support
2.8.12 Remote Code POS4000 Support The Wash Select II may be configured to interface to a POS4000 in order to be activated by codes sold at one or multiple POS4000 units. Any Wash Select II may also be upgraded in the field to interface to a POS4000 either by direct wires or via encrypted codes from a Remote Code POS4000. -
Page 71: Customer Interface Menu
The “Customer Interface Menu” contains functions that affect the operation of the coin box with the customer. 2.9.1 Customer Stacking This feature allows you to enable or disable the ability for the Wash Select II to interact with a customer in front of it while the wash is in use. Document Number:... -
Page 72: Forced Selection
DISABLED – The Wash Select II will not allow any interaction at the coin box while the wash is in use. -
Page 73: Allow Upgrades
2.9.4 Enabling and Setting Automatic Selection Timer This setting is disabled by default, but if enabled it will allow the Wash Select II to make a wash selection if the customer has not done so within a specified time. This helps... -
Page 74: Paging Functions
You may disable this feature by setting the timer to “0”. Note: Using the toggle switch at the top of the CPU board, place the Wash Select II in setup mode by moving the switch toward the back of the Wash Select II case. -
Page 75: Pager Types
After the second page, no more pages will be sent until the error has been corrected. (See Table 7 for further information). 2.10.1 Pager Types The three different pager types supported by the Wash Select II are described in the Table below. Table 6. Pager Message Types Pager Type... -
Page 76: Pager Error Codes
S E L E C T 2.10.2 Pager Error Codes The following table provides a listing of each of the alarm conditions and error codes generated for each type of pager supported by the Wash Select II. Table 7. Pager Error Codes Error Text Name... -
Page 77: Programming/Editing Pager Numbers
Network Login Success LOGIN SUCCESS 2.10.3 Programming/Editing Pager Numbers The Wash Select II can be programmed to accommodate specific pager requirements. The following sections provide the settings and descriptions available for programming and editing the wash Select II Pager Number. Document Number:... -
Page 78: Table 8. Numeric Pager Parameters
Use the following procedure to program or edit the pager number: Using the toggle switch at the top of the CPU board, place the Wash Select II in setup mode by moving the switch toward the back of the Wash Select II case. -
Page 79: Table 9. Voice/Tone Pager Parameters
V o i c e / T o n e P a g e r s The voice type pager is useful if you do not have a pager but want the Wash Select II to call your cell phone, home, or answering machine. - Page 80 Use the following procedure to program or edit the pager number: Using the toggle switch at the top of the CPU board, place the Wash Select II in setup mode by moving the switch toward the back of the Wash Select II case.
-
Page 81: Disabling/Erasing Pager Slots
Use the following procedure to program or edit the pager number: Using the toggle switch at the top of the CPU board, place the Wash Select II in setup mode by moving the switch toward the back of the Wash Select II case. -
Page 82: View Current Pager Numbers
To enter this function, follow the steps below. Using the toggle switch at the top of the CPU board, place the Wash Select II in setup mode by moving the switch toward the back of the Wash Select II case. -
Page 83: Programming Voice Pager Site Id Numbers
W A S H S E L E C T Using the toggle switch at the top of the CPU board, place the Wash Select II in setup mode by moving the switch toward the back of the Wash Select II case. -
Page 84: Cash And Tokens Menu
The country code affects the assignment of coin and bill values for each coin and bill input, as well as which coin input is used for tokens. The Wash Select II software will support these countries; however, hardware changes are required for the cash components to work for different countries. -
Page 85: Set Maximum Tokens Per Customer
The “Coin Dispensing Mode” will allow you to configure the manner in which coins are dispensed. You may use the Wash Select II as a changer (put money in and press refund), or decide if a purchase is necessary to receive change. No matter how this feature is configured, however, no money may ever be refunded if the amount has already been applied to the purchase of a wash. -
Page 86: Configure Dispensed Coin Value
D I S P E N S E M O D E The Wash Select II will refund any money that has not yet been applied to the purchase of a wash. Follow these steps to configure the dispense mode: Using the toggle switch at the top of the CPU board, place the Wash Select II in setup mode by moving the switch toward the back of the Wash Select II case. -
Page 87: Miscellaneous Setup Menu
To set the alarm duration: Using the toggle switch at the top of the CPU board, place the Wash Select II in setup mode by moving the switch toward the back of the Wash Select II case. -
Page 88: Assigning A Service Phone Number
7, 10, or 11-digit numeric format. Follow the steps below to program a service phone number. Using the toggle switch at the top of the CPU board, place the Wash Select II in setup mode by moving the switch toward the back of the Wash Select II case. -
Page 89: Enable Receipt Printer
The steps below will walk you through this process. Using the toggle switch at the top of the CPU board, place the Wash Select II in setup mode by moving the switch toward the back of the Wash Select II case. -
Page 90: Internet Credit And Remote Reporting
Configure Remote Reporting Use the following procedures to set the Remote Reporting configuration. After configuring the Wash Select II, you should call the modem number to verify that the Wash Select II is operating properly. 2 . 1 3 . 2 . 1 E n a b l i n g R e m o t e R e p o r t i n g Use this function to enable/disable the “Remote Reporting”... - Page 91 Example: If you have two Wash Select II units, you would use the “Site ID” feature under the “Misc. Setup” menu to set the first unit as site one and the second unit as site two. Set the “Deaf Time”...
-
Page 92: Using Hyperterminal To Access The Wash Select Ii
Follow these steps to configure this option: Using the toggle switch at the top of the CPU board, place the Wash Select II in setup mode by moving the switch toward the back of the Wash Select II case. -
Page 93: Dialing And Connecting To A Site
W A S H S E L E C T Figure 6. HyperTerminal New Connection Window Add the name of your site in the Name: field, and select an Icon if you wish. When you do, the “Connect To” screen will be displayed. In the “Connect To”... - Page 94 ENTER YOUR CHOICE: If the Enhanced Remote Reporting option has been purchased, the selection of number 15 above will give the following new menu. SITE: 1 REMOTE WASH SELECT II DAILY REPORTS MENU Document Number: WS21002 Document Title: WSII Operations Manual...
-
Page 95: Disconnection From A Site
For the Enhanced Remote Reporting to work, there should be an Expansion memory added to U57 on the CPU board of the Wash Select II. If the Wash Select II is not equipped with the expansion memory, the following error message shows up on Remote Reporting. -
Page 96: Automatic Disconnection By The Wash Select Ii
Multiple Units at Same Site If you have more than one Wash Select II at the same site that share the same phone line, you will have to configure the Rings and Deaf time settings in the Remote Reporting menu of the Wash Select II. -
Page 97: Adding An Alternate Modem Setup
2.13.10 Adding an Alternate Modem Setup If you are having problems connecting to your site, you may try the following. Unitec has seen problems with some modems that have compression and error correcting (most modems sold today) in connecting w/ Wash Select II units with Credit. Adding an alternate modem configuration in windows that will be used just for your Wash Select II HyperTerminal sessions should alleviate this. -
Page 98: Disabling Error Control
We do not recommend this unless you are only using your modem to connect to the Wash Select II system. This may alter your performance with Internet services. We would then recommend that you purchase another modem for your computer. -
Page 99: Pass Codes And Pass Cards
W A S H S E L E C T 2.14 Pass Codes and Pass Cards The Pass Codes and Pass Cards discussed in this Section provide access to programming fleet accounts. They are not to be confused with the VIP Pass Cards™ or the Fleet Account Codes themselves. -
Page 100: Add Code/Card
Wash Select II. This way you do not have to teach the attendant/trustee how to operate the unit. This is useful also if you want to have a trustee remove cash from the unit and print a report while you are on vacation. -
Page 101: View Codes/Cards
Use the instructions below to view codes and cards. Using the toggle switch at the top of the CPU board, place the Wash Select II in setup mode by moving the switch toward the back of the Wash Select II case. -
Page 102: Delete Code/Card
This function allows you to delete a Pass Code/Card. Follow the steps below to delete a code/card. 1. Using the toggle switch at the top of the CPU board, place the Wash Select II in setup mode by moving the switch toward the back of the Wash Select II case. - Page 103 W A S H S E L E C T The value of each coupon must be programmed in the Wash Select II. If a coupon has not been programmed into the Wash Select II, the bill validator will reject the coupon.
-
Page 104: Mars (Mei) Bill Validator
The value of each coupon must be programmed in the Wash Select II. If a coupon has not been enabled in the Wash Select II, the bill validator will not accept the coupon. -
Page 105: Figure 6. Blue Service Button Location
W A S H S E L E C T Enable Coupon Press the blue service button directly on the back of the bill feed opening, below the bill stacker. Figure 7. Blue Service Button Location The Bezel Lights on the bill acceptor opening will start blinking. Feed the coupon you want to be enabled. -
Page 106: Vip Wash Coupon Limit
To program a VIP Wash Coupon: Using the toggle switch at the top of the CPU board, place the Wash Select II in setup mode by moving the switch toward the back of the Wash Select II case. -
Page 107: Pos4000 Link
POS network. In this case, set the interface mode to ‘1’. If you have multiple Wash Select II units, you will also need to set the bay address for each Wash Select II. -
Page 108: Interface Mode
POS4000 or a master Wash Select II unit to be used at a secondary Wash Select II at your site. If at any time this feature is disabled or the unit loses communication, you will get a message on the POS4000 that indicates “Time Out From Unit “X”. -
Page 109: Notifications
You can have any notifications that are normally sent to the pager printed at the POS4000 as well. Using the toggle switch at the top of the CPU board, place the Wash Select II in setup mode by moving the switch toward the back of the Wash Select II case. - Page 110 PRIMARY unit for use at any bay in your system, including the PRIMARY. Without this option, when there is more than one Wash Select II at a self-serve car wash, one cannot share fleet accounts; a fleet account opened at a given bay can only be used at that bay.
-
Page 111: Table 16. Multi-Unit Bay Numbering
The Multi-Unit Fleet option allows for up to five coin boxes to be connected to one “Primary” Wash Select II unit (no POS). Units are denoted by the network address. For Multi-Unit Fleet, you will need to set the number of bays. This is when setting the bay address to one at the master unit. -
Page 112: Convey Accounting
POS4000. The POS4000 allows you to configure first and second line and apply that as a wash name. Make a note however, that the Wash Select II will take only the first 10 characters and apply that as the wash name. To configure the Wash Select II to allow the POS4000 to control wash names and prices follow the steps below. -
Page 113: Document Title: Wsii Operations Manual
W A S H S E L E C T Using the toggle switch at the top of the CPU board, place the Wash Select II in setup mode by moving the switch toward the back of the Wash Select II case. -
Page 114: Document Title: Wsii Operations Manual
W A S H S E L E C T [ T H I S P A G E I N T E N T I O N A L L Y L E F T B L A N K ] Document Number: WS21002 Document Title:... -
Page 115: Component Operation & Maintenance
3.1 Component Locations The following line drawing provides a general overview of where the Wash Select II primary components are located. The printer, token bucket, printer controller board, intercom board, card reader, and proximity sensor are components that can be added by purchasing the corresponding option package. -
Page 116: Figure 8. Locating The Eprom And Reset System Memory Button
W A S H S E L E C T 1. Remove the existing EPROM located at connection U58 on the CPU board (see Figure 9) by inserting a small flat-blade screwdriver between the EPROM and the socket and prying it off. Be careful not to damage the socket or the circuit board. Figure 9. -
Page 117: Bill Validator
6. Replace the protective plastic cover over the CPU board. 3.3 Bill Validator 3.3.1 Mars Bill Validator The Wash Select II is equipped with the Mars bill validator. This bill validator supports $1, $5, $10, and $20 bills as well as Mars coupons. ... -
Page 118: Figure 9. Mars Bill Validator/Stacker
W A S H S E L E C T Figure 10. Mars Bill Validator/Stacker Figure 11. Mars Bill Validator—Top View Document Number: WS21002 Document Title: WSII Operations Manual... -
Page 119: Figure 11. Mars Bill Stacker Replacement
W A S H S E L E C T 3 . 3 . 1 . 2 R e p l a c i n g t h e S t a c k e r To replace the stacker, perform the following steps: Position the stacker behind the Mars Bill Validator with the hinged doors on the side, and the back of the stacker facing away from you. -
Page 120: Figure 12. Mars Flash Code Led
W A S H S E L E C T Figure 13. Mars Flash Code LED The LED will repeat a specific number of flashes. Each number of flashes corresponds to a specific problem. Error! Reference source not found. lists the meaning of each set of flashes. - Page 121 R e m o v i n g t h e M a r s B i l l V a l i d a t o r F r o m t h e W A S H S E L E C T Perform the following steps to remove the Mars Bill Validator. Unlock and open the door of the WASH SELECT II. Power off the WASH SELECT II.
-
Page 122: Figure 13. Mars With Lower Housing
W A S H S E L E C T Slide the inner housing out of the back of the validator, revealing the belts, pulleys and sensors. Silver Rod Figure 14. Mars with Lower Housing Figure 15. Mars with Lower Housing Removed Document Number: WS21002 Document Title:... -
Page 123: Figure 15. Mars Dip Switches
W A S H S E L E C T 3 . 3 . 1 . 6 C l e a n i n g a n d G e n e r a l M a i n t e n a n c e The AE2600 series will not need cleaning as often as magnetic sensing bill validators. -
Page 124: Coinco Bill Validator
W A S H S E L E C T Table 19. Mars Bill Validator DIP Switches Switch Default 1 & 2 1 & 2 both ON = 1 ON, 2 OFF = 1 OFF, 2 ON = 2-way bill acceptance (switches work 4-way bill acceptance 1-way bill acceptance... -
Page 125: Figure 16. Bill Acceptor/Stacker
W A S H S E L E C T Figure 17. Bill Acceptor/Stacker 3 . 3 . 2 . 2 R e p l a c i n g t h e S t a c k e r Follow the steps below when replacing the stacker. -
Page 126: Figure 17. Bill Stacker
W A S H S E L E C T S lo ts T a b s Figure 18. Bill Stacker Slide the Stacker down until it is fully seated. (See Figure 19) Figure 19. Bill Stacker 3 . 3 . 2 . 3 U n d e r s t a n d i n g t h e F l a s h C o d e s The Bill Validator is equipped with an internal diagnostic LED flash code system. -
Page 127: Figure 19. Flash Code Led
W A S H S E L E C T Remove the stacker from the bill validator by pressing the plastic tab at the top and lifting the stacker upward. Using a small hand mirror, place the mirror behind the bill validator until you can see the LED. - Page 128 W A S H S E L E C T # of Description of diagnostic code Flashes EEPROM checksum error RAM or ROM checksum error Center optic sensor- may need cleaning Right optic sensor – may need cleaning Left optic sensor- may need cleaning Bill position sensor- may need cleaning Right position sensor - may need cleaning Left position sensor may need cleaning...
-
Page 129: Figure 20. Removing Lower Housing
W A S H S E L E C T Figure 21. Removing Lower Housing Firmly grasp the top of the housing with your fingers and pull it toward the palm of you hand. (Be sure to keep steady pressure on the housing at all times during removal.) Slide the inner housing out of the back of the validator, revealing the belts, pulleys and sensors. -
Page 130: Table 21. Bill Validator Programming
S y s t e m S e t t i n g s A f f e c t i n g O p e r a t i o n Every component of the Wash Select II is affected by various system configuration settings. -
Page 131: Single Coin Acceptor
The bill acceptor will not accept bills once a wash is purchased. 3.4 Single Coin Acceptor The Wash Select II comes standard with the model PEM-35 single coin acceptor. In this section, you will find instruction for proper maintenance of the PEM-35. 3.4.1 Replacing the Reference Coin For proper operation of the coin acceptor, you must have a sample of the coin to be accepted (U.S. -
Page 132: Removing The Coin Acceptor
This completes the smaller value coin adjustment. 3.4.3 Removing the Coin Acceptor If you find it necessary to remove the Slug-Buster from the Wash Select II door, a small head Phillip’s screwdriver will be needed. Follow the steps below to remove the assembly from the door. -
Page 133: Programming The Idx Acceptor
S E L E C T The current configuration of the Wash Select II only allows one coin to be dispensed at a time. Therefore, if you would like to dispense the dollar coin, it will be necessary to make changes to the coin hopper. -
Page 134: Figure 22. Outside/ Inside Of The Idx
How much will each token be worth? Can the Wash Select II programmed token-value be divided evenly into each of these values? (This helps to determine the number of pulses the IDX will need to output for each token.) ... -
Page 135: Programming The Idx To Accept Site-Specific Tokens
The IDX acceptor can be programmed to accept four different tokens. Each token will need to be sampled and assigned a number of pulses. This means that each token will need to be worth some multiple of the Wash Select II programmed token value (from the cash & tokens Document Number:... - Page 136 1 = $.50, token 2 = $1.00 token 3 = $1.50 and token 4 = $2.00. As you can see each token in this example represents numbers that can be divided by $.50.) The Wash Select II does not keep a separate accounting of each different token your site may have; it just keeps a running total equal to the total dollar value entered.
-
Page 137: Programming Token Value
The following steps will assist you when setting Token Values. Using the toggle switch at the top of the CPU board, place the Wash Select II in setup mode by moving the switch toward the back of the Wash Select II case. -
Page 138: Modifying The Hopper
W A S H S E L E C T the Wash Select II must also be changed to reflect the value of the dollar coin. The default value for this function is $.25. To change the dispense value, follow the steps below. -
Page 139: Figure 24. Hopper View - Side Screw And Internal Hopper - Cube
W A S H S E L E C T H o p p e r R e m o v e th e 2 C u b e s c r e w s f r o m e a c h s id e , th e n p u ll h o p p e r c u b e o u t Figure 25. -
Page 140: Figure 26. Hopper View - Top Removed
W A S H S E L E C T Figure 27. Hopper View - Top Removed Remove the dispensing wheel by grasping the coin openings and lifting up. Figure 28. Hopper View - Wheel Removed Using your hand, remove the guide arm cover from over-top of the coin exit opening. -
Page 141: Figure 28. Hopper View - Guide Arm Cover Removed
W A S H S E L E C T Figure 29. Hopper View - Guide Arm Cover Removed Using a screwdriver, gently pry off the old hopper arm. Be very careful not to break the pins that hold the arm in place. A r m C o v e r Figure 30. -
Page 142: Program The Idx To Accept Quarters
W A S H S E L E C T Slide the black plastic top back onto the hopper-cube assembly. Securely latch it in place by locking the clasp. Place the hopper-cube back into the metal housing and replace the two screws you removed previously. -
Page 143: Erasing Idx Programming
You can empty the bucket by grasping it firmly at the top and lifting it up and out of the Wash Select II case. When returned to the case, the bucket locks into an upright position using a bracket on the floor of the Wash Select II. 3.5.10 Cleaning and General Maintenance You are strongly advised to check the coin-accepting system for proper operation. -
Page 144: System Settings Affecting Idx Coin Acceptor Operations
3.5.11 System Settings Affecting IDX Coin Acceptor Operations The following Wash Select II system settings will have an effect on how the IDX Coin Acceptor operates. Table 25. System Settings Affecting IDX Coin Acceptor Operations... - Page 145 W A S H S E L E C T You have purchased the _______________. You may enter the wash if it is ready. 4) PACKAGE 2 PURCHASED (8.5 seconds) You have purchased the _______________. You may enter the wash if it is ready. 5) PACKAGE 3 PURCHASED (8.5 seconds) You have purchased the _______________.
-
Page 146: System Settings Affecting Speech Module Operations
When you are ready to record you messages, follow the steps below. Using the toggle switch at the top of the CPU board, place the Wash Select II in setup mode by moving the switch toward the back of the Wash Select II case. -
Page 147: Proximity Sensor
3.7 Proximity Sensor With the proximity sensor, the Wash Select II will detect vehicles when they drive up. The proximity sensor consists of the following components: Transmitter/Receiver pair - attached to the door. -
Page 148: System Settings Affecting Proximity Sensor Operations
3.8 Coin Hopper and Assembly The Wash Select II is equipped with a Suzo Mark II coin dispenser, which is embedded in a proprietary Unitec design. The dispenser is able to hold/dispense up to 2,400 quarter-sized coins. -
Page 149: Removing The Hopper From The Wash Select Ii
Wash Select II case. 3.8.4 System Settings Affecting Coin Hopper Operations The following Wash Select II system settings will have an effect on how the Coin Hopper and Assembly operate. Table 28. System Settings Affecting Coin Hopper Operations... -
Page 150: Card Reader
#MS2031 and can also be purchased from Clean Team by calling 1-800-888-8830. 3.9.2 System Settings Affecting Card Reader Operations The following Wash Select II system settings will have an effect on how the Card Reader operates. Table 29. Card Reader Related System Settings... -
Page 151: Thermal Printer Assembly
"Feed" and "Reset". You will find the printer control board mounted on the inside right wall of the Wash Select II case, just above the CPU board. The following sections contain information and procedures important for peak operating performance. -
Page 152: Clearing A Paper Jam
This will clear up any failures due to electronic error. If you press the feed button and hold it, the paper feed motor will feed paper through the side of the Wash Select II door. The paper will stop feeding once you let go of the button. -
Page 153: System Settings Affecting Thermal Printer
3.10.6 System Settings Affecting Thermal Printer The following Wash Select II system settings will have an effect on how the Thermal Printer operates. Table 30. System Settings Affecting Thermal Printer Operations... -
Page 154: Credit Setup And Programming
3.12.2 System Settings Affecting Modem Operation The following Wash Select II system settings will have an effect on how the Modem operates. “Deaf Time” is a period of time after the modem disconnects that the modem will not answer incoming calls. This allows multiple units sharing a single telephone line to be accessed using Remote Reporting. -
Page 155: Appendix A. Paging Access Numbers
S E L E C T Appendix A. Paging Access Numbers The following paging access numbers are listed for your convenience only. Unitec does not endorse or take any responsibility for the policies of the companies listed below. At the time of this release, these companies still provide TAP Text paging protocol. - Page 156 W A S H S E L E C T [ T H I S P A G E I N T E N T I O N A L L Y L E F T B L A N K ] Document Number: WS21002 Document Title:...
-
Page 157: Appendix B. Wash Select Ii Accounting Report
S E L E C T Appendix B. Wash Select II Accounting Report This section describes the information printed on a Wash Select II detailed accounting report. This report can be obtained via the receipt printer or from a Remote Reporting Session via a modem. - Page 158 W A S H S E L E C T POS4000 REFND: $0.00 Total code refunds at the POS4000. ========================== MONETARY -------------------------- TYPE COUNT VALUE COINS 507 $126.75 Count and value of quarters/dollar coins DISPENSED 1305 $326.25 Count and value of coins dispensed BILLS 1685 $4573.00 Count and value of bills accepted...
- Page 159 W A S H S E L E C T POS4000 Group and option sold at POS4000 (May not be redeemed yet). Count Value OPTION 1 $0.00 OPTION 2 $0.00 OPTION 3 $0.00 Group 1 $0.00 Group 2 $0.00 Group 3 $0.00 Group 4 $0.00...
- Page 160 W A S H S E L E C T ========================== POS4000 CODE USAGE Usage of POS4000 Codes: -------------------------- This includes only codes used. BASIC $ 5.00 : It includes POS4000 random codes REGULAR $ 6.00 : and POS4000 Fleet codes that were DELUXE $ 7.00 : Programmed via the POS4000.
- Page 161 W A S H S E L E C T Debit fleet only : Used amount from Debit fleet Debit fleet +other: Debit combined with token or cash EXT Fleet only : EXT fleet account only used EXT Fleet + other : EXT Fleet combined with cash or token ========================== ACTIVATION DETAIL...
- Page 162 W A S H S E L E C T POS Code + Other : VIP Coupon Only : VIP Coupon + Other: Debit fleet only : Debit fleet +other: EXT Fleet only : EXT Fleet + other : TOTAL : 149 DELUXE $7.00...
- Page 163 W A S H S E L E C T POS Code + Other : VIP Coupon Only : VIP Coupon + Other: Debit fleet only : Debit fleet +other: EXT Fleet only : EXT Fleet + other : TOTAL : 341 ========================== END OF REPORT...
- Page 164 W A S H S E L E C T [ T H I S P A G E I N T E N T I O N A L L Y L E F T B L A N K ] Document Number: WS21002 Document Title:...
-
Page 165: Appendix C. Pos4000 Accounting Report
S E L E C T Appendix C. POS4000 Accounting Report This section details the references in the POS4000 report to sales at the Wash Select II This report will be available at a POS4000 console when the POS4000 has Wash Select II- supported software installed. - Page 166 W A S H S E L E C T Bay 1 3 3 How many Express washes were sold, paid for and fired at Bay 1 (No POS codes; only cash, credit, fleet, VIP coupon, etc) Bay 2 2 2 How many Express washes were sold, paid for and fired at Bay 2 (No POS codes;...
- Page 167 W A S H S E L E C T Bay 2 4 4 How many Super washes were sold, paid for and fired at Bay 2 (No POS code; only cash, credit, fleet, VIP coupon, etc) Bay 3 4 4 How many Super washes were sold, paid for and fired at Bay 3 (No POS code;...
- Page 168 W A S H S E L E C T the third WSII without an upgrade to a higher wash Coinbox only Bay 1 2 2 How many Deluxe washes were sold, paid for and fired at Bay 1 (No POS codes; only cash, credit, fleet, VIP coupon, etc) Bay 2 3 3 How many Deluxe washes were sold, paid for and...
- Page 169 W A S H S E L E C T ------------ POSCode only Bay 1 0 How many of the above Works POS codes were used at the first WSII without an upgrade to a higher wash Bay 2 0 How many of the above Works POS codes were used at the second WSII without an upgrade to a higher wash Bay 3...
- Page 170 W A S H S E L E C T Bay 1 2 Count of all washes at Bay 1 paid for partly with a POS code (POS code + some form of payment for upgrade; e.g. POS code for Express wash + $1 = Super wash) Bay 2 2 Count of all washes at Bay 2 paid for partly with...
- Page 171 W A S H S E L E C T console( either master console is turned OFF or is experiencing communication difficulty with Bay 2 ) Bay 3 0 Count of Deluxe washes fired at Bay 3 while Bay 3 was not communicating with the master console( either master console is turned OFF or is experiencing communication difficulty with Bay 3 )
- Page 172 W A S H S E L E C T Bay 1 3 Count of Deluxe washes fired at Bay 2 part or all of which is paid for using standard or debit fleet (code or card) Bay 1 3 Count of Deluxe washes fired at Bay 3 part or all of which is paid for using standard or debit fleet (code or card) WSII Fleet 4...
- Page 173 W A S H S E L E C T Console Sales $54.00 $54.00 Total $ in sales of POS codes from the master EXT POS Sales $0.00 $0.00 $ in wash code sales from EXT POS devices at the master console Sales Refunds $0.00 $0.00 Total $ in POS codes refunded at the master console and EXTPOS...
- Page 174 W A S H S E L E C T Coinbox -Bay 2 Cash Deposited $3.50 $3.50 Cash Dispensed $0.00 $0.00 Net Cash $3.50 $3.50 Overpayments $0.50 $0.50 Quarters 2 Count of quarters at Bay 2 $1 bills: 3 Count of $1 bills or $1 coins at Bay 2 $2 bills: 0 Count of $2 bills at Bay 2 $5 bills:...
-
Page 175: Table 32. Pos4000 - Wash Select Ii Accounting Reports
W A S H S E L E C T Wash Select II Bay x , where x is a bay number Express $4.00 Super $5.00 Deluxe $6.00 Works $7.00 The following table will help you to cross-reference the information on the POS4000 accounting report to the Wash Select II report. - Page 176 Coinbox Only Sum of all Activation transactions except for: Note: POS Code Only and If the Wash Select II activated washes while not POS Code + Other communicating to the POS4000, some Coinbox This includes: Only transactions will appear in the Offline Wash category.
- Page 177 W A S H S E L E C T POS4000 Report item Equivalent item on Wash Select II POS Coupon Codes Sum of: Coupon + Cash Coupon + Credit Coupon + Token Coupon + Other Sum of $1 coins and $1 bills...
- Page 178 W A S H S E L E C T [ T H I S P A G E I N T E N T I O N A L L Y L E F T B L A N K ] Document Number: WS21002 Document Title:...
-
Page 179: Appendix D. Circuit Board Connections
W A S H S E L E C T Appendix D. Circuit Board Connections The following are pin out descriptions of the various connectors on the Wash Select II components: CPU BOARD J1 Main Power Description +5VDC main power input... - Page 180 W A S H S E L E C T J19 Fault/Warning Outputs Description Fault output Common (dry contact) 500ma max Fault output Normally Open (dry contact) 500 ma max Warning output Common (dry contact) 500 ma max Warning output Normally Open (dry contact) 500ma max J18 Wash Inputs Description Wash In Use Hot (20-120VAC/DC)
- Page 181 GND for 12VDC for I/O board J9 Bill Validator (MDB Mode) Note to Unitec Technicians: The following pin outs are reversed from the schematic to match the pin numbering embossed in the MDB housing. Pin 1 on the housing equates to Pin 8 on Unitec internal schematics.
- Page 182 W A S H S E L E C T J12 Bill Validator (Pulse Mode) Description Bill Enable Common (N/C) (voltage applied to J11 pin 2) Normally 24AC neutral (Note: 12VDC for Canadian units) Bill Enable switched (switched voltage applied to J11 pin 1) Normally 24AC hot (Note: 12VDC for Canadian units) Not connected Bill pulse 1 (not used)
- Page 183 W A S H S E L E C T 5VDC + output (from J1 pin 1) J4 24VDC Printer Power (Printer Option Only) Description 24VDC + input from power supply 24VDC ground input from power supply P1 Modem Connection (Standard PC-AT Pin Outs) Description CD –...
- Page 184 W A S H S E L E C T J26 Data to Display I/O Board Description Encoded Button 0 Encoded Button 1 Display DB0 Encoded Button 2 Display DB1 TTL Cash Enable Display DB2 5VDC Display DB3 TTL Coin pulse 1 Display DB4 TTL Coin pulse 2 Display DB5...
- Page 185 W A S H S E L E C T J25 Display I/O Board Data Description Rear Sensor Card Present Data Track 1 Wash Fault TTL for LED Strobe Track 1 Aux output 4 Data Track 2 Aux output 3 Strobe Track 2 Aux output 2 Wash Relay 1 TTL...
- Page 186 W A S H S E L E C T DISPLAY I/O BOARD J3 Main Coin Acceptor Description 24 AC Hot Switched (500 mA average max) 24 AC neutral 24 AC neutral Coin 1 pulse (short to pin 3 or pin 2 for coin pulse) Coin 2 pulse (short to pin 3 or pin 2 for coin pulse) Coin 3 pulse (short to pin 3 or pin 2 for coin pulse) J2 Auxiliary Coin Acceptor...
- Page 187 W A S H S E L E C T JP1 Ribbon Cable Coin Acceptor Interface Description 12VDC switched (500 mA average max) GND for 12VDC Coin 4 (sink to pin 2 for coin input) Coin 3 (sink to pin 2 for coin input) Coin 2 (sink to pin 2 for coin input) Coin 1 (sink to pin 2 for coin input) GND for 12VDC...
- Page 188 W A S H S E L E C T J9 Credit Card Reader Description Rear Sensor Data Track 2 Card Present Strobe Track 2 5VDC power to card reader GND power to card reader Strobe Track 1 Data Track 1 J20 Wash 1 Button Description 12VDC button feed (current limited)
- Page 189 W A S H S E L E C T J24 Refund Button Description 12VDC button feed (current limited) Button return (short this to Pin 1 for button press) J5 Keypad Connector Description Return 2 (row 4, 5, 6) Return 1 (row 7, 8, 9) Feed 2 (column 3, 6, 9, #) Return 0 (row *, 0, #) Feed 0 (column 1, 4, 7, *)
- Page 190 W A S H S E L E C T J12 Backlight for Wash Display 4 Description Backlight Ground – (black) Backlight Power + (Red) J11 Main Display Description 5VDC Ground 5VDC power Ground (contrast) Enable 0 J6 External Fleet Connector Description 5VDC power Aux Output 1...
- Page 191 W A S H S E L E C T J7 External Fleet Connector Description Aux output 3 Aux output 4 Aux input 1 GND for 12VDC power Document Number: WS21002 Document Title: WSII Operations Manual...
- Page 192 W A S H S E L E C T EXPANSION BOARD J5 CPU Board Connector Description Address pin 0 Address pin 1 Address pin 2 /RES Address pin 3 Address pin 4 Address pin 5 Address pin 6 Address pin 7 INTE input INTF input /EXPANSION input...
- Page 193 W A S H S E L E C T P2 Debit Description RS485 RS485 Ground P4 Spare 232/485 Description RX 232 TX 232 DTR 232 Ground DSR 232 Document Number: WS21002 Document Title: WSII Operations Manual...
- Page 194 W A S H S E L E C T [ T H I S P A G E I N T E N T I O N A L L Y L E F T B L A N K ] Document Number: WS21002 Document Title:...
-
Page 195: Appendix E. Tunnel Mode
T U N N E L M O D E : Customer drives up to Wash Select II, which then after several seconds of having the proximity sensor activated, plays a greeting message. Customer enters some form of money. The Wash Select II plays a wash selection message (messages 3-6). - Page 196 W A S H S E L E C T [ T H I S P A G E I N T E N T I O N A L L Y L E F T B L A N K ] Document Number: WS21002 Document Title:...
-
Page 197: Appendix F. Wash Select Ii/Pos4000 Canadian Addendum
“cash & tokens” menu in the setup mode by setting “max tokens/cust” to any number you want. The Wash Select II does not keep an account of the different types of tokens your site may have; we just show the total value of all the tokens on the accounting report. - Page 198 IDX. Programming the IDX to Accept Currency The Canadian Wash Select II comes programmed to accept and dispense the Canadian $1 dollar coin and quarter. If your unit needs to be reprogrammed for any reason, use the following procedures.
- Page 199 W A S H S E L E C T Press the button immediately to the left of the rotary switch once. Drop the 6 quarters through the acceptor. The IDX will blink once after each coin. Verify that the light (LED) blinks 5 times after the last coin is entered. Replace the rotary switch back to zero.
-
Page 200: Figure 32. Outside/Inside Of Idx Coin Acceptor
Drop the six sample tokens of the second type, and note that the LED blinks multiple times after the last token Replace the rotary switch to 0 Replace the cover Refer to the following table for your token information. Table 33. Wash Select II Token Values Name Default Setting Maximum Allowed Token Value $1.00... -
Page 201: Table 34. Canadian Idx Program Configuration
W A S H S E L E C T Table 34. Canadian IDX Program Configuration IDX Rotary Switch Old Style with $1 New Style with $1 Number of Output Position coin Diverted Coin Diverted Pulses Old Style $1 New Style coin diverted $1 Coin Diverted... - Page 202 If you have any clues from the printout, proceed to open the batch after solving the problems. If you are still experiencing problems, please contact Unitec, as your modem might be bad. You are now ready to do business via credit. You can return the unit back to operate mode via the setup/operate switch.
-
Page 203: Table 35. Cashcode Bill Validator Diagnostic Flash Codes
“If you want to do batch opening/closing manually” above. F. CashCode Bill Validator The Canadian Wash Select II comes equipped with the CashCode bill validator. 1. Emptying the Bill Stacker The CashCode bill stacker will hold up to 400 bills and is equipped with a keyed-entry vault. -
Page 204: Table 36. Cashcode Dip Switch Settings
5. Cleaning and General Maintenance To clean the CashCode bill validator, first remove it from the Wash Select II using the above procedure. Next, turn the validator face down. Push the button labeled “PUSH.” When you do, the lower housing will open and reveal the sensors. -
Page 205: Appendix G. Installing Hyperterminal
W A S H S E L E C T Appendix G. Installing HyperTerminal This process assumes you already have an installed modem. If your modem is not installed then follow the installation procedure provided with your modem. You may need your Windows 95/98 CD during this installation. Click Start->Settings->Control Panel Then Click Add Remove Programs Icon Click the Windows Setup Tab and you will see the following... -
Page 206: Figure 34. Communications Screen
W A S H S E L E C T Figure 35. Communications Screen Click OK on the “Communications” window Click OK on the “Add Remove Programs Properties” window At this time a “Copying files” window may appear and you may be prompted to insert the Windows 95/98 CD. -
Page 207: Appendix H. Security Alarm Option
Wash Select II will prompt you to enter another number. Follow the steps below to program a Pass Code or Pass Card. Using the toggle switch at the top of the CPU board, place the Wash Select II in setup mode by moving the switch toward the back of the Wash Select II case. -
Page 208: Table 37. Programming Pass Codes/Cards
To set the alarm duration: Using the toggle switch at the top of the CPU board, place the Wash Select II in setup mode by moving the switch toward the back of the Wash Select II case. -
Page 209: Figure 35. Shock Sensor
S E L E C T Figure 36. Shock Sensor 2. Alarm Siren The alarm siren is mounted to the rear-left corner of the Wash Select II case. When triggered, this provides maximum decibel magnification as the sound waves reverberate off the stainless steel. -
Page 210: Figure 37. Door Switch
W A S H S E L E C T 3. Door Switch The door switch detects whether the door is open or closed. When the alarm is armed, opening the door will set off the siren. The door switch is connected to J18, pins 3 & 4 of the CPU Board. Figure 38. -
Page 211: Figure 38. Ws2 Alarm Wiring Diagram
W A S H S E L E C T Figure 39. WS2 Alarm Wiring Diagram Document Number: WS21002 Document Title: WSII Operations Manual... - Page 212 W A S H S E L E C T [ T H I S P A G E I N T E N T I O N A L L Y L E F T B L A N K ] Document Number: WS21002 Document Title:...
-
Page 213: Appendix I. Citizen Cd-S500 Printer Configuration Procedures
W A S H S E L E C T Appendix I. Citizen CD-S500 Printer Configuration Procedures Refer to the Citizen CD-S500 operations manual, page 36 for more information on configuring the printer. Configuration Settings Command Type CBM2 Number of Col. 42/35 Font Select To configure the printer for operation with the POS4000, perform the following procedure:... - Page 214 W A S H S E L E C T [ T H I S P A G E I N T E N T I O N A L L Y L E F T B L A N K ] Document Number: WS21002 Document Title:...
Need help?
Do you have a question about the Wash Select II and is the answer not in the manual?
Questions and answers
how to print a report