Table of Contents
Advertisement
Quick Links
Congratulations!
You have purchased the finest winch available in its
service class. The Quick Mount
winch. It can be easily mounted to the front or rear of
a vehicle for self recovery and other applications. It
allows one winch to be used on multiple vehicles, and
can be quickly installed and removed to avoid extra
vehicle weight.
The Quick Mount
comes with a remote control
TM
switch,
anti-theft locking pin and a hawse fairlead. Front mount
requires a front receiver mounting kit. Optional 5 ft., 20
ft. or 24 ft. battery cables for front or rear mounting are
available.
The Quick Mount
features a highly efficient 3 stage
TM
planetary gear set which transmits torque from a
series wound D.C. motor. A positive clutch allows free
spooling for quick cable deployment. An automatic load
holding brake is designed to hold the full rated capacity
of the winch. It was designed and manufactured to
provide you with the utmost in utility. As with any device
that combines power and movement in its use, there
are dangers if improperly used. At the same time, there
are easier and faster ways for getting the job done if
certain precautions are taken first.
Please read this manual carefully. It contains useful
ideas in obtaining the most efficient operation from
your Ramsey Winch and safety procedures you need
to know before beginning use.
When you follow our guidelines for operation, your
Ramsey Winch will give you many years of satisfying
service. Thank you for choosing Ramsey. You will be
glad you have one working for you.
CAUTION: Read and understand this manual before installation and operation of winch. See
Safety Precautions.
is a detachable
TM
Ramsey Winch Company
Owner's Manual
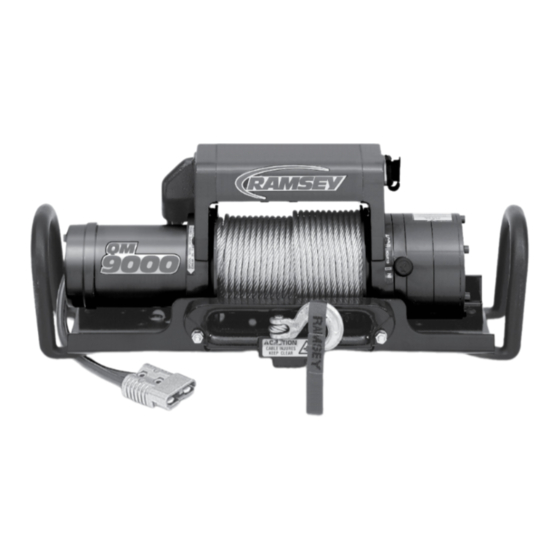
Front Mount Electric Winch
Model Quick Mount 9000/9500
QUICK MOUNT 9000
Layer of Cable
1
(lbs)
9,000
Rated Line Pull Per Layer
(kg)
4,070
Cumula ve Cable Capacity
( )*
15
Per Layer
(5/16" - 8mm - dia. Cable)
(m)*
4
(lbs)
NO
Line Pull First Layer
(kg)
LOAD
Line Speed First Layer
(FPM)
12V
29
24V
29
(MPM)
12V
8.8
24V
8.8
Amp Draw
(12V)
90
(24V)
45
QUICK MOUNT 9500
Layer of Cable
(lbs)
Rated Line Pull Per Layer
(kg)
Cumula ve Cable Capacity
( )*
Per Layer
(5/16" - 8mm - dia. Cable)
(m)*
(lbs)
Line Pull First Layer
(kg)
(FPM)
12V
24V
(MPM)
12V
24V
AMP DRAW
12V
24
Please Note: Ramsey Quick MountTM series
winches are designed for front and rear mount
vehicle use. The winches are not designed for and
should not be used in industrial applications (car
haulers /carriers, wreckers, hoisting, etc.), and
Ramsey does not warrant them to be suitable for
such use. Ramsey makes a separate, complete line
of winches for industrial/commercial use. Please
contact the factory for additional information.
2
3
4
5
7,300
6,200
5,400
4,700
3,300
2,800
2,440
2,130
35
60
90
105
10
18
27
32
2,000
4,000
6,000
9,000
900
1,810
2,720
4,070
15
11
9
7
16
13
10
8.5
4.6
3.3
2.7
2.1
4.9
4
3
2.6
190
245
315
400
95
128
165
205
1
2
3
4
9,500
7,700
6,500
5,700
4,309
3,480
2,940
2,580
15
34
58
86
4
10
17.5
26
NO
2,000
4,000
6,000
LOAD
900
1,810
2,720
34.5
16.7
12.7
10.6
29
16
13
10
10.7
5.1
3.8
3.2
8.8
4.9
4
3
97
180
260
335
45
95
128
165
OM-914122-0814-J
5
4,900
2,210
100
30.5
8,000
9,500
3,620
4,309
9
7.8
9
8
2.7
2.3
2.7
2.4
395
430
192
212
Advertisement
Table of Contents

Related Manuals for Ramsey Winch QUICK MOUNT 9000


Summary of Contents for Ramsey Winch QUICK MOUNT 9000
- Page 1 Ramsey Winch and safety procedures you need to know before beginning use. When you follow our guidelines for operation, your Ramsey Winch will give you many years of satisfying service. Thank you for choosing Ramsey. You will be glad you have one working for you.
-
Page 2: Table Of Contents
Table of Contents Performance Specifications ........Front Cover Safety Precautions ..............1 Tips for Safe Operation ............1 Techniques of Operation ............2 Assembling Your Winch............3 Electrical Connections ............4 Installation ................4 Clutch Operation ..............4 Remote Control Operation ............4 Maintenance ................ -
Page 3: Safety Precautions
K. Modification, alteration, or deviation to the winch clutch with motor running. should only be made by Ramsey Winch Company. Never connect the hook back to the cable. This L. Keep the duration of your pulls as short as possible. -
Page 4: Techniques Of Operation
Techniques of Operations Neat, tight spooling avoids cable binding. Cable binding When pulling a heavy load, place a blanket, jacket or tar- occurs when a cable under load pulls down into the layer paulin over the cable five or six feet from the hook. It will below, becoming pinched between two other wraps of slow the snap back in the event of a broken cable. -
Page 5: Assembling Your Winch
Winch Assembly Assembling Your Winch To assemble the QUICK MOUNT attach the handles to both ends of the quick mount channel using (2) black 3/8” button head screws for each handle. Tighten to 20 ft-lbs. torque. Once the handles are attached, lift the winch into the quick mount channel. -
Page 6: Electrical Connections
ELECTRICAL / CLUTCH / REMOTE CONTROL OPERATING INSTRUCTIONS 1 . To disengage the clutch, move the clutch shifter Electrical Connections knob to the “OUT ” position. Wire rope may now be For normal self recovery work, your vehicle’s existing freespooled off the drum. electri cal system is adequate. -
Page 7: Maintenance
MAINTENANCE AND CABLE INSTALLATION GUIDE Maintenance Cable Installation 1 . Unwind the new cable by rolling it out along the All moving parts are permanently lubricated with high ground to prevent kinking. temper ature lithium grease at the time of assembly. Under normal conditions factory lubrication will suffice. -
Page 8: Troubleshooting Guide
Troubleshooting Guide CONDITION POSSIBLE CAUSE CORRECTION Jar each solenoid to free contacts. Check each solenoid by Defective solenoid or stuck applying 12 volts to coil-terminal (it should make an audible click solenoid when energized). MOTOR RUNS IN ONLY ONE DIRECTION Disengage winch clutch, remove remote control switch from the Defective remote control socket and jump pins at 8 and 4 o'clock. -
Page 9: Winch Parts List
QUICK MOUNT 9000 2 13 Item Item Qty. Parts No. Description Qty. Parts No. Description 247009 GEAR CARRIER ASSEMBLY - INPUT 416212 SCREW #10-24NC X 3/8 LG. SOC. BUTT. HD. Z/P 247022 GEAR CARRIER ASSEMBLY - INTERMEDIATE 414830 CAPSCREW - 1/4-20NC X 3/8 SOC BUTTON HD... - Page 10 QUICK MOUNT 95000 QUICK MOUNT 9500 2 13 Item Item Qty. Parts No. Description Qty. Parts No. Description 247009 GEAR CARRIER ASSEMBLY - INPUT 416212 SCREW #10-24NC X 3/8 LG. SOC. BUTT. HD. Z/P 247022 GEAR CARRIER ASSEMBLY - INTERMEDIATE 414830 CAPSCREW - 1/4-20NC X 3/8 SOC BUTTON HD 247023 GEAR CARRIER ASSEMBLY - OUTPUT 414861 CAPSCREW - 1/4-20NC X 3/4 FLT SOCHD NYLOK...
- Page 11 Solenoid Assembly Parts List Solenoid Assembly Parts List: QM 9000/9500 278180 278208 Item Item Qty. Part No. Description Qty. Part No. Description 289195 WIRE ASSEMBLY - #2 GA 13.25" MOTOR LEAD 440259 STRAP - COPPER 289196 WIRE ASSEMBLY - #2 GA 14.5" MOTOR LEAD 440260 STRAP - COPPER 316101 CAP - LH END 440262 SOLENOID - 12V...
-
Page 12: Warranty
If the need should arise, the warranty procedure is outlined on the back of your self- addressed postage paid warranty card. Please read and fill out the enclosed warranty card and send it to Ramsey Winch Company. If you have any problems with your winch, please follow instructions for prompt service on all warranty claims.
Need help?
Do you have a question about the QUICK MOUNT 9000 and is the answer not in the manual?
Questions and answers