
Related Manuals for Samsung HT-AS730S


Summary of Contents for Samsung HT-AS730S
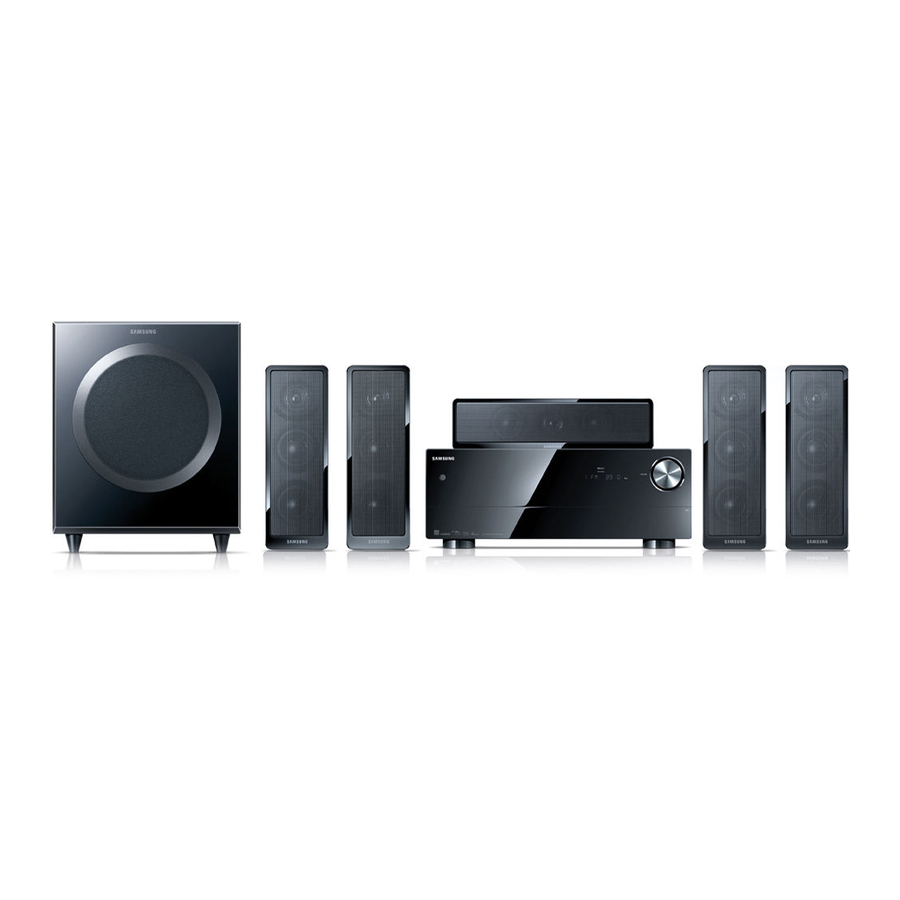
- Page 1 HT-AS730S AV Receiver System user manual imagine the possibilities Thank you for purchasing this Samsung product. To receive more complete service, please register your product at www.samsung.com/register...
-
Page 2: Safety Information
Safety information Safety WarningS TO REDUCE THE RISK OF ELECTRIC SHOCK, DO NOT REMOVE THE COVER(OR BACK). NO USER-SERVICEABLE PARTS ARE INSIDE. REFER SERVICING TO QUALIFIED SERVICE PERSONNEL. CAUTION RISK OF ELECTRIC SHOCK DO NOT OPEN CLASS 1 LASER PRODUCT... -
Page 3: Important Safety Instructions
A grounding type plug has two blades and a third grounding prong. The wide blade or the third prong are provided for your safety. If the provided plug does not fit into your outlet, consult an electrician for replacement of the obsolete outlet. -
Page 4: Precautions
Ensure that the AC power supply in your house complies with the identification sticker located on the back of your player. Install your player horizontally, on a suitable base (furniture), with enough space around it for ventilation (3~4inches). Make sure the ventilation slots are not covered. -
Page 5: Accessories
DTS 96/24 DTS 96/24 encodes standard 16 bit/44.1 kHz sound to 24 bit/96kHz and applies it to a 5.1 CH sound track. DOLBY DIGITAL EX Adds a surround back channel for more spacious sound compared to regular 5.1 channel Dolby Digital. -
Page 6: Table Of Contents
Contents SAfETy infORmATiOn DESCRiPTiOn COnnECTiOnS Safety Warnings Important Safety Instructions Precautions fEATURES Accessories Front Panel 10 Rear Panel 12 Display 13 Insert Remote Control Batteries 13 Operation Range of the Remote Control 14 Tour of the Remote Control 16 Speaker Positioning 18 Connecting the Speakers 19 Connecting the Video Out to your TV 20 Connecting External Devices/your TV via HDMI 21 HDMI Function 22 Connecting a DVD or BD(Blu-Ray) Player 23 Connecting a Cable, Satellite or Set-top Box 24 Connecting a VCR 25 Connecting a CD Player 26 Connecting 7.1 Channel Devices... - Page 7 58 Operating Your TV with the Remote Control 60 Operating Your DVD or BD PLAYER with the troubleshooting 61 Troubleshooting appendix 63 Specifications Remote Control...
-
Page 8: Description
* Also used to return to the previous menu from the SETUP menu. Used to output 2 CH PCM audio signal without any signal processing, providing higher audio quality. This is useful for obtaining the best sound from a connnected CD player. - Page 9 7.1CH IN * Also used to move the cursor down in the SETUP menu. Used to select a source (FM, DVD, SAT, TV, VCR, CD, AUX, 7.1 MULTI CH) FUNCTION button * Also used to move the cursor to the right in the SETUP menu.
-
Page 10: Rear Panel
10 9 Connect the FM Antenna here. Receives the analog audio signal from an external player with a multi-channel port. Receives the video signal from a video player (DVD, SAT, TV, VCR). Receives digital video and audio signals simultaneously using an HDMI cable. - Page 11 IPOD INPUT JACK COAXIAL INPUT JACK (DIGITAL AUDIO IN) OPTICAL INPUT JACKS (DIGITAL AUDIO IN) Receives the audio signal from an audio CD player. Outputs the audio signal to a VCR. Receives the audio signal from a video player. Receives the audio/video signal from an iPod.
-
Page 12: Display
Receives the audio/video signal from an iPod. Displays the current listening mode. Displays the status of the current radio broadcasting. Displays the input signal type of the current audio source. Displays the volume level. Displays the current radio frequency range. -
Page 13: Insert Remote Control Batteries
The remote control can be used up to approximately 23 feet/7 meters in a straight line. It can also be operated at a horizontal angle of up to 30° from the remote control sensor. -
Page 14: Tour Of The Remote Control
Tour of The remoTe ConTrol... - Page 15 Used to set the Sleep Timer. NUMBER buttons Used to select a TV channel. SPK LEVEL/ SPK SELECT/ Used to select and adjust the level of a desired speaker. Also used to select the Test Tone TEST TONE buttons function. MO/ST button Select MONO or STEREO for radio broadcasting.
-
Page 16: Connections
Place the speakers so that their tweeters will be at the same height as your ears. Align the front face of the front speakers with the front face of the center speaker or place them slightly in front of the center speaker. -
Page 17: Speaker Configuration
If you are using two rear center speakers, place them facing forward from behind the listening position. Place the surround back speaker about 2.3-3.3feet (70 cm to 1 m). When you attach the speakers to a wall, make sure to fasten them tightly so they do not fall off. Speaker Configuration For the best surround-sound experience, you should connect seven speakers and a powered subwoofer. -
Page 18: Connecting The Speakers
Tighten the knob by turning clockwise to secure the wire. Keep the subwoofer speaker out of reach of children to prevent them from inserting their hands or objects into the duct (hole). Never touch speaker terminals while the power is on. Doing so could result in electric shock. -
Page 19: Connecting The Video Out To Your Tv
Y) jacks on the back of your AV Receiver to the Component Video Input jacks on your TV. Connect the Video cable from the VIDEO OUT (MONITOR) jack on the back of your AV Receiver to the Video Input jack on your TV. -
Page 20: Connecting External Devices/Your Tv Via Hdmi
HDMI is a digital standard interface for connection to such devices as a TV, projector, DVD player, Blu-ray player, settop box and more. HDMI removes any loss of signal from analog conversion, enabling you to enjoy video and audio sound quality as it was originally created in the digital source. -
Page 21: Hdmi Function
“SETUP OFF” appears on the display and Setup Mode is exited. If you use an HDMI cable to connect a Samsung TV to your AV Receiver, you can operate the AV receiver using the TV’s remote control. This function is available only in connection with Samsung TV and DVD player supporting Anynet +(HDMI-CEC). -
Page 22: Connecting A Dvd Or Bd(Blu-Ray) Player
AV Receiver to the Component Video Output jacks on your DVD/BD player. Connect a Video cable from the VIDEO IN (DVD) jack on the back of your AV Receiver to the Video Output jack on your DVD/BD player. -
Page 23: Connecting A Cable, Satellite Or Set-Top Box
Disconnect the power plug from the outlet if you will not use this unit for a long period of time. If the external component has only one audio output jack, connect it to either the right or left audio input jack of the main unit. -
Page 24: Connecting A Vcr
(For playback) Video Connection for playback Connect a Video cable from the VIDEO IN (VCR) jack on the back of your AV Receiver to the Video Output jack on your VCR. for recording Connect a Video cable from the VIDEO OUT (VCR) jack on the back of your AV Receiver to the Video Input jack on your VCR. -
Page 25: Connecting A Cd Player
Connect AUDIO IN (CD) on your AV Receiver to the Audio Out of the CD player. If the external component has only one audio output jack, connect it to either the right or left audio input jack of the main unit. Connect the audio cable's red plug to the red jack and white cable to the white jack. -
Page 26: Connecting 7.1 Channel Devices
COnneCting 7.1 CHanneL DeViCeS You can connect the AV receiver to a DVD player, SUPER AUDIO CD player or other device with 7.1 channel output. FRONT SURROUND WOOFER 5.1 CH 7.1 CH 7.1 Channel device CENTER SURROUND BACK... -
Page 27: Connecting An Ipod
COnneCting an ipod You can listen to the audio from an iPod through the main unit. For iPod operation with your receiver, see pages 28 and 54 ~ 55. Connect the iPod dock connector to the iPod jack on your reciever. - Page 28 COnneCting an ipod (Continued) ipod models that are compatible with Ht-aS730S “Made for iPod” means that an electronic accessory has been designed to connect specifically to iPod and has been certified by the developer to meet Apple performance standards. Apple is not responsible for the operation of this device or its compliance with safety and regulatory standards.
-
Page 29: Connecting The Fm Antenna
Connect the FM antenna supplied to the FM 75Ω COAXIAL terminal as a temporary measure. Slowly move the antenna wire around until you fi nd a location where reception is good, then fasten it to a wall or other rigid surface. -
Page 30: Setup
For your convenience, you can set this AV receiver's features for the best use. SetUp menU tree Here’s a quick look at how the setup menus are organized on your AV Receiver. INPUT OPTICAL 1,2,3 OPTICAL 1,2,3 OPTICAL 1,2,3... - Page 31 CROSS OVER 60Hz, 80Hz, 100Hz, 120Hz, 150Hz, 180Hz, 200Hz FRONT LEFT FRONT RIGHT CENTER SURROUND LEFT 1 ~ 30 feet (1 foot steps) , default : 10 feet SURROUND RIGHT SURROUND BACK LEFT SURROUND BACK RIGHT SUBWOOFER FRONT LEFT FRONT RIGHT...
- Page 32 CENTER WIDTH NEO:6 CENTER IMAGE EX/ES TONE CONTROL OPTION STEREO MULTI CH STEREO MODE Movie Music PANORAMA DIMENSION -7 ~ STD ~ +7 0 ~ 7 HALL1 HALL2 ROCK CLASSIC MOVIE NEO:6 MODE MUSIC CINEMA 0 ~ 7 AUTO TONE SET...
- Page 33 SetUp menU tree (Continued) INPUT SPEAKER SURROUND OPTION A/V Sync MP3 ENHANCER SMART VOLUME ASC SETUP HDMI SETUP AUTO LIPSYNC Delay 0 ~ 200mS (10mS Step) Auto Setup HDMI Audio Anynet+...
-
Page 34: Input Setup
“SETUP OFF” appears on the display and Setup Mode is exited. - Digital audio input Select - SOURCE DEVICE You can also use SETUP, Receiver. To move up one level from SETUP/MENU or EXIT SETUP when the SETUP mode is released, press the RETURN button. INPUT JACK AUDIO OPTIC1,2,3,COAX... -
Page 35: Speaker Setup
S.BACK (Surround Back) SUB(Subwoofer) CROVR (Crossover Frequency) LARGE : Select when using large speakers. You can listen to full range sound. SMALL : Select this when using small speakers NONE : Select when no speaker is used ON (subwoofer) : Select when using the subwoofer speaker. -
Page 36: Setting The Speaker Listening Distance
• SBR (surround back right) : 1ft ~ 30ft • S.L (surround left) : 1ft ~ 30ft If the listening position is beyond the range of the speaker distance setup, set the speaker distance to the maximum. The distance range of the overall speaker system is determined based on the F.L(front left) speaker distance from the listening position. -
Page 37: Setting The Speaker Level
Press ◀▶ button to select the speaker you want. Each time you press this button, F.L F.R CEN S.L S.R SBL SBR S.W will be selected in turn. Press ▲▼ button to set the speaker mode. -
Page 38: Setting The Test Tone
(MANUAL): Enables you to adjust the output level of the speaker manually. 1) Press ◀▶ button to select the speaker you want. Each time you press ◀▶ button, F.L CEN S.W F.R S.R SBR SBL S.L will be selected in turn. -
Page 39: Surround Setup
SUrrOUnD SetUp Setting the stereo mode You can select this mode when listening to sound through the front left and right speakers and subwoofer. Press SETUP/MENU button. “INPUT” appears on the display and goes into Setup Mode. Press ▲▼ button to select "SURROUND", and then press the ENTER. - Page 40 (Incrementally adjusts the sound field (DSP)from the front or surround.) Center WiDtH : You can set from 0 to 7. (This sets the width of the center image. The higher the setting, the less sound comes from the center speaker.) PANORAMA, DIMENSION and CENTER WIDTH settings are enabled only if the mode is set to "MUSIC".
- Page 41 Center image : Press ▲▼ button to set the sound image you want. You can set the sound image from 0 to 7 This parameter adjusts the height of the center image through the front and center speakers. “0” is the lowest while “7” is the highest.
- Page 42 A built-in DTS-ES decoder has been equipped with this system that supports discs encoded with DTS- ES Direct and DTS-ES Matrix. You cannot use DTS-ES without surround back speakers connected. If the input source is in DTS 96/24, you will hear only 5.1 CH sound even if you have set EX/ES to ...
-
Page 43: Setting Tone Control
“SETUP OFF” appears on the display and Setup Mode is exited. The Tone Control function can be applied to all channels except for the subwoofer. You can also press TEST TONE button on the remote control to use this function. ... -
Page 44: Option Setup
This will regulate and stabilize the volume level against a drastic volume change when changing channels or during a scene transition. To move up one level from SETUP/MENU or EXIT SETUP when the SETUP mode is released, press the RETURN button. ... - Page 45 This will be automatically reverted if you press the SETUP/MENU, eXit or retUrn button. Setting the ASC function takes about 3 minutes. Because the volume level of the tone is fixed during the ASC setup, you cannot adjust the volume using the volume control buttons.
-
Page 46: Hdmi Setup
This preference determines whether audio received at the HDMI IN is output by the HDMI OUT. You may want to turn this preference on if your TV is connected to the HDMI OUT and you want to listen to the audio from a component that’s connected to an HDMI IN, through your TV’s speakers. -
Page 47: Operation
Method 1 Press the Function button. Each time you press this button, fm DVD Sat tV VCr CD aUX 7.1 mULti CH ipOD will be selected in turn. Method 2 Press DVD/BD, SAT, TV, VCR, CD, AUX, 7.1CH, IPOD or TUNER button. -
Page 48: Selecting Digital/Analog Input
You can change the detailed input setting in the “INPUT” setup. (See page 34) You can enjoy Dolby Digital or DTS if you connect the digital audio output jack of an external audio component to the optical or coaxial digital audio input jack on the main unit. -
Page 49: Using The Surround Modes
Using the Sfe mODe button Press SfE mODE button. Each time you press this button, HALL 1 HALL 2 J.CLUB CHURCH ROCK CLASSIC LIVE GAME will be selected in turn. Using the Press MODE button. - Page 50 Each time you press this button, STEREO PLIIx NEO:6 SFE will be selected in turn. Press SELECT( .,, ) button. Each time you press SELECT ( .,, ) button, MOVIE MUSIC GAME MATRIX PL will be selected in turn.
- Page 51 L/R : front speaker (left/right) C : center speaker SL/SR : surround speaker (left/right) SBL/SBR : surround back speaker (left/right) SW : subwoofer Channel status displays are dependent on the speaker configuration. SFE mode works with 2-ch signals. Output Channel Decoding SubW Dolby Digital 5.1...
-
Page 52: Using The Speaker Adjustment Buttons
Using the SPK LEVEL button Press SPK LEVEL button to select the speaker you want. Each time you press this button, F.L F.R CEN S.L S.R • SBL SBR S.W SPK LVL OFF will be selected in turn. -
Page 53: Listening To The Radio
1) Press TUNING MODE button to select MANUAL. 2) Press TUNING/CH ( .,, ) button briefly to increase or decrease the frequency step by step. You can also select FM by pressing the FUNCTION button on the front of your AV Receiver. -
Page 54: Using An Ipod
• The AV receiver starts playing from the first track of the iPod player. You can use the remote control or main unit to control simple playback functions such as PLAY, PAUsE, sTOP, F-sKiP( See page 28 for compatible iPods. - Page 55 • the player will stop playing and return to the list screen. If you press the PrEV button 3 seconds or later after the playback, the player will move to the start screen of the current file. Press the nEXT button to stop playing and return to the list screen.
-
Page 56: Convenient Functions
You can set the time that this unit will shut itself off. Press SLEEP button. SLEEP : OFF 15 30 45 60 90 120 M (MIN) will be selected in turn. To check sleep timer Press the SLEEP button. -
Page 57: Using Headphones
BRIGHT. Using headphones Use headphones (not supplied) for private listening pleasure. Connect the headphones to the headphone jack and listen to music. Do not turn the volume up too high when you use headphones as It may damage your hearing. -
Page 58: Operating Your Tv With The Remote Control
Point the remote control toward the TV. While holding down POWER button, enter the code corresponding to your brand of TV. If there is more than one code listed for your TV in the table, enter one at a time to determine which code works. - Page 59 Operating yOUr tV WitH tHe remOte COntrOL (Continued) TV Brand Code List Brand Code Number Admiral (M.Wards) 056, 057, 058 A Mark 001, 015 Anam 001, 002, 003, 004,005, 006, 007, 008, 009, 010, 011, 012, 013, 014 001, 018, 040, 048 Bell &...
- Page 60 While holding down POWER button, enter the code corresponding to your brand of DVD (BD). If there is more than one code listed for your DVD (BD) in the table, enter one at a time to determine which code works.
-
Page 61: Troubleshooting
FM antenna in a place with good reception. • Refer to pages 16 ~18 to connect them properly. • Refer to page 35 to select LARGE or SMALL. • Refer to pages 39 ~ 43 to select proper Surround Mode. Remedy... - Page 62 - If speaker terminal is shorted - If speaker cable is shorted If there is no problem when you turn the unit on again after turning it off, PROTECTION mark will disappear on the display and the unit will work properly.
-
Page 63: Specifications
TV format Input level/impedance VIDEO OUTPUT Output level/impedance Video frequency response S/N ratio * S/N ratio, distortion, separation and usable sensitivity are based on measurement using AES (Audio Engineering Society) guidelines. 120V, 60 Hz 0.9W Main unit Subwoofer 12.7 Ibs 16.9 x 5.7 x 13.7 inches... - Page 64 (*90 days Parts and Labor for Commercial Use) This limited warranty begins on the original date of purchase, and is valid only on products purchased and used in the United States. To receive warranty service, the purchaser must contact SAMSUNG for problem determination and service procedures. Warranty service can only be performed by a SAMSUNG authorized service center.
- Page 65 Contact SAMSUNG WORLD WIDE If you have any questions or comments relating to Samsung products, please contact the SAMSUNG customer care center. region Country CANADA North America MEXICO U.S.A ARGENTINE BRAZIL CHILE NICARAGUA HONDURAS COSTA RICA ECUADOR EL SALVADOR Latin America...
- Page 66 QUESTIONS OR COMMENTS? COUNTRY CALL OR VISIT US ONLINE AT WRITE Samsung Electronics America, Inc. 1-800-SAMSUNG IN THE US www.samsung.com/us 105 Challenger Road Ridgefield Park, (7267864) NJ 07660-0511 Code No. AH68-02174R...