Advertisement
User Manual
User Manual
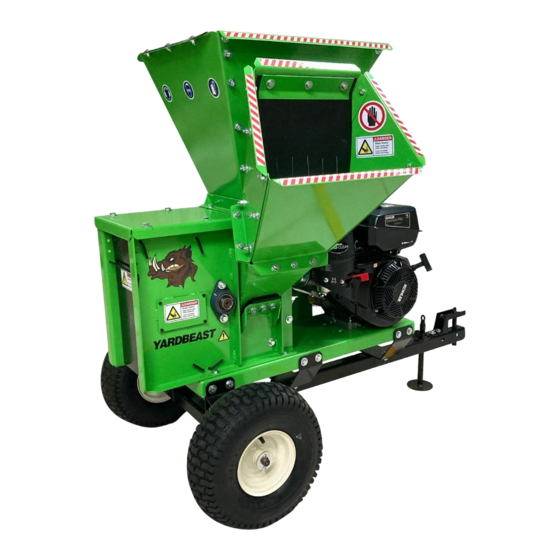
Heavy Duty Wood Chipper Shredder
Heavy Duty Wood Chipper Shredder
WARNING
Read and follow all instructions in this manual before
to operate this machine. Please keep this manual
consultation at any time. Read it thoroughly and
with the operating instructions, maintenance and security
indications. Failure to follow these instructions can
injury to yourself and others.
www.yardbeast.com | (305) 396-3396
www.yardbeast.com
©
3.5"
this manual before attempting
this manual available for
thoroughly and become familiar
, maintenance and security
instructions can result in serious
Rederick Metal Industries Corp.
Rederick Metal Industries Corp.
YB2090
1925 NW 21st Terrace
Miami, FL 33142
1
Advertisement

Related Manuals for Yardbeast YB2090

Summary of Contents for Yardbeast YB2090
- Page 1 , maintenance and security indications. Failure to follow these instructions can instructions can result in serious injury to yourself and others. Rederick Metal Industries Corp. Rederick Metal Industries Corp. 1925 NW 21st Terrace Miami, FL 33142 www.yardbeast.com www.yardbeast.com | (305) 396-3396...
-
Page 2: Table Of Contents
THANK YOU! INDEX thank much having Important safety measures……………..3 purchased a wood chipper manufactured by us. The same has been designed and Assembly of the 2090…………………..….8 carefully fabricated to give you excellent performance, reliability and ultimately, to Controls and Features…………………….11 exceed your expectations. -
Page 3: Important Safety Measures
Mail: 1925 NW 21 ST TERRACE, Miami, FL 1925 NW 21 ST TERRACE, Miami, FL 33142 Phones (305)-396-3396/ Web: www.yardbeast.com Email: customer.service@yardbeast.com Email: customer.service@yardbeast.com IMPORTANT SAFETY MEASURES IMPORTANT SAFETY MEASURES This machine is designed to be used in This machine is designed to be used in... - Page 4 BYSTANDERS AWAY AT: BYSTANDERS AWAY AT: Wear Safety Gloves Wear Eye Protection Wear Eye Protection Wear Ear Protection Caution No hands beyond this point INSPECT BLADES BEFORE EACH USE INSPECT BLADES BEFORE EACH USE Protective equipment required for the Protective equipment required for the operation of this equipment.
- Page 5 contained in this manual. No persons below years should operate this equipment. 4. Without receiving appropriate instructions, do not allow anyone to operate this machine. 5. Do not start the chipper in closed spaces or in an areas with poor ventilation. The gases from the engine exhaust contain carbon monoxide, a lethal gas which is odorless.
- Page 6 4. Use work gloves with palm of leather or 6. Never remove gas cap or add fuel industrial cotton when you feed the material while the engine is hot or running . Allow into the hopper. Before you turn on the engine to cool at least two minutes machine, check all bolts and accesories to before re- fueling .
- Page 7 larger than specified in this manual. than specified in this manual. Puts you and the machine at risk. 3. Grease the bearing often as the bearing often as instructed by the maintenance chart (found maintenance chart (found below) to 7. Keep all guards and safety elements ep all guards and safety elements avoid premature wear;...
-
Page 8: Assembly Of The 2090
See Fig . below. Manuals and Operator safety accesories. Assembly of the YARDBEAST 2090 Note: This unit is shipped without fuel and without oil in the engine. Fill with gasoline (depending on the engine type) and oil as... - Page 9 -To secure each wheel, slide a 3/4" flat washer, then screw a castle nut on each shaft end and secure by inserting a safety cotter pin. a. 2 Flat washer 5/8" b. 2 Castle nut 3/4" c. 2 Cotter pins 3/16" x 1-1/2" First, assemble the two trailer brackets as shown.
-
Page 10: Operation
Assemble the feed chute onto the the Assemble the feed chute onto the the chipper opening -as shown on the FIgure as shown on the FIgure below- by screwing the 9 bolts required. by screwing the 9 bolts required. Start by screwing the first two top bolts with Start by screwing the first two top bolts with a nut so the hopper doesn't come off while a nut so the hopper doesn't come off while... - Page 11 FEATURES & CONTROLS Subaru EX40 Engine Feed Chute (For Chipping Branches) Blade Port (Inspection, Change of blades, rotor pins) Discharge deflector Adjustable anvil...
- Page 12 Top Chute (For Shredding leaves, twigs and small branches) Manual Canister Centrifugal Clutch (internal) Trailer Stand 15x6.00-6 Turf Wheels...
- Page 13 These are some of the wood chipper These are some of the wood chipper the chipper and the engine the engine inside the features and controls you should be aware features and controls you should be aware manual canister –as well well safety...
- Page 14 1. Turn the fuel valve to the ON position and position and 3.Move the lever throttle control throttle control to the the switch in the ON position. (If equipped equipped) center position between idle and fast between idle and fast. See Fig 1 &...
- Page 15 MAINTENANCE Stopping your engine General recommendations 1. Move the throttle lever to the start to the start position, where it was in the beg the beginning (slow 1. Always observe safety rules when safety rules when position). performing maintenance. 2. The warranty on this wood chipper wood chipper, does not cover items that have been subjected that have been subjected...
- Page 16 Every 50 hours of use •Change oil (every 100 hours) (every 100 hours) Use only original spare parts for the engine. for the engine. Other parts may not perform as well perform as well, •Replace Oil Filter damaging the unit; and may cause injury. cause injury.
- Page 17 and must not overheat to loose its heat and must not overheat to loose its heat Carefully clean the cutting chamber the cutting chamber after treatment properties. each use. 6. Retighten. Tools used: 9/16" Hex Wrench , 5mm hex key. Tools used: 9/16"...
-
Page 18: Service
What to to with the metal cage Please contact us at: Please contact us at: package? www.yardbeast.com www.yardbeast.com You may modify the box as storage You may modify the box as storage purposes, or you can cut it with a hand saw... -
Page 19: Troubleshooting
TROUBLESHOOTING Problem Cause Solution 1. The spark plug is disconnected 1. Connect the cable to spark plug. 2. The fuel tank is empty. 2. Fill tank with clean, fresh fuel. Engine does 3. Shut-off valve is closed. 3. Turn the fuel valve ON not start 4. -
Page 20: Parts List
SPARE PARTS LIST Component Part Number and Description # PART: 2090 | BLADE # PART: 2090410 | ANVIL # PART: 2090402 | SIZE SCREEN # PART: 2090304 | POWER BELT (x2) # PART: 2090309 | CLUTCH # PART: 2090206 | 15-INCH TURF WHEEL... - Page 21 Rederick MI Corp. Dealers and/or channels of export distribution. e. Parts that are not genuine to the Yardbeast Chipper line will not be covered by this or any other warranty expressed by Rederick MI Corp.
- Page 22 CHIPPING HOPPER omponent Part No. Rubber deflector Rubber deflector 2090101 Rubber holder Rubber holder 2090102 Right side cover Right side cover 2090103 Bottom cover Bottom cover 2090104 Lest side cover Lest side cover 2090105 Top Cover Top Cover 2090106 5/16” Hex lock nut 5/16”...
- Page 23 BASE & TOWING KIT Component Part No. 2090201 Base Base 2090202 Front support Front support 2090203 Hitch Hitch 2090204 Trailer stand Trailer stand 2090205 Knob Knob 2090206 Pneumatic wheel Pneumatic wheel 2090207 Trailer axle Trailer axle 2090208 Hitch pin Hitch pin 2090209 Ring Ring...
- Page 24 BELTGUARD Component Part No. 2090301 Chipper 2090302 Belt Guard support 2090303 Large belt guard support 2090304 Belt 2090305 Pulley 2090306 Manual canister 2090307 Belt guard 2090308 Spacer 2090309 Clutch 2090310 Small guard support 2090311 3/8”Flat washer 2090312 3/8” x 1” Hex bolt 2090313 ½’...
- Page 25 CHIPPER Component Part No. 2090401 Rotor Rotor 2090402 Size screen Size screen 2090403 Product deflector Product deflector 2090404 Right cover Right cover 2090405 Left cover Left cover 2090406 Top cover Top cover 2090407 Blind screen Blind screen 2090408 Blowback cover Blowback cover 2090409 Front cover...
- Page 26 TOP HOPPER Component Part No. 2090501 Blowback cover 2090502 Back cover 2090503 Right side cover 2090504 Left side cover 2090505 Front cover 2090506 Base top hopper 2090507 Rubber protection 2090508 Rubber holder 2090509 5/16” x ¾” Carriage bolt 2090510 5/16” Flat washer 2090511 5/16”...
- Page 27 NOTES:...
Need help?
Do you have a question about the YB2090 and is the answer not in the manual?
Questions and answers