Advertisement
Quick Links
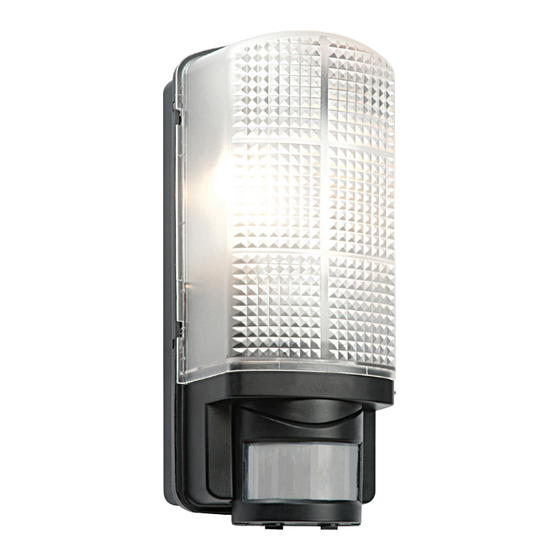
PIR Adjustment
1. The unit must be installed in a vertical position, and
fitted 1.8m - 2.5m above the ground.
2. The PIR sensor is set to 10 metres. The detection
angle is set at 110 degrees. The duration that the lamp
stays on can also be altered from (10±5) seconds
Fitting/replacing bulb
• The LED Module in this product is non replaceable
We recommend cleaning with a soft dry cloth.
Do not use solvents or abrasive cleaners as these could
damage the finish.
Recycling advice
Waste electrical products should not be disposed of with household waste. Please recycle where facilities
exist. Check with your Local Authority or retailer for recycling advice.
Safety information
For your safety, always switch off the supply before changing lightbulbs, or cleaning.
This LED is protected by a shade. This part must be replaced immediately should the shade become
cracked or damaged. This fitting must not be used without the shade in place.
www.saxbylighting.com
to (4±1) minutes. Use a small screwdriver to adjust
the 'TIME' and 'LUX' screws. When adjusting the
sensitivity (detection distance) in daylight it will be
necessary to cover the sensor to simulate night time.
Do not clean the product with a pressure washer.
Iss.2 21072017
Saxby Lighting. BH23 3PE
Instruction leaflet
Motion LED Wall
73716, 73717
Advertisement

Related Manuals for Saxby 73716

Summary of Contents for Saxby 73716
-
Page 1: Safety Information
For your safety, always switch off the supply before changing lightbulbs, or cleaning. This LED is protected by a shade. This part must be replaced immediately should the shade become cracked or damaged. This fitting must not be used without the shade in place. Iss.2 21072017 www.saxbylighting.com Saxby Lighting. BH23 3PE... - Page 2 Installation & Wiring Thank you for purchasing this light fitting. Please read the instructions carefully before use to ensure safe and satisfactory operation of this product. Please retain these instructions for future reference. Existing fittings must be completely removed before • Hold the product in position and mark the location installation of a new product. Before removing the of the fixing holes. Sensor must be at the base, as existing fitting, carefully note the position of each set shown below..
Need help?
Do you have a question about the 73716 and is the answer not in the manual?
Questions and answers