Chapters
Table of Contents

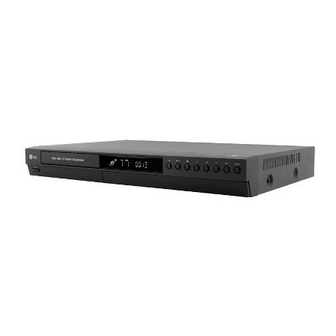
Related Manuals for LG DR265


Summary of Contents for LG DR265
- Page 1 DR265-M_EVENT_ENG DVD RECORDER OWNER’S MANUAL MODEL: DR265 Before connecting, operating or adjusting this product, please read this instruction booklet carefully and completely.
- Page 2 CAUTION: The apparatus should not be exposed to water CAUTION (dripping or splashing) and no objects filled with liquids, such as vases, should be placed on the apparatus. RISK OF ELECTRIC SHOCK DO NOT OPEN CAUTION concerning the Power Cord CAUTION: TO REDUCE THE RISK Most appliances recommend they be placed upon a OF ELECTRIC SHOCK...
- Page 3 IMPORTANT SAFETY INSTRUCTIONS CAUTION: PLEASE READ AND OBSERVE ALL WARNINGS AND INSTRUCTIONS IN THIS OWNER’S MANUAL. AND THOSE MARKED ON THE PRODUCT. RETAIN THIS BOOKLET FOR FUTURE REFERENCE. This product has been designed and manufactured to assure personal safety. Improper use can result in electric shock or fire hazard.
-
Page 4: Table Of Contents
Contents Introduction ......5-9 Playback ......23-29 General Playback Features . -
Page 5: Introduction
Introduction Notes on Discs To ensure proper use of this product, please read this Handling Discs owner’s manual carefully and retain for future Do not touch the playback side of the disc. Hold the reference. disc by the edges so that fingerprints do not get on the surface. -
Page 6: Recordable And Playable Discs
Recordable and Playable Discs DVD-RW (Digital Video Disc - ReWritable): DVD-RW discs can be formatted for VR mode recording or Video mode recording. These Discs can be recorded on repeatedly. Recordings can be erased, then you can record again on the same Disc. [VR mode] Recordings can be extensively edited Playable only on VR mode compatible players (after finalization) -
Page 7: Playable Discs
Playable Discs DVD (8 cm / 12 cm disc) Discs such as movies that can be purchased or rented Audio CD (8 cm / 12 cm disc) Music CDs or CD-Rs/CD-RWs in music CD format that can be purchased Video CD (VCD) (8 cm / 12 cm disc) VIDEO CDs or CD-Rs/CD-RWs in VIDEO CD/Super VIDEO CD format CD-R/CD-RW (8 cm / 12 cm disc) CD-R/CD-RW discs that contain audio titles, DivX, MP3, WMA, or JPEG files. -
Page 8: Front Panel
Front Panel e f g h i a 1 1 POWER g N (PLAY) Switches the recorder ON or OFF. Starts playback. b Disc Tray h STOP Insert a disc here. Stops playback or recording. c Display window i z (REC) Shows the current status of the recorder. -
Page 9: Remote Control
Remote Control SCAN (m / M): Search REC (z): Starts recording. backward or forward. REC MODE: Selects the recording mode. SKIP (. / >): Go to next or previous chapter or track. THUMBNAIL: Selects a thumbnail picture. PAUSE/STEP (X) : Pause playback or recording temporarily. -
Page 10: Hookup And Settings
Hookup and Settings Rear Panel ANTENNA IN (FROM ANT) COAXIAL (DIGITAL AUDIO OUTPUT) Connect the antenna to this terminal. Connect to digital (coaxial) audio equipment. COMPONENT OUTPUT (Y P AUDIO OUTPUT (Left/Right) Connect to a TV with Y P inputs. Connect to a TV or other equipment with audio inputs. -
Page 11: Connecting An Antenna Or Cable Tv
Connecting an Antenna Antenna Antenna or Cable TV a Antenna Disconnect the antenna from the rear of the TV and identify the antenna cable. If it is a round 75 ohm coaxial cable connect it directly to the jack marked ANTENNA IN on your Recorder. -
Page 12: Connections To Your Tv
Connections to Your TV Component Video connection Connect the COMPONENT OUTPUT jacks on the Make one of the following connections, depending recorder to the corresponding input jacks on the TV on the capabilities of your existing equipment. using an Y P cable (C). -
Page 13: Connecting To An Amplifier
Connecting to an Amplifier Rear of Recorder Connecting to an amplifier equipped with two channel analog stereo or Dolby Pro Logic ll/ Pro Logic Connect the Left and Right AUDIO OUTPUT jacks on the recorder to the audio left and right in jacks on your amplifier, receiver, or stereo system, using the audio cables (A). -
Page 14: Accessory Audio/Video (A/V) Connections
Accessory Audio/Video (A/V) Connections Connecting to the INPUT 1 or AV IN 2 Jacks Connect the input jacks (AV1, AV2) on the recorder to the audio/video out jacks on your accessory component, using audio/video cables. Rear of Recorder Front of Recorder... -
Page 15: Auto Set Up
Auto Set Up Using the Home Menu After the POWER is pressed for the first time to turn From the Home Menu screen you can access all the on the unit or resetting the unit, the Initial Setup Media for playback and recording of the recorder. Wizard function sets the language, clock and tuner channels automatically. -
Page 16: Initial Settings
Initial Settings Auto Channel Set Connect the Recorder to the desired type of antenna In this menu system, there are several ways to or cable TV system as shown on page 11. customize the settings provided. Most menus consist This Recorder is equipped with a frequency of three levels to set up the options, but some require synthesized tuner capable of receiving up to 181 greater depth for the variety of settings. -
Page 17: Clock Set
Clock Set Power Save Mode You can set up the unit into an economic power save 1. Select [Clock set] option then press B. mode. Nothing is displayed in the display window 2. Enter the necessary information for year, date and when the unit is turned off. -
Page 18: Language Settings
Language Settings Audio Settings Each DVD disc has a variety of audio output options. Set the recorder’s Audio Output according to the type of audio system you use. Display Menu Select a language for the Setup menu and on-screen display. Dolby Digital / DTS / MPEG Disc Menu/Audio/Subtitle [Bitstream]: Select “Bitstream”... -
Page 19: Lock (Parental Control) Settings
Lock (Parental Control) Settings Set Password 1. Select [Set Password] option then press B. Follow step 2 as shown “Rating”. To change the password, select the [Change], press ENTER and input the new password twice after inputting the current password. To delete the password, select [Delete] then input the password. -
Page 20: Recording Settings
Recording Settings Disc Settings Initialize If you load a completely blank disc, the recorder will initialize the disc. DVD-R: The recorder initialize the disc to Video mode. The recording mode will always be Video mode. DVD-RW/DVD+RW/DVD+R : The Initialize menu will appears. -
Page 21: Finalize / Disc Label / Disc Protect
Disc Settings (Continued) Disc Label Use this to enter a name for the disc. This name Finalize appears when you load the disc and when you display disc information on-screen. Finalizing ‘fixes’ the recordings in place so that the The disc name can be up to 32 characters long. disc can be played on a regular DVD player or For discs formatted on a different recorder, you will computer equipped with a suitable DVD-ROM drive. -
Page 22: General Explanation Of On-Screen Display
General Explanation of Displaying Disc Information on-screen You can display various information about the disc On-Screen Display loaded on-screen. This manual gives basic instructions for operating the 1. Press DISPLAY once to show current status. recorder. Some DVDs require specific operation or allow only limited operation during playback. -
Page 23: Playback
Playback General Playback Features 1. Load your chosen disc in the tray, with the playback side down. 2. Starts playback using HOME menu (see page 15). 3. To stop the playback, press STOP (x). The unit records the stopped point, depending on the disc. “Xx” appears on the screen briefly. Press PLAY (N) to resume playback (from the scene point). -
Page 24: Playback
General Playback Features (Continued) Buttons Operations Discs PLAY MODE For repeat playback DVD ALL During playback, press PLAY MODE repeatedly to select a desired repeat mode. DVD (Chapter/Title/Off) VR mode DVD-RW (Chapter/Title/All/Off) Video CD, Audio CD (Track/All/Off) MP3/WMA (Track/Folder/Off) Notes: On a Video CD with PBC, you must set PBC to [OFF] in the Setup menu to use the Repeat function. - Page 25 If a menu screen is displayed Camera Angle The menu screen may be displayed first after loading a If the disc contains scenes recorded at different DVD or Video CD which contains a menu. camera angles, you can change to a different camera angle during playback.
-
Page 26: Playing A Divx Movie File
Playing a DivX Movie File Movie List menu options 1. Press v / V to select a folder/file on the [Movie The recorder can play DivX files. Before playing DivX List] menu then press ENTER. files, read “DivX file requirement” on right. [Movie List] menu options appear. -
Page 27: Playing An Audio Cd Or Mp3/Wma File
Playing an Audio CD or MP3/WMA Audio CD and Music List menu options file 1. Press v / V to select a folder/file on the [Music List] menu then press ENTER. The recorder can play audio CDs and MP3/WMA files. The menu options appear. -
Page 28: Viewing A Jpeg File
Viewing a JPEG File Photo List menu options 1. Press v / V to select a file on the [Photo List] The recorder can play JPEG files. Before playing menu then press ENTER. JPEG recordings, read “Photo file requirement” on The menu options appear. - Page 29 View Slide Shows 1. Select [Slide Show] option on the [Photo List] menu (Refer to “Photo List menu options” on page 28). 2. Press ENTER. The Slide Show menu appears. 3. Use b / B / v / V to set the options. [Speed] option: Sets the Slide Show speed to [Slow], [Normal], or [Fast].
-
Page 30: Recording
Recording If using a DVD-RW disc, make sure you change the recording format (Video mode or VR mode) before you record anything on the disc. See page 20 (Initialize) for how to do this. About DVD recording When using a DVD-R or DVD+R disc, you can keep recording until the disc is full, or until you finalize the Notes: disc. - Page 31 Restrictions on copying Copyright Recording equipment should be used only for lawful Some video material is copy-once protected: If you copying and you are advised to check carefully what want to record copy-once protected material to DVD, is lawful copying in the area in which you are you must use a VR mode DVD-RW disc compatible making a copy.
-
Page 32: Basic Recording From A Tv
Basic Recording from a TV Instant Timer Recording Instant Timer Recording allows you to make a Follow the instructions below to record a TV program. recording easily of a preset length without using the Recording starts immediately and continues until the program timer. -
Page 33: Timer Recording
Timer Recording 4. Enter the necessary information for your timer recording(s). This recorder can be programmed to record up to 16 b / B (left/right) – move the cursor left/right programs within a period of 1 month. For unattended v / V (up/down) – change the setting at the recording, the timer needs to know the channels to be current cursor position recorded, the starting and ending time. -
Page 34: Checking Timer Recording Details
Checking Timer Recording You cannot enter a timer program when: A recording is already underway. Details The time you’re trying to set has already passed. There are already 16 timer programs set. Programming can be checked whenever the recorder If two or more timer programs overlap: is turned on. -
Page 35: Editing
Editing Title List and Chapter List Menu Overview Using the Title List menu you can edit video content. The editing features available in the Title List menu depend on whether you are editing video on DVD, and whether you’re editing Original content, or a Playlist. -
Page 36: Vr Mode: Original And Playlist Editing
VR Mode: Original and Playlist Adding Chapter Markers Editing Titles, Chapters and Parts You can create chapters within a title by inserting chapter marks at the desired points. Titles in the disc’s original content contain one or more chapters. When you insert a disc’s title into the During recording or playing back, at the point you Playlist, all the chapters within that title also appear. -
Page 37: Making A New Playlist
Making a New Playlist Adding Additional Title/Chapters to the Playlist Use this function to add an Original title or chapter to You can add an Original title or chapter to add to a the Playlist. When you do this, the whole title or Playlist title even if it is already registered. -
Page 38: Deleting An Original Or Playlist Title/Chapter
Deleting an Original or Playlist Deleting a Part Title/Chapter You can delete a part which you do not want in the When you erase a title or chapter from the Playlist title. menu, you only remove it from the Playlist; the 1. -
Page 39: Naming A Title
Naming a Title Time Search You can name the titles. You can select start point of the title. 1. Choose the title you want to name on the Title List 1. Use b / B / v / V to choose a title on the Title List menu, then press ENTER. -
Page 40: Divide One Titles Into Two
Divide One Titles Into Two Combining Two Chapters Into Use this function to combine two adjacent chapters Use this command to split a title up into two new titles. into one. 1. On the Title List menu, select a title you want to 1. -
Page 41: Moving A Playlist Chapter
Moving a Playlist Chapter If you select a hidden chapter or title on the Title List or Chapter List menu, you can ‘show’ it by choosing [Show] option on the menu. After doing that, you are Use this function to re-arrange the playing order of able to see the chapter or title. -
Page 42: Reference
Reference 2. Press TITLE in play or stop mode. Title List menu will appear as shown below. Additional Information You can remove the Title List menu by pressing STOP (x). Overwriting Recording To overwrite a new video recording on a previously recorded title, follow these steps. -
Page 43: Language Codes
Language Codes Use this list to input your desired language for the following initial settings: Disc Audio, Disc Subtitle, Disc Menu. Language Code Language Code Language Code Language Code Abkhazian 6566 Fiji 7074 Lingala 7678 Singhalese 8373 Afar 6565 Finnish 7073 Lithuanian 7684... -
Page 44: Controlling Your Tv With The Supplied Remote Control
You can control the sound level, input source, and You can control the sound level, input source, and power switch of non-LG TVs as well. If your TV is power switch of your TV with the supplied Remote listed in the table below, set the appropriate Control. -
Page 45: Troubleshooting
Troubleshooting Check the following guide for the possible cause of a problem before contacting service. Symptom Cause Solution The power cord is disconnected. Plug the power cord into the wall No power. outlet securely. No picture. The TV is not set to receive recorder Select the appropriate video input mode signal output. - Page 46 Symptom Cause Solution Cannot play a disc The disc was recorded in Video mode. Finalize the disc. (page 21) recorded using this Some players will not play even a No solution. recorder on another finalized disc recorded in Video mode. player.
-
Page 47: Specifications
Specifications General Power requirements AC 110-240V, 50/60Hz Power consumption Dimensions (approx.) 430 X 54 X 275 mm (w x h x d) without foot Net Weight (approx.) 2.6 kg Operating temperature 5˚C to 35˚C Operating humidity 5 % to 90 % Television system NTSC color system Recording format... - Page 48 DR265M_HA1PLLB_SPA REPRODUCTOR Y GRABADOR DE MANUAL DE INSTRUCCIONES MODELO: DR265 Antes de conectar, hacer funcionar o ajustar este producto, lea el manual de instrucciones completa y cuidadosamente.
- Page 49 PRECAUCIÓN: Este aparato no deberá exponerse al agua PRECAUCIÓN (goteo o salpicaduras) y ningún objeto lleno de agua, como jarrones, debe colocarse sobre el equipo. NO ABRIR, EXISTE RIESGO DE DESCARGA ELÉCTRICA. ADVERTENCIA en relación al cable de PRECAUCIÓN: PARA REDUCIR EL RIESGO DE alimentación DESCARGA ELÉCTRICA NO RETIRE LA CUBIERTA Se recomienda que la mayoría de los equipos sean...
- Page 50 IMPORTANTES INSTRUCCIONES DE SEGURIDAD ADVERTENCIA: LEA Y SIGA TODAS LAS ADVERTENCIAS E INSTRUCCIONES EN ESTE MANUAL DEL USUARIO Y AQUÉLLAS INDICADAS EN LA UNIDAD. CONSERVE ESTE MANUAL PARA FUTURAS CONSULTAS. Esta unidad ha sido diseñada y fabricada para garantizar la seguridad personal. Su uso inadecuado podría provocar descargas eléctricas o incendios.
- Page 51 Índice Introducción ......5-9 Reproducción ......23-29 Características generales de reproducción .
-
Page 52: Introducción
Introducción Notas sobre los discos Manejo de los discos Para garantizar un uso correcto de este producto, por No toque la cara a reproducir del disco. Sujete el favor, lea detenidamente el manual y guárdelo para disco por los bordes para no dejar huellas dactilares futuras consultas. -
Page 53: Discos Grabables Y Reproducibles
Discos grabables y reproducibles DVD-RW (disco de video digital - Regrabable): Los discos DVD-RW se pueden formatear para una grabación en modo VR o grabación en modo Video. Estos discos se pueden regrabar repetidamente. Puede borrar lo grabado y, a continuación, volver a grabar en el mismo disco. -
Page 54: Discos Reproducibles
Discos reproducibles DVD (disco de 8 cm / 12 cm) Discos como los de las películas, que se pueden comprar o alquilar. CD de video (VCD) (disco de 8 cm / 12 cm) CDs de video o CDs grabables/regrabables, en formato CD de video/súper CD de video. CD de audio (disco de 8 cm / 12 cm) Los CDs de música o CDs grabables/regrabables en formato de CD de música, que pueden comprarse... -
Page 55: Panel Frontal
Panel frontal e f g h i a 1 1 POWER g N (PLAY) Enciende (ON) y apaga (OFF) el grabador. Inicia la reproducción. b Bandeja de discos h STOP (x) Inserte aquí un disco. Detiene la reproducción o grabación. c Ventana de visualización i z (REC) Muestra el estado actual del grabador. -
Page 56: Control Remoto
Control remoto Botones de control del televisor: ZOOM: Amplia la imagen de Consulte la página 44. vídeo. SETUP: Accede o sale del menú de configuración SCAN (m / M): Busca hacia delante o hacia atrás. REC (z): Inicia la grabación. SKIP (. -
Page 57: Conexión Y Configuraciones
Conexión y configuraciones Panel posterior ANTENNA IN (FROM ANT) COAXIAL (SALIDA DE AUDIO DIGITAL) Conecte la antena a este terminal. Conecte un equipo de audio digital (coaxial). COMPONENT OUTPUT (Y P AUDIO OUTPUT (Izquierda/Derecha) Conecte a un televisor con entradas Y P Conecte a un TV u otro equipo con entradas de audio. -
Page 58: Conexión De Una Antena O Tv Por Cable
Conexión de una antena o TV Antena Antena Tomacorriente del Antenna Antenna por cable descodificador de la TV por cable a Antena: Cable plano Desconecte la antena de la parte posterior del (300 ohms) televisor e identifique su cable. Si es un cable coaxial 300/75 ohms redondo de 75 ohms, conéctelo directamente a la Adaptador (no... -
Page 59: Conexión A Su Televisor
Conexión a su televisor Conexión de video componente Conecte las tomas COMPONENT OUTPUT del Realice una de las siguientes conexiones, grabador a las tomas de entrada correspondientes del dependiendo de la capacidad del equipo al que se televisor usando un cable Y P (C). -
Page 60: Conexión A Un Amplificador
Conexión a un amplificador Panel posterior del grabador Rear of Recorder Conexión a un amplificador equipado con dos canales estéreo analógicos o Dolby Pro Logic II/ Pro Logic Conecte las tomas izquierda y derecha de AUDIO OUTPUT del grabador a las tomas izquierda y derecha de su amplificador, receptor o sistema estéreo usando los cables de audio (A). -
Page 61: Conexiones Adicionales De Audio/Video (A/V)
Conexiones adicionales de audio/video (A/V) Conexión a las tomas INPUT 1 o AV IN 2 Conecte las tomas de entrada (AV1, AV2) del grabador a las tomas de salida de audio/video de su componente adicional usando cables de audio/video. Panel de tomas de equipo adicional (VCR, videocámara, etc.) Parte posterior del Rear of Recorder... -
Page 62: Configuración Automática
Configuración automática Uso del menú Home Una vez pulsado POWER por primera vez para Desde la pantalla del menú Home, podrá acceder a encender la unidad o para reiniciarla, la función del todos los soportes de reproducción y grabación del asistente realizará... -
Page 63: Configuraciones Iniciales
Configuraciones iniciales Auto Programación Conecte el grabador al tipo de antena o sistema de TV En este sistema de menús, existen diferentes por cable deseado como se muestra en la página 11 maneras de personalizar los ajustes proporcionados. Esta grabadora está equipada con un sintonizador La mayoría de menús disponen de tres niveles para sintetizado de frecuencias capaz de recibir hasta 181 ajustar las opciones, pero algunos necesitan más... -
Page 64: Ajuste De Reloj
Modo económico Ajuste de reloj Puede configurar la unidad para que entre en el modo Si su estación local de televisión no envía información de ahorro de energía. No aparece nada en la ventana sobre la fecha y la hora, o envía información de visualización cuando se apaga la unidad. -
Page 65: Configuraciones De Idioma
Configuraciones de idioma Configuraciones de audio Todos los discos DVD tienen una variedad de opciones de salida de audio. Ajuste la salida de audio del grabador de acuerdo con el tipo de sistema de audio utilizado. Display Menú Seleccione un idioma para el menú de configuración y los mensajes en pantalla. -
Page 66: Bloquear Las Configuraciones (Control Paterno) Calificación
Bloquear las configuraciones Fijar contraseña (control paterno) calificación 1. Seleccione la opción [Fijar contraseña] y, después, presione B. 2. Siga o passo 2 conforme mostrado em “Índice”. Para cambiar la contraseña, seleccione [Change] (Cambiar) y, a continuación, presione ENTER (Acceder) e introduzca la nueva contraseña dos veces tras introducir la contraseña actual. -
Page 67: Configuraciones De Grabación
Configuraciones de grabación Configuración del disco Iniciar Si carga un disco completamente en blanco, el grabador inicializará el disco. DVD-R: El grabador inicializará el disco a modo de video. El modo de grabación siempre será modo de video. DVD-RW/DVD+RW/DVD+R: Aparecerá el menú Initialize (Iniciar). -
Page 68: Proteger Disco / Pbc
Configuración del disco Disco Label (continuación) Utilícelo para entrar el nombre de un disco. Este nombre aparece cuando carga el disco y cuando Finalizar presenta información del disco en pantalla. El nombre del disco puede tener hasta 32 La finalización “fija” la grabación en su sitio de modo caracteres. -
Page 69: Explicación General De Los Mensajes En Pantalla
Explicación general de los Visualización de información del disco en pantalla mensajes en pantalla Puede visualizar en pantalla información variada Este manual ofrece instrucciones básicas para hacer sobre el disco que se ha cargado. funcionar el grabador de DVD. Algunos DVD requieren un funcionamiento específico o permiten 1. -
Page 70: Reproducción
Reproducción Características generales de reproducción. 1. Cargue el disco elegido en la bandeja de discos con la cara de reproducción hacia abajo. 2. La reproducción se inicia usando el menú HOME (consulte la página 15). 3. Para detener la reproducción, presione STOP (x). La unidad comienza la grabación a partir del punto en donde se detuvo, dependiendo del disco. - Page 71 Características generales de reproducción (continuación) Discos Botones Operaciones PLAY MODE Para repetir la reproducción DVD ALL Durante la reproducción, presione PLAY MODE repetidamente para seleccionar un modo de repetición deseado. DVD (capítulo/título/desactivado) DVD-RW en modo VR (capítulo/título/todo/desactivado) CD de vídeo, CD de audio (pista/todo/desactivado) MP3/WMA (pista/carpeta/desactivado) Notas En un CD de video con PBC, deberá...
- Page 72 Si aparece una pantalla de menú Ángulo de la cámara Si el disco contiene escenas grabadas desde diferentes ángulos, podrá cambiar a un ángulo de La pantalla de menús puede aparecer la primera vez cámara diferente durante la reproducción. después de cargar un DVD que contenga un menú. 1.
-
Page 73: Reproducción De Un Archivo De Película Divx
Reproducción de un archivo de Opciones del menú lista de películas película DivX 1. Presione v / V para seleccionar una carpeta/archivo en el menú [lista de películas] y El grabador puede reproducir ficheros DivX. Antes de después presione ENTER. reproducir ficheros DivX, lea “Requisitos para los Aparecerán las opciones del menú... -
Page 74: Reproducción De Un Cd De Audio O Archivo Mp3
Reproducción de un CD de audio Opciones del menú CD de audio y lista de cancíones o archivo MP3 1. Presione v / V para seleccionar una El grabador puede reproducir CDs de audio y ficheros carpeta/fichero en el menú [lista de cancíones] y, a MP3/WMA. -
Page 75: Visualización De Un Archivo Jpeg
Visualización de un archivo JPEG Opciones del menú lista de fotos El grabador puede reproducir ficheros JPEG. Antes 1. Presione v / V para seleccionar un fichero en el menú [lista de fotos] y, a continuación, presione de reproducir ficheros JPEG, lea “Requisitos para los ENTER. - Page 76 Visualizar presentaciones en diapositivas 1. Seleccione la opción [Slide Show] en el menú [lista de fotos] (consulte las “Opciones del menú lista de fotos” en la página 28). 2. Presione ENTER. Aparecerá el menú Slide Show. 3. Utilice b / B / v / V para ajustar las opciones. Opción [Velocidad]: Establece la velocidad de la Exhibición de diapositivas a [Lento], [Normal] o [Rápido].
-
Page 77: Grabación
Grabación Si graba imágenes fijas o sólo audio, el tiempo de grabación podrá alargarse. Los tiempos de grabación y tiempo restante mostrados tal vez no coincidan exactamente con la Acerca de la grabación de un longitud del disco. El tiempo de grabación disponible puede reducirse si edita en exceso un disco. - Page 78 Restricciones en el copiado Derechos de autor El equipo de grabación deberá usarse sólo para un Algunos videos está protegidos con la función copiar- copiado legal y se le recomienda que revise once (una sola copia). Si desea transferir material cuidadosamente qué...
-
Page 79: Grabación Básica Desde Un Televisor
Grabación básica desde un Grabación temporizada televisor instantánea Siga las siguientes instrucciones para grabar un La grabación temporizada instantánea le permite programa de TV. La grabación comienza efectuar una grabación de un periodo preestablecido inmediatamente y continúa hasta que el disco está de tiempo mediante el temporizador de programas. -
Page 80: Grabación Temporizada
Grabación temporizada 4. Entre la información necesaria para su(s) grabación(es) temporizadas. Esta grabadora puede programarse con hasta 16 b / B (izquierda/derecha) – mueven el cursor programas para un período de 1 mes. En la grabación izquierda/derecha sin supervisión, el temporizador necesita conocer qué v / V (arriba/abajo) –... -
Page 81: Comprobación De Los Datos De La Grabación Temporizada
Comprobación de los datos de No podrá introducir un programa temporizado en los siguientes casos: la grabación temporizada Ya hay una grabación en curso. La hora que intenta ajustar ya ha pasado. La programación puede chequearse siempre que el Ya hay 16 programas temporizadas ajustados. grabador de DVD está... -
Page 82: Edición
Edición Menú Lista de títulos y Lista de capítulos – Generalidades Utilizando el menú lista de títulos podrá editar el contenido del video. Las prestaciones de edición disponibles en el menú Lista de títulos dependen de si está editando video en un DVD en modo VR y si está... -
Page 83: Modo Vr: Edición De Original Y Lista De Reproducción
Modo VR: Edición de original y Añadir marcadores de capítulo lista de reproducción Títulos, capítulos y partes Puede crear capítulos dentro de un título insertando marcadores de capítulo en los puntos deseados. Los títulos del contenido original del disco contienen uno o más capítulos. -
Page 84: Crear Una Nueva Lista De Reproducción
Crear una nueva lista de Agregar título/capítulo adicional a la lista de reproducción reproducción Use esta función para agregar un título Original o un capítulo a la lista de reproducción. Al hacerlo, la Puede agregar un título o capítulo original para totalidad del título o capítulo pasará... -
Page 85: Eliminar Un Título/Capítulo De Original O Lista De Reproducción
Eliminar un título/capítulo de Eliminar una parte Original o Lista de reproducción Puede eliminar una parte que no desee en el título. Cuando borre un título o capítulo del menú “Lista de 1. Utilice b / B / v / V para escoger un título que reproducción”, sólo lo elimina de la lista;... -
Page 86: Nombrar Un Título
Nombrar un título Búsqueda por tiempo Es posible nombrar los archivos. Puede seleccionar el punto de inicio del título. 1. Seleccione el título que desea nombrar en el 1. Seleccione b / B / v / V para elegir un título del menú... -
Page 87: Dividir Un Título En Dos
Combinar dos capítulos en uno Dividir un título en dos Utilice este comando para dividir un título en dos nuevos títulos. Use esta función para combinar dos capítulos 1. En el menú de la “Lista de títulos”, seleccione el adyacentes en uno solo. título que desee dividir y, a continuación, presione ENTER. -
Page 88: Mover Un Capítulo De La Lista De Reproducción
Mover un capítulo de la lista de Sugerencia Si selecciona un capítulo o título oculto del menú Reproducción Lista de títulos o Lista de capítulos, podrá ‘mostrarlo’ escogiendo la opción [Muestra] en el menú. Tras Utilice esta función para reorganizar el orden de hacerlo, podrá... -
Page 89: Referencia
Referencia 2. Presione TITLE en modo de reproducción o parada. El menú “Lista de títulos” aparecerá como se Información adicional de muestra a continuación. referencia Sugerencia Puede retirar el menú “Lista de títulos” Sobrescribir la grabación presionando STOP (x). Para sobrescribir una nueva grabación de video en un título grabado anteriormente, siga estos pasos. -
Page 90: Códigos De Idiomas
Códigos de idiomas Utilice esta lista para introducir el idioma deseado para las siguientes configuraciones iniciales: Audio del disco, subtítulos del disco, menú del disco. Idioma Código Idioma Código Idioma Código Idioma Código Abjasio 6566 Fijiano 7074 Lingala 7678 Urdú 8373 Afar 6565... -
Page 91: Control De Su Televisor Con El Control Remoto Suministrado
Si en la lista aparece más de un código, indíquelos uno a uno, hasta que encuentre el que funcione mejor con su TV. Botones de control Fabricante Número del código del televisor LG / GoldStar 1 (Predeterminado), 2 Zenith 1, 3, 4 Samsung 6, 7 Sony... -
Page 92: Solución De Problemas
Solución de problemas Compruebe la siguiente guía en busca de la posible causa a un problema antes de ponerse en contacto con el servicio. Problema Causa Solución Conecte firmemente el cable de El cable de alimentación está No hay alimentación. alimentación a la toma de la pared. - Page 93 Problema Causa Solución No se puede reproducir El disco se grabó en modo video. Finalice el disco. (página 21) un disco grabado Algunos reproductores no No hay solución. usando esta grabadora reproducirán incluso un disco en otro reproductor. finalizado grabado en modo video. El disco se grabó...
-
Page 94: Especificaciones
Especificaciones General Requisitos de alimentación 110-240 V~ 50/60 Hz Consumo de energía Dimensiones (Aprox). 430 X 54 X 275 mm (An x Al x Lg) sin base Peso neto (Aprox). 2,6 kg Temperatura de funcionamiento 5˚C a 35˚C Humedad operativa...
Need help?
Do you have a question about the DR265 and is the answer not in the manual?
Questions and answers