Table of Contents
Advertisement
Quick Links
Advertisement
Chapters
Table of Contents

Related Manuals for Livorsi Vantage View NMEA 2000 VVMHN2K


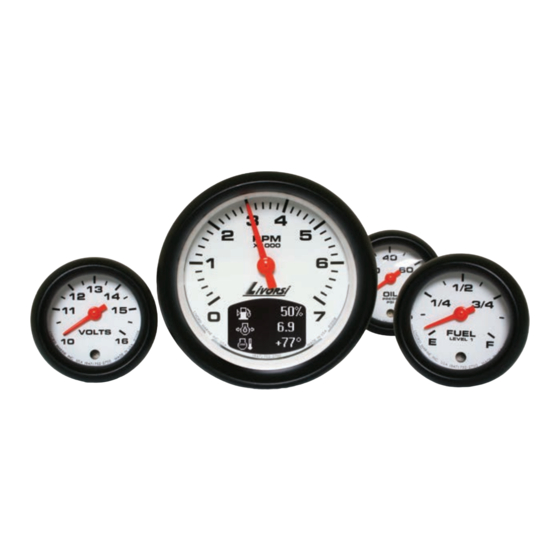
Summary of Contents for Livorsi Vantage View NMEA 2000 VVMHN2K
- Page 1 Installation and Operation Manual NMEA 2000® SAE J1939 SmartCraft® Livorsi Marine, Inc. PART # LIT-GA-CANB-VV-REV0617 715 Center Street Grayslake, IL 60030 USA Toll Free: 877.548.5900 Office: 847.752.2700 Fax: 847.752.2415 Email: sales@livorsi.com www.livorsi.com...
-
Page 2: Table Of Contents
Operation Manual Vantage View® PART # LIT-GA-CANB-VV-REV0617 About ................1 Scope . - Page 3 Operation Manual Vantage View® PART # LIT-GA-CANB-VV-REV0617 Main Roll ............... . .38 Main Recall .
- Page 4 • Master Tach or Speedometer- Standard Size PART # LIT-GA-CANB-VV-REV0617 • Slave Gauges or FWA- Standard Size • VV Saw Assembly Switch Plate- Single Engine Please note: Maximum torque is 4 to 6 In lbs on all Livorsi gauge mounting hardware.
- Page 5 Installation Manual Vantage View® PART # LIT-GA-CANB-VV-REV0617 • Master Tach or Speedometer or Four Function Gauge- Over Sized • Slave Gauges- Over Size • Control Pods - Single and Multiple Engine...
- Page 6 Installation Manual Vantage View® PART # LIT-GA-CANB-VV-REV0617 Installation Guide IMPORTANT: Vantage View gauge installation and gauge sequence is critical in the operation of this system. Please read the important information below before installing gauges. You cannot skip a Deutsch connector in the slave harness chain, doing so will result in network failure.
- Page 7 Installation Manual Vantage View® PART # LIT-GA-CANB-VV-REV0617 Installation Guide • Master Harness Diagrams SmartCraft Master Harness 36 in. Model #: VVMHSC Wire Labeling/Color chart REV D COLOR LABEL PINK ANALOG YELLOW NMEA 0183 9-12 TO AMP CONNECTOR NMEA 2000® Micro C Male Master Harness - 36 in. Model #: VVMHN2K Wire Labeling/Color chart REV D...
- Page 8 Installation Manual Vantage View® PART # LIT-GA-CANB-VV-REV0617 Installation Guide • Master Harness Diagrams SAE J1939 Master Harness - 36 in. Wire Labeling/Color chart REV F Model #: VVMHJI COLOR LABEL VIOLET SWITCHED POWER BLACK GROUND LT. BLUE CAN L WHITE CAN H BLUE LIGHTING...
- Page 9 Installation Manual Vantage View® PART # LIT-GA-CANB-VV-REV0617 Installation Guide • Control Pod Wiring Both the Master Harness and the control pod are supplied with amp connectors to facilitate installation. Simply join the two connectors. Please note that if using the VVSAW assembly, it will connect to the Master Harness in the same manner.
- Page 10 240-33ohms / 10-180ohms / 0-90ohms /Centroid 3 • GPS Receiver/Antenna GPS Speed requires the use of a NMEA 0183 GPS receiver/antenna. It is recommended to use Livorsi part number GPSRAQ3VV as power and ground are pre-terminated and the signal wire is pre-terminated with a butt connector to connect to the NMEA 0183 input on the Master Harness.
- Page 11 Installation Manual Vantage View® PART # LIT-GA-CANB-VV-REV0617 List of Figures Figure 1-1: Menu Scrolling and Option Selection ....... . 3 Figure 1-2: Blinking Bar Cursor .
- Page 12 Installation Manual Vantage View® PART # LIT-GA-CANB-VV-REV0617 List of Figures Figure 1-45: Setting LCD Background Color Scheme ......41 Figure 1-46: Setting LCD Contrast .
-
Page 13: About
PART # LIT-GA-CANB-VV-REV0617 • About Vantage View® is the next generation instrumentation system from Livorsi that combines the best of analog and digital data display technologies. Vantage View® reads and displays vehicle performance data directly from CAN (Controller Area Network) equipped apparatus that support protocols such as SAE J1939, NMEA 2000®... -
Page 14: Menu Navigation
Operation Manual Vantage View® PART # LIT-GA-CANB-VV-REV0617 • Menu Navigation Menu navigation requires the use of three externally mounted momentary switches connected to the Master Tach instrument. The switch functions are MODE, UP and DOWN. These switches are supplied and installed by the vehicle/equipment manufacturer. •... -
Page 15: Selection Arrow Cursor
Operation Manual Vantage View® PART # LIT-GA-CANB-VV-REV0617 • Menu Navigation (Continued) Vantage View® uses various icons and indicators to guide users for item selection and/or input while navigating the menus. The selection arrow and blinking bar cursors appear frequently throughout the menus. -
Page 16: Blinking Bar Cursor
Operation Manual Vantage View® PART # LIT-GA-CANB-VV-REV0617 • Blinking Bar Cursor A blinking bar cursor appearing beneath a numeric value or parameter indicates the item may be changed by pressing or pressing and holding the Up or Down switches. When a numeric value appears above a blinking bar cursor, pressing or pressing and holding the Up or Down switch increases or decreases the value until the maximum value limits are reached. -
Page 17: Start-Up Screen
Vantage View® PART # LIT-GA-CANB-VV-REV0617 • Start-up Screen Upon Instrument start-up the Livorsi logo and/or one of several possible CAN based protocol logo(s) appear for approximately three seconds. • Default Quick View Main Screen The default Quick View Main Screen screen appears after completion of the start-up routine and replaces the start-up logo. -
Page 18: Bar Graph & Three Line Format
Operation Manual Vantage View® PART # LIT-GA-CANB-VV-REV0617 • Bar Graph & Three Line Format Vantage View® can display vehicle operating parameters on the Quick View Main Screens in two formats, single parameter bar graph or three-line. The default display format is single parameter bar graph which provides the most detail for a given parameter. -
Page 19: Trips (Hours) Screen
Operation Manual Vantage View® PART # LIT-GA-CANB-VV-REV0617 • Trips (Hours) Screen Vantage View® offers three maintenance hour logs or trips. To access the trips screen press and release the Mode switch when the total hours Quick View Main Screen is active. Pressing the Mode switch a second time returns the total hours screen. -
Page 20: Main Menu
Operation Manual Vantage View® PART # LIT-GA-CANB-VV-REV0617 • Main Menu The Main Menu contains functions to configure the LCD (Liquid Crystal Display), set alarms or view ECM faults and warnings. Some frequently used Setup Menu functions are also located in the Main Menu to provide easier and faster access. -
Page 21: Trips
Operation Manual Vantage View® PART # LIT-GA-CANB-VV-REV0617 • Trips Selecting the trips function in the Main Menu displays three separate maintenance hour logs. This is an alternate method to pressing the Mode switch with any Quick View Main Screen active. Resetting any of the three maintenance hour logs is described below and previously on page 7. -
Page 22: View Parameters
Operation Manual Vantage View® PART # LIT-GA-CANB-VV-REV0617 • View Parameters View Parms is an abbreviation for viewing actively broadcast parameters and inputs. Parameter sources include analog inputs, NMEA 0183 input and CAN protocols. The quantity and type of parameters depends upon the CAN protocol used along with the configuration of analog inputs. Parameters are displayed in single function bar graph format when viewed using View Parms. -
Page 23: Setup
Operation Manual Vantage View® PART # LIT-GA-CANB-VV-REV0617 • Setup The Setup option in the Main Menu provides the functions necessary for configuring Vantage View® to suit individual preferences or application requirements. Such functions range from backlight intensity to choosing and setting alarms. See page 18 for Setup Menu function descriptions. Figure 1-9: Accessing the Setup Menu Access the Main Menu by pressing and holding the Menu Switch. -
Page 24: Mute
Operation Manual Vantage View® PART # LIT-GA-CANB-VV-REV0617 • Mute When a Vantage View® Master Tach Instrument is connected to a FWA (Fault, Warning & Alarm) Slave Instrument with audible output capabilities, the mute function temporarily turns off the audible alarm. Faults are muted for 20 seconds. -
Page 25: Warnings
Operation Manual Vantage View® PART # LIT-GA-CANB-VV-REV0617 • Warnings Warnings are an indicator of vehicle problem as reported by the ECM/ECU that does not warrant immediately stopping the vehicle or vessel. Users should consult the owners manual or a service technician to correct the warning condition(s). -
Page 26: Alarms
Operation Manual Vantage View® PART # LIT-GA-CANB-VV-REV0617 • Alarms Alarms are user configured limits for CAN or analog parameters used to alert operators when the parameter or parameters exceed those limits. Alarms help users protect a vehicle, vessel or equipment from damage by providing an option to set operating notification limits for parameters critical to the application. -
Page 27: Recall
Operation Manual Vantage View® PART # LIT-GA-CANB-VV-REV0617 • Recall The recall function displays the maximum vehicle speed and engine RPM. The recall data is stored in non-volatile memory which retains the information until it is reset or overwritten by higher values. To reset either recall value to zero, place the selection arrow cursor at the value to reset by using the Up and Down switches. -
Page 28: Fuel
Operation Manual Vantage View® PART # LIT-GA-CANB-VV-REV0617 • Fuel The fuel Main Menu function provides fuel management data such as consumption rate, amount remaining and amount used. In order to see and use all the fuel management features, fuel tanks must be calibrated using Main Menu-Setup-Calibration function found on page 45. -
Page 29: Miscellaneous
Operation Manual Vantage View® PART # LIT-GA-CANB-VV-REV0617 • Miscellaneous The Miscellaneous Menu contains functions for restoring factory default settings, viewing current firmware revision and active CAN Bus protocol. Figure 1-16: Miscellaneous Functions Menu From the Main Menu, scroll to place the selection arrow cursor next to the Misc option. -
Page 30: Setup Menu
Operation Manual Vantage View® PART # LIT-GA-CANB-VV-REV0617 • Setup Menu The Setup Menu contains all the functions necessary to configure a Master Tach Instrument to satisfy user preferences and application requirements. This section of the manual describes those functions. Figure 1-17: Setup Menu Functions To access the Setup Menu, Main Menu-Setup, press and hold the Menu Switch with any Quick View Main Screen displayed until the... -
Page 31: Figure 1-18: Setting Backlight Intensity
Operation Manual Vantage View® PART # LIT-GA-CANB-VV-REV0617 Figure 1-18: Setting Backlight Intensity From the Setup Menu, scroll to place the selection arrow cursor at the backlight option. Switch Backlight Menu appears Return with selection arrow cursor at the Switch option. Main Screen Switch Menu Function List... -
Page 32: Units
Operation Manual Vantage View® PART # LIT-GA-CANB-VV-REV0617 • Units Users may choose between English and SI-Metric units for parameter display. Users may also select between statute and nautical mile for marine odometer units. If SI-Metric units is chosen, the statute and nautical mile units are displayed in kilometers. -
Page 33: Clock Viewing & Setting
Operation Manual Vantage View® PART # LIT-GA-CANB-VV-REV0617 • Clock Viewing & Setting Vantage View® offers a digital clock display screen. Users enable/disable clock display, set clock time/ format and enable date display using the clock menu functions. • Viewing & Setting If clock display is enabled, it always appears as the last Quick View Main Screen. -
Page 34: Clock Format
Operation Manual Vantage View® PART # LIT-GA-CANB-VV-REV0617 • Clock Format The clock display format can appear as either Hours:Minutes or Hours:Minutes:Seconds. The date can be added to the clock display and appears as a second line below the time display in the format of MM/DD/YY. -
Page 35: Main Clock
Operation Manual Vantage View® PART # LIT-GA-CANB-VV-REV0617 • Main Clock The Main Clock function adds the clock as one of the Quick View Main Screens. The clock always appears as the last screen in the Quick View Main Screen list. Figure 1-22: Enable Display of Main Clock Place the selection arrow cursor at the Clock option in the Setup Menu. -
Page 36: Alarms
Operation Manual Vantage View® PART # LIT-GA-CANB-VV-REV0617 • Alarms See "Alarms" on page 14 for a description of the Alarm function. The Setup-Alarm function is identical to the Main Menu-Alarm function. This section provides detailed descriptions of all the Alarm Menu functions •... -
Page 37: Viewing Alarms
Operation Manual Vantage View® PART # LIT-GA-CANB-VV-REV0617 • Viewing Alarms View Alarms allows users to scroll through all parameters causing the alarm condition or conditions. The parameter(s) causing the alarm condition will have the actual measured value blinking. To exit alarm review and return to the Quick View Main Screen, press the Mode switch. -
Page 38: Editing Alarms
Operation Manual Vantage View® PART # LIT-GA-CANB-VV-REV0617 • Editing Alarms The edit alarm function is how users add, delete and configure limits of selected CAN parameters or configured analog inputs for alarm notification. If alarms were previously set, users should view and note the current alarm parameter type, order and settings before editing. -
Page 39: Active & All Parameters Selection Sets
Operation Manual Vantage View® PART # LIT-GA-CANB-VV-REV0617 • Active & All Parameters Selection Sets When selecting parameters for alarm notification, users can choose from the actively broadcast parameters or all parameters defined by the CAN protocol. The active CAN parameters selection set includes those parameters that are currently or “actively” broadcast on the CAN network and read by Vantage View®. -
Page 40: Alarm Configuration
Operation Manual Vantage View® PART # LIT-GA-CANB-VV-REV0617 • Alarm Configuration After setting the alarm quantity, the alarm configuration screen appears with the blinking bar cursor below the first available parameter to include as an alarm parameter. When configuring an alarm, users must tell Vantage View® the following: 1. -
Page 41: Figure 1-30: Alarm Configuration
Operation Manual Vantage View® PART # LIT-GA-CANB-VV-REV0617 Figure 1-30: Alarm Configuration Navigate to the Edit Alarms screen, Main Menu-Alarms-Edit or Main Menu-Setup-Alarms-Edit, select a parameter list and alarm quantity Alarm #1 to bring up Alarm #1 con guration screen. Con guration Screen The blinking bar cursor appears under a parameter name. -
Page 42: Adding Additional Alarms
Operation Manual Vantage View® PART # LIT-GA-CANB-VV-REV0617 • Adding Additional Alarms Repeat the edit alarm process to add additional alarms. When prompted for the alarm quantity, increase it by the desired number of additional alarms. Once the alarm quantity increase is accepted, the first of all previously configured alarms appear. -
Page 43: Deleting An Alarm
Operation Manual Vantage View® PART # LIT-GA-CANB-VV-REV0617 • Deleting an Alarm Repeat the edit alarm process to delete an alarm. When prompted for the alarm quantity, decrease it by the number of alarms to be removed. Vantage View® uses a last in first out (LIFO) algorithm. Therefore, decreasing the alarm quantity deletes the last alarm entered. -
Page 44: A/D (Analog/Digital) Inputs
Operation Manual Vantage View® PART # LIT-GA-CANB-VV-REV0617 • A/D (Analog/Digital) Inputs Analog sender or A/D inputs are used to connect discrete non-CAN senders such as fuel level, engine trim and water pressure. Vantage View® reads the analog signal and converts it to a digital signal for processing. -
Page 45: A/D Pressure Sender Inputs
Operation Manual Vantage View® PART # LIT-GA-CANB-VV-REV0617 Figure 1-34: A/D Input Setup Place the selection arrow cursor at the A/D Inputs option in the Setup Menu, Main Menu-Setup-A/D Inputs. The Analog Menu appears. Select the appropriate analog input. Depending on the Master Tach Instrument version, up to three inputs are available. -
Page 46: Figure 1-35: A/D Pressure Sender Input Configuration
Operation Manual Vantage View® PART # LIT-GA-CANB-VV-REV0617 Figure 1-35: A/D Pressure Sender Input Configuration From the Analog Menu, Main Menu-Setup-A/D Inputs, select the desired analog input channel and press the Enter switch to accept. Blinking bar cursor appears under parameter name. -
Page 47: Display
Operation Manual Vantage View® PART # LIT-GA-CANB-VV-REV0617 • Display The Display Menu functions give users the ability to configure the LCD. Options for configuring the display include brightness, contrast, viewing mode and which parameters to include in the Quick View Main Screen stack. -
Page 48: Figure 1-37: Quick View Main Screen Parameter Selection
Operation Manual Vantage View® PART # LIT-GA-CANB-VV-REV0617 Figure 1-37: Quick View Main Screen Parameter Selection From the Display Menu, Main Menu-Setup-Display, Display place the selection arrow cursor next Menu to the Main Order option and press the Enter switch. The Active option includes con gured analog signal inputs and CAN parameters “actively”... -
Page 49: Trim Screen Formats
Operation Manual Vantage View® PART # LIT-GA-CANB-VV-REV0617 • Main Trim Because trim is a commonly used function for NMEA 2000® configured CAN instruments, the Main Trim function provides a fast way to display engine trim and trim tab position to the Quick View Main Screens. -
Page 50: Main Clock
Operation Manual Vantage View® PART # LIT-GA-CANB-VV-REV0617 • Main Clock Main Clock function adds a clock display to the Quick View Main Screens. The clock can also be added or removed from the Quick View Main Screens by using Main Menu-Setup-Clock-Main Clock-On or Off. The clock always appears as the last Quick View Main Screen and may not be reordered in the screen list. -
Page 51: Main Recall
Operation Manual Vantage View® PART # LIT-GA-CANB-VV-REV0617 Figure 1-42: Setting Quick View Main Screen Scrolling Style Select Main Roll from the Display Menu, Main Menu-Setup-Display-Main Roll. Press the Enter switch to accept. The Main Roll Menu appears. The Roll option enables continuous scrolling/looping of Quick View Main Screens. - Page 52 Operation Manual Vantage View ® PART # LIT-GA-CANB-VV-REV0617 · Notes © 2012...
- Page 55 Operation Manual Vantage View ® PART # LIT-GA-CANB-VV-REV0617 · Notes © 2012...
-
Page 56: Key Off
Operation Manual Vantage View® PART # LIT-GA-CANB-VV-REV0617 • Key Off Users can choose to retain the clock or ODO/Hours displays when the ignition key is turned off. Note: This feature turns on the LCD and not the LCD backlight. The transflective nature of the LCD will allow for viewing in low ambient lighting conditions. -
Page 57: Set Video
Operation Manual Vantage View® PART # LIT-GA-CANB-VV-REV0617 • Set Video Setting video changes the color scheme of the LCD from white graphics on a black background (Normal) to black graphics on a white background (Reverse). Figure 1-45: Setting LCD Background Color Scheme Select Set Video from the Display Menu, Main Menu-Setup-Display-Set Video. -
Page 58: Set Contrast
Operation Manual Vantage View® PART # LIT-GA-CANB-VV-REV0617 • Set Contrast Contrast sets the difference between the white and black colors of the LCD. Figure 1-46: Setting LCD Contrast Select Set Contrast from the Display Menu, Main Menu-Setup-Display-Set Contrast. Press the Enter switch to accept. Use the Up and Down switches to increase or decrease contrast. -
Page 59: Speedometer
Operation Manual Vantage View® PART # LIT-GA-CANB-VV-REV0617 • Speedometer Vantage View® reads both CAN and GPS based speed inputs. This function tells Vantage View® what speed source to use to drive the speedometer pointer. Should more than one speed source exist, users can view all speed data on the LCD by selecting View Parms from the Main Menu. - Page 60 Operation Manual Vantage View® PART # LIT-GA-CANB-VV-REV0617 • SmartCraft® Speedometer Settings • CAN Speedometer The Can speed drives the pointer in the speedometer from a CAN source. Can speed sources are further defined by either Airmar, Paddle Wheel or Pitot-High or Low. •...
-
Page 61: Calibration - Fuel Tank
Operation Manual Vantage View® PART # LIT-GA-CANB-VV-REV0617 • Calibration - Fuel Tank The calibration function helps insure accuracy of fuel and engine trim parameters. Calibration is a multi-step process requiring users to input characteristics of the tank or engine trim positions. -
Page 62: Calibration Tank 1 Or 2
Operation Manual Vantage View® PART # LIT-GA-CANB-VV-REV0617 • Calibration Tank 1 or 2 The process calibrating a fuel tank requires entering a source for the fuel data, setting fuel tank capacity and calibrating the fuel tank level. The next several pages detail each step of the process. Calibrate, Reset and View Steps Menu options do not appear until source and capacity information is entered. -
Page 63: Setting Fuel Tank Data Source
Operation Manual Vantage View® PART # LIT-GA-CANB-VV-REV0617 • Setting Fuel Tank Data Source After deciding which tank to calibrate, users must choose a source for the fuel data. The source can be a CAN parameter, A/D input (analog discrete fuel sender) or None. Selecting the None option still provides fuel level information but disables fuel management data for the tank. -
Page 64: Setting Fuel Tank Total Capacity
Operation Manual Vantage View® PART # LIT-GA-CANB-VV-REV0617 • Setting Fuel Tank Total Capacity Setting tank capacity is the second step in the calibration process. It is important to enter an accurate capacity amount for the fuel tank since accurate fuel sender calibration relies on this information. -
Page 65: Calibrating Fuel Tank Level
Operation Manual Vantage View® PART # LIT-GA-CANB-VV-REV0617 • Calibrating Fuel Tank Level The final step for calibrating fuel level indication requires characterizing the sender to the actual fuel tank level. Manually characterizing a fuel sender to the fuel tank accounts for possible fuel level errors due to complex shaped tanks and fuel sender mounting location. -
Page 66: Calibrating Fuel Tank Level Steps 2 Thru 5
Operation Manual Vantage View® PART # LIT-GA-CANB-VV-REV0617 • Calibrating Fuel Tank Level Steps 2 thru 5 Setting the remaining calibration points for 25-100% of tank capacity is identical to setting the empty tank calibration point except for the required amount of fuel at each calibration point. The amount of fuel needed in the tank is displayed on the LCD and is based upon the total tank capacity set earlier. -
Page 67: Resetting Fuel Tank Calibration
Operation Manual Vantage View® PART # LIT-GA-CANB-VV-REV0617 • Resetting Fuel Tank Calibration The calibration points for a fuel tank can be reset by using the reset option found in either the Tank 1 or Tank 2 menus. This option only appears if calibration data was entered for a tank. Figure 1-54: Resetting Fuel Tank Calibration Data Points Select Reset from the Tank 1 Menu, Main Menu-Setup-Calibration-Tank 1-Reset. -
Page 68: Viewing Calibration Steps 2 Thru 5
Operation Manual Vantage View® PART # LIT-GA-CANB-VV-REV0617 • Viewing Calibration Steps 2 thru 5 Pressing the Down switch after the first calibration step is displayed scrolls through the remaining calibration steps 2 thru 5. The values shown in the figure below are from the 80 gallon tank example shown earlier. Values shown will vary for each user. -
Page 69: Saving Fuel Tank Calibration Data
Operation Manual Vantage View® PART # LIT-GA-CANB-VV-REV0617 • Saving Fuel Tank Calibration Data After making fuel tank source, capacity or calibration changes, users must save the changes for Vantage View® to retain the information. Figure 1-57: Saving Fuel Tank Data & Calibration Steps Select Save from the Tank 1 Menu, Main Menu-Setup-Calibration-Tank 1-Save. -
Page 70: Calibration - Engine Trim
Operation Manual Vantage View® PART # LIT-GA-CANB-VV-REV0617 • Calibration - Engine Trim The implementation and accuracy of trim senders may vary greatly on a vessel. The engine trim calibration feature allows users to characterize the engine trim position to better match the sender, satisfy personal preferences or set a safety margin to the full-up or down positions. -
Page 71: Selecting Engine Trim Sender Type For Calibration
Operation Manual Vantage View® PART # LIT-GA-CANB-VV-REV0617 • Selecting Engine Trim Sender Type for Calibration Users may choose to calibrate either analog or CAN Bus trim sender types. A “No Cal” option permits the use of OEM sender calibration or setup. Trim senders are still read by Vantage View® when No Cal is chosen but this may result in the physical full-up or down engine trim positions not matching the full scale display on the Master Tach LCD or pointer position of a Slave trim gauge connected to the Master Tach Instrument. -
Page 72: Calibrating Full-Down & Full-Up Trim Sender Positions
Operation Manual Vantage View® PART # LIT-GA-CANB-VV-REV0617 • Calibrating Full-Down & Full-Up Trim Sender Positions Once a trim sender source is selected, the options for calibrating the full-down and up trim positions appear. Setting full-down and up positions allows users to maximize the full trim sender range or set an offset for either or both the up or down positions. -
Page 73: Viewing Trim Calibration Settings
Operation Manual Vantage View® PART # LIT-GA-CANB-VV-REV0617 Figure 1-61: Setting Full Up Trim Position Place the selection arrow cursor next to the Full Up option in the Engine Trim Menu, Main Menu-Setup-Calibration-Engine Trim-Full Up. Press the Enter switch to begin setting full-up position. The engine trim Full Up Menu appears with the selection arrow cursor at the No Change option. -
Page 74: Saving Trim Calibration Settings
Operation Manual Vantage View® PART # LIT-GA-CANB-VV-REV0617 • Saving Trim Calibration Settings To retain any changes to engine trim source or calibration settings, users must save them before exiting the Engine Trim Menu. Figure 1-63: Saving Engine Trim Settings Place the selection arrow cursor next to the Save option in the Engine Trim Menu, Main Menu-Setup-Calibration-Engine Trim-Save. -
Page 75: Set Popup
Operation Manual Vantage View® PART # LIT-GA-CANB-VV-REV0617 • Set Popup Turning on popups provide a highly visible alert screen when a system fault, warning or alarm occurs. Figure 1-64: Popup Fault, Warning & Alarm Screens When popups are enabled, the following screens appear if a fault, warning or alarm occurs. -
Page 76: Trim Popup Function
Operation Manual Vantage View® PART # LIT-GA-CANB-VV-REV0617 • Trim Popup Function Since engine trim and trim tab positions are frequently adjusted, enabling the popup feature for trim temporarily brings up the appropriate trim detail screen when a change in trim position occurs. This feature allows users to see the trim position screen yet have the prior screen reappear several seconds after trim adjustments are completed. -
Page 77: Popup Menu
Operation Manual Vantage View® PART # LIT-GA-CANB-VV-REV0617 • Popup Menu The Popup Menu is found in the setup section of the Main Menu and provides all the options for enabling/disabling popup screens. Users can turn on popups for each feature individually or use the Enable/Disable All function to turn on popups for all features in one step. -
Page 78: Figure 1-68: Setting Trim Popup State
Operation Manual Vantage View® PART # LIT-GA-CANB-VV-REV0617 Figure 1-68: Setting Trim Popup State Select Set Popup from the Setup Menu, Main Menu-Setup-Set Popup. Press the Enter switch to accept. Set Popup Menu appears with the selection arrow cursor next to the trim option. Press the Enter switch to set trim popup state. -
Page 79: Figure 1-69: Setting Fault Popup State
Operation Manual Vantage View® PART # LIT-GA-CANB-VV-REV0617 Figure 1-69: Setting Fault Popup State Select Fault option from the Set Popup Menu, Main Menu-Setup-Set Popup-Fault. Press the Enter switch to set fault popup state. Popup Fault Menu appears. Selection arrow cursor location depends upon current state of fault popup. -
Page 80: Figure 1-71: Setting Alarm Popup State
Operation Manual Vantage View® PART # LIT-GA-CANB-VV-REV0617 Figure 1-71: Setting Alarm Popup State Select Alarm option from the Set Popup Menu, Main Menu-Setup-Set Popup-Alarm. Press the Enter switch to set alarm popup state. Popup Alarm Menu appears. Selection arrow cursor location depends upon current state of alarm popup. -
Page 81: Figure 1-73: Disable All Popup Functions
Operation Manual Vantage View® PART # LIT-GA-CANB-VV-REV0617 Figure 1-73: Disable All Popup Functions If available, select Disable All option from the Set Popup Menu, Main Menu-Setup-Set Popup-Disable All. Press the Enter switch to enable popup state for all functions. The All Popup Inactive screen appears after selecting disable all. -
Page 82: Set Can Bus
Operation Manual Vantage View® PART # LIT-GA-CANB-VV-REV0617 • Set CAN Bus - SAE Master Tachometers The Vantage View SAE Master Tachometer is configured with several CAN protocols from which users can select. The Set CAN Bus function allows users to change to a desired protocol. Note: Use the Main Menu-Miscellaneous-CAN Bus function to view the currently set protocol. -
Page 83: Multiple Engine Applications
Operation Manual Vantage View® PART # LIT-GA-CANB-VV-REV0617 • Set Can Bus - SmartCraft Master Tachometers The SmartCraft® Master Tachometer does not contain other CAN protocols, it is strictly for interpreting SmartCraft® data. • Multiple Engine Applications Multiple engine applications require a Master Tach Instrument for each engine. Each engine has a unique CAN identification "engine number". -
Page 84: Setting Sae J1939 Engine Number
Operation Manual Vantage View® PART # LIT-GA-CANB-VV-REV0617 • Setting SAE J1939 Engine Number To display data from a vehicle or vessel running multiple engines and using the SAE J1939 protocol, users must sync the Master Tach Instrument to the engine number from which it will read CAN data. The diagram below illustrates the steps to set the engine number. -
Page 85: Setting Sae J1939 Default Quick View Main Screen 1 (Total Hours Or Miles)
Operation Manual Vantage View® PART # LIT-GA-CANB-VV-REV0617 • Setting SAE J1939 Default Quick View Main Screen 1 (Total Hours or Miles) When Using the SAE J1939 protocol, users have the option to set Total Hours or Total Miles as the default Quick View Main Screen 1. -
Page 86: Figure 1-78: Setting Master Tach Instrument Instance Number
Operation Manual Vantage View® PART # LIT-GA-CANB-VV-REV0617 • Setting Master Tach Instrument Instance Number (SAE J1939) Vantage View® allows for up to four Master Tach Instruments to be connected to a single engine. This is often done when applications require a Master Tach Instrument in the cabin or at the helm as well as another location such as the engine compartment or engine room. -
Page 87: Setting Nmea 2000® Engine Number
Operation Manual Vantage View® PART # LIT-GA-CANB-VV-REV0617 • Setting NMEA 2000® Engine Number To display data from a vehicle or vessel running multiple engines and using the NMEA 2000® protocol, users must sync the Master Tach Instrument to the engine number from which it will read CAN data. The diagram below illustrates the steps to set the engine number. -
Page 88: Setting Nmea 2000® Default Quick View Main Screen 1 (Total Hours Or Miles)
Operation Manual Vantage View® PART # LIT-GA-CANB-VV-REV0617 • Setting NMEA 2000® Default Quick View Main Screen 1 (Total Hours or Miles) When using the NMEA 2000® protocol, users have the option to set Total Hours or Total Miles as the default Quick View Main Screen 1. -
Page 89: Setting Smartcraft® Engine Number
Operation Manual Vantage View® PART # LIT-GA-CANB-VV-REV0617 • Setting SmartCraft® Engine Number Figure 1-81: Setting SmartCraft® Engine Number Navigate to the Set Can Bus Menu. Main Menu-Set Can Bus. Move the selection arrow cursor to the SmartCraft option and press the Enter switch to select. -
Page 90: Saving Set Can Bus Changes
Operation Manual Vantage View® PART # LIT-GA-CANB-VV-REV0617 • Saving Set CAN Bus Changes After changing the CAN protocol configuration to read the proper engine number, instance number and/or the display of hours or miles for default Quick View Main Screen display, users must save the changes before exiting the Set CAN Bus Menu to apply the changes. -
Page 91: Analog Input Parameters Table
Operation Manual Vantage View® PART # LIT-GA-CANB-VV-REV0617 • Analog Input Parameters Table Parameter Range Analog Input LCD Display Name Block Pressure 0-200 PSI 240-33Ω/10-180Ω Block Press Boost Pressure 0-200 PSI 240-33Ω/10-180Ω Boost Press Brake Application Pressure 0-200 PSI 240-33Ω/10-180Ω Brake Appl Pr Brake Primary Pressure 0-200 PSI 240-33Ω/10-180Ω... -
Page 92: Vantage View® Implementation Of Nmea 2000® Parameters
Operation Manual Vantage View® PART # LIT-GA-CANB-VV-REV0617 • Vantage View® Implementation of NMEA 2000® Parameters Parameter Name Source Range LCD Display Name Engine RPM PGN 127488 0-10,000 RPM Engine Speed Engine Boost Pressure PGN 127488 0-400 PSI Boost Press Engine Tilt/Trim PGN 127488 0-100% Engine Trim... - Page 93 Operation Manual Vantage View® PART # LIT-GA-CANB-VV-REV0617 • Vantage View® Implementation of NMEA 2000® Parameters Parameter Name Source Range LCD Display Name Transmission Oil Temperature PGN 127493 0-500 °F Tran Oil Temp Transmission Status - Check Transmission PGN 127493 0-1 (Off-On) Trans Check Transmission Status - Over Temperature PGN 127493...
-
Page 94: Vantage View® Implementation Of Sae J1939 Parameters
Operation Manual Vantage View® PART # LIT-GA-CANB-VV-REV0617 • Vantage View® Implementation of SAE J1939 Parameters Parameter Name Range LCD Display Name Accelerator Pedal Position 1 61443 0-100% Accel Pedal % Engine Air Inlet Pressure 65270 0-72 PSI Air Inlet Prs Alternator Current 65271 0-250 Amps... - Page 95 Operation Manual Vantage View® PART # LIT-GA-CANB-VV-REV0617 • Vantage View® Implementation of SAE J1939 Parameters Parameter Name Range LCD Display Name Fire Apparatus Pump Engagement 2599 61448 0-1 (Off-On) Fire App Pump Engine Instantaneous Fuel Economy 65266 0-200 MPG Fuel Economy Fuel Level 1 65276 0-100%...
- Page 96 Operation Manual Vantage View® PART # LIT-GA-CANB-VV-REV0617 • Vantage View® Implementation of SAE J1939 Parameters Parameter Name Range LCD Display Name Tire Pressure 65268 0-140 PSI Tire Press Tire Temperature 65268 -100 - 250 ºF Tire Temp Transmission Oil Level 65272 0-100% Trans Oil Lvl...
-
Page 97: Vantage View® Implementation Of Smartcraft® Parameters
Operation Manual Vantage View® PART # LIT-GA-CANB-VV-REV0617 • Vantage View® Implementation of SmartCraft® Parameters Parameter Name Parameter Name Diesel MS Boost Pressure Gas/Diesel LS Sea Water Temperature Diesel MS Load Percent Gas/Diesel MS Boat Speed (Paddle Wheel) Gas MS Actual Gear Gas/Diesel MS Engine RPM Gas MS Fault: Water Pressure Gas/Diesel MS Fault: CAN... -
Page 98: Smartcraft® Engine Data Sensor List
Operation Manual Vantage View® PART # LIT-GA-CANB-VV-REV0617 • SmartCraft® Engine Data Sensor List 2 Stroke 4 Stroke Sterndrive Inboard Make Outbard Outboard No Troll No Troll JetDrive SternDrive Inboard (Verado) Diesel Data Item Gear Pressure Gear Temperature Intake Manifold Temp Oil Pressure Temperature Coolant... -
Page 99: Parameter Icons & Descriptions
Operation Manual Vantage View® PART # LIT-GA-CANB-VV-REV0617 • Parameter Icons & Descriptions Parameter Icon Description Parameter Icon Description Accelerator Pedal Brake Secondary Position Pressure Alternator Current Compass Heading or Voltage Altitude Crankcase Pressure Atmospheric/ Cruise Control Barometric Active Pressure Air Temperature Drive Axle (Inside) Temperature... - Page 100 Operation Manual Vantage View® PART # LIT-GA-CANB-VV-REV0617 • Parameter Icons & Descriptions Parameter Icon Description Parameter Icon Description Engine Oil Hydraulic Retarder Temperature Oil Temperature Hydraulic Retarder Engine RPM/Speed Pressure Instantaneous Fuel Fresh Water Level Economy Fuel Level Latitude Fuel Level 2 Live Well Level Fuel Pressure Longitude...
- Page 101 Operation Manual Vantage View® PART # LIT-GA-CANB-VV-REV0617 • Parameter Icons & Descriptions Parameter Icon Description Parameter Icon Description Speed, Wheel or Water Trip Fuel Based Transmission Oil Steering Angle Pressure Steering Axle Transmission Oil Temperature Temperature Turbocharger Oil Throttle Position Temperature Tire Pressure Turbocharger Speed...
-
Page 102: Menu Navigation Icon Descriptions
Operation Manual Vantage View® PART # LIT-GA-CANB-VV-REV0617 • Menu Navigation Icon Descriptions Menu Navigation Icon Description Menu Navigation Icon Description Analog to Digital Menu List Identifier Signal Source Identifier Selection Arrow No CAN Data Cursor Present Blinking Bar Cursor No CAN Data (Shown under Present number 0, zero) - Page 103 Operation Manual Vantage View ® PART # LIT-GA-CANB-VV-REV0617 · Notes © 2012...
- Page 104 Operation Manual Vantage View ® PART # LIT-GA-CANB-VV-REV0617 · Notes © 2012...
- Page 105 Livorsi Marine, Inc. 715 Center Street Grayslake, IL 60030 USA Toll Free: 877.548.5900 Office: 847.752.2700 Fax: 847.752.2415 Email: sales@livorsi.com INSTRUCTION PACKET PART # LIT-GA-CANB-VV-REV0617 www.livorsi.com...
Need help?
Do you have a question about the Vantage View NMEA 2000 VVMHN2K and is the answer not in the manual?
Questions and answers