Table of Contents
Advertisement
Fisher Engineering, 50 Gordon Drive, Rockland, ME 04841-2139 • www.fi sherplows.com
Homesteader™ PERSONAL PLOW
This snowplow is for personal/homeowner use only.
This manual supersedes all editions with an earlier date.
Owner's Manual
CAUTION
Read this document before operating or
servicing snowplow.
A SUBSIDIARY OF DOUGLAS DYNAMICS, L.L.C.
August 15, 2009
Lit. No. 48593, Rev. 00
Advertisement
Table of Contents

Related Manuals for Fisher Homesteader Personal Plow


Summary of Contents for Fisher Homesteader Personal Plow
- Page 1 Fisher Engineering, 50 Gordon Drive, Rockland, ME 04841-2139 • www.fi sherplows.com August 15, 2009 Lit. No. 48593, Rev. 00 Homesteader™ PERSONAL PLOW Owner's Manual This snowplow is for personal/homeowner use only. CAUTION Read this document before operating or servicing snowplow.
- Page 2 OWNER INFORMATION Register your snowplow online at www.fi sherplows.com Owner Name: Date Purchased: Outlet Name: Phone: Outlet Address: Vehicle Model: Year: Snowplow Type (Model): Blade Width: Weight: lb/kg Ballast: No Amount: lb/kg Hydraulic Unit Serial Number: (Located on hydraulic reservoir) Blade Serial Number: (Located on back of blade) Lit.
- Page 3 PREFACE This manual has been prepared to acquaint you with When service is necessary, bring your snowplow to the safety information, operation and maintenance of your local outlet. They know your snowplow best and your new snowplow. Please read this manual carefully are interested in your complete satisfaction.
- Page 4 Lit. No. 48593, Rev. 00 August 15, 2009...
-
Page 5: Table Of Contents
TABLE OF CONTENTS SAFETY ..............1 Snowplow Headlamp Check ....... 10 Safety Defi nitions ..........1 Aiming the Headlamps ......... 10 Warning/Caution And Instruction Labels ....1 Blade Drop Speed Adjustment ......10 Safety Precautions ..........2 Transporting Snowplow ........11 Hydraulic Safety ............ - Page 6 Lit. No. 48593, Rev. 00 August 15, 2009...
-
Page 7: Safety
SAFETY SAFETY DEFINITIONS WARNING/CAUTION AND INSTRUCTION LABELS WARNING Become familiar with and inform users about Indicates a potentially hazardous situation the warning labels on the back of the blade and the that, if not avoided, could result in death or instruction label on the headgear. -
Page 8: Safety Precautions
FUSES WARNING The driver shall keep bystanders clear of the The FISHER electrical and hydraulic systems contain ® blade when it is being raised, lowered or angled. several blade-style automotive fuses. If a problem Do not stand between the vehicle and the blade should occur and fuse replacement is necessary, or within 8 feet of a moving blade. -
Page 9: Fire And Explosion
SAFETY FIRE AND EXPLOSION NOISE WARNING Airborne noise emission during use is below 70 dB(A) for the snowplow operator. Gasoline is highly fl ammable and gasoline vapor is explosive. Never smoke while TORQUE CHART working on vehicle. Keep all open fl ames away from gasoline tank and lines. -
Page 10: Vehicle Application Information
See Ballast Requirements section. Position and secure ballast • FISHER Kit Selection Guide/eMatch is based on as close to the tailgate available vehicle capacity for snowplow equipment as possible. on a representative vehicle equipped with options commonly used for plowing and with 300 lb of front seat occupant weight. -
Page 11: Getting To Know Your Snowplow
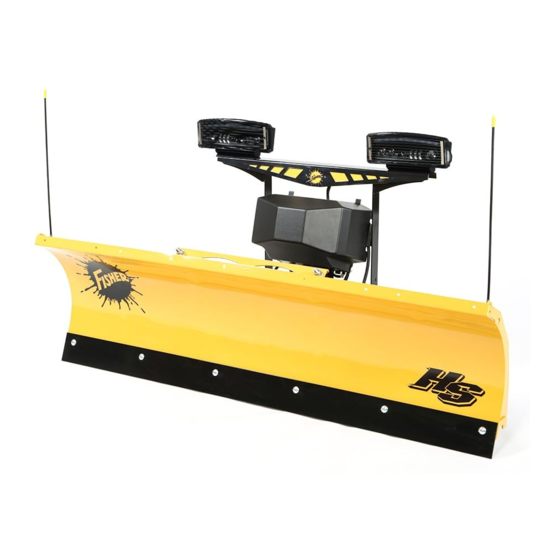
GETTING TO KNOW YOUR SNOWPLOW Snowplow Components Headlamps Hydraulic Unit Lift Plow Gear Trip Truck Mount Spring Blade Connecting Receiver Cutting A-Frame Jack Leg Assembly Edge SNOWPLOW COMPONENTS When the snowplow plugs are connected, the vehicle headlamps, when turned ON, automatically switch to the snowplow headlamps. -
Page 12: Hydraulic Unit
GETTING TO KNOW YOUR SNOWPLOW HYDRAULIC UNIT CONTROLS WARNING The Hydraulic Unit's angling gives you full control of the snowplow from within the cab. Two single-acting To prevent accidental movement of the hydraulic rams hold the blade at the desired angle. blade, always turn the ON/OFF switch to OFF whenever the snowplow is not in use. -
Page 13: Mounting Snowplow To Vehicle
MOUNTING SNOWPLOW TO VEHICLE ATTACHING SNOWPLOW 3. Twist both connecting pins to release spring tension, then push plow gear toward vehicle so connecting pins fully engage holes in attachment WARNING arms. Keep 8' clear of the blade drop zone when it is being raised, lowered or angled. -
Page 14: Operating Your Snowplow
OPERATING YOUR SNOWPLOW JOYSTICK SOLENOID CONTROL WARNING RAISE To prevent accidental movement of the blade, always move the ON/OFF switch to OFF whenever the snowplow is not in use. The control indicator light will turn off. LOWER FLOAT Power Indicato CAUTION Light (red) DO NOT hold control lever in RAISE, ANGLE... -
Page 15: Hand-Held Control
OPERATING YOUR SNOWPLOW HAND-HELD CONTROL Float Light Power Indicato (green) Light (red) FLOAT ON/OFF WARNING To prevent accidental movement of the blade, RAISE always push button to switch the control OFF ON/OFF whenever the snowplow is not in use. The Button control indicator light will turn off. -
Page 16: Snowplow Headlamp Check
OPERATING YOUR SNOWPLOW SNOWPLOW HEADLAMP CHECK BLADE DROP SPEED ADJUSTMENT WARNING With all electrical plugs connected, check the operation of vehicle and snowplow headlamps. Keep 8' clear of the blade drop zone when it is being raised, lowered or angled. Do not stand Lights Results between the vehicle and blade or directly in... -
Page 17: Transporting Snowplow
OPERATING YOUR SNOWPLOW TRANSPORTING SNOWPLOW DRIVING AND PLOWING ON SNOW AND ICE WARNING CAUTION Position blade so it does not block headlamp beam. Drinking then driving or plowing is very Do not change blade position while traveling. dangerous. Your refl ex, perceptions, You could suddenly lower blade accidentally. -
Page 18: Plowing Snow
OPERATING YOUR SNOWPLOW PLOWING SNOW Hard-Packed Snow WARNING 1. On blades equipped with a shoe kit, raise the antiwear shoes so that the cutting edge comes Never plow snow with head out the vehicle into direct contact with the pavement. window. -
Page 19: Parking With Snowplow Attached
AFTER PLOWING TRANSPORTING SNOWPLOW TOWING DISABLED OR STUCK VEHICLES These instructions are for driving short distances. Do not use any snowplow components as an attaching Remove the snowplow from the vehicle for long trips. point when retrieving, towing or winching a disabled or stuck vehicle. -
Page 20: Removing Snowplow From Vehicle & Storage
REMOVING SNOWPLOW FROM VEHICLE & STORAGE DETACHING SNOWPLOW Plow Gear WARNING Keep 8' clear of the blade drop zone when it is being raised, lowered or angled. Do not stand between the vehicle and blade or directly in front of blade. If the blade hits you or drops on you, you could be seriously injured. -
Page 21: Maintenance
MAINTENANCE AIMING HEADLAMP BEAMS e. Check functioning of any automatic vehicle leveling systems and specifi c manufacturer's instructions pertaining to vehicle preparation Torque headlamp fasteners to 45 ft-lb once correct for headlamp aiming. visual aim is achieved. Clean lenses. 1. Place vehicle on a level surface 25 feet in front of a matte-white screen, such as a garage door. -
Page 22: Preseason Check
MAINTENANCE PRESEASON CHECK POSTSEASON MAINTENANCE WARNING NOTE: Coat all electrical connections with dielectric grease. Lower blade when vehicle is parked. Keep 8' clear of blade drop zone. Temperature • Clean and paint blade and attachments as changes could change hydraulic pressure, needed. -
Page 23: Hydraulic System
fi ttings. damage. 8. Remove breather. Fill reservoir to 1-1/2"–2" from 1. Perform this operation with the snowplow attached the top with FISHER High Performance Fluid ® to the truck on a hard, level surface. to –40°F (–40°C), or other fl uid conforming to Military Specifi... -
Page 24: Hose Or Fitting Replacement
MAINTENANCE 3. To remove a hose, loosen and unscrew the hose WARNING fl are nut from the fi tting. Keep 8' clear of the blade drop zone when it is being raised, lowered, or angled. Do not stand 4. To remove a fi tting, loosen the jam nut and between the vehicle and blade or directly in unscrew the fi... -
Page 25: Vehicle
Flashlight 1/8" Allen Wrench Breather 11/16" & 3/4" Open-End Wrenches Quill 1/4" Ratchet, 6" Extension, 5/16" Socket Reservoir Electrical Tape 1 – Quart FISHER High Performance Hydraulic Fluid ® Motor Drain Plug Valve Manifold TORX ® is a registered ( ®... -
Page 26: Troubleshooting
MAINTENANCE TROUBLESHOOTING in electrical and hydraulic repair, let your sales outlet service personnel do the repairs. If your problem does not appear in this guide, contact your sales outlet. Some of the following guide corrections listed here are complicated. Unless you are very experienced Condition Possible Cause Correction... - Page 27 Lit. No. 48593, Rev. 00 August 15, 2009...
- Page 28 Fisher Engineering reserves the right under its product improvement policy to change construction or design details and furnish equipment when so altered without reference to illustrations or specifi cations used. Fisher Engineering or the vehicle manufacturer may require or recommend optional equipment for snow removal. Do not exceed vehicle ratings with a snowplow. This product is manufactured under the following US Patents: 4,999,935;...
Need help?
Do you have a question about the Homesteader Personal Plow and is the answer not in the manual?
Questions and answers
how to install new trip rubbers on Homesteader 7'4'