Advertisement
Advertisement
Table of Contents

Related Manuals for Paytec Apex 7000


Summary of Contents for Paytec Apex 7000
- Page 1 APEX 7000 MDB BILL ACCEPTOR User Guide rev. AB 02/2018...
-
Page 2: Table Of Contents
Firmware update ..............................6 Maintenance ............................... 6 Cleaning instructions ............................7 Dimensions ............................... 11 The information contained in this user guide is subject to change without prior notice and is not binding for Payment Technologies S.r.l. APEX 7000 is distributed by Paytec. -
Page 3: General Warning
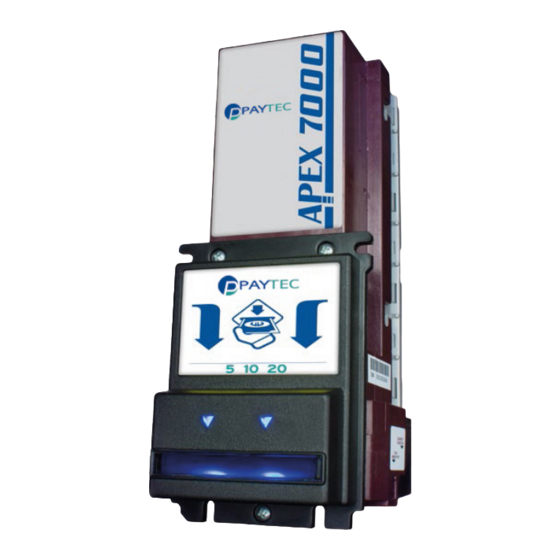
• Product overview APEX 7000 is a MDB Bill Acceptor, meeting the standards required by MDB protocol. The product is available with 200 bill- and 500 bill-stacker. The “Escrow” function enables users to get the bill back in the case of a failed vend or when no change is available. -
Page 4: Installation
Installation Apex 7000 can be configured by toggling the position of the DIP switches on the bottom of the unit. Toggle the switches to ON or OFF position to decide which bills are to be accepted and the insertion side. -
Page 5: Front Bezel Lights And Diagnostic Messages
Front bezel lights and diagnostic messages Apex 7000 has built-in diagnostic abilities. These can be accessed using the Diagnostic Pushbutton located on the bottom right side of the bill acceptor (under the label " "). DIAGNOSTIC PUSH BUTTON To enter the Diagnostic Mode, push and hold the Diagnostic Pushbutton for at least one (1) second, then release. -
Page 6: Firmware Update
Firmware update The firmware of APEX 7000 can be updated with the handheld programmer “PRO-2” (optional). Connect “PRO-2” to the 6-pole connector located on the right side of the acceptor (under the label " FLASH "). MEMORY PORT The programmer must be connected to a PC to load the correct firmware file, then disconnect PRO-2 from the PC. -
Page 7: Cleaning Instructions
Cleaning instructions Step 1: Remove the stacker from the unit being serviced as indicated here below: 1. Depress the stacker latch by pulling it towards the front of the bill acceptor 2. With the latch depressed slide the stacker up 3. - Page 8 Step 2: With the stacker removed, locate the two white plastic ball bearings located on the face of the stacker pointed in towards the validator when installed. These plastic ball bearings can get fouled with lint, paper, dust and dirt. Clean if any is present as this can cause the bearings to not make full contact with the bill or completely stop it from moving (see left).
- Page 9 Step 3: Bill path plate cleaning We recommend disconnecting all power and I/O connectors from the validator at this point. If any side connectors are still installed this could prevent you from fully removing the bottom plate without causing any damage to the validator.
- Page 10 Step 5: Cleaning internal components Directly above the plate inside the validator, there is another set four round and oval lenses that beam back and forth to each other in the bill path plate as seen in the image below. Dampen a lint free cloth with water, only enough water to pick up dust and run the cloth over all lenses and rollers until clean.
-
Page 11: Dimensions
Dimensions... - Page 12 Payment Technologies S.r.l. Via XX settembre, 49 22069 Rovellasca (CO) Italy Tel. +39 02 9696141 Fax +39 02 96961414 E-mail: info@paytec.it www.paytec.it...
Need help?
Do you have a question about the Apex 7000 and is the answer not in the manual?
Questions and answers