Table of Contents
Advertisement
Quick Links
Step 5
a)
Use the template provided to mark out the holes for the internal and external grilles.
b)
Once holes are marked, carefully cut along the marked lines with a jigsaw, keyhole saw or hacksaw.
Step 6
a)
Pull the flexible duct from the 150mm duct connectors through the internal and external vent holes.
b)
Attach inlet and outlet bells with flexible ducts using the cable ties or duct tape provided.
Step 7
a)
Swing the plasterboard clips toward the fan inlet bell
then insert the inlet bell through the hole cut in the
previous step.
b)
Tighten the plasterboard clips to lock the inlet bell into
position.
c)
Proceed to Step 8.
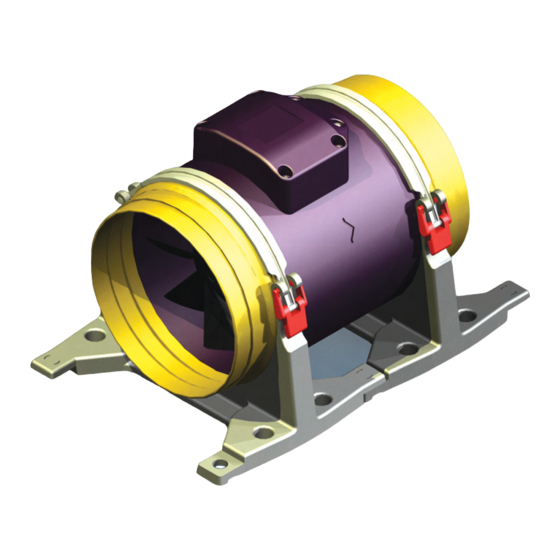
Figure 9
c)
Put the plasterboard clips back on and swing them
toward the inlet bell. Then insert the attached pieces
through the exhaust hole as shown in Figure 11.
d)
Tighten plasterboard clips to lock the inlet bell into
position. Do the same for the outlet bell.
Figure 11
Step 8
a)
Attach the internal grille and the external grille
b)
Switch power back on at the main switch and turn fan
on.
c)
Check the fan is functioning properly. If fan is speed
controlled, check all speeds operate correctly.
a)
Remove the plasterboard clips.
b)
Place the square grille adaptor plate together with the
inlet bell as shown in Figure 10.
Figure 10
MAINTENANCE
Follow the steps below to clean and maintain your HPI exhaust fan.
a)
Disconnect all power supply to the unit before attempting to clean
or maintain the unit.
b)
Removal of round grille
- remove grille by pulling outside edge of grille down and rotate.
Removal of square grille
- remove grille by sloting a butter knife between the grille and the
square adaptor plate, then gently flicking the grille to release it
from the square adaptor plate.
c)
Wash plastic parts in warm water and dry before repositioning into
unit.
d)
Ensure that the electrical components remain dry and undamaged.
Hunter Pacific International Pty Ltd
Head Office - Sydney
Customer Service Hotline: 1300 360 280
General Enquiries: +61 (02) 9658 1958
Fax: +61 (02) 9658 1952
Web: http://www.hunterpacific.com.au
ABN: 18 063 521 666
PLEASE READ THIS IMPORTANT WARRANTY INFORMATION
NOTE: Fixed wiring must only be installed by persons appropriately licensed by the applicable State regulatory body.
WARRANTY
1.
For a period of 3 years Hunter Pacific International warrants this
product to be free from defects in material and workmanship.
Warranty period commences from the date of sale to the end
user. The warranty form must be completed in full and retained
together with the purchase receipt.
2.
The following conditions and exclusions do not limit or remove
any rights the purchaser has under the Trade Practices Act or
similar State or Territory laws.
3.
Faulty product will be repaired or replaced at the discretion of
Hunter Pacific International. Items repaired or replaced under
warranty inherit the balance of the warranty period applying to
the original product.
4.
This warranty is only applicable within Australia.
For safety, and to protect your warranty, the following must be taken
into account when installing and operating the product(s):
1.
Mounting bracket must be firmly screwed to a solid structure
such as concrete, steel or timber framing. If additional bracing
is added it must be firmly secured to the rafters and not left
floating on the ceiling.
2.
Vibration damping (if required) must be installed between the
mounting bracket and supporting surface. Vibration of supports
and other structures may occur unless suitable damping is fitted.
Trouble shooting of vibration or resonance issues is not covered
by warranty.
3.
Supervise the use of these products by children and the infirm.
NATIONAL WARRANTY HOT LINE 1300 360 280
All wiring must be carried out by a licensed electrician according to the installation instructions.
3
Designed &
Engineered
Do not use solid-state wall controllers.
in Australia
Year
Please read the installation and warranty manual carefully prior to the installation of this product.
WARNING
WARRANTY LIMITATIONS AND EXCLUSIONS
1.
Hunter Pacific International products are for domestic use only
and not for use with hazardous substances or ventilation of
confined spaces for OH&S purposes. No warranty of fitness for
purpose is expressed or implied other than for ordinary domestic
duty.
2.
Do not use solid-state wall controllers. Neither leading nor
lagging edge controllers will give satisfactory performance. Use
of solid-state speed controllers will void the warranty.
3.
The liability of Hunter Pacific International is strictly limited to
the repair or replacement of faulty product only (or the actual
cost thereof) and excludes consequential damage or costs
directly or indirectly related to the use of the product.
4.
Warranty will be voided should the appliance be modified or
installed other than in accordance with the installation
instructions.
5.
Damage caused by incorrect installation or maintenance, force-
majeure, electrical surges, lightning, power grid fluctuations,
water or by connection to alternative power supply sources (such
as generators, solar inverters, etc.) is not eligible for warranty
repair.
6.
Warranty does not cover normal maintenance, such as cleaning
and periodic tightening of detachable parts.
7.
Noise caused by signals carried over the power grid is not
covered under warranty. Such signals are commonly used for
control of pumping stations, lighting and off-peak hot water
heating. Presence of this noise is not an indication of a product
fault. Optional filters are available at extra cost to reduce this
noise.
V 5 00i
Advertisement
Table of Contents

Related Manuals for Hunter Pacific VortX V500i


Summary of Contents for Hunter Pacific VortX V500i
- Page 1 WARRANTY LIMITATIONS AND EXCLUSIONS Step 6 For a period of 3 years Hunter Pacific International warrants this Hunter Pacific International products are for domestic use only Pull the flexible duct from the 150mm duct connectors through the internal and external vent holes.
- Page 2 Step 1 Step 2 PREPARATION Interlock the 2 mounting bracket pieces together into Secure the mounting bracket using the screws provided Seal ducting and adaptors with duct tape to reduce air leakage. Check the intended location will not interfere with previously one piece as shown in Figure 1.
Need help?
Do you have a question about the VortX V500i and is the answer not in the manual?
Questions and answers