Advertisement
Quick Links
FLUE INSTALLATION
Once the heater and hearth are positioned correctly and bolted down, install the flue as described in the Manufacturer's
Instructions included in the flue kit. It is very important for safety that the instructions are followed correctly and no parts are
omitted or altered. Once all components are correctly installed, your heater is ready for use. On initial light up, the presence of
smoke may be noticed. This is normal and will dissipate quickly. DO NOT BURN YOUR HEATER TOO QUICKLY TO BEGIN WITH. Allow
several small fires to build up a layer of ash in the heater, and cure the paint before using maximum power.
FOR MORE INFORMATION, REFER TO THE INSTALLATION INSTRUCTIONS INCLUDED WITH THE FLUE KIT.
SPARE PARTS
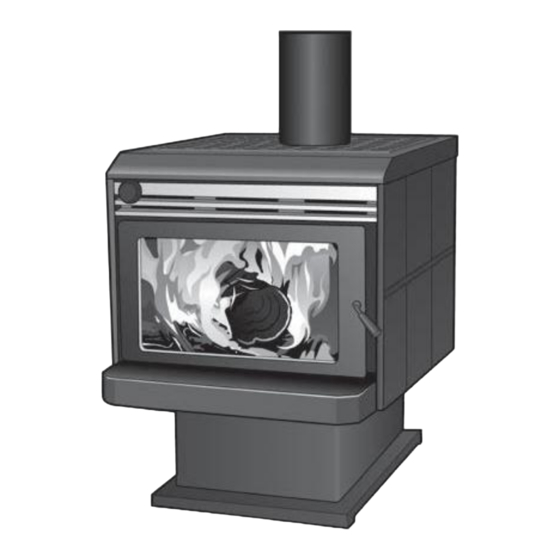
Certain parts of the Tilefire will require periodic replacement in normal use. These parts include the baffle plate and air tube, the
door rope and glass seal, firebricks and control knobs and handles. Because we have no control over the conditions of use of
the heater, we cannot say how long these parts may last. Replacement parts may be purchased from your Kent dealer. To
ensure the correct parts are ordered, please refer to the parts diagram (Refer Fig. 10), and advise the dealer of the date of
purchase and serial number of the Tilefire. The serial number is located on the identification plate on the back panel of the
panels, For enamelled panels, please also advise the colour of the panels required.
TILEFIRE PARTS DIAGRAM
Single Storey Flue Install
7005
7006
Kent Standard
Kent Energy Saver
Flue kit
Flue kit
Fig 10
Second Storey Flue Install
STANDARD
INSTALLATION
(Non-Clean Air Model)
GENERAL INFORMATION
The Tilefire Freestanding Wood Heater, when installed according to these instructions, complies with the provisions of AS/NZS 2918-
1.
2001 Appendix B - "Thermal Testing of Installation Clearances".
You must obtain a Building Consent from your Local Authority before installing this heater, and we suggest that your Insurance
2.
Company be advised of the installation.
Do not allow any makeshift compromise installation methods. This could result in a house fire. The Tilefire must be installed
3.
according to these instructions. We suggest that a New Zealand Home Heating Association-registered installer be used for installing
the appliance.
The clearances given in these instructions are necessary to prevent overheating of nearby combustibles and drying out of the
4.
house structure. They may not be reduced without authorisation.
There must be a clearance of at least 1 metre between the front of the Tilefire and any building structure or other substantial
5.
immovable object in front of the heater.
PRIOR TO INSTALLATION
1.
The minimum requirements for installing your Kent heater are an assembled heater, a hearth, a flue kit and material for flashing the
roof penetration.
2.
Select the location for the heater, bearing in mind the clearances required (Refer Table 1 and Fig 1 on next page).
3.
Check the proposed route of the flue to ensure it is clear of roof trusses and rafters in the ceiling space or other obstructions. We
recommend that the flue is vertical and without elbows or bends if possible, and installed strictly in accordance with the
manufacturer's installation instructions. Oversize flues may reduce the performance of the heater and should not be used.
4.
The Tilefire requires up to 40 cu.m/h of fresh air for burning, and this must come from outside the house. A normal house will allow
enough air in through incidental openings to satisfy this. We recommend that a source of air be located near the heater for best
performance. This can be a window that is left ajar while the heater is in use. If this is not possible, and the house is particularly
air-tight, a vent may need to be installed next to the heater to provide the air required. Lack of air will lead to a heater that is hard
to light and get going, or in bad cases, to smoke spilling back into the room. This situation can also lead to excessive carbon
monoxide levels through incomplete combustion.
Tilefire
Model No. KWF296-6068
665
Distributed by:
Aber, Hamilton, NZ
www.aber.co.nz
3634-03/14
Advertisement

Summary of Contents for KENT Tilefire KWF296-6068
- Page 1 PRIOR TO INSTALLATION The minimum requirements for installing your Kent heater are an assembled heater, a hearth, a flue kit and material for flashing the roof penetration. Select the location for the heater, bearing in mind the clearances required (Refer Table 1 and Fig 1 on next page).
- Page 2 SEISMIC RESTRAINT FLUE SYSTEMS The heater must be restrained against movement due to earthquakes. The Tilefire is restrained by fixing the heater to the floor with The flue system should be vertical and without bends. If an offset is required, it should be as close to the heater as practicable and two bolts of 6mm diameter through the holes provided in the plinth base, through the hearth and floor and fixed with heavy should not be offset more than 500mm from the centreline of the flue stub.


Need help?
Do you have a question about the Tilefire KWF296-6068 and is the answer not in the manual?
Questions and answers