
Related Manuals for Albrecht DR 463


Summary of Contents for Albrecht DR 463
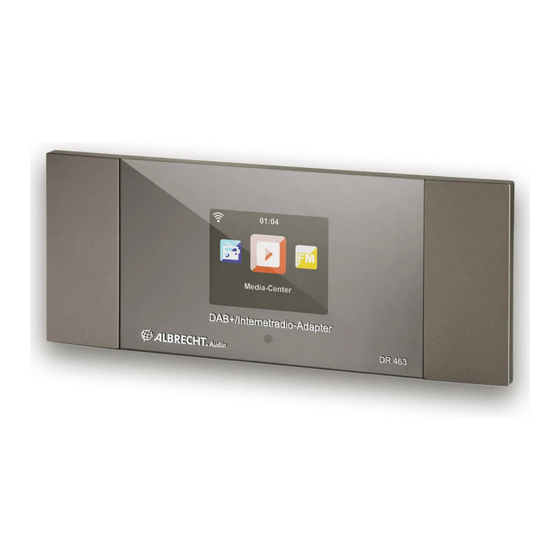
- Page 1 ALBRECHT DR 463 Internet-Radio/DAB+/UKW Adapter mit Bluetooth Bedienungsanleitung / Manual Deutsch / English / Français / Italiano...
-
Page 2: Table Of Contents
Inhaltsverzeichnis 1. Lieferumfang..................................... 3 2. Bedienelemente und Anschlüsse ..............................3 2.1. Vorderseite ....................................3 2.2. Rückseite ....................................4 2.3. Fernbedienung ..................................4 3. Erste Schritte ....................................5 3.1. Netzwerkanforderungen ................................5 3.2. Netzwerk vorbereiten ................................5 3.3. Navigation durch Menüs ................................5 3.4. -
Page 3: Lieferumfang
6. Wurfantenne 7. IEC-Antennenadapter 2. Bedienelemente und Anschlüsse Nehmen Sie sich bitte etwas Zeit, um sich mit den Funktionen des DR 463 vertraut zu machen, nachdem Sie es aus der Verpackung genommen haben. 2.1. Vorderseite Ihr DR 463 hat keine Tasten am Gerät selbst. Durch die einfache und benutzerfreundliche Menüführung können alle Funktionen des Radios per mitgelieferter Fernbedienung gesteuert... -
Page 4: Rückseite
2.2. Rückseite Die Anschlüsse dieses Modells sind: • Line-Out: 2 x Cinch (Stereo) • DC-Eingang: für Netzteil • Antennenanschluß: 3,5 mm Klinkenstecker 2.3. Fernbedienung Ein/Aus Gerät ein- und ausschalten (Standby) Favoritenliste anzeigen Favoriten Lange drücken: Favoriten speichern Aufwärts durch Menüpunkte scrollen ▲... -
Page 5: Erste Schritte
Netzwerkgerät. ● Das Netzwerkgerät muss WLAN (802.11b/g/n) Drahtlosverbindung unterstützen. ● Wenn das DR 463 per DLNA fernbedient werden soll, benötigen Sie einen PC oder Smartphone mit Verbindung zu dem gleichen Netzwerk wie das DR 463. 3.2. Netzwerk vorbereiten • Eine WLAN-Verbindung stellen Sie wie folgt her: •... -
Page 6: Anschluß An Ein Audiosystem
Audiosystem (z.B. Stereoanlage, externer Lautsprecher, etc.). 3.5. Inbetriebnahme Schließen Sie das Netzteil auf der Rückseite des DR 463 an und verbinden Sie den Netzstecker mit einer Steckdose. Verbinden Sie die mitgelieferte Antenne mit dem Antenneneingang auf der Rückseite. Alternativ verbinden Sie Ihre Antennenanlage/ Zimmerantenne mit dem mitgelieferten Antennenadapter. -
Page 7: Airmusic Control App
Sie ◄, um zum vorherigen Eintrag zu navigieren. 3.6. AirMusic Control App Das DR 463 kann mit einem Smartphone via WLAN gesteuert werden. Wir empfehlen dafür die App „AirMusic Control“. Neben der Steuerung des Radios, können mittels der App auch Musikdateien des Smartphones auf dem DR 463 wiedergegeben werden. -
Page 8: Hauptmenü
4. Hauptmenü Im Hauptmenü können Sie folgende Betriebsmodi wählen: Internet Radio, Media-Center, FM (UKW), DAB, Informations-Center, Bluetooth, Einstellungen, Lokale Stationen und My mediaU (falls aktiviert, siehe Kapitel „12.2. My mediaU verwalten“ auf Seite 16). 5. Internetradio Um in den Internetradio-Modus zu gelangen drücken Sie die Taste und wählen Sie Internet Radio aus. -
Page 9: Sender/Musik
5.2. Sender/Musik Sender sind nach Weltweite Top 20, Genre und Land/Region kategorisiert. In den Unterkategorien wählen Sie den Sender, den Sie hören möchten. Drücken Sie OK, um einen Sender direkt zu hören. Alternativ drücken Sie ► zum Aufrufen des Untermenüs – hier stehen Ihnen Zu Favoriten hinzufügen, Auto Scannen oder Wiedergabe zur Verfügung. -
Page 10: My Mediau
Sie über My mediaU. Bei Aktivierung wird My mediaU im Hauptmenü angezeigt. Bestehen mehrere mediaU Konten für das DR 463, so wählen Sie das Standardkonto aus, mit dem Sie sich einloggen möchten. Im Kapitel 12.2 My mediaU verwalten fi nden Sie weitere Informationen zur mediaU Kontoeinrichtung. -
Page 11: Dab/Dab+ Radio
Signalstärke und damit die beste Tonqualität erreicht wird. Das Symbol oben links auf dem Display zeigt die Stärke des empfangenen Sendesignals an. 7.1. Scannen nach DAB-Sendern Wenn Sie den DAB-Radio-Modus das erste Mal auswählen führt das DR 463 automatisch einen vollständigen Scan nach verfügbaren Radiosendern durch. 08:00 AM Scanning... -
Page 12: Media-Center
Auf UPnP Server kann vom DR 463 zugegriffen werden und deren Musik wiedergegeben werden. Die Steuerung und Navigation wird hierbei vom DR 463 vorgenommen. Mittels DLNA kann die Wiedergabe z.B. auf einem PC gestartet werden und das DR 463 wird lediglich als Wiedergabegerät ausgewählt. -
Page 13: Dlna
Sie Bluetooth. Aktivieren Sie danach Bluetooth auf Ihrem mobilen Gerät (z.B. Smartphone, Tablet, etc.), suchen Sie nach aktiven Geräten und verbinden Sie das DR 463. Ist das Radio erfolgreich verbunden kann nun Musik zum DR 463 gestreamt werden. Deutsch... -
Page 14: Fm (Ukw) Radio
10. FM (UKW) Radio Der UKW-Radiomodus empfängt Analogradio im UKW-Band und zeigt Informationen vom Sender, falls diese per RDS gesendet werden. Für die beste Wiedergabequalität muss die Antenne so ausgerichtet werden, dass auf dem Display die größte Signalstärke und damit die beste Tonqualität erreicht wird. -
Page 15: Informations-Center
11. Informations-Center 11.1. Wetter-Informationen Es stehen Wetterinformationen und Vorhersagen für über 5000 Städte zur Verfügung. Wählen Sie das Land und dann die Stadt aus. Drücken Sie◄/►, um die Wettervorhersage anzuzeigen. Wetterinformationen können im Stand-by-Modus angezeigt werden. Auf der Wetterinformationsseite drücken Sie OK, um die Stadt im Stand-by-Modus anzuzeigen. Dann schalten Sie die Wetteranzeige ein, wie in Kapitel 12.13 Wetter beschrieben. -
Page 16: Einstellungen
Bei Aktivierung wird dem Hauptmenü der Menüpunkt „My mediaU“ hinzugefügt. Bestehen mehrere mediaU Konten für das DR 463, so wählen Sie das Standardkonto aus, mit dem Sie sich einloggen möchten. Im Kapitel 6 My mediaU fi nden Sie weitere Informationen zur mediaU Kontoeinrichtung. -
Page 17: Netzwerk
12.3. Netzwerk 12.3.1. Funknetz-Einstellung Mit diesem Menüpunkt starten Sie den automatischen WLAN Einrichtungsassistenten. Der Assistent beginnt mit einem Scan nach verfügbaren WLAN-Netzwerken Wählen Sie den gewünschten Zugangspunkt. Geben Sie den Netzwerkschlüssel zur Verbindung mit dem WLAN ein. Bei Fehleingabe drücken Sie ◄ zum Korrigieren. Deutsch... -
Page 18: Datum & Uhrzeit
WPS-Funktion einstellen. Rufen Sie die Funktion auf und drücken Sie die WPS/ QSS-Taste auf Ihrem Router innerhalb von 120 Sekunden. Die Verbindung zwischen dem Router und dem DR 463 wird dann automatisch konfi guriert. 12.3.3. Manuelle Konfi guration Wählen Sie DHCP (mit automatischer IP-Zuordnung) oder geben Sie die IP-Adresse für die... -
Page 19: Wecker
• Stellen Sie das Zeitformat als 12 Stunden oder 24 Stunden (Standard) ein. • Stellen Sie das Datumformat für YY (Jahr), MM (Monat) und DD (Tag) – YY/MM/DD, DD/MM/ YY (Standard) oder MM/DD/YY ein. • Aktivieren/deaktivieren (Standard) Sie Sommer-/Winterzeit (DST) - nur bei Manuell verfügbar. Bei verbundenem Drahtlosnetzwerk ist GMT (+00:00) eine Zeitreferenz für die Uhrzeiteinstellung. -
Page 20: Timer
12.6. Timer Über die Pfeiltasten ◄/► können Sie den Timer in Sekundenschritten einstellen. OK startet und unterbricht den Timer im Menü. Der Timer zählt rückwärts und piept, wenn er 00:00 erreicht hat. Jede Taste beendet den Alarm. Bei laufendem Timer kann man den Modus wechseln, die verbleibende Zeit wird dann oben rechts im Display angezeigt. -
Page 21: Anzeige
Ein Bettsymbol mit den verbleibenden Minuten wird oben rechts im Display angezeigt. Nach dem Ablauf der eingestellten Zeit schaltet sich das DR 463 automatisch ab. Drücken Sie Sleeptimer auf der Fernbedienung, um diese Funktion direkt aufzurufen. Langes Drücken der Taste ruft das Schlafradio auf, siehe Kapitel 5.4 Schlafradio... -
Page 22: Zwischenspeicher
Musikwiedergabe auf 2/4/8 Sekunden einstellen. 12.13. Wetter Das DR 463 kann im Stand-by-Modus aktuelle Wetterinformationen anzeigen. Schalten Sie Anzeigen bei Standby ein und stellen Sie die Temperatureinheit (°C oder °F) ein, um im Standby- Modus das Wetter für Ihre Region (siehe Abschnitt 11.1 Wetter-Informationen ) angezeigt zu bekommen. -
Page 23: Wiedergabe-Einstellung
- Wiederholen eins: wiederholt nur den gewählten Titel. - Zufällig: spielt die Titel in zufälliger Reihenfolge ab. 12.17. Gerät (DLNA-Einstellung) Unter Umbenennen kann der Standard-Gerätename „ALBRECHT DR 463“ geändert (DLNA- Einstellung) werden. Der Menüpunkt AirMusic Control App zeigt Ihnen die QR-Codes für Android und iOS . -
Page 24: Equalizer
Aktualisierung der Software. Befi ndet sich eine aktualisierte Softwareversion auf dem Server, so benachrichtigt Sie das System bei Rückkehr in das Hauptmenü. 12.23. Auf Werkseinstellung zurücksetzen Nach der Rücksetzung des DR 463 startet automatisch der Einrichtungsassistent wie bei der ersten Verwendung des Gerätes. Sie müssen erneut alle Einstellungen vornehmen. Deutsch... -
Page 25: Fehlerbehebung
13. Fehlerbehebung Fehler Abhilfe Das Gerät schaltet sich nicht ein. 1. Überprüfen Sie, ob das Netzteil korrekt angeschlossen ist. Das Gerät zeigt Fehlfunktionen, wenn es in Bereichen mit starken Funkstörungen verwendet wird. Das Gerät arbeitet wieder normal, sobald die Funkstörungen nicht mehr vorliegen. -
Page 26: Technische Daten
Aufgrund der Lautstärke-Einstellung lesen Sie die Lösungen von „Kein Ton“. DLNA-Streaming ist nicht möglich. 1. Überprüfen Sie die Netzwerkverbindung. Das DR 463 und Ihr Gerät müssen sich auf dem gleichen Netzwerk befinden; vergewissern Sie sich, dass das Netzwerk in Ordnung ist. -
Page 27: Wichtige Sicherheitshinweise
15. Wichtige Sicherheitshinweise ZUR VERMEIDUNG VON BRAND- ODER STROMSCHLAGGEFAHR BENUTZEN SIE DIESES GERÄT BITTE NICHT MIT VERLÄNGERUNGSKABELN ODER STECKDOSEN, BEI DENEN DER STECKER NICHT VOLLSTÄNDIG EINGEFÜHRT WERDEN KANN. ZUR VERMEIDUNG VON BRAND- ODER STROMSCHLAGGEFAHR DARF DIESES GERÄT WEDER REGEN NOCH FEUCHTIGKEIT AUSGESETZT WERDEN. -
Page 28: Gewährleistungs- Und Recyclinginformationen
Bevor Sie bei einem Problem ein vermeintlich defektes Gerät zurückschicken, können Sie Zeit und Versandkosten sparen, indem Sie sich per Hotline helfen lassen. Konformitätserklärung Hiermit erklärt Alan Electronics GmbH, dass der Funkanlagentyp DR 463 der Richtlinie 2014/53/EU entspricht. Der vollständige Text der EU-Konformitätserklärung ist unter der folgenden Internetadresse verfügbar: www.alan-electronics.de Gehen Sie zu Downloads/Konformitätserklärungen und wählen Sie das entsprechende... - Page 29 ALBRECHT DR 463 Internet Radio/DAB+/FM Adapter with Bluetooth Instruction Manual English...
- Page 30 Table of Contents 1. Product contents..................................... 31 2. Controls and connections ................................31 2.1. Frontside ....................................31 2.2. Backside ....................................32 2.3. Remote control ..................................32 3. First steps .......................................33 3.1. Network requirements ................................33 3.2. Preparing the network ................................33 3.3.
-
Page 31: Product Contents
6. Cable antenna 7. IEC antenna adapter 2. Controls and connections Please take some time to familiarise yourself with the functions of the DR 463 after you have taken it out of the box. 2.1. Frontside Your DR 463 has no buttons on the device itself. Thanks to the simple and user-friendly menu navigation, all functions of the radio can be controlled via the supplied remote control. -
Page 32: Backside
2.2. Backside The connections of this model are: • Line-Out: 2 x RCA (stereo) • DC input: for mains adapter • Antenna connection: 3.5 mm jack plug 2.3. Remote control On/Off Switch device on and off (standby) Show favourites list Favourites Long press: Save favourites Scroll up through menu... -
Page 33: First Steps
The network device must support WLAN (802.11b/g/n) wireless connection. ● If you want to remotely control the DR 463 via DLNA, you will need a PC or smartphone connected to the same network as the DR 463. 3.2. Preparing the network •... -
Page 34: Connecting To An Audio System
RCA audio cable. 3.5. Getting started Connect the mains adapter to the back of the DR 463 and connect the mains plug to an electrical outlet. Connect the supplied antenna to the antenna input on the back. Alternatively, connect your antenna system/indoor antenna with the supplied antenna adapter. -
Page 35: Airmusic Control App
Control App. Additionally to controlling the radio, the app is able to play the smartphone’s music fi les on the DR 463. Due to frequent updates of the app the manual is only available online. Please visit www.alan-electronics.de and enter the article number 27463 into the search. You will fi nd the DR 463 product page. -
Page 36: Main Menu
4. Main menu In the main menu you can select the following modes: Internet Radio, Media Center, FM, DAB+, Information Center, Confi guration and My mediaU (if activated, see chapter 6 My mediaU ). 5. Internetradio The DAB radio mode receives DAB/DAB+ digital radio and displays information about the station. To switch to Internetradio-mode, press , select Internet Radio and confi rm with OK. -
Page 37: Station/Music
5.2. Station/music Stations are categorized into Global Top 20, Genre and Country/Location. Enter to continue the subcategories and choose a station to listen. For each station, press OK to play directly. You may press ► to enter its submenu – you can Add to Favorite, Auto Scan or Play. -
Page 38: My Mediau
If enabled, My mediaU is displayed in the main menu. If there are several mediaU accounts for the DR 463, select the default account with which you want to log in. See Chapter 12.2 Manage my mediaU for more information about mediaU account setup. -
Page 39: Dab/Dab+ Radio
The icon at the top left of the display shows the strength of the received transmission signal. 7.1. Scanning for stations The first time you select DAB radio mode the DR 463 automatically performs a full scan to see what stations are available. 08:00 AM Scanning... -
Page 40: Media Centre
The UPnP server can be accessed from the DR 463 and its music will be played back. Control and navigation are done by the DR 463. With DLNA, playback can be started on a PC, for example, and the DR 463 is only selected as a playback device. -
Page 41: Dlna
You can delete all tracks from the playlist 8.2. DLNA The default device name for DLNA is "ALBRECHT DR 463". Alternatively, you can customise the name individually (see Section 12.17 DLNA-Setup ). See Chapter 8.1 UPnP for information on how to set up media streaming from your PC or other media servers. -
Page 42: Fm Radio
10. FM radio The FM radio mode receives analogue radio in the FM band and displays information from the station if it is sent via RDS. For the best playback quality, the antenna must be aligned in such a way that the highest signal strength and thus the best sound quality are achieved on the display. The icon at the top left of the display shows the strength of the transmission signal received from the device. -
Page 43: Information Centre
11. Information centre 11.1. Weather Information There are weather information and forecasts for over 5000 cities. Select the country and then the city for the weather details. Press ◄/► to see the weather forecasts. It is able to display the weather information on the standby mode. On the weather information page, press OK to set the city to displaying on the standby mode. -
Page 44: Settings
When it is enabled, My mediaU will be shown in the main menu. If various mediaU accounts exist in the DR 463, Select the default login account in here. Refer to chapter 11 for more information of mediaU account setup. -
Page 45: Network
12.3. Network 12.3.1. Wireless Network Confi guration Enable / disable WiFi network. When you enable the WiFi network, the system will automatically connect to the network Select your required AP. Enter WEP or WPA code to connect the WiFi. If you would like to change/correct an entry , press ◄ to correct. English... -
Page 46: Date & Time
If you are using a router with WPS/QSS button, you may set up the network connection simple via WPS function. Enter it and go to press the WPS/QSS button on your router within 120 seconds. The connection between the router and the DR 463 will then be confi gured automatically. 12.3.3. Manual Confi guration You can choose DHPC (which IP assigned automatically) or manually input IP address for wireless network connection. -
Page 47: Alarm
• Set time format display as 12 Hour or 24 Hour (default). Only for manual setup required. • Set date format in the positions of YY (year), MM (month) and DD (day) – YY/MM/DD, (default) or MM/DD/YY. • Turn on/off (default) the Daylight Saving Time (DST).Available only on manual setup With a wireless network connected, GMT (+00:00) time is a time reference of time setting. -
Page 48: Timer
12.6. Timer Press ◄/► to set the timer, press OK to start. The timer will count down and beep sound when it reaches 00:00. To cancel the timer, enter the timer screen and press OK again. When the timer is running, you can change the mode, the remaining time is then displayed in the top right of the display. -
Page 49: Display
Turn off or set the sleep time to 15/30/60/90/120/150/180 minutes. Once the time is set, there will be a bed icon with remaining minutes at the top right corner. The DR 463 will shut down once the time runs out. Press Sleep on the remote control for the shortcut of this function. Pressing and holding the button calls up the sleep radio, see Chapter 5.4 Sleep radio... -
Page 50: Buffer Memory
Confi gure the buffer time of the music playback, 2/4/8 seconds. 12.13. Weather DR 463 is able to display current weather information under standby mode. Turn on Show on Standby and set Temperature Unit (°C or °F) to get the weather displayed at the standby mode. -
Page 51: Playback Setup
Select the playback mode of media center – Off (no repeat or shuffl e), Repeat all, Repeat one, or Shuffl e. 12.17. DLNA-Setup The default device name for DLNA is ALBRECHT DR 463. You may rename it for DLNA setup on the PC or mobile. 12.18. Button The function of the Mode button can be programmed. -
Page 52: Equalizer
12.23. Factory Reset Restore the default settings. After DR 463 is reset, the system will move to Language setting menu. And it will automatically turn to Network setting menu once the OSD language is selected English... -
Page 53: Troubleshooting
13. Troubleshooting Error Remedy The device does not switch on. Check if the power adaptor is connected properly. The device may malfunction when used in areas with strong radio interference. The device will work properly again once there is no more interference. No sound 1. -
Page 54: Specifications
Error Remedy Unable to do DLNA streaming. Check the connection of the network. DR 463 and your device need to be in the same network; and test if the network in good condition. Make sure the settings on your device are correct. -
Page 55: Important Safety Notes
15. Important Safety Notes TO PREVENT FIRE OR SHOCK HAZARD, DO NOT USE THIS PLUG WITH AN EX- TENSION CORD, RECEPTACLE OR OTHER OUTLET UNLESS THE BLADES CAN BE FULLY INSERTED TO PREVENT BLADE EXPOSURE. TO PREVENT FIRE OR SHOCK HAZARD, DO NOT EXPOSE THIS APPLIANCE TO RAIN OR MOISTURE. CAUTION RISK OF ELECTRIC SHOCK DO NOT OPEN... -
Page 56: Warranty And Recycling Information
Service@alan-electronics.de Declaration of Conformity Hereby, Alan Electronics GmbH declares that the radio equipment type DR 463 is in compliance with Directive 2014/53/EU. The full text of the EU declaration of conformity is available at the following internet address: www.alan-electronics.de Printing errors reserved. - Page 57 ALBRECHT DR 463 Adaptateur radio Internet/DAB+/FM avec Bluetooth Mode d’emploi Français...
- Page 58 Table des matières 1. Contenu d’emballage............................59 2. Commandes et branchements ......................... 59 2.1. Partie avant ............................... 59 2.2. Partie arrière ............................. 60 2.3. Télécommande ............................60 3. Première étape ..............................61 3.1. Exigences relatives au réseau ........................61 3.2. Préparation du réseau ..........................61 3.3.
-
Page 59: Contenu D'emballage
6. Antenne 7. Adaptateur d’antenne IEC 2. Commandes et branchements Veuillez prendre le temps de vous familiariser avec les fonctions du DR 463 après l’avoir retiré de son emballage. 2.1. Partie avant Votre DR 463 ne dispose d'aucun bouton. Grâce à la navigation simple et conviviale entre les menus, toutes les fonctions radio peuvent être commandées à... -
Page 60: Partie Arrière
2.2. Partie arrière Les branchements de ce modèle sont : • Line-Out : 2 x Cinch (stéréo) • Entrée CC : pour le bloc d’alimentation • Branchement de l’antenne : Prise Jack 3,5 mm 2.3. Télécommande Mettre l’appareil sous tension et hors Marche/Arrêt tension (veille) Affi cher la liste des favoris... -
Page 61: Première Étape
Le périphérique réseau doit prendre en charge la connexion sans fi l WLAN (802.11 b/g/n) ; ● Si le DR 463 doit être commandé à distance via DLNA, il vous faudra un PC ou un smartphone connecté au même réseau que le DR 463. -
Page 62: Connexion À Un Système Audio
à l’aide du câble audio Cinch (RCA) fourni. 3.5. Mise en marche Raccordez le bloc d’alimentation à l’arrière du DR 463 et branchez la fi che d’alimentation à une prise murale. Branchez l’antenne fournie à l’entrée d’antenne sur le panneau arrière. Vous pouvez également brancher votre antenne/antenne intérieure à... -
Page 63: Airmusic Control App
à l’écran. • Si vous avez déjà confi guré la connexion réseau et que vous utilisez à nouveau le DR 463 dans le réseau, la connexion s’établit automatiquement. Si vous souhaitez changer de réseau, allez à... -
Page 64: Menu Principal
4. Menu principal Dans le menu principal, vous pouvez sélectionner les modes suivants: Radio Internet, Media Center, FM, DAB+, Centre d‘information, Bluetooth, Station locales, confi guration es Mes mediaU. 5. Internetradio Une fois la connexion à une station est réussie, le débit binaire et le format de la station seront affi chés sur l‘écran. -
Page 65: Veille Radio
continuer dans les sous-catégories et choisir la station à écouter. Pour chaque station, appuyez sur OK pour l‘écouter directement. Vous pouvez appuyer sur ► pour accéder au sous-menu ; vous pouvez Add to Favorite, Auto Scan ou Play. Lorsque vous choisissez Auto Scan, la radio présente chaque station de la liste en vous la faisant pendant 30 secondes. -
Page 66: My Mediau (Mes Mediau)
Se joindre à Mes mediaU Se connecter au site Web Entrez les adresses MAC sans fi l de la DR 463 sur le site mediaU. Ces informations peuvent être obtenues par Information Center > System Information > Wireless Info Si la confi guration est correcte, vous pouvez enregistrer et affi cher vos propres listes de stations mediaU. -
Page 67: Radio Dab/Dab
7.1. Recherche de stations La première fois que vous sélectionnez le mode radio DAB, la radio DR 463 effectue automatiquement une recherche complète de toutes les stations disponibles. 08:00 AM Scanning... -
Page 68: Media-Center
8. Media-Center Avec le DR 463 vous pouvez lire vos fi chiers musicaux via UPnP ou DLNA. La différence entre les deux techniques de lecture réside dans le sens de l’accessibilité. Le DR 463 permet d'accéder au serveur UPnP et de lire sa musique. La commande et la navigation sont ainsi assurées par le DR 463. -
Page 69: Dlna
Bluetooth. Activez ensuite Bluetooth sur votre appareil mobile (par ex. smartphone, tablette, etc.), recherchez les appareils actifs et connectez le DR 463. Si la radio est correctement connectée, la musique peut à présent être transmise au DR 463. Français... -
Page 70: Radio Fm
10. Radio FM Le mode radio FM reçoit la radio analogique en bande FM et affi che les informations du canal si celles-ci sont transmises via RDS. Pour obtenir une qualité de transmission optimale, l’antenne doit être positionnée de sorte que l’écran affi che la plus grande Intensité du signal avec la meilleure qualité... -
Page 71: Centre D'information
11. Centre d’information 11.1. Informations météo Des informations et des prévisions météo sont données pour 5000 villes. Sélectionnez le pays puis la ville pour en obtenir des détails sur la météo. Appuyez sur ◄/► pour voir les prévisions météo. Les informations météo peuvent être affi chées en mode veille. Sur la page des informations météo, appuyez sur OK pour choisir la ville à... -
Page 72: Configuration
Lorsqu‘il est activé, Mon mediaU sera affi ché dans le menu principal. Si la DR 463 contient plusieurs comptes mediaU, sélectionnez ici le compte de connexion par défaut. Pour plus d‘informations sur la confi guration d‘un compte mediaU, jetez un coup d‘œil au chapitre Mon mediaU. -
Page 73: Réseau
12.3. Réseau 12.3.1. Confi guration du réseau sans fi l Activer/désactiver le réseau WiFi. Lorsque vous activez réseau Wi-Fi, le système se connecte automatiquement au réseau Sélectionnez un point d‘accès. Entrez le code WEP ou WPA pour se connecter au WiFi. En cas d‘erreur d‘entrée de caractères, utilisez les touches ►... -
Page 74: Date Et Heure
Si vous utilisez un routeur avec un bouton WPS/QSS, vous pouvez confi gurer une connexion réseau simple via la fonction WPS. Y accédez et appuyez sur le bouton WPS/QSS sur votre routeur dans les 120 secondes. La connexion entre le routeur et la DR 463 est alors confi gurée de façon automatique. -
Page 75: Réveil
• Pour régler l‘heure et la date • Vous pouvez choisir le format d‘affi chage de l‘heure : 12 Hour ou 24 Hour (par défaut). • Régler le format de la date dans cet ordre YY (année), MM (mois) et DD (jour) - YY/MM/DD, DD/MM/YY (par défaut) ou MM/DD/YY. -
Page 76: Minuterie
12.6. Minuterie Appuyez sur◄/► pour régler la minuterie. Appuyez sur OK pour commencer. Le compte à rebours démarre et un bip sonore retentira quand le palier 00:00 sera atteint. Pour désactiver la minuterie, rendez-vous sur l’écran de la minuterie et appuyez de nouveau sur 12.7. -
Page 77: Indicateur
Une fois le temps est chois, un icône de lit avec les minutes restantes apparaît dans le coin supérieur droit. La DR 463 s’éteint une fois le temps s‘écoule. Sleep de la télécommande est le raccourci de cette fonction... -
Page 78: Mémoire Intermédiaire
Permet de régler le temps tampon de lecture parmi 2/4/8 secondes. 12.13. Temps La DR 463 peut affi cher des informations météo réelles en mode veille. Activez l‘Affi chage Veille et réglez l‘unité de température (°C ou °F) pour que la météo soit affi chée en mode veille. -
Page 79: Réglage De La Lecture
Répéter tout, Répéter une fois, ou aléatoire. 12.17. Confi guration DLNA Le nom par défaut de l‘appareil pour DLNA est ALBRECHT DR 463. Vous pouvez donner un autre nom pour la confi guration DLNA sur le PC/téléphone portable. 12.18. Touche La fonction de la touche Mode peut être programmée. -
Page 80: Égaliseur
êtes au menu principal. 12.23. Réinitialiser Restaurer les paramètres par défaut Après une réinitialisation de la DR 463, le système se met au menu Langue. Puis passe automatiquement au menu Réveil une fois la langue des menus est sélectionnée. Français... - Page 81 13. Guide de dépannage Erreur Suggestion L‘appareil ne s‘allume pas Vérifiez si l‘adaptateur secteur est correctement branché. L‘appareil peut ne pas fonctionner correctement s‘il est dans une zone à fortes interférences radio. L‘appareil reprend un fonctionnement normal lorsqu‘il n‘y a plus d‘interférences Aucun son.
- Page 82 Placez l‘appareil dans un autre endroit s‘il ne fonctionne toujours pas normalement. 14. Données techniques Numéro de modè DR 463 Description Adaptateur radio avec radio internet / DAB + / FM / Bluetooth Affichage 2,4“/320 x 240 TFT-Farbdisplay...
- Page 83 à Service@alan-electronics.de 16. DECLARATION CE Le soussigné, Alan Electronics GmbH, déclare que l‘équipement radioélectrique du type DR 463 est conforme à la directive 2014/53/UE. Le texte complet de la déclaration UE de conformité est disponible à l‘adresse internet suivante: www.alan-electronics.de Les erreurs d‘impression réservés.
- Page 84 Français...
- Page 85 ALBRECHT DR 463 Adattatore Internet-Radio/DAB+/FM con Bluetooth Manuale utente Italiano...
- Page 86 Contenuto 1. Dotazione ................................. 87 2. Controlli e connessioni ............................. 87 2.1. Lato anteriore ............................87 2.2. Lato posteriore ............................88 2.3. Telecomando ............................. 88 3. Primi passi ................................ 89 3.1. Requisiti di rete ............................89 3.2. Preparazione della rete ..........................89 3.3.
-
Page 87: Dotazione
Prendersi del tempo per familiarizzare con le funzionalità del DR 463 dopo averlo rimosso dalla sua confezione. 2.1. Lato anteriore Il DR 463 non ha tasti sul dispositivo stesso. La navigazione del menu semplice e intuitiva consente di controllare tutte le funzionalità della radio tramite il telecomando incluso. Italiano... -
Page 88: Lato Posteriore
2.2. Lato posteriore Le connessioni di questo modello sono: • Line-Out: 2 x RCA (Stereo) • Ingresso CC: per alimentatore • Connessione antenna: Spinotto RCA da 3,5 mm 2.3. Telecomando Accensione e spegnimento del dispositivo On/Off (Standby) Visualizzazione lista dei preferiti Preferiti Pressione prolungata: Salvataggio preferiti... -
Page 89: Primi Passi
Il dispositivo di rete deve supportare la connessione wireless (802.11b/g/n). ● Se il DR 463 deve essere controllato a distanza tramite DLNA, è necessario un PC o uno smartphone collegato alla stessa rete del DR 463. 3.2. Preparazione della rete •... -
Page 90: Connessione A Un Impianto Audio
3.5. Messa in servizio Collegare l'alimentatore di rete sul retro del DR 463 e la spina di alimentazione a una presa di corrente. Collegare l'antenna in dotazione all'ingresso dell'antenna sul retro. In alternativa, collegare il sistema di antenna/antenna da camera con l'adattatore per antenna in dotazione. -
Page 91: Airmusic Control App
• Se si è impostata la connessione di rete e si sta utilizzando nuovamente il DR 463 all'interno della rete, la connessione verrà stabilita automaticamente. Se si desidera cambiare la rete, richiamare le impostazioni per modifi care la connessione corrispondente. -
Page 92: Menu Principale
4. Menu principale Nel menù principale si possono scegliere le seguenti modalità di funzionamento: Radio Internet, Media Center, FM Radio, DAB+, Centro Informazioni, Bluetooth, Confi gurazione e My mediaU. 5. Internetradio Dopo che la connessione con la stazione scelta è completa, lo schermo di riproduzione visualizza il bit rate e il formato della stazione 5.1. -
Page 93: Stazione/Musica
5.2. Stazione/Musica Le stazioni radio sono divise nelle seguenti categorie: Global Top 20, Genre e Country/Location. Per continuare, inserire le sotto-categorie e scegliere la stazione da ascoltare. Per ogni stazione, premere OK per attivarne la riproduzione. Premendo ► , è possibile entrare nel sotto-menù... -
Page 94: My Mediau
Per accedere al DR 463 non serve inserire nome utente e password. Se ci sono diversi profi li di accesso defi niti sul DR 463, sarà possibile scegliere quella attualmente in uso al menù Confi guration. -
Page 95: Scansione Delle Stazioni
7.1. Scansione delle stazioni La prima volta che si seleziona la modalità radio DAB, DR 463 esegue automaticamente una scansione completa per vedere quali stazioni sono disponibili. 08:00 AM Scanning... Quando la scansione è completa, la radio mostra un elenco delle stazioni disponibili. Se si desidera eseguire un'altra ricerca della stazione DAB, premere due volte il tasto ◄. -
Page 96: Centro Multimediale
È possibile accedere al server UPnP dal DR 463 e la sua musica può essere riprodotta. Il controllo e la navigazione sono eseguiti dal DR 463. Mediante DLNA, la riproduzione può essere ad es. essere avviata su un PC e il DR 463 è selezionato solo come dispositivo di riproduzione. -
Page 97: Dlna
Quindi attivare il Bluetooth sul proprio dispositivo mobile (ad es. smartphone, tablet ecc.), cercare i dispositivi attivi e collegare il DR 463. Se la radio è connessa correttamente, la musica può ora essere riprodotta in streaming al DR 463. Italiano... -
Page 98: Radio Fm
10. Radio FM La modalità radio FM riceve la radio analogica nella banda FM e visualizza le informazioni dalla stazione se sono inviate tramite RDS. Per la migliore qualità di riproduzione, l'antenna deve essere allineata in modo tale che il display ottenga la massima potenza del segnale e quindi la migliore qualità... -
Page 99: Centro Informazioni
Se attivo, le opzioni di My mediaU saranno mostrate nel menù principale. Se ci sono più accessi mediaU defi niti nel DR 463, scegliere da qui il profi lo di accesso predefi nito. Fare riferimento a 8.2 più avanti per altre informazioni sulla defi nizione di un profi lo mediaU. -
Page 100: Configurazione
Scegliere lo stile dell‘orologio durante la modalità standby – Analogico o Digitale 12.2. Gestione di My mediaU Se attivo, le opzioni di My mediaU saranno mostrate nel menù principale. Se ci sono più accessi mediaU defi niti nel DR 463, scegliere da qui il profi lo di accesso predefi nito. Italiano... -
Page 101: Rete
12.3. Rete 12.3.1. Confi gurazione di rete wireless Attiva/Disattiva la rete WiFi. Quando la rete WiFi è attivata, il sistema si connette automaticamente alla rete Scegliere l‘AP richiesto. Inserire la chiave WEP o WPA per connettersi al sistema WiFi. Se premuto accidentalmente ► per spostare una battuta ridondante, premere ◄ per correggere. Italiano... -
Page 102: Data E Ora
Se si dispone di un router dotato di tasto WPS/QSS, è possibile impostare la connessione di rete semplicemente, grazie alla funzione WPS. Inserirlo e premere il tasto WPS/QSS sul router entro 120 secondi. La connessione tra il router e il DR 463 sarà quindi confi gurata automaticamente. 12.3.3. Confi gurazione manuale Si può... -
Page 103: Sveglia
• Impostare data e ora • Scegliere il formato dell‘ora visualizzata tra 12 Hour o 24 Hour (predefi nito). • Scegliere il formato data indicando la posizione di YY (anno), MM (mese) e DD (giorno) – YY/ MM/DD, DD/MM/YY (predefi nito) o MM/DD/YY. •... -
Page 104: Timer
12.6. Timer Premere ◄/►per impostare il timer, premere OK per avviare. Il timer effettuerà il conto alla rovescia ed emetterà un bip quando raggiunge 00:00. Per annullare il timer, accedere alla schermata timer e premere nuovamente OK. 12.7. Lingua Scegliere la lingua OSD: English/Deutsch/Español/Français/Português/Nederlands/Italiano/ Pусский/Svenska/Norsk/Dansk/Magyar/Český/Slovenský/Polski/Türkçe/Suomi 12.8. -
Page 105: Indicazione
Il DR 463 si spegne alla scadenza del tempo impostato. Premere il pulsante Sleep sul telecomando per l‘accesso rapido a questa funzione. Pressione prolungata del tasto per richiamare la radio sonno, si veda il Capitolo 5.3 Radio sonno... -
Page 106: Memoria Di Transito
Confi gurare il tempo di bufferizzazione durante la riproduzione musicale, 2/4/8 secondi. 12.13. Meteo DR 463 è in grado di mostrare le attuali condizioni meteo in modalità standby. Attivare la schermata di standby e scegliere l‘unità di misura della temperatura (°C o °F) da usare per mostrare le condizioni meteo in modalità... -
Page 107: Impostazioni Di Riproduzione
Ripetizione di una o tutte le tracce, o Riproduzione casuale. 12.17. Dispositivo Il nome predefi nito del dispositivo per il sistema DLNA è Internet Radio DR 463. Si può rinominare l‘unità dal menù di impostazioni DLNA sul proprio PC o dispositivo mobile. -
Page 108: Equalizzatore
12.23. Reimpostazione Ripristino delle impostazioni predefi nite. Dopo la reimpostazione dell‘unità DR 463, il sistema apre il menù di impostazione Language. Quindi il sistema passa automaticamente al menù di impostazione Network, dopo aver scelto la lingua di visualizzazione OSD. - Page 109 13. Risoluzione dei problemi Errore Rimedio L‘unità non si accende. Controllare che l‘adattatore di alimentazione sia collegato. Il dispositivo può avere malfunzionamenti se usato in aree con grandi interferenze radio. Il dispositivo tornerà a funzionare correttamente, quando non ci sonio più interferenze.
- Page 110 Errore Rimedio Impossibile fare streaming tramite Controllare la connessione di rete. Il DR 463 e il DLNA. dispositivo di streaming devono appartenere alla stessa rete; controllare la buona qualità della connessione di rete. Verificare le impostazioni di rete del proprio dispositivo.
- Page 111 Dichiarazione di conformità Il fabbricante, Alan Electronics GmbH, dichiara che il tipo di apparecchiatura radio DR 463 è conforme alla direttiva 2014/53/UE. Il testo completo della dichiarazione di conformità UE è disponibile al seguente indirizzo Internet: www.alan-electronics.de Errori di stampa riservati.
Need help?
Do you have a question about the DR 463 and is the answer not in the manual?
Questions and answers