Advertisement
Quick Links
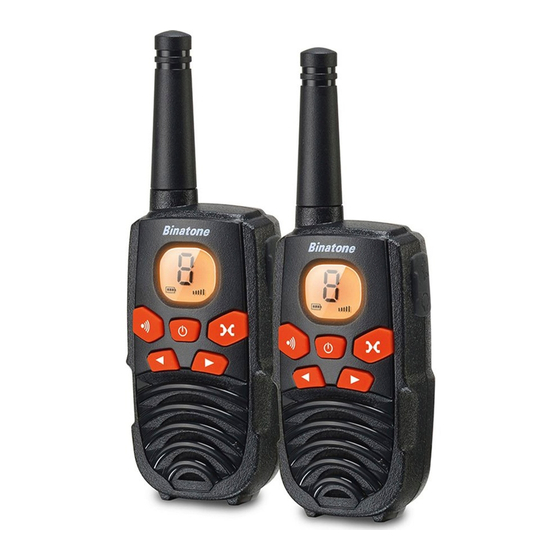
Latitude 250
USER GUIDE
Antenna
LCD screen
PTT(push to talk)
-Displays the current
button
Channel selection and
-press and hold
other radio symbols.
to transmit.
Power charge socket (
)
CHG
& Headset socket (
)
CALL (
)button
CHG
- micro-USB socket for
-press to send a ringing
charging installed batteries
tone to other PMR units.
- 2.5mm headset socket
UP( ) / DOWN( ) buttons
MENU (
) button
-press to change
-press to program
channels, volume, and
the PMR settings.
to select settings
during programming.
MIC(microphone)
Speaker
Power ( ) button
-press and hold to
turn the PMR
unit ON or OFF.
1. LCD Screen
Channel Number. Changes from 1 to
8 as selected by the user.
Indicates battery charge level
Displays when Scan function is activated
FM
Displays with frequency when the FM radio is activated
Displays when Key Lock function is activated
Displays when transmitting a signal.
Displays when receiving a signal.
Indicates the speaker volume level
Mon-Fri from 8.00am to 8.00pm
Sat from 8.30am to 2.00pm
0844 557 9677 (UK only - Calls cost 7p per minute plus
your telephone company's access charge.)
/ 0818 762092 ROI or send email to us:
enquiries@binatone-support.co.uk
www.binatoneglobal.com
2. Installation
2.1 Removing the Belt clip
a. Pull the belt clip latch
away from the PMR.
b. While pulling the belt
clip latch, push up
the belt clip as
shown in Fig. 1.
2.2 Installing the Belt clip
a. Slide the belt clip into
the slot as shown
Figure 1
Figure 2
in Fig. 2.
b. A "click" indicates the
belt clip is locked into
its position.
2.3 Installing the Batteries
Figure 3
Figure 4
a. Unclip the battery compartment cover.
b. Insert the 3xAAA batteries. Position the batteries
according to the polarity marking
in the battery compartment. See Fig.3
c. Replace the battery cover. See Fig. 4.
Notes:
Use only same type and make of batteries on the PMR units.
·
·
The PMR units have a built-in Power Saver (PS) for maximum
battery life, but when not in use, turn the units OFF to save
battery power.
Remove the batteries if the units will not be used for a long period
·
of time.
Binatone Help Line - 0844 5579677
2.4 Charging the batteries using Adapter
Important: Always turn Off
the PMR units when
Insert the USB connector (5.0V DC/400mA)
charging. This will shorten
mains adaptor into the power-in
the charging time.
micro-USB socket in the side of
the Radio unit. Plug the mains
USB adaptor into a suitable mains
Main socket
socket with the switch on the socket
to Off, and then turn it On.
CAUTION!
Risk of explosion if battery is replaced by an incorrect type.
Dispose of used batteries according to the instructions.
Use only AAA size Ni-MH, 1.2V, 600mAh rechargeable batteries.
The Latitude 250 must be charged using the mains USB adaptor
provided. Using any other USB adaptor will result in any non-compliance
with EN60950-1 and will invalidate the approvals and warranty.
It takes about 10 hours to fully recharge the batteries if they
completely run down. New batteries take up to 14 hours to fully charge.
Note:
Do not mix battery types when using the PMR unit.
The PMR unit has a built-in power saver (PS) for maximum battery
life, but when not in use, turn the units Off to save the battery power.
Remove the batteries if the unit will not be used for a long period of time.
Dispose of used batteries safely at a recycling centre. NEVER put
them anywhere they could get burnt or punctured.
Battery meter
The battery icon is located in the left corner of the LCD panel. This battery icon indicates
the battery level, and when it reaches its minimum level, the handset will emit two beep
tones and then it will automatically turn Off the power.
Battery life
The PMR has a built in power saver feature to make the batteries last longer. But when
you are not using the handset, it's better to switch off to save the battery power.
3. Operation
The talk range depends on the environment and terrain. It will reach
up to about 5km in wide open spaces, without obstructions such as
hills, buildings or trees.
Don't use two PMR units too close together otherwise you may get
loud feedback interference.
3.1 Turning the Unit ON/OFF
To Turn ON;
a. Press and hold the
(Power) button. A special "beep" sound
will be heard. The LCD screen will display the current channel.
To Turn OFF;
a. Press and hold the
(Power) button. A single "beep"
will be heard and LCD screen will turn blank.
Binatone Help Line - 0844 5579677
3.2 Adjusting the speaker volume
There are 8 volume levels, the current speaker volume level
is displayed on the LCD screen.
To adjust the speaker volume level, press the
button to
increase, or press the
button to decrease. The LCD screen will
display the speaker volume icon bars ascending, or descending
respectively.
3.3 Receiving a Call
The unit is continuously in receive mode when the unit is turned
ON and not transmitting. When a signal is received on the current
channel, the receive signal icon "RX" will be displayed on the
LCD screen.
3.4 Transmitting (sending)
a. Press and hold the PTT button to transmit your voice. The
transmit signal icon "TX" will display on the LCD screen.
b. Hold the unit in a vertical position with the Mic (Microphone)
5 cm away from the mouth. While holding the PTT button,
speak into the microphone in a normal tone of voice.
c. Release the PTT button when you want to finish transmitting.
3.5 Roger Beep
The Roger beep is a tone which is automatically transmitted
whenever the PTT button is released. This alerts the receiving
party that you have ended the transmission.
3.6 Changing Channels
The PMR has 8 available channels. To change channels, in
normal mode;
a. Press the
(Menu) button, the channel icon "1" on the LCD
screen will start blinking.
b. While the Channel icon is blinking, press the
or
button to select the desired channel. The channel changes
from 1 to 8, or vice versa.
c. Press the
(Menu) button to confirm your setting and return
to the standby mode.
Binatone Help Line - 0844 5579677
3.7
Calling (Paging) Tone
You can use the CALL button to send a tone to other users on
the same channel. To activate this feature;
a. With the PMR in normal mode, press and release the
button. The unit will transmit a 2-second page tone to any other
unit/s set with the same channel within transmitting range
3.8
Channel Scan
Your radio can scan the 8 channels for any activity. This allows to
find other radios without having to manually change the channel.
To activate this feature:
a. Press and hold the
and
button at the same time and
channel scanning will start immediately, with SC displayed on the
screen and the channel number cycling through the channels.
When a signal is detected, the unit will pause on that channel, while
receiving the signal and for a further 3 seconds.
b. Press the
PTT
button to stop scanning and talk on that channel,
or press the
or
button to manually restart the scanning.
c. To stop scanning, press the
button and return to standby mode.
3.9
Monitor Feature
You can use the Monitor feature to check for weaker signals in the
current channel.
To activate this feature:
a. Press and hold the
and
button at the same time. The
receiving icon "RX" appears on the display, and the speaker
turns on and plays any signals on the current channel.
b. Press the
button to stop the monitoring.
3.10 To Lock the Buttons
With the buttons lock you can still transmit (TX), or call the current
channel, but you can not change the volume. To activate this
feature;
In the standby mode, press and hold the
until the
icon appears on the LCD screen.
To unlock the buttons
Press and hold again the
button until the
icon
disappears on the LCD screen.
3.11
FM Radio function
While in standby mode, press and release the power button. The FM
Frequency will display in the LCD screen. Press the Up or Down
button to adjust the FM frequency channel.
You can still transmit (TX) and receive (RX) calls on your current
channel, with the FM radio being interrupted during calls.
Press and release the Power button to go back to PMR frequency
mode.
Binatone Help Line - 0844 5579677
Advertisement

Related Manuals for Binatone Latitude 250

Summary of Contents for Binatone Latitude 250
- Page 1 PMR units. Figure 2 The Latitude 250 must be charged using the mains USB adaptor a. Press and hold the PTT button to transmit your voice. The in Fig. 2.
- Page 2 No communication tuned to the same Channel. 4. Specifications 3. In the unlikely event that you need to return your Latitude 250 to our Repair Electrical Safety: EN 60950-1:2006/A2:2013 Centre while it is under Guarantee, please include the sales receipt. There Channel Frequency Table may be a handling charge for the repair of your unit under Guarantee.
Need help?
Do you have a question about the Latitude 250 and is the answer not in the manual?
Questions and answers
How do I turn off the rodger beep