Advertisement
QUICHER
NJ
Series
NSRI Type
Operation manual (Maintenance)
・ R e a d t h e s e i n s t r u c t i o n s f o r t h e p r o p e r u s e o f t h i s m a c h i n e .
・ A f t e r h a v i n g r e a d t h e s e i n s t r u c t i o n s , k e e p t h e m i n a c o n v e n i e n t
p l a c e s o y o u o r t h e o p e r a t o r c a n r e f e r t o t h e m w h e n e v e r n e c e s s a r y .
ATTENTION : www.ohtake-root.co.jp is the only web site associated with our company.
We do not have any branches in China.
www.ohtake-root.co.jp
www.ohtake-root.co.jp
Automatic Screw Feeder
HP
自動ネジ供給機
NJ1MA01M a
02aM
Advertisement
Table of Contents

Subscribe to Our Youtube Channel
Related Manuals for OHTAKE NJ-2320


Summary of Contents for OHTAKE NJ-2320
- Page 1 . ATTENTION : www.ohtake-root.co.jp is the only web site associated with our company.
- Page 2 CAUTION ! Note:About the screws stock limit If too much screws are placed into the storage chamber of the feeder, it may affect the process of screw feeding, or cause the machine to be overloaded and malfunction. Please refer to the diagram below and carefully adjust the screw level to be 2 ~ 3mm below upper edge of the rail. (When the scooper plates are at the lowest point.) ○...
-
Page 3: Table Of Contents
Contents 6. Maintenance ・・・・・・・・・・・・・・・・・・・・・・・ 13 1. Before Use ・・・・・・・・・・・・・・・・・・・・・・・・・・・・・・・・・・・・・・ 1 7. Troubleshooting Guide ・・・・・・・・・・・・・ 16 2. Operating Precautions ・・・・・・・・・・・・・・・・・・・・・・・・・・・ 1 8. Main Specifications ・・・・・・・・・・・・・・・・・ 19 3. Component Names ・・・・・・・・・・・・・・・・・・・・・・・・・・・・・・ 3 9. Warranty ・・・・・・・・・・・・・・・・・・・・・・・・・・・ 21 4. Pre-operational Checks and Adjustments ・・・・・・・・・ 4 5.Operating Procedures and Operational Checks ・・・... - Page 4 AC adapter CAUTION Use only the AC adapter supplied with this machine otherwise it may result in a fire or electric shock. Ground wire When the earth wire is connected, loosen the screw near the mark once. After attaching the earth wire,tighten the screw again. the bottom of the main body Rail Do not scratch the rail.
-
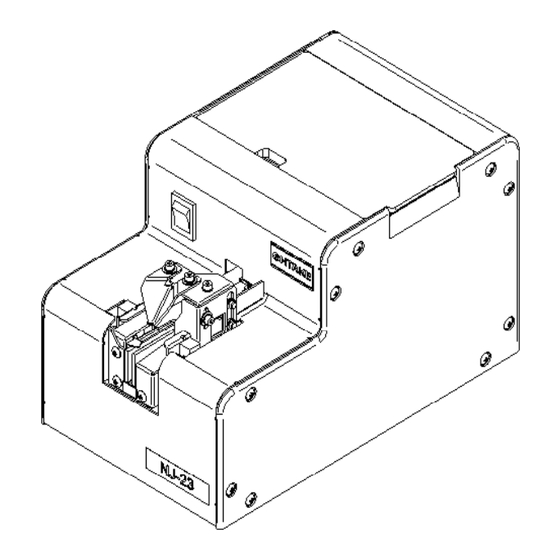
Page 5: 3. Component Names
3. Component Names Rail front-rear position lock Screw bin lid Shutter (in front of screw access hole screw passage plate) Passage plate Screw passage window Bit guide assembly Passage plate Holding plate lock screw (Screw guide1) Bin scooper Bit guide plate Sensor Screw bin... - Page 6 This machine can be converted to different screw sizes by replacing the rail assembly, and the passage plate. When you replace component parts, verify the actual screw size to be used. Screw nominal Exchange Kit Rail model Passage plate Type Model number diameter number number model number NJ-2320 φ2.0 R20SET W2320 NJ-2323 φ2.3 R23SET W2323 NJ-23 NJ-2326 φ2.6 R26SET...
- Page 7 Checking and Adjusting the Brush 4 2 . Turn off the power switch before performing any check/adjustment procedure. The switch shown below is in the off position. Check the height of the brush. Ensure that the brush check/ adjustment procedure is completed while the brush is placed in Brush a horizontal position as shown at right.
- Page 8 Checking and Adjusting the Passage Plate 4 3 . Passage plate retaining screw Drop the employed screws into the rail groove. Slide the screws to the passage window section and check or adjust the passage plate height. Check that the Passage plate Up-down clearance between the passage window upper end and the screw heads is not...
- Page 9 If the holding plate (screw guide 1) height needs to be adjusted, please proceed as directed below. Tilt this machine or operate it so that the screws are delivered to the rail assembly stopper. If there is no clearance between the hold- ing plate (screw guide 1) and screw heads, the screws cannot move.
- Page 10 4- 6. Checking and Adjusting the Bit Guide Place five to ten screws in the rail and tilt this machine until they hit the stopper on the rail as- sembly. Bit guide mounting screws When the internal shutter is closed, the screws cannot go through the passage plate. If it is closed, turn the timing shaft clockwise with the Allen wrench to keep it open.
-
Page 11: 5.Operating Procedures And Operational Checks
5. Operating Procedures and Operational Checks Loading the Screws - 1. 5 Open the screw bin lid. While the bin dipper plates are at the lowest position, Rail pour in the screws until they are piled up to about 3 mm below the rail upper Approx. - Page 12 Operational features This machine is equipped with an overload protection circuit. If a movable part is overloaded during a feeder operation, for instance, when a small screw or other particles is trapped, or excessive screw is placed into the screw bins, the overload protection circuit will activate. Function descriptions and remedies Under normal conditions, the drive motor in this machine rotates in normal direction to feed the loaded screws continuously to the escaper section, thereby allowing you to obtain the screws successively.
- Page 13 This machine is equipped with an external output signal cable. This machine can take out the screw extraction signal. Please use it for connectionwith general purpose counter etc. Since the signal エスケーパネジ取出し部にネジが 有るか 無いか の信号を取出せます。 line is stored inside, when using it please remove the back cover Grommet ネジ締めロボット、...
- Page 14 Picking up the screw 5 3 . Attach a bit to your electric screwdriver to match the head of the screw. Refer to the following. Screw normonal Cross size on top Standard Bit shape diameter φ2.0 No.1/No.2 φ2.3 No.1/No.2 φ2.6 No.1/No.2 small φ3.0...
-
Page 15: 6. Maintenance
6. Maintenance Before performing any maintenance, turn off the power switch CAUTION and remove all the loaded screws from this machine. 6- 1. Cleaning the Rail and Rail Guide Wall Rail front-rear position lock screw When the rail groove becomes dirty, the screw feeding speed may be affected. - Page 16 This machine allows you to change the screw diameter setup by replacing Passage plate associated components. (this change can be made with the same OHTAKE feeder machine). To change the screw diameter, you have to replace the passage plate in addition Passage plate to the rail assembly.
- Page 17 Model number NOTE 1: Different screw sizes may be applicable diameter number number model number with exchanging parts. NOTE 2: To change the screw size (nominal NJ-2320 φ2.0 R20SET W2320 diameter), replace all the parts indicated at NJ-2323 φ2.3 R23SET W2323 left.
-
Page 18: 7. Troubleshooting Guide
7. Troubleshooting Guide CAUTION Before taking any action, please turn OFF the power switch. Problem Cause Remedy -No power is supplied. -Ensure that the AC adapter is properly connected The machine does to a power source. not start when power -The screw in the removal section has not -Remove the screw from the removal section. - Page 19 Problem Cause Remedy -The clearance between the holding plate -Shift the holding plate (screw guide 1) upward. The screws on the (screw guide 1) and screw heads is Use the Quicher in a tilted position. rail do not feed insufficient. Adjust the timer setting control.
- Page 20 Problem Cause Remedy -The overload protection circuit is activated. -Turn the power switch off and then back on. The machine comes If the operation comes to a stop again, the probable to a sudden stop. causes are: There are too many screws in the screw bin.
-
Page 21: 8. Main Specifications
8. Main Specifications NOTES -Measure the shank diameter of the screw to be used, and check whether it matches the rail groove reference dimension. -Within the range of screw size and length below, there may be Input :AC100~240V 50/60Hz Exclusive adapter instances of unique screw shape or structure not compatible with the Output :DC15V (Switching type)... - Page 22 Screw nominal Exchange Kit Rail model Passage plate Type Model number diameter number number model number NJ-2320 φ2.0 R20SET W2320 NJ-2323 φ2.3 R23SET W2323 NJ-23 NJ-2326 φ2.6 R26SET W2326 NJ-2330 φ3.0 R30SET W2330 NJ-4535 φ3.5 R35SET W4540 NJ-45 NJ-4540 φ4.0...
-
Page 23: 9. Warranty
9. Warranty For users within Japan, the product is covered by warranty for a period of six months after the date of delivery. Such warranty will not be applicable to purchase or users outside of Japan. If it should become faulty, however, please contact your local dealer. Solutions to the following situations may be implemented at a reasonable charge without regard to the warranty period. -
Page 24: 10.External Dimension
10.External dimension 34.7 DC jack DCジャック 140.5 29.6 Power switch 電源スイッチ [unit: mm] - 22-... - Page 25 - Notes -...
- Page 26 Fax +81-191-24-3145 Fax +81-191-24-3145 「Quicher」 「OHTAKE」 「OHTAKE ・ ROOT KOGYO」 is a trademark or registerd trademark of OHTAKE ・ ROOT KOGYO CO.,LTD.] 「Quicher( クイッチャー)」 「OHTAKE」 「OHTAKE ・ ROOT KOGYO」 は、 株式会社 大武 ・ ルート工業の商標又は登録商標です。 The specification and the design of a product may be changed without a preliminary announcement for improvement.
Need help?
Do you have a question about the NJ-2320 and is the answer not in the manual?
Questions and answers