Synthes Colibri II Instructions For Use Manual
Universal and powerful battery system for a variety of applications
Hide thumbs
Also See for Colibri II:
- Instructions for use manual (60 pages) ,
- Instructions for use manual (72 pages)

Subscribe to Our Youtube Channel
Related Manuals for Synthes Colibri II


Summary of Contents for Synthes Colibri II
- Page 1 Universal and powerful battery system for a variety of applications Colibri II Instructions for Use...
-
Page 3: Table Of Contents
Cleaning and Disinfection • Preparation Prior to Reprocessing • Manual Cleaning Instructions • Automated Cleaning Instructions with Manual Pre-cleaning Maintenance and Lubrication Function Control Packaging, Sterilization and Storage Repairs and Technical Service Disposal Troubleshooting Colibri II Instructions for Use DePuy Synthes... - Page 4 Table of Contents System Specifications Electromagnetic Compatibility Additional Information Ordering Information DePuy Synthes Colibri II Instructions for Use...
-
Page 5: Introduction
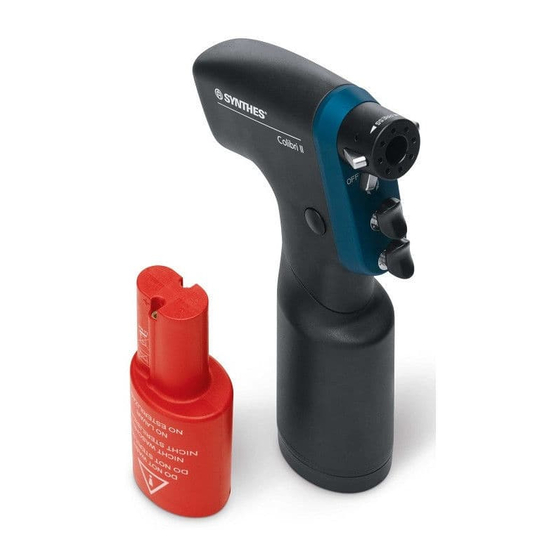
“Surgical Techniques” of the implant system used. For important information regarding electromagnetic The Colibri II is only to be used for surgery after careful compatibility (EMC), please refer to the chapter “Electro- consultation of the instructions for use. It is recom- magnetic Compatibility”... - Page 6 Accessories/Scope of delivery Please use the original packaging for dispatch and trans- The Colibri II consists of a handpiece, one or several bat- port. If this is no longer available, please contact the tery casings and batteries and a range of attachments Synthes office.
- Page 7 See section “Disposal” on page 47. Indicates Environment Friendly Use Period of 5 years in China. Duty cycle type according to IEC60034-1 Indicates Environment Friendly Use Period of 10 years in China. Ingress protection rating according to IPX4 IEC 60529 Colibri II Instructions for Use DePuy Synthes...
- Page 8 Introduction General Information Manufacturer Date of manufacture Non sterile Non sterile Do not use if package is damaged. DePuy Synthes Colibri II Instructions for Use...
-
Page 9: Colibri Ii
7 Release buttons for battery casing 8 Knob for the battery casing cover Safety system The Colibri II is equipped with a safety system that pre- vents the machine from being unintentionally started. To lock and unlock the tool, turn the mode selector switch... - Page 10 / remove attachments and cutting tools. The existing Colibri handpiece (532.001) can be used with the new battery pack of the Colibri II (532.103 with • After inserting a cutting tool, always check that it is properly engaged by pulling it.
-
Page 11: Use
(Fig. 4) and checks if it is seated correctly. The sterile cover ensures that the unsterile battery does not contact the outside of Figure 3 Figure 4 the sterile casing. Colibri II Instructions for Use DePuy Synthes... - Page 12 After having closed the casing cover, turn the lid sideways (90°) until it clicks. Figure 7 Figure 8 DePuy Synthes Colibri II Instructions for Use...
- Page 13 Removing the battery pack from the power tool Simultaneously press the release buttons for the battery casing with one hand (Fig. 12) and use the other hand to remove the battery pack from the handpiece. Figure 11 Figure 12 Colibri II Instructions for Use DePuy Synthes...
- Page 14 • Only insert the battery pack (battery and battery cas- Testing and Measuring ing) in the handpiece directly before using the Colibri II • Do not short-circuit the battery. Do not try to measure system. This saves battery energy and prevents having the short-circuit current.
- Page 15 Oscillating drilling ( ) mode To protect soft tissue when drilling and inserting Kirschner wires, the Colibri II has an electronically con- trolled oscillating mode. To preset the oscillating mode, switch the mode selector switch to position. Pressing the bottom trigger causes the tool to rotate clockwise as usual.
-
Page 16: General Information
Attachments General Information The Colibri II system offers a broad range of attach- ments. A wide range of rotating attachments has color-coded rings, so that they can easily be identified. The table on the next page lists the different types of attachments available, the color coding as well as the speed of each attachment. - Page 17 * Color coding on Torque Limiters does not refer to speed. Technical data is subject to tolerances. Specifications are approximate and may vary from one device to another or as a result of power supply fluctuations. Colibri II Instructions for Use DePuy Synthes...
-
Page 18: Drill Attachments
To disconnect, push the coupling sleeve of the attach- ment back and remove the tool. Chucks There are two Drill Attachments Chucks available as Drill Attachments for the Colibri II system. Article number Clamping range Spare key Comments 05.001.252... -
Page 19: Screw Attachments
• Always use an appropriate torque limiting attach- ment when putting locking screws into a locking plate. • The attachment is also suitable for application at a lower rpm and / or higher torque. Colibri II Instructions for Use DePuy Synthes... -
Page 20: Ream Attachments
Quick Coupling for DHS/DCS Triple Reamers (532.015) For DHS/DCS Triple Reamers; can also be used to open the medullary cavity with most of the Synthes nailing systems. Mounting and removing the tools To connect the tool, push the coupling sleeve forward and then introduce the tool while turning slightly. - Page 21 Chucks There are two chucks available as Ream Attachments for the Colibri II system. Article number Clamping range Spare key Comments 05.001.254 0.5–7.3 mm 510.191 For drilling and medullary reaming, with reverse motion Inserting cutting tools Open the jaws of the chuck using the appropriate key or by hand.
-
Page 22: Other Rotating Attachments
6. To adjust the grip on the wire, reduce the clamping force and move the tool to the desired length. Rec- lamp the wire by pulling on the tension lever. DePuy Synthes Colibri II Instructions for Use... - Page 23 Radiolucent Drive (511.300) The Radiolucent Drive can be used with the Colibri II in combination with the AO/ASIF Quick Coupling (05.001.250) and the Adapter for the Radiolucent Drive (532.031). Coupling the Radiolucent Drive to the power tool Connect the AO/ASIF Quick Coupling to the Colibri II and the adapter to the Quick Coupling.
- Page 24 Swing the drive up and center it precisely so that the drill bit appears as a round point and the locking hole is visi- ble around it. The target ring also assists the centering. The locking hole can now be drilled directly. DePuy Synthes Colibri II Instructions for Use...
- Page 25 – Hitting a nail: Remove the drill bit until the flutes are visible and re-aim the drill bit or ex- change the drill bit if necessary. Colibri II Instructions for Use DePuy Synthes...
- Page 26 M on the burr shank is no longer visible. Information on handling burrs Synthes recommends using a new sterile burr for each operation. This prevents health risks to the patient. Used burrs present the following risks: • Necrosis due to excess heat • Longer cutting time due to reduced performance of...
-
Page 27: Saw Attachments
5. Place your thumb on the saw blade coupling to hold the saw blade and turn the locking mechanism clockwise until the saw blade is fixed. 6. Unlock the power tool. Precaution: Saw blades labeled “Single Use” should not be reused. Figure 3 Colibri II Instructions for Use DePuy Synthes... - Page 28 Figure 4 Instructions for handling the saw blades Synthes recommends using a new blade for each opera- tion to ensure that the saw blade is optimally sharpened and clean. The following risks are associated with used blades: • Necrosis caused by excessive heat build-up...
- Page 29 • Do not use the saw attachments in oscillating drilling mode ( • The appropriate surgical technique (036.000.907) should be observed to ensure the safe and success- ful application of the Crescentic Technique. Colibri II Instructions for Use DePuy Synthes...
- Page 30 ( ). • Avoid applying high pressure onto the saw blade. Removing the saw attachment Turn the locking sleeve to the unlock position before pushing both release buttons on the handpiece. DePuy Synthes Colibri II Instructions for Use...
-
Page 31: Other Attachments
(SM_708376). This document specifi cally describes the correct usage and reprocessing of these articles. Coupling the Torque Limiter to the power tool Torque Limiters can be connected to the Colibri II using the AO/ASIF Quick Coupling (05.001.251). Note: The Torque Limiter must be annually serviced and recalibrated by Synthes. -
Page 32: General Information
Refer to “Clinical Processing of Cutting Tools” (DSEM/PWT/0915/0082) for detailed For more information about Care and Maintenance, please clinical processing instructions. refer to the Colibri II Care and Maintenance Poster (DSEM/PWT/0417/0145). Unusual Transmissible Pathogens Surgical patients identified as at risk for Creutzfeldt-Jakob... -
Page 33: Cleaning And Disinfection
Handpieces, battery casings, sterile covers and attach- ments must be processed using a) manual cleaning and / or b) automated cleaning with manual pre-cleaning. Note: Clean all movable parts in opened position. Colibri II Instructions for Use DePuy Synthes... -
Page 34: Manual Cleaning Instructions
Cleaning and Disinfection Manual Cleaning Instructions Important: • The Colibri II batteries must not be cleaned follow- ing the Manual Cleaning Instructions. • This section does not apply to articles 511.773, 511.776 and 511.777. Please refer to the specifi c In-... - Page 35 7. Wipe / Spray disinfection. Wipe off or spray the surfaces of the devices with a minimum of 70% alcohol-based disinfectant. 8. Visually inspect device. Inspect the cannulations, coupling sleeves, etc. for visible soil. Repeat steps 1–8 until no visible soil remains. Colibri II Instructions for Use DePuy Synthes...
- Page 36 2 minutes. 10. Dry. Dry device using a soft lint-free cloth or medical grade compressed air. If smaller devices or cannula- tions contain residual water, blow dry with medical grade compressed air. DePuy Synthes Colibri II Instructions for Use...
- Page 37 Cleaning and Disinfection Automated Cleaning Instructions with Manual Pre-Cleaning Important: • The Colibri II batteries must not be cleaned follow- ing the Mechanical / Automated Cleaning Instruc- tions with Manual Pre-Cleaning. • This section does not apply to articles 511.773, 511.776 and 511.777.
-
Page 38: Automated Cleaning Instructions With Manual Pre-Cleaning
7. Visually inspect device. Inspect the cannulations, coupling sleeves, etc. for visible soil. Repeat steps 1–7 until no visible soil remains. DePuy Synthes Colibri II Instructions for Use... - Page 39 A lid (68.001.602) is available for the washing basket. This can be used for sterilization, but is not required for machine washing. Warning: Do not wash the system in the Synthes Vario Cases (68.001.255, 68.001.253). Dimensions of the Washing Basket (Length Width Height): Washing Basket without Lid: 500 ...
- Page 40 Mechanical cleaning / disinfection is an additional stress for power equipment, especially for seals and bearings. Therefore, systems must be properly lubri- cated and regularly sent to be serviced (at least once per year). DePuy Synthes Colibri II Instructions for Use...
-
Page 41: Maintenance And Lubrication
1 drop of Synthes special oil (519.970); distribute the oil by moving the components. Wipe off the excess oil with a cloth. For detailed information, please refer to the Colibri II Care and Maintenance Poster (DSEM/PWT/0417/0145). Lubricating the handpiece (Fig. 1 and 2) • Lubricate the trigger shafts and then press the triggers... - Page 42 • Place oil on the seal of the cover and then evenly distribute the oil on the seal. • Lubricate the lock, hinge and knob, then actuate it several times. Figure 3 Figure 4 DePuy Synthes Colibri II Instructions for Use...
- Page 43 First lubricate and then move all movable parts: • Saw blade coupling (slot between the saw blade coupling and attachment) • Locking sleeve of the attachment coupling (slots on both sides) • Coupling pins • Opening of the attachment coupling Colibri II Instructions for Use DePuy Synthes...
- Page 44 Exception: The Radiolucent Drive (511.300) does not require lubrication. • The power tool and accessories must only be lubri- cated with Synthes special oil (519.970). The com- position of the vapor-permeable and biocompatible oil is optimized for the specific requirements of the power tool.
-
Page 45: Function Control
• Check instruments for correct adjustment and func- tioning prior to every use. • Should the system have corroded parts, do not use it anymore and send it to the Synthes service center. Colibri II Instructions for Use DePuy Synthes... -
Page 46: Packaging, Sterilization And Storage
Synthes recommends the use of the specifically designed Synthes Vario Case (68.001.255) or of the specifically designed Washing Basket (68.001.610). Synthes Colibri II system must be resterilized using vali- dated steam sterilization methods (ISO 17665 or national standards). Synthes’ recommendations for packed de- vices and cases are as follows. - Page 47 Use products in the order in which they are received (“first- in, first-out principle“), taking note of any expiration date on the label. Colibri II Instructions for Use DePuy Synthes...
-
Page 48: Repairs And Technical Service
Care and Maintenance Repairs and Technical Service The tool should be sent to the Synthes office for repair if it is faulty or malfunctions. Contaminated products have to run through the complete reprocessing procedure be- fore being sent to the Synthes office for repair or techni- cal service. -
Page 49: Disposal
Please send tools that are no longer used to your local Synthes representative. This ensures that they are dis- posed of in accordance with the national application of the respective directive. The tool must not be disposed of with household waste. - Page 50 Kirschner wire. Bone and tool heat up during Cutting edges of the tool are blunt. Replace the tool. surgery. DePuy Synthes Colibri II Instructions for Use...
- Page 51 39. If the recommended solutions do not work, send the power tool to your local Synthes service center. For further technical questions or information on our services, please contact your Synthes representative. Colibri II Instructions for Use DePuy Synthes...
-
Page 52: System Specifications
Collateral Standard: Electromagnetic disturbances – Requirements and tests: IEC 60601-1-2 (2014) (Ed. 4.0), EN 60601-1-2 (2015) Medical electrical equipment – Part 1–6: Collateral Standard: Usability: IEC 60601-1-6 (2010) (Ed. 3.0) + A1 (2010) DePuy Synthes Colibri II Instructions for Use... - Page 53 38 °C; 100 °F 72 h 85 % 60 °C; 140 °F 30 % *products have been tested according to ISTA 2A Warning: The machine must not be stored or operated in explosive atmospheres. Colibri II Instructions for Use DePuy Synthes...
- Page 54 System Specifications Technical Data Colibri II: 532.101 Battery: 532.103 Battery Casing: 532.132 Continuously adjustable speed: 0–3500 rpm Weight (w. battery and 925 g battery casing): Operating voltage: 14.4 VDC Battery capacity: 1.2 Ah Battery type: Li-Ion Cannulation: B 3.2 mm Empty battery charging time: approx.
- Page 55 Burring 60 sec 60 sec ments. • The Colibri II must not be stored or operated in an Kirschner Wire setting 30 sec 60 sec explosive atmosphere. Sawing 532.021...
- Page 56 No limitation Attachment (532.045) (532.021) Saw blade (532.067) Oscillating Saw Saw blade 9 h 33 min Attachment (03.000.313) (532.023) Saw blade (03.000.316) Large Oscillating Saw blade 12 h (03.000.394) Attachment Saw blade (532.026) (03.000.396) DePuy Synthes Colibri II Instructions for Use...
- Page 57 Oscillating Saw Saw blade < 2.5 Attachment (532.023) (03.000.313) Saw blade 1 h 18 min (03.000.316) Large Oscillating Saw Saw blade 14.02 15 min Attachment (532.026) (03.000.394) Saw blade 18.44 8 min (03.000.396) Colibri II Instructions for Use DePuy Synthes...
-
Page 58: Electromagnetic Compatibility
Guidance and manufacturer’s declaration – electromagnetic emissions The Synthes Colibri II system is intended for use in the electromagnetic environment specified below. The customer or user of the Synthes Colibri II system should ensure that it is used in such an environment. Emission test Compliance Electromagnetic environment –... - Page 59 Guidance and manufacturer’s declaration – electromagnetic immunity The Synthes Colibri II system is intended for use in the electromagnetic environment specified below. The customer or user of the Synthes Colibri II system should ensure that it is used in such an environment. Immunity test standard...
- Page 60 TV broadcast cannot be predicted theoretically with accuracy. To assess the electromagnetic environment due to fixed RF transmitters, an electromagnetic site survey should be considered. If the measured field strength in the location in which the Synthes Colibri II system is used exceeds the applicable RF compliance level above, the Synthes Colibri II system should be observed to verify normal operation.
- Page 61 Synthes Colibri II system The Synthes Colibri II system is intended for use in the electromagnetic environment in which radiated RF distur- bances are controlled. The customer or user of the Synthes Colibri II system can help prevent electromagnetic in-...
-
Page 62: Additional Information
532.104). be used. • Before first use or after storing the battery (532.003) In addition to the information provided in the Colibri II outside of the charger for more than one month, a IFU, this section provides specific information regarding refreshing-cycle with the Synthes Universal Battery the three above listed articles. -
Page 63: Ordering Information
Accessories 532.132 Battery Casing for Nos. 532.101 and 532.110, with Locking for Lid 68.001.255 Vario Case, size 1/1, for Colibri II and Small Battery Drive II, without Lid, without Contents 532.103 Battery for Nos. 532.101 and 532.110 689.507 Lid (Stainless Steel), size 1/1, for Vario Case 532.104... - Page 64 Synthes GmbH Eimattstrasse 3 4436 Oberdorf Switzerland Tel: +41 61 965 61 11 Not all products are currently available in all markets. Fax: +41 61 965 66 00 0123 www.depuysynthes.com This publication is not intended for distribution in the USA.
Need help?
Do you have a question about the Colibri II and is the answer not in the manual?
Questions and answers