
Related Manuals for Aveo Systems Mira Connect

Summary of Contents for Aveo Systems Mira Connect
- Page 1 Mira Connect™ Administrator’s Guide S Y S T E M S Simplifying Collaboration www.aveosystems.com January 2018 Version 1.06 (Production) Document 210.1096.001...
- Page 2 Mira Connect and Mira Portal Administrator’s Guide Trademark Information Aveo Systems and the Aveo logo are registered trademarks, and the names and marks associated with Aveo Systems’ other products are trademarks of Aveo Systems, Inc. and are registered and/or common law marks in the United States. All other trademarks are the property of their respective owners. Patent Information The accompanying product may be protected by one or more U.S. and foreign patents and/or pending patent applications held by Aveo Systems, Inc. © 2017 Aveo Systems, Inc. All rights reserved. Aveo Systems, Inc. 1791 West Oak Parkway, Suite 8 Marietta, GA 30062 USA No part of this document may be reproduced or transmitted in any form or by any means, electronic or mechanical for any purpose, without the express written permission of Aveo Systems, Inc. Under the law, reproducing includes translating into another language or format. As between the parties, Aveo Systems, Inc., retains title to and ownership of all proprietary rights with respect to the software contained within its products. The software is protected by United States copyright laws and international treaty provision. Therefore, you must treat the software like any other copyrighted material (e.g., a book or sound recording). Every effort has been made to ensure that the information in this manual is accurate. Aveo Systems, Inc. is not responsible for printing or clerical errors. Information in this document is subject to change without notice. Mira Connect Administrator’s Guide Version 1.06 S Y S T E M S...
-
Page 3: Table Of Contents
Mira Connect and Mira Portal Administrator’s Guide Table of Contents Introduction .............................. 5 About this Manual ..............................5 Quick Start for a Typical Installation ......................... 7 Getting Started with Mira Connect and Mira Portal .................. 9 Create a Mira Portal Account ............................ 9 2.1.1 Mira Portal Options .............................. 11 2.1.2 User Settings ................................. 11 2.1.3 User Permissions ..............................12 2.1.4 Assigning Permissions ............................14 Add Organization ..............................16 2.2.1 Organization Settings ............................17 2.2.2 Office 365 Settings ..............................17 Add Sites to an Organization ..........................17 2.3.1 Site Settings ................................18 2.3.2 Recent Events ............................... 19 2.3.3 Using Visual Themes to Customize Mira Connect ....................19 2.3.4 Permissions . - Page 4 Mira Connect and Mira Portal Administrator’s Guide 6.2.2 Telnet ..................................59 Epson Projectors ..............................59 Polycom Video Codecs ............................59 Sharp Aquos Displays ............................. 60 Integrating Office 365 Calendar with Mira Connect ................... 6 1 Overview of Integrating Mira Connect with Office 365 ................... 61 Configuring Microsoft Office 365 ..........................62 7.2.1 Create a Service “User Account” .......................... 62 7.2.2 Adding Room Resources ............................65 7.2.3 Add the ‘Service User’ as a Delegate to the Room Resource Accounts ..............69 7.2.4 Sharing the Room Calendars with the Service User Account ................72 7.2.5 Changing Room Resource Settings ........................82 Enabling Office 365 Calendars in Mira Portal ......................85 Adding Dial Information to Meeting Invitations ...................... 95 7.4.1 Adding Telephone Numbers to Meeting Invitations ..................... 95 7.4.2 Adding Video Conferencing Numbers to Meeting Invitations ................96 Creating a new Office 365 Account ......................... 96 7.5.1 Create Office 365 Trial Subscription ........................96 Using Mira Connect .......................... 1 00 Mira Connect Technical Specifications ..................... 1 01 Mira Connect Accessories .
-
Page 5: Introduction
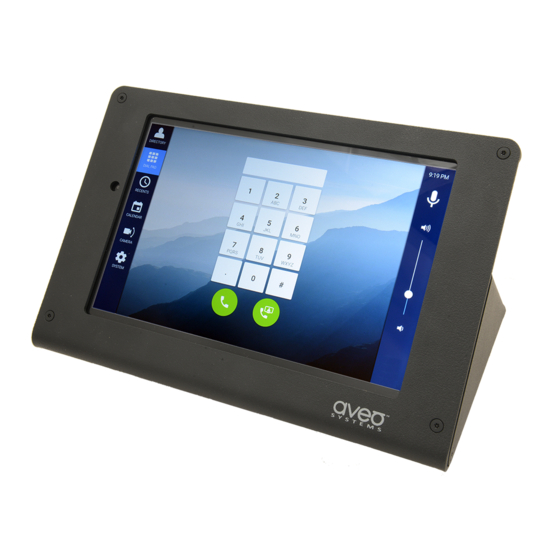
Mira Connect and Mira Portal Administrator’s Guide 1 Introduction Mira Connect™ is a touch interface and control appliance for conference rooms, huddle rooms, and collaboration spaces that makes controlling and managing audio and video conferencing, presentation systems, and other collaboration systems easy for end-users, room and facility managers, and solution providers. Mira Connect controls installed video codecs, DSP audio systems, and other commonly used room equipment including displays and projectors. Mira Connect presents a consistent user interface for the users regardless of the underlying equipment – making it easy to use the equipment in the room without assistance. Mira Connect’s professionally designed user interface makes it easy to launch audio and video calls, share content, control audio levels in the room, control displays, and more. Users can initiate calls through the room’s scheduled meetings, their company’s directory, through speed dials, or direct dial calls as shown in Figure 1. Mira Connect is designed for three types of users: the end-users who collaborate and communicate with local and remote individuals and teams, facility and technology managers who are responsible for maintaining communication platforms, and solution providers who design, install, and manage these systems. Figure 1. An example of the user interface for Mira Connect. Mira Connect uses an enterprise-grade cloud management system, Mira Portal™, for easy deployment, system management, and notifications about room and equipment status. Using Mira Portal, a remote support team can securely monitor the system, assist users, and launch calls. 1.1 About this Manual This manual is intended for installers and managers of audio and video conferencing rooms to configure and setup Mira Connect for controlling audio and video conferencing equipment in the room. This manual presents an overview of the typical system, describes how to use Mira Portal, and then illustrates how to setup Mira Connect for in-room control. Mira Connect Administrator’s Guide Version 1.06 S Y S T E M S... - Page 6 Mira Connect and Mira Portal Administrator’s Guide A separate manual, the Mira Connect Users Guide, describes how to use the Mira Connect system once it has been configured. Important sections of the text will be highlighted as shown below. This is an important message. Mira Connect Administrator’s Guide Version 1.06 S Y S T E M S...
-
Page 7: Quick Start For A Typical Installation
Mira Connect and Mira Portal Administrator’s Guide 1.2 Quick Start for a Typical Installation A typical installation with Mira Connect is shown in Figure 2 where Mira Connect is used in each room and is on the same network as the equipment it controls. For setup and management Mira Connect must have internet access to reach Mira Portal (https://mira.aveosystems.com) over port 443 (https protocol using transport layer security). Mira Connect contacts Mira Portal to download information about the desired room and the equipment that is to be controlled. Status information from the room is shared with Mira Portal for remote management and monitoring from any location where Mira Portal is accessible. Room 2 Audio DSP P O R T A L Firewall Router Video Codec Video Codec Audio DSP Display Room 1 Room N Figure 2. Typical configuration with Mira Connect in each room communicating to equipment and Mira Portal. Below are the quick setup instructions for installing Mira Connect. The remainder of this administrators guide provides more detailed information about how to setup the Mira Connect system and how to use Mira Portal. 1. Create an account on Mira Portal (https://mira.aveosystems.com ) 2. - Page 8 Mira Connect and Mira Portal Administrator’s Guide See the Mira Connect Quick Install Guide that comes with Mira Connect for more information on quick setup. Mira Connect™ Quick Install Guide Simplifying Collaboration www.aveosystems.com May 2017 Version 1.0 Document 210.1196.001 © 2017 Aveo Systems, Inc. Figure 3. Mira Connect quick install guide is included with Mira Connect. Mira Connect Administrator’s Guide Version 1.06 S Y S T E M S...
-
Page 9: Getting Started With Mira Connect And Mira Portal
To get started with Mira Connect, the integrator/installer creates a Mira Portal account and uses that to define their client’s organization, sites, and rooms and add the desired collaboration equipment to the rooms. To define a room and add equipment in Mira Portal, we’ll use the steps outlined in Figure 4 and detailed in the following sections. Create a Mira Portal Account Add Organiza on Add Site to Organiza on Add Room to Site Pair Mira Connect with Room Add Equipment to Room Figure 4. Mira Portal steps to prepare for using Mira Connect in the room. 2.1 Create a Mira Portal Account Navigate to Mira Portal (https://mira.aveosystems.com) with your internet browser. Supported browsers include current versions of Google Chrome, Internet Explorer, Safari, and Firefox. If you don’t have an account, click create one as shown in Figure 5 to create an account. Mira Connect Administrator’s Guide Version 1.06... - Page 10 Mira Connect and Mira Portal Administrator’s Guide Figure 5. Logging in to Mira Portal requires a valid email address and a password. Create an account using your first and last name, your email address, and a password as shown in Figure 6. Passwords must be at least 6 characters long. The strength of the password is shown to provide guidance on password selection. Click the eye icon to see the password in clear text. Set a strong password to minimize the risk of your account being accessed by others. If you have an account already, login using your existing credentials. If you’ve forgotten your password, click Forgot your password? and you will receive an email with instructions to reset your password. Make sure to check your junk mail folder if you don’t see a recovery email shortly after resetting your password. Figure 6. Creating a Mira Portal account. Once you have entered your first name, last name, email address and password, select Create Account to create an account. Once the account has been created, our terms of service agreement appears, and then the Mira Portal dashboard will appear as shown in Figure 7. Accept the terms of service to get to the dashboard. While there is a tutorial that you can step through to create your first organization, site, and room, you can skip the tutorial and start on your own. Mira Connect Administrator’s Guide Version 1.06 S Y S T E M S...
-
Page 11: Mira Portal Options
Mira Connect and Mira Portal Administrator’s Guide The Mira Portal dashboard shows the names of your Organizations, Sites, and Rooms for which you have valid permissions. You have access to the organizations, sites, and rooms that you have defined or that were assigned to you using permissions. After creating a new account there will be no data in the dashboard. Organizations are the end customer’s company or organization name. A site is a physical location of the organization. There may be multiple sites per organization. A room is a physical room within a site where Mira Connect will be installed. There are typically many rooms per site. Figure 7. Default dashboard is empty after creating a new account. 2.1.1 Mira Portal Options On the Dashboard page, there are several headers including All Rooms, In Call, and Alerts. • All Rooms shows the total number of rooms that you can view based on your permissions. • In Call shows the number of rooms with active calls in progress. Alerts shows the number of rooms that have an issue such as network connectivity issues to one • or more devices in the room. 2.1.2 User Settings Select the user name in the upper right-hand corner as shown in Figure 8 to enter user information, such as a mobile phone number for text alerts from the system, as shown in Figure 9. Figure 8. User Information in the Mira Portal menu bar. Clicking EDIT on any of the fields will allow you to edit the information about your account. Your email address is used for login and for assigning permissions to you in the database. Your mobile number can be used for receiving text messages when there are issues with the room. Mira Connect Administrator’s Guide Version 1.06 S Y S T E M S... -
Page 12: User Permissions
Mira Connect and Mira Portal Administrator’s Guide Figure 9. Additional information is available about the user. 2.1.3 User Permissions Mira Portal supports four different permission levels for managing the organization and sites: Administrator, Technical, Help Desk, and Reporting. These permissions may be assigned at the site level or the organization level. Organization-level permissions are valid at all sites within the organization. Table 1 shows the Mira Portal permission levels and who they are designed for. Table 1. M ira Portal permission levels. Permission Designed for Administrator a user who is responsible for managing the entire organization or site. Technical an integrator who is responsible for installing rooms within an organization. Help Desk an integrator assisting room users remotely using the Mira Connect ‘Remote Control’ capabilities Reporting a user who needs to view and create reports for the organization, site, room, and equipment settings The permission levels are described below. A user with administrator permissions can create or remove an organization, adjust organization • settings, add and remove sites, rooms, equipment, and can assign permissions to others at the organization or site level. If you create a new organization, by default you have Administrator permissions for the entire organization. Administrator permissions are designed for a user who is responsible for managing the entire organization or site. This user may be the integrator who is installing all the systems and/or perhaps the client who is responsible for managing the rooms after installation. There may be multiple users with Administrator permissions. Administrator permissions at a site level allow one to add and remove rooms, equipment, and to assign permissions to other users at that site level. Administrator permissions at an organization level are the broadest set of permissions allowed and Mira Connect Administrator’s Guide Version 1.06 S Y S T E M S... - Page 13 Mira Connect and Mira Portal Administrator’s Guide should be assigned with care. The Administrator permissions is a superset of Technical permissions. Only an Administrator can assign and remove permissions to other users. Technical permissions are designed for a partner who is installing a room, adding equipment, and • pairing Mira Connect to a room. The Technical permissions may be assigned at an organization or site level. Technical permissions at the organization level allow the user to adjust organization settings and site settings within that organization, create sites and rooms within the sites, and modify all equipment in the rooms. Technical permissions at the organization level are designed for an integrator who is expected to work on all rooms and all sites within an organization. Technical permissions at the site level allow the user to adjust site settings (time zone, customize the Mira Connect visual theme, and more), create rooms within the site and add, delete, and modify all equipment in those rooms. Technical permissions at the site level are designed for an integrator who is expected to work on all rooms within a site but doesn’t need access to other sites in the organization. Technical permissions are a superset of the Help Desk permissions. Help Desk permissions at the organization or site level are designed for someone who is assisting • room users remotely using the Mira Connect Remote Control capability that is available with the Mira Portal Enterprise service offering. Help Desk permissions allow the remote user to dial calls and use the Mira Connect user interface just as a user in the room can use the Mira Connect system. A person with help desk permissions cannot change equipment settings in the room nor add or remove equipment. Help desk permissions are a superset of the Reporting permissions. • Reporting permissions allow a user to view the organization, site, room, and equipment settings and create reports from Mira Portal but not modify the equipment, room, site, or organization settings. Reporting permissions can be thought of as a ‘read-only’ version of the information in Mira Portal. Reporting permissions can be assigned at either the organization or site level. Typically, the integrator/installer has Administrator, or at least Technical permissions, if they are creating sites and rooms for their customer. Mira Connect Administrator’s Guide Version 1.06 S Y S T E M S...
-
Page 14: Assigning Permissions
Mira Connect and Mira Portal Administrator’s Guide A best practice for an integrator with administrator permissions is to assign administrator permissions to an A/V or IT manager at their customer’s organization before completing the installation. 2.1.4 Assigning Permissions To assign permissions for an organization, select the organization, and select the Permissions settings as shown in Figure 10. Figure 10. Mira Portal permissions interface. The permissions panel shows who has what type of permissions on the organization. As shown in Figure 11, clicking the icon expands the permissions settings to show what the user can do with their permissions. Mira Connect Administrator’s Guide Version 1.06 S Y S T E M S... - Page 15 Mira Connect and Mira Portal Administrator’s Guide Figure 11. Permissions panel expanded. Choosing ADD will cause the ‘Add Permissions for My Organization’ window to appear as shown in Figure 12. Enter the user’s email address that they used to register with Mira Portal and select the permissions to assign to the user. Figure 12. Adding permissions for an organization. Assuming the user has a valid Mira Portal account, select the permissions to be granted. Select ADD PERMISSIONS when ready to assign the new permissions to the user. The user will see the appropriate organization, sites, and rooms automatically in Mira Portal when they are logged in. It is not necessary for the user to logout and log back in to see new organization, site, or room permissions that have been added as new permissions appear immediately in Mira Portal. If the user does not have an account, Mira Portal will report an error that it can’t find the user as shown in Figure 13. Permissions can only be assigned to valid Mira Portal users. If the user already has permissions and you are changing them, you are prompted to confirm the new permissions. Mira Connect Administrator’s Guide Version 1.06 S Y S T E M S...
-
Page 16: Add Organization
Mira Connect and Mira Portal Administrator’s Guide Figure 13. Error message when assigning permissions to someone who doesn't have a Mira Portal account. User permissions can also be removed by a user with administrator permissions by expanding the permissions section by pressing the icon and selecting REMOVE. A best practice is to review permissions after a system installation has been completed, to understand who has what permissions on an organization or site. 2.2 Add Organization Before you can create a room and add equipment to it, start by adding an ‘Organization’, then a ‘Site’, and then the room. The Organization is the name of the end customer’s company or organization within which the room is located. In this example, the organization is called My Organization. Once an organization is created, organization settings can be configured. With the current release, you can set the Time Zone under the Settings panel. The time zone is used for time-stamping system log entries and scheduling firmware updates. As new organizations, sites, and rooms are added to Mira Portal, a date and time-stamped entry is added to Recent Events. Organization names are case-sensitive and must be unique. Figure 14 shows Mira Portal after an organization has been added and named My Organization. Mira Connect Administrator’s Guide Version 1.06 S Y S T E M S... -
Page 17: Organization Settings
Mira Connect and Mira Portal Administrator’s Guide Figure 14. Mira Portal dashboard after creating an organization called My Organization. 2.2.1 Organization Settings The Time Zone of the organization may be changed by clicking the EDIT button. 2.2.2 Office 365 Settings As described in the section “Integrating Office 365 Calendar with Mira Connect”, you enable Office 365 calendar integration with the Organization settings. 2.3 Add Sites to an Organization Once you have created an organization, click on the organization’s name and select ADD in the Sites panel as shown in Figure 15. In this example, we’ll create a site called Headquarters in the organization, My Organization. Figure 15. Click the Add button to add a site to the selected organization. Enter the site name and address information to help differentiate that site from other sites with similar names within the organization as shown in Figure 16. Address information is optional and can be used in reporting usage by site or location. Duplicate site names are not allowed and site names are case sensitive. Mira Connect Administrator’s Guide Version 1.06 S Y S T E M S... -
Page 18: Site Settings
Mira Connect and Mira Portal Administrator’s Guide Figure 16. Entering site information for the site Headquarters. After the site has been added the Mira Portal dashboard will be updated as shown in Figure 17. Figure 17. The dashboard after adding the site Headquarters to the organization My Organization. 2.3.1 Site Settings As shown in Figure 18, site-specific settings can be accessed by clicking the EDIT button from the Settings panel. The site settings include: Physical Address is the address of the selected site. • Time Zone is the time zone associated with the selected site. The default is America/New York. • Sites may have different time zones from the organization. Notify Me Via enables text/SMS alerts to the user’s cell phone number if the equipment in any • of the rooms within the site goes offline or online from the network. Mira Connect Administrator’s Guide Version 1.06 S Y S T E M S... -
Page 19: Recent Events
Mira Connect and Mira Portal Administrator’s Guide • Application Update Time is used to tell all the Mira Connect devices in this site to look for new firmware updates and update automatically if there is new firmware available. Default update time is 12:00am in the site’s time zone. • Smart Sleep allows the Mira Connect to dim its screen after the specified time. If Mira Connect is in an active call, the screen will not dim. The default value is to have Smart Sleep enabled with the screen set to dim at 10 minutes. When the screen is dimmed, a touch on the screen will re-activate the screen. Idle Screen selects which screen on Mira Connect will be the shown after there has not been • any activity for more than a couple of minutes. The default setting is “Automatic” which is based on the equipment in the room. Automatic will default to the calendar when there is an Office 365 calendar integration, otherwise it defaults to the dialer keypad, otherwise it defaults to the display settings, otherwise it defaults to the audio source selection. Setting the Idle Screen to a screen will default the display to that screen, assuming the functionality exists for that screen within the Mira Connect system. For example, selecting the Display screen if there are no displays in the system will have the system default to a different screen. Power Off Button Enabled controls whether there is a power off button on the Mira Connect • system. The Power off button will put the equipment in the room back to its default state including powering off displays, hanging up audio or video calls, and setting the volume back to the middle of the range. Under the ‘Advanced power settings’ the installer can specify whether the local room microphones should be unmuted (default) or muted upon room power off. Figure 18. Site settings for the site Headquarters. 2.3.2 Recent Events Recent events show changes to the site settings, room additions, and other changes to the system. All entries are timestamped in the time-zone of the site and the user who made the changes is recorded. 2.3.3 Using Visual Themes to Customize Mira Connect The Visual Theme of a site, as shown in Figure 19, may be customized with a logo, background image, and custom colors. Display customization is performed at the site level and is automatically used by all rooms at that site. Click the image preview or the EDIT button to edit the visual theme. Mira Connect Administrator’s Guide Version 1.06 S Y S T E M S... - Page 20 Mira Connect and Mira Portal Administrator’s Guide Figure 19. Visual themes may be customized within Mira Portal. The default theme is called Blue Ridge and includes a background image of the Blue Ridge mountains. Click SELECT BACKGROUND IMAGE… as shown in Figure 20 to open an image file on your computer. Selecting the image will upload the image to Mira Portal and show a preview of the image. Images are not loaded to the Mira Connect devices in that site until you press SAVE. Figure 20. Edit dialog for the Virtual Theme. Use the trash can icon to remove an image and then click SAVE to delete the image from the Mira Connect display. Background, foreground, and room title colors may also be changed by selecting the colors on this panel. You may select a color from the color areas or type in an RGB color code in hexadecimal. To restore one of the pre-configured visual themes, select the theme name and press SAVE. A logo image should be 240x80 pixels and will be placed automatically on the upper right of the Mira Connect display. Larger images will be scaled automatically to 240x80 by scaling the image so that it fits within 80 pixels of height. For example, a 320x240 image will be scaled down to 140x80 and be right justified. For best results, use an image size of 240x80 pixels. The background image should be at least 1064x800 pixels and will be placed in the middle of the Mira Connect display. Larger images will be scaled down to 1064x800 and smaller images will be scaled up and centered. The aspect ratio of background and logo images will be preserved. The target image dimensions and overall screen size are summarized in Table 2 and illustrated in Figure 21. Mira Connect Administrator’s Guide Version 1.06 S Y S T E M S...
-
Page 21: Add Room To Site
Mira Connect and Mira Portal Administrator’s Guide Table 2. Image sizes for customizing the background of Mira Connect. Image Type Image Size (pixels) Logo 240x80 Background image 1064x800 Figure 21. Background and logo image specifications in pixels. 2.3.4 Permissions Site user permissions were described as part of the Organization and Site permissions in section: User Permissions on page 12. 2.4 Add Room to Site After adding the Site, select the desired Site within an Organization, and in the Rooms panel, select ADD. In this example, a room called Conference Room has been added as shown in Figure 22. Mira Connect Administrator’s Guide Version 1.06 S Y S T E M S... -
Page 22: Pairing Mira Connect To The Room
Mira Connect and Mira Portal Administrator’s Guide Figure 22. Adding a room called Conference Room to a site with the conference room options highlighted. Once the room has been added, there are additional fields that appear on the dashboard as highlighted in Figure 22. The icons under the Conference Room name indicate whether the system is in a call, , the mute status , and the room volume control . After a Mira Connect has been paired with the room, the REMOTE CONTROL feature allow a user, with proper permissions, to open their browser and use the same user interface as Mira Connect, allowing remote control of the room. 2.5 Pairing Mira Connect to the Room After a room has been defined, the next step is to pair Mira Connect with the room so the Mira Connect can help with adding equipment and control points. Control points are channel names or instance names/numbers that are defined in the audio or video equipment’s configuration file that are accessible for external control. For example, in a SoundStructure device, a control point will be a virtual channel name, such as “Mics”, while in a QSC device, a control point can be an exported control or a named component. If Mira Connect is not available yet for the room, you may skip the pairing step and continue to add equipment to the room and manually add control points. If Mira Connect is available and your equipment is already on the network, pairing Mira Connect with the equipment can simplify the control point selection process, depending on the equipment. Mira Connect Administrator’s Guide Version 1.06 S Y S T E M S... - Page 23 Mira Connect and Mira Portal Administrator’s Guide To pair Mira Connect to a room, Mira Connect must have network access to the Mira Portal site: https://mira.aveosystems.com. To add Mira Connect to the room, power up the Mira Connect, select the language for the user interface, and then select the network interface – wired Ethernet or wireless Ethernet – that will be used to connect to the equipment and externally to Mira Portal. See section: Installing Mira Connect, on page 42 for more information. Once Mira Connect has connected to Mira Portal, it will present a unique pairing code, valid for 60 minutes, that can be used to pair the device with the room. Figure 23. Pairing code displayed on Mira Connect. If the pairing code expires on Mira Connect you will be prompted to generate another pairing code as shown in Figure 24. Figure 24. An expired pairing code requires getting a new pairing code. Mira Connect Administrator’s Guide Version 1.06 S Y S T E M S...
- Page 24 Mira Connect and Mira Portal Administrator’s Guide Enter the pairing code into Mira Portal by clicking the PAIR button on the Mira Connect panel as shown in Figure 25. Figure 25. Use Mira Portal to enter the pairing code shown on the Mira Connect screen. Figure 26. Enter the pairing code and click PAIR. On Mira Connect, you will see a pairing summary as shown in Figure 27 that confirms the pairing status. Press FINISH to start the Mira Connect interface. Figure 27. Pairing summary after successful pairing. If there is no equipment defined in the room at this point, Mira Connect will display a screen that prompts you to add equipment to the room using Mira Portal as shown in Figure 28. Mira Connect Administrator’s Guide Version 1.06 S Y S T E M S...
-
Page 25: Adding Equipment To The Room
Mira Connect and Mira Portal Administrator’s Guide Figure 28. After pairing to the room, Mira Connect reminds you to add equipment to the room. 2.6 Adding Equipment to the Room Once a room has been defined, add equipment, that you’d like to control and have the user interface create, to the room. To add devices to the selected room, click the ADD button in the equipment panel and choose the equipment from the list of equipment as shown in Figure 29. Figure 29. Example list of equipment that may be added to the room. After selecting the Equipment Type, in this example a Polycom SoundStructure, the CONNECTION tab will be selected by default. Enter the IP Address of the equipment in the IP Address or Hostname field. If the equipment requires a password for authentication, enter the password in the Administrator Password field shown in Figure 30. Mira Connect Administrator’s Guide Version 1.06 S Y S T E M S... - Page 26 Mira Connect and Mira Portal Administrator’s Guide We recommend using static IP addresses on the equipment you are controlling so that the equipment IP address doesn’t change over time. The Simulate equipment check box allows you to add simulated equipment to the room if the equipment is not available or perhaps not installed yet. Using simulated equipment allows you to create the full user interface for demonstration purposes and proof of concept for customers and partners. When the physical equipment is available, you can uncheck the Simulate equipment box and connect to the physical equipment. Figure 30. Adding equipment to a room. Simulated equipment – particularly for DSP audio systems – may require different control points than your actual equipment, so switching between simulated and real equipment may require changing control points. In Mira Portal, simulated equipment will have a “SIM” graphic associated with the equipment as shown in Figure 31. While you are building your system, you can mix and match simulated equipment with real-equipment – for example adding a simulated display – to show what the user interface will look like on Mira Connect. Figure 31. Simulated equipment will show the "SIM" graphic to highlight the equipment is simulated. Once the IP address has been added to the equipment, press ADD EQUIPMENT to add the device to the room. If you have already paired a Mira Connect to the room (See Section Pairing Mira Connect to the Room), Mira Connect will connect to IP address of the equipment and show the connection status in Mira Portal. If there is no Mira Connect in the room, the question mark icon will be shown as the equipment status. Mira Connect Administrator’s Guide Version 1.06 S Y S T E M S...
-
Page 27: Adding Video Conference Equipment
Mira Connect and Mira Portal Administrator’s Guide Once Mira Connect has been paired with the room and installed in the room and the network connection to equipment has been validated, the question marks will turn to green check marks, , if Mira Connect is able to control the device successfully. If the network connection to the equipment is not successful or control has not been established, the icon next to the equipment will indicate a warning, . The status of the connection will be shown under the equipment as described below. • A ‘Connection error’ or ‘Connection failed’ message means that the device could not be connected to at the IP address specified. To resolve this issue, confirm the equipment’s IP address was entered properly and that the Mira Connect has a route to the equipment at the specified IP address. Check that Telnet is enabled on the equipment to be configured. See section ‘Equipment Information’ for product-specific information. An ‘Edit equipment to complete additional configuration’ message means that the device could • be connected to over IP, but the control points are not configured as shown in Figure 32. To resolve this issue, edit the equipment and check the control points as described in the following sections. Figure 32. An example showing the control points that need to be configured. 2.6.1 Adding Video Conference Equipment Video conferencing systems can be added to Mira Portal by selecting the type of video codec, the model, entering the IP address of the system, and password information as shown in Figure 33. The video codec is typically controlled over telnet (port 23). Mira Connect Administrator’s Guide Version 1.06 S Y S T E M S... - Page 28 Mira Connect and Mira Portal Administrator’s Guide Figure 33. Adding a video conferencing device. Once a video codec’s IP address and authentication parameters have been added, there’s a “Video Inputs” section that can be used to specify which video inputs on the codec are used for sharing content through the video conferencing system. Content sharing makes it possible for a user to connect different video sources, such as their computer, to the video codec for local display in the room and, when in a call, for display to the remote participants too. For example, Figure 34 shows the HDMI/VGA input of the Polycom RealPresence Group Series has a laptop connected to it for content sharing locally in the room as well as to the remote participants. To enable this video input, check the box, select an icon, enter a label, and optionally add more information in the description field. The video input’s label and icon becomes part of Mira Connect user interface for selecting a video source to display in the local room. As we will see later, selecting a content source for display in the room will automatically start that content source playing through the video codec. Content will be stopped when a different input source is selected on the display. Mira Connect Administrator’s Guide Version 1.06 S Y S T E M S...
-
Page 29: Audio Dsps
Mira Connect and Mira Portal Administrator’s Guide Figure 34. The input sources to the video codec can be enabled and labeled for use. Once the video input selections are complete, click ADD EQUIPMENT to add the video codec to the room. Before controlling Polycom video conferencing devices (codecs), ensure telnet is enabled on the codec so that Mira Connect can control the codec with a telnet session. Telnet is usually enabled via the web user interface of the codec. For further information, see the codec’s administrator guide. 2.6.2 Audio DSPs To control audio Digital Signal Processing (DSP) equipment, it is necessary to define specific control points to mute microphones, to adjust volume level, to dial the telephony interface, and for other tasks. For example, adding a mute control point tells the DSP audio device what to do when the mute button is pressed on Mira Connect. Depending on the DSP audio device, control points may be automatically identified by Mira Connect and then selected from a list or manually entered based on knowledge of the design. Depending upon the DSP device, once Mira Connect has established a connection to the DSP equipment over the network, it will determine the relevant control points and provide lists of those control points to Mira Portal, allowing you to easily choose the proper control point from a list of options. Mira Connect Administrator’s Guide Version 1.06 S Y S T E M S... - Page 30 Mira Connect and Mira Portal Administrator’s Guide Edit the equipment by clicking the icon and you will see the Update Equipment page as shown in Figure 35. In this example, we see that the network connection to the device is valid ( ) but the audio control is not correct ( ). Figure 35. Audio control issue with a device that has been added to the room. To edit control points, click the AUDIO CONTROL tab to change the control points to see the details of the control issue as shown in Figure 36. At least one control point must be defined to control a DSP audio device. Mira Connect Administrator’s Guide Version 1.06 S Y S T E M S...
-
Page 31: Microphone Mute
Mira Connect and Mira Portal Administrator’s Guide Figure 36. Details of the control points that can be added for an audio conferencing device. The control points options and related applications for DSP’s are described in the following sections. 2.6.2.1 Microphone mute In conferencing applications, the mute control point should control the mute state of the echo cancelled microphones that are sent to the remote sites from the local room. When the mute icon on Mira Connect is pressed, this mute control point value will be changed. If the microphone mute control point is not defined, there will be no mute control on Mira Connect. For advanced applications, select Use Presets… to use presets instead of a mute control point. One preset will mute the system and the other should unmute the system. A mute status control point is required to indicate the mute state. Select Use Mute Block to use a mute control block for mute control instead of presets. There is only one microphone mute control. 2.6.2.2 Room volume This is the room volume control point that controls the level of audio in the local room. This is typically a gain block that controls the level of the audio in the local room. If the room volume control point is not defined, there will be no volume adjustment control on Mira Connect. The DSP gain structure for the output used to send audio into the local room should be set such that a default room volume level of 0 provides a comfortable level in the room. The users will be able to adjust the room volume above and below this level. Mira Connect Administrator’s Guide Version 1.06 S Y S T E M S... -
Page 32: Audio Dialing
Mira Connect and Mira Portal Administrator’s Guide There is only one room volume control point. 2.6.2.3 Audio dialing The audio dialing control point is typically a telephony dialer block name, named component, or output telephone virtual channel name depending on the DSP audio device. In addition, depending on the DSP audio device, a telephony receive level control point may be assigned to let users adjust the receive volume level on the incoming telephony channel. There may be multiple Audio dialing telephony interface control points added to a system, one for each telephony interface supported by the DSP. 2.6.2.4 Assistive listening The assistive listening control point is used to mute or unmute a signal that feeds an assistive listening system, such as an inductive loop or infrared distribution system. There is only one assistive listening control point. 2.6.2.5 Overflow rooms The overflow room control point is used to mute or unmute an audio output that can be used to send audio to another room or, perhaps, another zone of loudspeakers. For advanced applications, select Use Presets… to use presets to enable overflow rooms and disable overflow rooms. A mute status control point must be specified that tracks the mute state. The enable preset must set the mute state false, and the disable preset must set the mute state to true. Select Use Mute… to use a single mute control block instead of presets. There can be multiple overflow rooms. 2.6.2.6 Sound Reinforcement Sound reinforcement control points can be added for muting and unmuting microphone audio to audio outputs. A single microphone mute control point can be used for each sound reinforcement zone. To use presets for enabling and disabling sound reinforcement, select Use Presets… which will present the interface shown in Figure 37. Figure 37. The control points required for sound reinforcement when using presets. The first preset name is used to disable sound reinforcement or, in other words, mute the sound reinforcement. To properly track that sound reinforcement is off, the ‘disable preset’ must also set a “Mute Status” mute block or logic output state to true or high. Mira Connect Administrator’s Guide Version 1.06 S Y S T E M S... -
Page 33: Audio Input Selection
Mira Connect and Mira Portal Administrator’s Guide The second preset name is used to enable sound reinforcement or, in other words, unmute the sound reinforcement. To properly track that sound reinforcement is on, the ‘enable preset’ must also set the “Mute Status” mute block or logic output state to false or low. The “Mute Status” control point or logic output tracks whether sound reinforcement is enabled or disabled. A mute value that is true (mute enabled) indicates that sound reinforcement is disabled. A mute value that is false (mute not enabled) will indicate the sound reinforcement state is disabled. This control point is different from the Microphone Mute described previously. Select Use Mute… to use a single mute control block instead of presets for sound reinforcement. 2.6.2.7 Audio input selection The audio input selection is used to create an audio switcher where one audio source can be selected at a time while the remaining audio inputs are muted. This is typically used when selecting one of multiple audio sources for playback in a room. Multiple audio sources may be selected for the audio input control points. Only one source will be unmuted at a time. Control points may be entered manually by typing in the name of the control point or, depending on the equipment capabilities, may be selected from a list of control points that were automatically discovered by Mira Connect. For example, to enter a Microphone mute control point, click on the Microphone mute control or the ‘ No Channel Configured’ message to expand the list of channels available as shown in Figure 39. From the list of channels, select the channel to control and then continue to the Room volume control. If you don’t see the control point that you expected, you may enter one manually based on the names used in your DSP configuration file. Some devices may require entering different control points based on the specific device that is being controlled. For QSC core audio products, you can type in a named control point that has been exported or type in a named component. Named components are created in the QSC configuration file by typing a name into the signal processing block while working offline as shown in Figure 38 and then uploading the configuration file to the QSC system. Mute and Gain named components are discovered by Mira Connect and presented to the user. Mira Connect Administrator’s Guide Version 1.06 S Y S T E M S... - Page 34 Mira Connect and Mira Portal Administrator’s Guide Figure 38. Create a named component “Room Volume” in the QSC design software by (1) clicking in the block when the system is offline, (2) typing a name, (3) clicking away from the block. Italics indicate the block is a named component. For SoundStructure products, the control points are typically virtual channel or preset names and are automatically discovered by Mira Connect. For Biamp TesiraForté products, the control points are associated with instance tags and can be level blocks or mute blocks. Naming the level and mute block instance tags with human-readable useful names, such as “RoomVolume”, will help make it easier to select the proper control points within Mira Portal. Mira Connect Administrator’s Guide Version 1.06 S Y S T E M S...
- Page 35 Mira Connect and Mira Portal Administrator’s Guide When using Biamp Tesira products, ensure that telnet is enabled for the system. To enable Telnet, navigate to the System -> Network -> Perform Network Maintenance… menu and click the Telnet check box on the Control Network dialog window. Figure 39. List of options expanded for the Microphone mute control point. Control points selected from a list will automatically have their status changed to a check mark ( ). If a control point was typed in manually, the control point will be verified after selecting UPDATE EQUIPMENT. You may check on the status by editing the equipment again. If the control point exists on the equipment, the red triangle ( ) will turn into a green circle with the check mark ( ) as shown in Figure 40. Mira Connect Administrator’s Guide Version 1.06 S Y S T E M S...
- Page 36 Mira Connect and Mira Portal Administrator’s Guide Figure 40. The green check mark will appear next to control points that are valid for the system. For adding an Audio dialing control point, click ADD to add a telephone interface to the system as shown in Figure 41. Figure 41. Adding a telephony control point to the Audio Controls. As shown in Figure 42, select one of the proposed telephony channels from the list or manually enter a valid telephony control point. Mira Connect Administrator’s Guide Version 1.06 S Y S T E M S...
-
Page 37: Split And Combine Rooms
Mira Connect and Mira Portal Administrator’s Guide Figure 42. Selecting a telephone channel control point resolves the control point error. Once valid control points have been selected, click UPDATE EQUIPMENT for a validation of the channel selections. If the control points correspond to valid external controls for the system, then the overall system status will turn green ( ) as shown in Figure 43 and the user interface for the equipment will appear on the Mira Connect device. If the overall equipment status remains in a warning state ( ), then edit the equipment to see which control points have a warning and correct those control points to match the control points that were defined in the DSP configuration file. When using simulated equipment, there are control points that are defined by default by the simulated devices. Choose the appropriate control points from the list and then click UPDATE EQUIPMENT. Figure 43. A system with valid control points will have a green check mark next to the equipment. It is the integrator’s responsibility to ensure the correct control points are used for the equipment configuration and application. 2.6.2.8 Split and Combine Rooms With the v1.0 Mira Connect release, a two-room split-and-combine configuration is only supported when using two or more Polycom SoundStructure devices. The SoundStructure devices need to be connected over OBAM and connected with an RS-232 cable to each other with one SoundStructure Mira Connect Administrator’s Guide Version 1.06 S Y S T E M S... -
Page 38: Adding Displays, Projectors, And Video Switchers
Mira Connect and Mira Portal Administrator’s Guide configured for RS-232 Command mode to receive RS-232 commands and one SoundStructure is configured for RS-232 Broadcast mode for transmitting commands to the other SoundStructure. To start, configure the SoundStructure device for the individual rooms (‘split mode’) with separate Mute and Volume control points for the two rooms. Then when the rooms are to be combined, create a partial preset to convert from the split routing to the combined routing and then another partial preset to convert from the combined routing to the split routing. SoundStructure events will be used to tie the split room volume and mute states together when the rooms are combined so that either Mira Connect can be used to control volume and mute state in the combined room. Two events will be used to enable the split and combine events when the rooms are combined and to disable the events when the rooms are disabled. For more information, contact Aveo Systems at 678 653 7090. 2.6.3 Adding Displays, Projectors, and Video switchers As with video conferencing systems and audio DSP’s, displays projectors, and video switchers may be added to the room by clicking ADD in the Equipment panel of Mira Portal. Choose the type and model from the dropdown lists, enter the IP address and optional password to establish a network connection. For some equipment, a universal driver will be listed instead of individual model numbers. The universal driver supports all the different types of inputs across the product line. Select the VIDEO INPUTS tab to see a list of possible video inputs for the selected model. To enable specific video inputs, check the box to the left of the physical input, select an icon, and select or enter a label for the input. The steps to setup a display or projector are enumerated in Figure 44 and described in this section. To assign a name for the display, enter the name on the right side of the Video Inputs tab under Menu Preview. The name will be shown on the display controls on Mira Connect and is helpful when more than one display is controlled in a room. The order of the input names shown on the Mira Connect display source menu may be changed manually by dragging the inputs in the Menu Preview panel. The inputs will appear in the selected order on Mira Connect, with the first input set as the default. When done adding and customizing inputs, click ADD EQUIPMENT. As with all other devices, if an IP address has not been entered for the device under the CONNECTION menu, then the ADD EQUIPMENT button will not be active. Mira Connect Administrator’s Guide Version 1.06 S Y S T E M S... -
Page 39: Video Input Settings
Preview of what the UI will look like on Mira Connect. Enter the text labels you’d like to have visible in the room. Click Update Equipment to make the changes live on Mira Connect. - Page 40 Mira Connect and Mira Portal Administrator’s Guide Figure 45. Adding a display provides an option for using sources connected to other equipment. For example, selecting ‘Use Sources Connected to Other Equipment’ and selecting the Polycom RealPresence Group input (configured in Figure 34) will result in the screen shown in Figure 46. Here the inputs to the video conferencing system will be presented to the Mira Connect user as if they were direct inputs to the Sharp Aquos display. Content sharing may be stopped by pressing the red button with the white square. The Sharp Aquos display will then show the default video conferencing signal. Mira Connect Administrator’s Guide Version 1.06 S Y S T E M S...
- Page 41 Mira Connect and Mira Portal Administrator’s Guide Figure 46. Selecting sources from external devices provides options for which inputs you'd like to have visible. Figure 47. The Mira Connect user interface when using content sources from a video conferencing system. Mira Connect Administrator’s Guide Version 1.06 S Y S T E M S...
-
Page 42: Sharp Aquos Settings
Mira Connect and Mira Portal Administrator’s Guide 2.6.3.2 Sharp Aquos Settings On Sharp Aquos displays several steps are required to enable Ethernet control and to allow the display to be turned on over the Ethernet interface after the display has been turned off. Typical setup steps include: 1. Use the IR remote to power on the display 2. Press the Menu button on the IR remote 3. Under ‘Initial Setup’ menu, set Quick Start Mode to On. 4. Under the ‘Smart TV’ menu, select ‘Internet Setup’ and set the Connection Type to Wired, assuming you are using wired Ethernet to connect the display to your network. 5. Under ‘Wired Setup’, set the Connect Type to Manual and enter the IP address info and press Connect. 6. Under the ‘Smart TV’ menu, select ‘AQUOS Remote Control’, and if the status is set to Disable, then change it to Enable and confirm under ‘Detailed Settings’ that the Control port is set to 10002 (the default) 7. Exit the menu Without these steps, it will not be possible to control the Sharp Display over the network. 2.6.4 Equipment requiring RS-232 Control For equipment that can only be controlled with serial communication (e.g., RS-232), an RS-232 to IP interface may be used to control the equipment and Mira Connect will send commands (and receive status information) to the interface which will then be sent (and received) over RS-232 to the device. When adding the equipment that only supports RS-232, enter IP address of the RS-232 to IP interface for the equipment’s IP address. Mira Connect is compatible with the Global Cache IP to RS232 (Aveo Systems Part Number: 115.0010.001), which may be purchased separately from Aveo Systems. See section: ‘Mira Connect Accessories’ for more information about setting the IP address of the RS-232 to IP device. Once all the equipment has been added to the room in Mira Portal, if you haven’t already, you should install Mira Connect in the room. 3 Installing Mira Connect To install Mira Connect, follow the steps shown in Figure 48 to pair with the desired room in Mira Portal. Mira Connect Administrator’s Guide Version 1.06 S Y S T E M S... -
Page 43: Power On Mira Connect
Mira Connect and Mira Portal Administrator’s Guide Power On Mira Connect Select Language Select Network Connec on Enter Pairing Code in Mira Portal Review Se ngs and Press Finish Ready to add Equipment with Mira Portal Figure 48. Steps for using connecting Mira Connect to a room. 3.1 Power on Mira Connect Mira Connect has a power button on the upper right when facing the rear of the device as shown in Figure 49. Press and hold the power button for 2 seconds to power up Mira Connect. When the system is powered off, connecting a PoE Ethernet connection to Mira Connect will cause the battery indicator to appear on the touch screen and then the system will respond to the power button. Power Button... -
Page 44: Select The Application Language
Mira Connect and Mira Portal Administrator’s Guide Figure 50. Mira Connect set up screen for starting the installation process by selecting the application language. 3.2 Select the Application Language Selecting the language sets the language for the remaining installation steps and for the user interface on the screen once installation is complete. 3.3 Select the Network Select the type of network for use with Mira Connect, either wired or wireless. If the wired Ethernet interface is connected to an Ethernet network, the Wired Connection status will show the network connection status as ‘Connected’ as shown in Figure 51. Mira Connect requires a DHCP server to provide an IP address. Static IP addresses are not supported for Mira Connect in the current release. Mira Connect Administrator’s Guide Version 1.06 S Y S T E M S... -
Page 45: Network Considerations
Mira Connect and Mira Portal Administrator’s Guide Figure 51. Mira Connect setup screen, selecting the network type – wired or wireless. If a Wireless Ethernet connection is selected, select the wireless network SSID (Service Set IDentifier) and enter the authentication password as shown in Figure 52. Once connected to the wireless network, the SSID will appear in the upper right-hand corner of Mira Connect display during setup. Tapping on the network name will show the IP address of Mira Connect. Figure 52. Wireless network setup requires the network name and password. Wireless Network Security modes supported are Open (no security), WPA, and WPA2 Personal. 3.3.1 Network Considerations Mira Connect can be used with wired or wireless Ethernet networks as shown in Figure 53. It is important that the Mira Connect’s network interface has a network route to both the local equipment that will be controlled and to Mira Portal for setup and management. In either a wired or wireless application the Mira Connect system is powered by a Power Over Ethernet (PoE) connection. An optional PoE injector is sold separately from Aveo Systems if power is not available on the network connection. Mira Connect also has a built-in battery that allows Mira Connect to be used on a wireless network without a connection to PoE power source, for extended periods of time, and then reconnected to the power source for recharging. Mira Connect Administrator’s Guide Version 1.06 S Y S T E M S... -
Page 46: Enter Pairing Code Into Mira Portal
Mira Connect and Mira Portal Administrator’s Guide Mira Connect communicates and controls equipment over an Ethernet network. Equipment with a serial interface (RS-232) requires an IP to RS-232 interface adapter available from Aveo Systems. PoE Network Switch Power + Data Wired Ethernet with PoE Power Network Switch + Data Data Wired Ethernet PoE Injector with PoE Injector Power Data Data Wireless Ethernet with PoE Injector PoE Injector Power Access Point Power Figure 53. -
Page 47: Reviewing The Settings And Press Finish
Mira Connect and Mira Portal Administrator’s Guide Figure 54. Pairing code displayed on Mira Connect should be entered into Mira Portal to associate the Mira Connect device with the room in Mira Portal. If the pairing code expires, a new pairing code may be requested from Mira Portal as shown in Figure 55. Figure 55. If the pairing code expires, a new pairing code may be requested. 3.5 Reviewing the Settings and Press Finish Once Mira Connect has been paired to the room within Mira Portal, the Mira Connect screen will show a summary of the settings for confirming that the Mira Connect has been paired to the proper room. Mira Connect Administrator’s Guide Version 1.06 S Y S T E M S... - Page 48 Mira Connect and Mira Portal Administrator’s Guide Figure 56. Use the pairing summary on Mira Connect to confirm the proper room has been selected. If the setup summary is correct, press FINISH to continue. If the setup summary is incorrect, press the back arrow on the upper left to go back to the pairing code screen. In the initial release, pairing more than one Mira Connect device to the same room may have unexpected behavior. Only pair one Mira Connect device to a room. Once setup of the Mira Connect is complete, add equipment to the room in Mira Portal as described in Adding Equipment to the Room. Figure 57 shows an example of the end-user interface. The options available on the interface will depend on the equipment controlled by Mira Connect. Figure 57. The default user interface for Mira Connect for a system with an audio DSP and a video conferencing system. Mira Connect Administrator’s Guide Version 1.06 S Y S T E M S...
-
Page 49: Unpair Mira Connect From The Room
Mira Connect and Mira Portal Administrator’s Guide 4 Unpair Mira Connect from the Room The Mira Connect device can be easily unpaired from the room once it has been paired. Once unpaired, the Mira Connect returns to factory defaults and can be paired with another room. To unpair, locate the room in Mira Portal and click the three dots to the right of the Mira Connect as shown in Figure 58. Figure 58. Mira Connect status in Mira Portal. Select Unpair and the system will prompt to unpair Mira Connect from the room as shown in Figure 60. Figure 59. Click Unpair to remove the Mira Connect device from its current room. Select UNPAIR CONTROLLER to complete the unpairing process. Figure 60. Confirmation prompt when unpairing Mira Connect from a room. Once the Mira Connect system is unpaired, the Mira Connect will go back to the first step in the setup process: Select the Application Language. Mira Connect Administrator’s Guide Version 1.06 S Y S T E M S... -
Page 50: Managing Rooms
Mira Connect and Mira Portal Administrator’s Guide 5 Managing Rooms Once a room has been created, it’s possible to remote, duplicate, or move the room to a new site. 5.1 Removing Rooms Rooms may be removed by clicking the dots to the right of the room name and selecting ‘Remove’ as shown in Figure 61. Figure 61. Selecting Remove will prompt to see if you want to remove the room from the site. Before the room is removed, the prompt in Figure 62 is presented for final confirmation. Removing a room cannot be undone, so remove with caution! Figure 62. The prompt to confirm removing a room. 5.2 Duplicating Rooms To duplicate the room, click the dots to the right of the room name and select Duplicate as shown in Figure 63. Mira Connect Administrator’s Guide Version 1.06 S Y S T E M S... -
Page 51: Moving Rooms To A New Site
Mira Connect and Mira Portal Administrator’s Guide Figure 63. The duplicate selection will create a copy of a room and the equipment. You will be prompted for the name of the new room name as shown in Figure 64. Figure 64. Duplicating a room requires a destination room name. This will create a new room with the same equipment as the source room. The IP addresses of the equipment in the duplicate room are cleared and need to be updated when the equipment is edited. If there is a Mira Connect paired with the room, the Mira Connect is not part of the copy and stays paired with the source room. Only the equipment and control points are copied. 5.3 Moving Rooms to a new Site Rooms may be moved to a different site, assuming you have permission on the source and destination sites. You could move a production room to a testing site for testing and then move it back to the production site when ready. To move a room click the dots to the right of the room name and select Move to Site… as shown in Figure 65. Mira Connect Administrator’s Guide Version 1.06 S Y S T E M S... - Page 52 Mira Connect and Mira Portal Administrator’s Guide Figure 65. Moving a room to another site. Once the Move to Site option has been selected, you’ll be prompted for the destination room as shown in Figure 66. You can only move the room to sites for which you have appropriate permissions. If you have organization-level administrative or technical permissions then you can move a room to another site. If you don’t have the proper permissions, you will not see the Move To Site… option. Figure 66. Select which site to move the room. Once MOVE ROOM is clicked, the message in Figure 67 will appear to confirm the move. Moving a room will delete the call history information and the events that have occurred in the room. If that information is important to you, do not move the room, instead duplicate the room and move the duplicate room. Mira Connect Administrator’s Guide Version 1.06 S Y S T E M S...
- Page 53 Mira Connect and Mira Portal Administrator’s Guide Figure 67. Moving a site removes the call history and event information for the site. All the site properties of the new destination site will be applied to the Mira Connect that is paired with this room and background image, logo, color schemes, room labeling, and more will change as a result of the room move. It’s all automatic. Mira Connect Administrator’s Guide Version 1.06 S Y S T E M S...
-
Page 54: Equipment Information
Mira Connect and Mira Portal Administrator’s Guide 6 Equipment Information This section includes information about specific equipment that is important for configuring or troubleshooting systems. 6.1 Symetrix Radius DSPs Mira Connect controls the Symetrix DSP’s mute and volume using controller numbers associated with mute and level controls. In Mira Portal, enter the controller number for muting microphones in the Microphone mute area. As an example, Figure 68 shows using controller number 250 (the default from the example file) from the master mute on the automixer block for controlling the local microphone mute. Figure 68. Example using controller number 250 for muting the microphones. For telephony control, enter the controller numbers shown in the Symetrix Composer software into Mira Portal as shown in Figure 69. Mira Connect Administrator’s Guide Version 1.06 S Y S T E M S... - Page 55 Mira Connect and Mira Portal Administrator’s Guide Figure 69. Example of Symetrix telephone controllers in Mira Portal. To simplify entering in the dial pad controller numbers, there’s an Update Keypad option that will populate the keypad controller numbers with sequential numbering starting with the Keypad 1 controller number as shown in Figure 70. The sequence of numbers matches the default Radius configuration file ordering (shown in Figure 69). Figure 70. Update keypad option makes it easier to enter controller numbers. For advanced applications, including Sound Reinforcement or Room Overflow, you can use controller numbers such as show shown on the In-Room Controls in the sample Symetrix configuration files as shown in Figure 71. For example, in this configuration file, controller 251 could be used for sound Mira Connect Administrator’s Guide Version 1.06 S Y S T E M S...
-
Page 56: Biamp Tesira Dsps
Mira Connect and Mira Portal Administrator’s Guide reinforcement, and controller numbers 265 could be used with “overflow rooms” to provide user control for enabling the front loudspeakers. Figure 71 Symetrix in-room user control controller numbers. 6.2 Biamp Tesira DSPs 6.2.1 Control Points Mira Connect controls the Biamp DSP using level blocks, mute blocks, and telephony status blocks for both VoIP or PSTN. When designing the Biamp configuration file, use the instance tag of level blocks for gains you’d like to control and mute blocks for mute as shown in Figure 73. In this example, we have a level control called “RoomLevel” that we’ll select in Mira Portal for controlling the audio level in the room. If the level or mute blocks has more than one channel, you can use the channel index in Mira Portal to select which channel to control as shown in Figure 72. Figure 72. Use the channel index to select which channel to control if the block supports more than one channel. Mira Connect Administrator’s Guide Version 1.06 S Y S T E M S... - Page 57 Mira Connect and Mira Portal Administrator’s Guide Figure 73. Example showing Mira Portal using the instance tag RoomLevel for controlling volume in the room. To add a telephony interface, enter the instance tag for the telephone control/status block as shown in Figure 74. Mira Connect Administrator’s Guide Version 1.06 S Y S T E M S...
- Page 58 Mira Connect and Mira Portal Administrator’s Guide Figure 74. Example using the telephone control/status block named “TIControlStatus1”. For control of the telephone receive level, you can optionally add a level control for audio dialing as shown in Figure 75. Mira Connect Administrator’s Guide Version 1.06 S Y S T E M S...
-
Page 59: Telnet
Mira Connect and Mira Portal Administrator’s Guide Figure 75. Telnet Example using an option gain control on the telephone receive signal. When using Biamp TesiraForté products, ensure that telnet is enabled for the system. To enable telnet, navigate to the System -> Network -> Perform Network Maintenance… menu and click the Telnet check box on the Control Network dialog window. Not enabling telnet will result in “Connection Failed” error in the equipment pane when trying to control the Biamp DSP. 6.3 Epson Projectors For Epson projectors to accept API commands after it has been powered off, the user must set Standby Mode: Communication On using the menus on the Epson User Interface. Without setting this setting to Communication On, once the projector is powered off, it will not be able to be powered on via commands sent over the network. 6.4 Polycom Video Codecs Before controlling Polycom video conferencing devices (codecs) over their network interface, ensure telnet is enabled on the codec so that Mira Connect can control the codec with a telnet session. Telnet is usually enabled via the web user interface of the codec. For further information, see the codec’s administrator guide. Not enabling telnet will result in “Connection Failed” error in the equipment pane when trying to control the Polycom video codec. If you are using the Real Presence Group Series 700 and using the RS-232 port for controlling the codec with the GlobalCache IP2SL device, you do not have to enable telnet on the codec. Serial control, Mira Connect Administrator’s Guide Version 1.06 S Y S T E M S... -
Page 60: Sharp Aquos Displays
Mira Connect and Mira Portal Administrator’s Guide however, requires you to provide a standard RS232 straight-through cable as shown in Figure 76 to connect between the IP2SL and the Group Series 700 codec. Figure 76. A straight-through RS232 cable is required to control the RealPresence Group Series 700 6.5 Sharp Aquos Displays Before controlling Sharp Aquos displays several steps are required to enable Ethernet control and to allow the display to be turned on over the Ethernet interface after the display has been turned off. 1. Use the IR remote to power on the display 2. Press the Menu button on the IR remote 3. Under ‘Initial Setup’ menu, set Quick Start Mode to On. 4. Under the ‘Smart TV’ menu, select ‘Internet Setup’ and set the Connection Type to Wired, assuming you are using wired Ethernet to connect the display to your network. 5. Under ‘Wired Setup’, set the Connect Type to Manual and enter the IP address info and press Connect. 6. Under the ‘Smart TV’ menu, select ‘AQUOS Remote Control’, and if the status is set to Disable, then change it to Enable and confirm under ‘Detailed Settings’ that the Control port is set to 10002 (the default) 7. Exit the menu Without these steps, it will not be possible to control the Sharp Display over the network. Mira Connect Administrator’s Guide Version 1.06 S Y S T E M S... -
Page 61: Integrating Office 365 Calendar With Mira Connect
Mira Connect and Mira Portal Administrator’s Guide 7 Integrating Office 365 Calendar with Mira Connect Microsoft’s Office 365 is a cloud-based collaboration service offering that provides web- and PC-based access to popular productivity applications including Microsoft Word, PowerPoint, Excel, and Email and Calendering with Outlook. More importantly for applications with Mira Connect, Office 365 provides calendar services for scheduling meetings and room resources. An organization using Office 365 will have user accounts for each of their employees allowing users access to the Office365 applications including calendar and email accounts. There will be one or more administrators who create new accounts and manage existing accounts. In addition to user accounts, Office 365 supports resource accounts that are used for scheduling and managing rooms or equipment (such as projectors that can be ‘checked-out’, used, and returned). Typically, room resource accounts are assigned to each of the meeting rooms so those rooms can be scheduled to allow more efficient use of conference rooms and to prevent room scheduling conflicts. Through access to the room’s calendar, a Mira Connect device in the room receives information about meetings from the calendar invitation and presents dial-in numbers to users in the room, making it easy for users to dial calls with one press of a button. Figure 77. The Office 365 cloud and Mira Portal cloud communicate securely to provide meeting information to Mira Connect in the room. 7.1 Overview of Integrating Mira Connect with Office 365 If you have an existing Microsoft Office 365 account for your organization, follow these steps to integrate Aveo Systems’ Mira Connect with your room resource accounts. If you don’t have an existing Office 365 account and are setting up Office 365 for the first time, start with the instructions in Section 7.5 ‘Creating a new Office 365 Account’ and then return here to continue with configuring the account. Mira Connect Administrator’s Guide Version 1.06 S Y S T E M S... -
Page 62: Configuring Microsoft Office 365
Mira Connect and Mira Portal Administrator’s Guide Note while the steps described will take less than an hour to set up (depending on the number of rooms), creating a new Microsoft Office 365 account for your domain or a test domain, may require as much as 24 to 48 hours before the Office 365 account is ready to be configured for Mira Connect. The most secure and easy way to integrate Mira Connect with Microsoft Office 365 room resources is to create an Office 365 ‘User Account’ for Mira Connect that we’ll call the ‘Service User Account’. Only one ‘service user account’ is required regardless of the number of rooms with Mira Connects devices. Once the ‘service user account’ is created, we’ll make that account a delegate for each of the room resource accounts and then we will share the calendar from each of the rooms with the ‘service user account’, and customize the behavior of the room resource accounts. Once we’ve shared the room calendars, we will associate the ‘service user account’ with the organization in Mira Portal and then assign the room calendars to the specific rooms in Mira Portal. The Mira Connect device in each room will then automatically show the calendar information for the room and allow users to dial audio and video numbers from the meeting invitation with one touch. We’ll use the following steps to configure Office 365 to operate with Mira Connect. In Office 365, we will: 1. Create a ‘service user account’ that will be used with Mira Portal 2. Create room resource accounts for each meeting room that will use Mira Connect 3. Add the ‘service user account’ as delegate to each of the room resource accounts 4. Share each room resource’s calendar with the ‘service user account’ 5. Customize the room resource calendar settings so the calendar invite’s subject is not removed by Office 365 Then, in Mira Portal, we will: 1. Authorize Mira Portal to use the ‘service user account’ at the Organization level 2. Assign room resources from Office 365 to rooms in Mira Portal 3. Schedule meetings and see the invitations and dial-in numbers appear on Mira Connect 7.2 Configuring Microsoft Office 365 Because we’ll be creating a new user account and room resources, these instructions assume you are an administrator for the Office 365 domain to be used with Mira Connect. If you are not the administrator, you will need to provide these instructions to the administrator. 7.2.1 Create a Service “User Account”... - Page 63 Mira Connect and Mira Portal Administrator’s Guide Figure 78 Navigate to Admin from the main apps page. Under the ‘Users > Active users’ section on the Office 365 administrator portal as shown in Figure 79, click ‘Add a user’, and enter a name for the service user account. Figure 79. Navigate to active users to add users. In this example, we’ll use ‘Mira Connect’ as our service user account name which will create a user name of miraconnect@aveosystemstest.onmicrosoft.com as shown in Figure 80. While there is no need to email the password for this account, nor does it need to be changed on first login, select an automatic password or enter the password as shown in Figure 80 as it will be needed when we log into this account and also when we associate this account with the desired organization within Mira Portal. Mira Connect Administrator’s Guide Version 1.06 S Y S T E M S...
- Page 64 Mira Connect and Mira Portal Administrator’s Guide Figure 80. Creating the service user account While the aveosystemstest.onmicrosoft.com domain name was used for this example, typically you will use your domain such as mycompany.com when adding an account where mycompany.com is your company’s specific domain. Once you have a service user account created, you need to wait until its mailbox has been fully created before continuing. You’ll know the mailbox is ready when the ‘Mailbox permissions’ field shows the text ‘There are no additional mailbox permissions set on this mailbox’ as shown in Figure 81. While the spinner graphic is active, the mailbox is not ready. It may take an hour or two to set up the permissions on the mailbox. Please be patient. Mira Connect Administrator’s Guide Version 1.06 S Y S T E M S...
-
Page 65: Adding Room Resources
Mira Connect and Mira Portal Administrator’s Guide Figure 81. The result of setting up a new room resource that is ready to be customized. If you already have Office 365 room resources defined for the rooms where you’d like to use Mira Connect, then proceed to Section 7.2.3 ‘Add the ‘Service User’ as a Delegate to the Room Resource Accounts’. If you don’t have room resources defined, follow the instructions in Section 7.2.2 ‘Adding Room Resources’. 7.2.2 Adding Room Resources Room resources are features that are available in Office 365 Business Premium or higher licenses. If your organization doesn’t have an Office 365 Business Premium or better license, then room resources aren’t available and instead you will need to create a ‘User Account’ for each room that you’d like to schedule and associate with Mira Connect. Using these instructions, you will need at least two Office 365 Business Premium licenses to integrate with Mira Connect. One license will be used for the ‘service user account’ that is described next, and one will be used for setting up each room. Once a room has been configured as described in this document, the Office 365 Business Premium license can be removed from the room. At the end of the setup process, you will only have used one Office 365 Business Premium license for the ‘service user account’. Assuming your organization has Office 365 Business Premium or higher licenses, then in the Admin panel, under the ‘Resources > Rooms & equipment’ section, click ‘Add’ and make sure ‘Type: Room’ is selected as shown in Figure 82. Mira Connect Administrator’s Guide Version 1.06 S Y S T E M S... - Page 66 Mira Connect and Mira Portal Administrator’s Guide Figure 82. Creating a new room resource requires a name and email address. Ensure the Type is set to Room. In this example, we’ve used the name ‘BoardRoom’ as the name of our room resource. This is the name that will be used by users when the room is being scheduled. While the e-mail address for this room will be created automatically from this name, it can be changed to whatever you prefer. You’ll repeat adding rooms and these steps for all the rooms in your organization that will use Mira Connect for connecting to calls from calendar invitations. Click ‘Add’ to add the room resource. You should see a screen confirmation as shown in Figure 83. Click ‘Close’ to close this window. Mira Connect Administrator’s Guide Version 1.06 S Y S T E M S...
- Page 67 Mira Connect and Mira Portal Administrator’s Guide Figure 83. The result of adding a room resource called BoardRoom. Next, we’ll need to temporarily activate a license for the new room resource. Once the room has been configured and its calendar shared with the service user account, we will be able to remove its license. To add the license, under the ‘Users > Active users’ section on the Office 365 administrator portal, click on the room that you just added, then click the ‘Edit’ link next to the ‘Product licenses’ section. Figure 84. Edit the room resource to assign a service license. Select the ‘United States’ location if you are in the United States or your location, if not in the United States, and enable the switch next to ‘Office 365 Business Premium’ as highlighted in Figure 85. As Mira Connect Administrator’s Guide Version 1.06 S Y S T E M S...
- Page 68 Mira Connect and Mira Portal Administrator’s Guide described earlier, a license is required for room setup and calendar sharing, but after the room’s calendar has been shared, the room license can be removed. Figure 85. Selecting the location of the room and enabling the license. Click ‘Add’ and you should see a status message as shown below. Click ‘Close’ to get back to the mailbox account for the room and then ‘Close’ again to get back to the Active Users page. Figure 86. The result of assigning a license to the room resource, BoardRoom. If you have enough licenses, repeat this for each room you have in your system. After adding the rooms and enabling the licenses, the ‘Active Users’ field will show a status of ‘Office 365 Business Premium’ as shown in Figure 87. If you don’t have enough available Office 365 licenses, enable one room at a time, following these steps for sharing the calendar, remove the license, and then repeat with the next room. Figure 87. The list of active room resources that are licensed. Mira Connect Administrator’s Guide Version 1.06 S Y S T E M S...
-
Page 69: Add The 'Service User' As A Delegate To The Room Resource Accounts
Mira Connect and Mira Portal Administrator’s Guide 7.2.3 Add the ‘Service User’ as a Delegate to the Room Resource Accounts Next, we’ll work with the room resources we just created and add the ‘service user account’ as a delegate to the room resource mailboxes. This next step is required for the service user account to share the room resource’s calendar. From the Admin page, Under the ‘Users > Active users’ section, click on a room, then click on the ‘Mail Settings’ section to expand it. If you see the message “We are preparing a mailbox for this user” as shown in the following figure, you need to wait until the mailbox is ready before editing any settings. Figure 88. A mailbox that is being set up and needs more time to be ready for next steps. Once the mailbox preparation has finished, click the ‘Edit Exchange properties’ link to continue. Figure 89. Mailboxes that are ready for next steps will have values in all the fields. Clicking the ‘Edit Exchange properties’ link will open the Exchange management console (you may need to sign in again with your administrator username and password that was used in the very first step). Next, click on the ‘mailbox delegation’ link highlighted in Figure 90. Mira Connect Administrator’s Guide Version 1.06 S Y S T E M S... - Page 70 Mira Connect and Mira Portal Administrator’s Guide Figure 90. BoardRoom exchange properties. Under ‘Send on Behalf’, click the ‘+’ as shown in step 1 in Figure 91. Double-click the name of the service user account, in this case ‘Mira Connect’, from the list of users, then click ‘OK’ as shown in Figure 92. Figure 91. Both the ‘Send on Behalf’ and the ‘Full Access’ Mailbox delegation settings must be set. Mira Connect Administrator’s Guide Version 1.06 S Y S T E M S...
- Page 71 Mira Connect and Mira Portal Administrator’s Guide Figure 92. Adding the service user account, Mira Connect, as the delegate for the room resource mailbox. Repeat adding the service user account in step 2 of Figure 91 with ‘Full Access’, click the ‘+’ and double- click the name of the service user account from the list of users, then click ‘OK’. The delegation page should appear as shown in Figure 93. Ensure the service user account has been added to both the ‘Send on Behalf’ and ‘Full Access’ fields. Click ‘Save’ to continue. Mira Connect Administrator’s Guide Version 1.06 S Y S T E M S...
-
Page 72: Sharing The Room Calendars With The Service User Account
Mira Connect and Mira Portal Administrator’s Guide Figure 93. Delegate settings for the room resource have been assigned to the service user account, Mira Connect. Repeat these steps for each room you have added to your organization where you’d like to have Mira Connect use the calendar information. Once all the room resources have had the service user account added as delegates, you are ready for the next step: sharing the calendars. 7.2.4 Sharing the Room Calendars with the Service User Account Once the service user account, in this case the user ‘Mira Connect’, has become a delegate of all the rooms where a Mira Connect device will be installed, the next step is to share the calendar of the room resources with the service account user ‘Mira Connect’. Since the service user account will need to be able to send and receive emails for this next step, we’ll first confirm the service user account is ready to be used. Assuming you are logged in as the administrator, under the ‘Users > Active users’ section on the Office 365 admin portal, click on the service user account, then click ‘Mail Settings’ to expand the section. If there is a spinner in any of the fields, the settings haven't propagated yet and are not ready to be customized. If you see values for ‘Mailbox permissions’, ‘Email forwarding, ‘Automatic replies’, etc. the settings have propagated and the system is ready for next steps as shown in Figure 94. This could take as much as an hour or so. Mira Connect Administrator’s Guide Version 1.06 S Y S T E M S... - Page 73 Mira Connect and Mira Portal Administrator’s Guide Figure 94. Confirming that the service user account mail settings are ready. Next, we’ll log out of the administrator account and sign in with our service user account. Navigate to the Office 365 web portal, https://office.com, and sign in with the service user account name and password. In this case, we’ll sign in with the username: miraconnect@aveosystemstest.onmicrosoft.com. Figure 95. Signing into the Service User Account. From the Office 365 portal, click the Mail application to open Outlook as shown in Figure 96. Mira Connect Administrator’s Guide Version 1.06 S Y S T E M S...
- Page 74 Mira Connect and Mira Portal Administrator’s Guide Figure 96. Starting the mail application from the Office 365 account for the service user account. Click the profile icon associated with the service user account in the upper right and select ‘Open another mailbox...’ as highlighted in Figure 97. Figure 97. Use the service user account to open the mailboxes associated with the room resources. Enter the email address of one of the rooms (search suggestions will appear as shown in Figure 98) and click ‘Open’ as shown in Figure 99. Mira Connect Administrator’s Guide Version 1.06 S Y S T E M S...
- Page 75 Mira Connect and Mira Portal Administrator’s Guide Figure 98. As you start typing a room resource name, the system will show names of existing rooms. Select the desired room and click ‘Open’. Figure 99. Once you’ve selected the proper room resource mailbox, click ‘Open’. The room mailbox will be opened in a new Outlook window. Click the calendar icon in the bottom left to display the calendar for the room resource as shown in Figure 100. Mira Connect Administrator’s Guide Version 1.06 S Y S T E M S...
- Page 76 Mira Connect and Mira Portal Administrator’s Guide Figure 100. Click the calendar icon in the lower left of the page to view the calendar. From the calendar view, click the ‘Share’ button in the top middle of the screen as shown in Figure 101. Mira Connect Administrator’s Guide Version 1.06 S Y S T E M S...
- Page 77 Mira Connect and Mira Portal Administrator’s Guide Figure 101. Share the calendar by pressing the Share option. Start typing the name of the email address of the service user account, ’Mira Connect’ in this example, and select the account name as shown in Figure 102. Figure 102. Typing the mailbox account will provide a list of accounts to choose from. Select the service user account that you created. Select ‘Can edit’ from the permissions list to the right of the email address. While the service user account needs at least ‘Read all details’ permissions, for future compatibility, we recommend using the ‘Can edit’ setting. Mira Connect Administrator’s Guide Version 1.06 S Y S T E M S...
- Page 78 Mira Connect and Mira Portal Administrator’s Guide Figure 103. Set the access to the calendar to ‘Can edit’. Click ‘Share’ and you should see a screen similar to Figure 104. Figure 104. The settings required to share the room resource with the service user account, ‘Mira Connect’ in this example. If you see the message "The sharing invitation could not be sent", the Exchange settings from the earlier steps of delegating the room resources’ mailbox to the service user account have not finished propagating. If this happens, close the calendar sharing dialog, click ‘Share’ again, and delete the entry for the service account. If you try again in about 15 minutes, it should successfully send the calendar sharing invitation. Mira Connect Administrator’s Guide Version 1.06 S Y S T E M S...
- Page 79 Mira Connect and Mira Portal Administrator’s Guide Next, go back to the service user account by selecting Open Another Mailbox and enter the service user account name, in this case, ‘Mira Connect’ as shown in Figure 105. Figure 105. Opening the service user account mailbox. Click ‘Open’ to open the service user account. The service user account will have received an email indicating that the room resource has shared its calendar as shown in Figure 106. Figure 106. The service user account, ‘Mira Connect’, received an email from the ‘BoardRoom’ about sharing its calendar. Click on the email to open it, and click the ‘Accept and view calendar’ button in the email as shown in Figure 107. Mira Connect Administrator’s Guide Version 1.06 S Y S T E M S...
- Page 80 Mira Connect and Mira Portal Administrator’s Guide Figure 107. Click the ‘Accept and view calendar’ option to gain access to the calendar. You should see the room calendar appear under the ‘People's calendars’ heading in the sidebar and on the top of the calendar for the service account's calendar in Outlook as shown in Figure 108. Figure 108. The calendar of the service user account will show the newly shared calendars from the room resources. Repeat this step for each room's mailbox. At the end of this process, the service user account, ‘Mira Connect’ in this example, will have ‘Can edit’ access to each of the room’s calendars. The service user account, by default, will have several calendars that you might want to remove, including ‘Birthdays’ and, for U.S. destinations, ‘United States holidays’ as shown in Figure 109. Removing these calendars will ensure that they can’t be assigned, in error, to rooms within Mira Portal. Mira Connect Administrator’s Guide Version 1.06 S Y S T E M S...
- Page 81 Mira Connect and Mira Portal Administrator’s Guide Figure 109. Calendars for the service user account include holiday and birthday calendars. To remove the United States holidays calendar, right click on the ‘United State holidays’ label and select ‘Remove’ as shown in Figure 110. Figure 110. Select the United States holiday calendar and right click to remove it. To remove the Birthday calendar, right click on the ‘Your calendars’ label and select ‘Turn off the birthday calendar’ as shown in Figure 111. Mira Connect Administrator’s Guide Version 1.06 S Y S T E M S...
-
Page 82: Changing Room Resource Settings
Mira Connect and Mira Portal Administrator’s Guide Figure 111. Right click on ‘Your calendars’ to turn off the birthday calendar. 7.2.5 Changing Room Resource Settings When reserving a room through a calendar invitation, Office 365’s default behavior is to remove the meeting subject and replace it with the name of the person who scheduled the room. This default behavior means that calendars invitations that are received by Mira Connect will not show the meeting subject information, however we can change those setting to ensure the meeting title remains in the calendar invitation that Mira Connect receives. Changing this behavior of the room resources requires using Microsoft’s PowerShell command console as described next. Don’t worry, it sounds complicated, but it’s not too hard. First, download the PowerShell program from the link below and then click the Download link highlighted in Figure 112 and install the program. http://connect.microsoft.com/site1164/Downloads/DownloadDetails.aspx?DownloadID=59185 Figure 112. Download link for PowerShell. Once you’ve installed the PowerShell program, you can right-click on the icon and run it as it as an administrator as shown in Figure 113. Mira Connect Administrator’s Guide Version 1.06 S Y S T E M S... - Page 83 Mira Connect and Mira Portal Administrator’s Guide Figure 113. You must run PowerShell as an Administrator. You must run PowerShell as an Administrator. From the PowerShell program, we’ll execute a series of commands as described below. To start, import the authentication module with the command: Import-Module MSOnline Next, get the credentials of the Office 365 administrator. Note, use the administrators account here, not the service user account, nor any of the room resource accounts. The Get-Credential command will prompt you with a Microsoft Office 365 login prompt for your login name and password. Enter your Office 365 administrator credentials here. $O365Cred = Get-Credential Next, we’ll create a remote session by entering the following command on one line (it is shown across multiple lines because of the document formatting): $O365Session = New-PSSession -ConfigurationName Microsoft.Exchange -ConnectionUri https://ps.outlook.com/powershell -Credential $O365Cred -Authentication Basic -AllowRedirection Next, we’ll import this session with the command: Import-PSSession $O365Session Mira Connect Administrator’s Guide Version 1.06 S Y S T E M S...
- Page 84 Mira Connect and Mira Portal Administrator’s Guide Note: If you see an error referencing "There were errors in loading the format data file: Microsoft.PowerShell" or "Running of scripts is Disabled", then you will need to allow remotely- signed code execution with this next command. Set-ExecutionPolicy RemoteSigned And then run the Import-PSSession command again: Import-PSSession $O365Session Finally, we connect to the session with the command: Connect-MsolService -Credential $O365Cred To finish our configuration of our room resources, we’ll use the Set-CalendarProcessing command to set options for the calendars for each of the room resources. The options that we recommend setting are described below. For reference, the full list of the command parameters to Set-CalendarProcessing may be found here: https://technet.microsoft.com/en-us/library/dd335046(v=exchg.160).aspx . • DeleteSubject set to $false The DeleteSubject parameter specifies whether to remove the subject of incoming meeting requests. The default value is $true. By setting this parameter to $false, the calendar invitation that appears on Mira Connect will include the Subject of the meeting. This provides more information to the room participant of whether they are joining the right meeting. Set this value to $false. AddOrganizerToSubject set to $false • The AddOrganizerToSubject parameter specifies whether the meeting organizer's name is used as the subject of the meeting request instead of the subject. The value of this parameter is set to $true by default and since we’re already disabling the DeleteSubject parameter to keep the subject name, we should disable AddOrganizerToSubject so we don’t add the organizer’s name to the subject. Set this value to $false. DeleteComments set to $false • The DeleteComments parameter specifies whether to remove or keep any text in the message body of incoming meeting requests. The default value of this parameter is $true. By setting DeleteComments to $false, the information in the body of the meeting invite can be used by Mira Connect to find dial-in numbers as well as to show the invitation to the room user in case there is other meeting information the user would need to see. If you don’t want to have the text of the meeting invitation body visible to users in the room, leave this value as $true, and Mira Connect will only be able to use information from the ‘location’ field to find meeting dial-in numbers. Set this parameter to $false.
-
Page 85: Enabling Office 365 Calendars In Mira Portal
Mira Connect and Mira Portal Administrator’s Guide To set these parameters, use the command below for each room resource. In our case, we’ll set the values for our example room, ‘BoardRoom’: Set-CalendarProcessing “BoardRoom” -DeleteSubject $false -AddOrg anizerToSubject $false -DeleteComments $false Substitute the names of your other rooms for ‘BoardRoom’ in your organization and run this command for each of your rooms. Alternatively, if you have more than a few rooms, you can copy and paste this script to set the parameters for all your rooms at one time: $rooms = Get-Mailbox -RecipientTypeDetails RoomMailbox foreach ($room in $rooms) Set-CalendarProcessing "$($room.Alias)" -DeleteSubject $false -AddOrganizerToSubject $false -DeleteComments $false Once all the room resources have been configured, we are ready to associate the room resource calendars with rooms in Mira Portal. 7.3 Enabling Office 365 Calendars in Mira Portal Before continuing, let’s have a quick review of the steps we have taken to integrate Office 365 with Mira Connect: Office 365 room resource accounts were created for each room that we’d like to use with Mira • Connect. While at least one Microsoft Office 365 license was required to configure a room, after configuring the rooms, the Office 365 licenses should be disabled for each room resource. - Page 86 Mira Connect and Mira Portal Administrator’s Guide Figure 114. Select Settings for the organization to enable Office 365 Integration. Next, select ‘Settings’ for the organization and click ‘Edit’ to change these settings as shown in Figure 115. Figure 115. The Settings options for an organization include a time zone and Office 365 integration. If you are signed into an Office 365 account, please log out now to ensure, in the next steps, that we’ll log in with the service user account. Next, check the enable box for Microsoft Office 365 Integration and enter the domain used by your Office 365 account as shown in Figure 116. In our example, the domain is aveosystemstest.onmicrosoft.com. Mira Connect Administrator’s Guide Version 1.06 S Y S T E M S...
- Page 87 Mira Connect and Mira Portal Administrator’s Guide Figure 116. Organization settings getting ready to enable Office 365 on the desired Office 365 domain. After clicking ‘Save’, Mira Portal will prompt you to authorize Office 365 on your Office 365 domain by either sending an email to the Office 365 administrator for your domain (you need to know who that is to send the email) or by allowing you to enter the service user account credentials immediately as shown in Figure 117. In our example, the service user account is the user ‘Mira Connect’. Figure 117. Microsoft Office 365 is used to authorize the service user account. If you have the login credentials for the ‘Mira Connect’ service user account, you can enter them directly by selecting the second link in the message as shown in Figure 118. Mira Connect Administrator’s Guide Version 1.06 S Y S T E M S...
- Page 88 Mira Connect and Mira Portal Administrator’s Guide Figure 118. Entering the Office 365 credentials for the service user account for user ‘Mira Connect’ on Microsoft’s secure portal. If you don’t have the credentials for the service user account, click the ‘send an email to the administrator of the domain’ link. An email message will appear as shown in Figure 119. Enter the email address of your company’s Office 365 Administrator and send the message. The Office 365 administrator can click the link and then enter the credentials for the service user account. Figure 119. Email that to be sent to the Office 365 domain administrator. Once the service user account has been authorized, you will see a message as shown in Figure 122. Mira Connect Administrator’s Guide Version 1.06 S Y S T E M S...
- Page 89 Mira Connect and Mira Portal Administrator’s Guide Figure 120. Mira Portal successfully integrated with Office 365. If you have enabled the wrong Office 365 account – perhaps the administrators account by mistake – uncheck the Microsoft Office 365 integration box, select Save, and edit the Settings again to re-enable the Office 365 integration and repeat the steps in this section. If the service user account credentials used were not entered correctly, you will see a message as shown in Figure 121. In this case, correct the credentials used and enable the Office 365 integration again. Figure 121. A permission denied message will appear of the credentials for the service user account are not correct. Assuming successful authorization, the Office 365 integration status in the Mira Portal Settings area will show a green circle with the check mark indicating successful integration and showing the name of the service user account as shown in Figure 122. Mira Connect Administrator’s Guide Version 1.06 S Y S T E M S...
- Page 90 Mira Connect and Mira Portal Administrator’s Guide Figure 122. Office 365 integration has been successfully enabled for this organization. Once the Office 365 service user account has been authorized, you can start to associate room resource calendars from Office 365 with rooms in Mira Portal. To associate a room resource calendar with a Mira Portal room, select the ‘Site’ and then the ‘Room’ that you’d like to enable in Office 365. In this example, we created a room in Mira Portal named ‘BoardRoom’ that’s part of the Headquarters site and we’d like to associate this room with the Office 365 room resource ‘BoardRoom’. Figure 123. Mira Portal with the desired room and settings page selected. Mira Connect Administrator’s Guide Version 1.06 S Y S T E M S...
- Page 91 Mira Connect and Mira Portal Administrator’s Guide With the room selected, click ‘Settings’, and then click ‘Edit’ to change the settings. Select the Office 365 room resource from the list of the shared calendars as shown in Figure 124. Figure 124. Select the desired Office 365 room resource calendar to associate with the Mira Portal room. In this example, we’ll select ‘BoardRoom’ and click ‘Save’. Mira Portal will associate the selected calendar with the room and when the green circle with the check mark appears next to the Office 365 calendar, the room resource’s Office 365 calendar has been successfully added to the room. Figure 125. Successful completion of the Office 365 calendar ‘BoardRoom’ with the room in Mira Portal. Once the calendar has been added to the room, the Mira Connect device paired to the room will update automatically to display the Calendar Icon and the calendar items appear on the bottom of the display as shown in Figure 126. Mira Connect Administrator’s Guide Version 1.06 S Y S T E M S...
- Page 92 Mira Connect and Mira Portal Administrator’s Guide Figure 126. Mira Connect showing the calendar icon and upcoming scheduled meetings. If there are no meetings scheduled for the room within the next 14 days, the calendar will show there are no upcoming meetings. Meetings can be scheduled using your Office 365 calendar by adding the room resource name, ‘BoardRoom’ in this example, as the location in the invitation as shown in Figure 127. Figure 127. Office 365 calendar invite that uses ‘BoardRoom’ as a room resource as highlighted in red. The dial-in number for this meeting can be added to the meeting location field (recommended) or the meeting description field. Mira Connect Administrator’s Guide Version 1.06 S Y S T E M S...
- Page 93 Mira Connect and Mira Portal Administrator’s Guide It’s important to include the meeting room name as a resource in the meeting invitation so Office 365 knows to schedule the meeting room for the meeting. Once the meeting has been sent, the Office 365 room resource will automatically accept the meeting (if there are no conflicts with other meetings using this room resource) and Mira Connect will show the new upcoming meeting as shown in Figure 128. Meetings that are more than 5 minutes in the future will show a yellow dial button. Pressing the dial button to join the call will show a message that the meeting occurs in the future, but the call can still be dialed by pressing the green dial button. If no dial numbers are shown, then Mira Connect could not find any valid numbers to dial in the meeting invitation. Mira Connect found dial-in information in the current meeting and presents an audio number as shown in Figure 128. If you don’t see the meeting subject, confirm that the DeleteSubject parameter is set to $false as described in Section 7.2.5 ‘Changing Room Resource Settings’. Figure 128. Mira Connect showing an upcoming meeting and dial in number. Since the “BoardRoom” (in this example) in Mira Portal only has equipment that supports dialing telephone numbers, the option presented for dialing this meeting is a telephone number. By pressing ‘More Calling Options’, we can see other dial-in numbers that might have been found in the invitation as shown in Figure 129. In this case we see there were also two video conferencing numbers identified, but since this room doesn’t have a video conferencing system, the option to dial those numbers is grayed out. Mira Connect Administrator’s Guide Version 1.06 S Y S T E M S...
- Page 94 Mira Connect and Mira Portal Administrator’s Guide Figure 129. Selecting the More Dialing Options shows other ways to dial the meeting. From ‘More Calling Options’ there is a ‘Dial Manually’ option that will show the entire meeting invitation in case there is additional information required for the user in the room as shown in Figure 130. As discussed in section: ‘Changing Room Resource Settings’, the information in the meeting invitation body is only available if the Office 365 administrator has set DeleteComments to $false. Figure 130. The Manual Dial option provides the full meeting invitation as a reference for manually dialing into a meeting. Mira Connect Administrator’s Guide Version 1.06 S Y S T E M S...
-
Page 95: Adding Dial Information To Meeting Invitations
Mira Connect and Mira Portal Administrator’s Guide 7.4 Adding Dial Information to Meeting Invitations While meeting invitations can have dial-in information in either the location field or in the invitation body as shown in Figure 131, a ‘best practice’ is to put dial number information into the location field as it is easier for participants and for Mira Connect to identify the numbers to use to dial into a meeting. Mira Connect always looks in the location field for dial-in information and looks in the invitation body only if there is no dial-in information found in the location field. If DeleteComments has been set to $true (see section ‘Changing Room Resource Settings’), then there is no message body information. Figure 131. A new calendar invitation highlighting the location and invitation body fields. The primary types of dial-in numbers are audio teleconferencing numbers and video conferencing numbers. Both may have additional digits required to dial a conference bridge number, and possibly a personal identification number (PIN) number for access too. 7.4.1 Adding Telephone Numbers to Meeting Invitations To simplify audio dial-in numbers for conference room users, we recommend that audio numbers be prefixed with Audio: or Audio and include any bridge or passwords immediately following the number and separated by a comma. Include the ‘#’ character if it is required to complete a passcode or password. An example is shown below. Mira Connect will find the dial-in number from either of these entries and present it as an option for users in a room. Audio (678) 653 7090,223344#,4342# As there are multiple ways to write a telephone number, Mira Connect recognizes telephone numbers with spaces or dots or dashes and with or without parentheses as shown below for North America telephone numbers 1-678-653-7090 • Mira Connect Administrator’s Guide Version 1.06 S Y S T E M S... -
Page 96: Adding Video Conferencing Numbers To Meeting Invitations
Mira Connect and Mira Portal Administrator’s Guide • 1.678.653.7090 1 678 653 7090 • (678) 653 7090 • • +(678) 653 7090 • 6786537090 Telephone numbers are terminated by either a comma (‘,’) for a pause, or with an end-of-line character. Multiple commas may be included in a number and the appropriate pauses will be added by Mira Connect when dialing. Please contact support@aveosystems.com if you have questions about telephone number formats or your geographic area has phone number formats not supported by Mira Connect. 7.4.2 Adding Video Conferencing Numbers to Meeting Invitations To simplify video dial-in numbers for conference room users, we recommend that video numbers be prefixed with Video: or Video Video numbers may take many forms including: user@domain • user@domain##MeetingRoom • • MeetingRoom@domain • MeetingRoom@IP_Address • IP_Address@MeetingRoom Valid examples include: Video 76110735@140.252.65.232 Video 140.252.65.232##7615534 Video 688432@rp1.vc If multiple dial-in numbers are identified from the meeting invitation, Mira Connect will present multiple options for dialing into the meeting based on the equipment that is controlled by Mira Connect. For example, if there is no video conferencing equipment in the room, then only the telephone number information will be presented as options for dialing. If there is no audio conferencing equipment in the room, then only the video conferencing numbers will be presented as dialing options. - Page 97 Mira Connect and Mira Portal Administrator’s Guide The Office 365 Trial subscription link will bring you to a screen as shown in Figure 132. Enter your contact information and click ‘Next’ to continue. Figure 132. Microsoft Office 365 Business Premium trial site. Next, create your user ID, password, and domain as shown in Figure 133. This will create the administrator user account for the Office 365 domain. Figure 133. Enter your user id and domain. After you enter your information, you will be prompted to enter a number to receive a text with your access code as shown in Figure 134. Enter your contact number and click ‘Text Me’ or ‘Call Me’ depending on how you will verify that you are not a robot. If you are a robot, you likely have a built-in mobile number that you can use for this step too. Mira Connect Administrator’s Guide Version 1.06 S Y S T E M S...
- Page 98 Mira Connect and Mira Portal Administrator’s Guide Figure 134. Office 365 requires a phone number for trial confirmation. After you receive the text or the call, enter the verification code as shown in Figure 135. Figure 135. Enter your verification code. After entering the verification code, you will see a summary of the administrator’s user ID as shown in Figure 136. Figure 136. Confirmation of administrator's login information. Click ‘You’re ready to go…’ and the system will log you into your Office 365 account and start setting up the different features as shown in Figure 137. Mira Connect Administrator’s Guide Version 1.06 S Y S T E M S...
- Page 99 Mira Connect and Mira Portal Administrator’s Guide Figure 137. Microsoft Office 365 is setting up the administrator's account. Note, it can take 24 to 48 hours to set up the account before you can continue with setting up the service user account and the room resources described in Section 7.2 ‘Configuring Microsoft Office 365’. The account is ready when you can add additional user accounts as described in Section 7.2.1 ’Create a Service “User Account”’. Mira Connect Administrator’s Guide Version 1.06 S Y S T E M S...
-
Page 100: Using Mira Connect
Mira Connect and Mira Portal Administrator’s Guide 8 Using Mira Connect See the Mira Connect™ User Guide for detailed information on how to use the Mira Connect system to dial calls, adjust volume, mute microphones, and more. Figure 138 summarizes the user interface for a room that has audio and video conferencing capabilities, calendar integration, and one or more displays. Figure 138. Summary of the Mira Connect User Interface. Mira Connect Administrator’s Guide 100 Version 1.06 S Y S T E M S... -
Page 101: Mira Connect Technical Specifications
Mira Connect and Mira Portal Administrator’s Guide 9 Mira Connect Technical Specifications Package Includes Calendar Integration • Mira Connect™ tabletop smart touch controller • Microsoft Office 365 • 7ft (2m) RJ45 (LAN) cable Technology • Screen cleaner • Quick setup sheet • Wi-Fi 802.11 a/b/g/n or Wired Ethernet LAN support Supported Video Systems • LCD panel with LED backlighting • Polycom RealPresence® Group Series 300, 310, • API control of systems through LAN 500, 550, and 700 RS-232 control supported with Mira Connect™ • • Polycom HDX 9000, 8000, 7000, 6000 accessories (sold separately) Supported Audio Systems Cloud Services • Polycom SoundStructure® C16, C12, C8, PSTN and • Mira Portal room and system management service VoIP interfaces required. Available in Essential and Enterprise •... -
Page 102: Mira Connect Accessories
Mira Connect and Mira Portal Administrator’s Guide 10 Mira Connect Accessories 10.1 PoE Injector As Mira Connect is powered by its network connection, a power over Ethernet (PoE) network connection is required for long-term operation of the device. If the local network does not support PoE, a PoE injector may be purchased and used with Mira Connect. Aveo Systems’ recommended PoE Injector (SKU: 151.0048.001) is a TrendNet TPE-115GI and is mountable under a table or in an equipment rack using the supplied 3M Dual-Lock fastener. 10.2 IP to RS-232 PoE As some devices require an RS-232 interface for control, Aveo Systems has partnered with Global Cache for their iTach PoE IP to RS-232 PoE interface. The IP to RS232 accessory is available from Aveo Systems as a convenience to our partners and supports PoE for simplified wiring and installation. The IP to RS-232 PoE interface (SKU: 151.0010.001) converts network communication from Mira • Connect to RS-232 communication at the device. The IP to RS-232 accessory requires approximately 1W of power from PoE and for applications without PoE can be powered externally with the included power connector. Setup of the accessory requires setting a static (preferred) IP address and then configuring the device as described in the next section. Configuration requires using software tools from Global Cache including iHelp.exe available from http://www.globalcache.com/downloads/ to find and set the IP address of device as shown in Figure 139. Figure 139. IHelp program can identify particular GlobalCache devices and their IP addresses. Once you have the IP address, browse to the IP Address as shown in Figure 140. Mira Connect Administrator’s Guide 102 Version 1.06 S Y S T E M S... - Page 103 Mira Connect and Mira Portal Administrator’s Guide Figure 140. Set a static IP address of the iTach GlobalCache device on the Network configuration page. Once the IP address of the interface has been set, that IP address should be used when adding device to a room in Mira Portal that is controlled via RS-232. The IP to RS232 interface has a male DB9 connector and typically requires a straight-through cable to connect to serial-controlled equipment, when the equipment has a DB9 pin female connector as shown in Figure 141. If the equipment to be controlled has a male DB9 connector, it is likely that pins 2 and 3 need to be reversed on one end of the cable. Figure 141. Typical serial cable pinout for controlling a device that only supports RS-232 control. Mira Connect Administrator’s Guide 103 Version 1.06 S Y S T E M S...
-
Page 104: Regulatory Statements
Mira Connect and Mira Portal Administrator’s Guide 11 Regulatory Statements 11.1 FCC Part 15 This equipment has been tested and found to comply with the limits for a Class A digital device, pursuant to Part 15 of the FCC Rules. These limits are designed to provide reasonable protection against harmful interference when the equipment is operated in a commercial environment. This equipment generates, uses, and can radiate radio frequency energy and, if not installed and used in accordance with the instruction manual, may cause harmful interference to radio communications. Operation of this equipment in a residential area is likely to cause harmful interference in which case the user will be required to correct the interference at his own expense. In accordance with part 15 of the FCC rules, the user is cautioned that any changes or modifications not expressly approved by Aveo Systems Inc. could void the user’s authority to operate the equipment 11.2 Canadian ICES-003 This Class A digital apparatus complies with Canadian ICES-003. Cet appareil numérique de la classe A est conforme à la norme NMB-003 Canada. Mira Connect Administrator’s Guide 104 Version 1.06 S Y S T E M S... -
Page 105: Warranty Statements
Mira Connect and Mira Portal Administrator’s Guide 12 Warranty Statements Limited Warranty Aveo Systems warrants to the end user ("Customer") that the product will be free from defects in workmanship and materials, under normal use and service, for one year, or such longer period as Aveo Systems may announce publicly from time to time for particular products, from the date of purchase from Aveo Systems or its authorized reseller. Aveo Systems' sole obligation under this express warranty shall be, at Aveo Systems' option and expense, to repair the defective product or part, deliver to Customer an equivalent product or part to replace the defective item, or if neither of the two foregoing options is reasonably available, Aveo Systems may, in its sole discretion, refund to Customer the purchase price paid for the defective product. All products that are replaced will become the property of Aveo Systems. Replacement products or parts may be new or reconditioned. Aveo Systems warrants any replaced or repaired product or part for ninety (90) days from shipment, or the remainder of the initial warranty period, whichever is longer. Products returned to Aveo Systems must be sent prepaid and packaged appropriately for safe shipment and it is recommended that they be insured or sent by a method that provides for tracking of the package. Responsibility for loss or damage does not transfer to Aveo Systems until the returned item is received by Aveo Systems. The repaired or replaced item will be shipped to Customer, at Aveo Systems' expense, not later than thirty (30) days after Aveo Systems receives the defective product, and Aveo Systems will retain risk of loss or damage until the item is delivered to Customer. Exclusions AVEO SYSTEMS WILL NOT BE LIABLE UNDER THIS LIMITED WARRANTY IF ITS TESTING AND EXAMINATION DISCLOSE THAT THE ALLEGED DEFECT OR MALFUNCTION IN THE PRODUCT DOES NOT EXIST OR RESULTS FROM: • FAILURE TO FOLLOW AVEO SYSTEMS'S INSTALLATION, OPERATION, OR MAINTENANCE INSTRUCTIONS. • UNAUTHORIZED PRODUCT MODIFICATION OR ALTERATION. • UNAUTHORIZED USE OF COMMON CARRIER COMMUNICATION SERVICES ACCESSED THROUGH THE PRODUCT. • ABUSE, MISUSE, NEGLIGENT ACTS OR OMISSIONS OF CUSTOMER AND PERSONS UNDER CUSTOMER'S CONTROL; OR • ACTS OF THIRD PARTIES, ACTS OF GOD, ACCIDENT, FIRE, LIGHTING, POWER SURGES OR OUTAGES, OR OTHER HAZARDS. Warranty Exclusive IF AN AVEO SYSTEMS PRODUCT DOES NOT OPERATE AS WARRANTED ABOVE, CUSTOMER'S SOLE REMEDY FOR BREACH OF THAT WARRANTY SHALL BE REPAIR, REPLACEMENT, OR REFUND OF THE... - Page 106 Mira Connect and Mira Portal Administrator’s Guide Support and Service Agreements If you purchased your product from an Aveo Systems Authorized Reseller, contact the Authorized Reseller for information about support and service agreements applicable to your product. For information on Aveo Systems service, go to the Aveo Systems web site www.aveosystems.com or call 1- 678-653-7090. Limitation of Liability TO THE FULL EXTENT ALLOWED BY LAW, AVEO SYSTEMS EXCLUDES FOR ITSELF AND ITS SUPPLIERS ANY LIABILITY, WHETHER BASED IN CONTRACT OR TORT (INCLUDING NEGLIGENCE), FOR INCIDENTAL, CONSEQUENTIAL, INDIRECT, SPECIAL, OR PUNITIVE DAMAGES OF ANY KIND, OR FOR LOSS OF REVENUE OR PROFITS, LOSS OF BUSINESS, LOSS OF INFORMATION OR DATA, OR OTHER FINANCIAL LOSS ARISING OUT OF OR IN CONNECTION WITH THE SALE, INSTALLATION, MAINTENANCE, USE, PERFORMANCE, FAILURE, OR INTERRUPTION OF ITS PRODUCTS, EVEN IF AVEO SYSTEMS OR ITS AUTHORIZED RESELLER HAS BEEN ADVISED OF THE POSSIBILITY OF SUCH DAMAGES, AND LIMITS ITS LIABILITY TO REPAIR, REPLACEMENT, OR REFUND OF THE PURCHASE PRICE PAID, AT AVEO SYSTEMS'S OPTION. THIS DISCLAIMER OF LIABILITY FOR DAMAGES WILL NOT BE AFFECTED IF ANY REMEDY PROVIDED HEREIN SHALL FAIL OF ITS ESSENTIAL PURPOSE. Disclaimer Some countries, states, or provinces do not allow the exclusion or limitation of implied warranties or the limitation of incidental or consequential damages for certain products supplied to consumers, or the limitation of liability for personal injury, so the above limitations and exclusions may be limited in their application to you. When the implied warranties are not allowed to be excluded in their entirety, they will be limited to the duration of the applicable written warranty. This warranty gives you specific legal rights which may vary depending on local law. Governing Law This Limited Warranty and Limitation of Liability shall be governed by the laws of the State of Georgia, U.S.A., and by the laws of the United States, excluding their conflicts of laws principles. The United Nations Convention on Contracts for the International Sale of Goods is hereby excluded in its entirety from application to this Limited Warranty and Limitation of Liability. Mira Connect Administrator’s Guide 106 Version 1.06 S Y S T E M S...
-
Page 107: Equipment Alerts
Mira Connect and Mira Portal Administrator’s Guide 13 Equipment Alerts You can test alerts by enabling the Notify Via option on the site and unplug the network connection on one of the pieces of equipment. Within 10 seconds you will receive a text alert that the system is offline. The default value of ‘Notify Me Via’ is disabled. Mira Connect Administrator’s Guide 107 Version 1.06 S Y S T E M S... -
Page 108: Index
Mira Connect and Mira Portal Administrator’s Guide 14 Index Application Update Time, 19 Assistive listening, 32 Audio dialing, 32 Audio input selection, 33 background image, 20 Biamp channel index, 55 instance tag, 55 level block, 34 mute block, 34 TesiraForté, 34, 58 content sharing, 28 control points, 29 displays, 37 DSP, 29 Epson, 58 Idle Screen, 19 logo, 20 Microphone mute, 31 Microsoft Office 365, 60 AddOrganizerToSubject, 83 Business Premium, 64 delegate, 68 DeleteComments, 83 deleteSubject, 83 resource account, 60 service user account, 61 PowerShell, 81 Mira Connect control points, 22 language, 23 pair, 22 Mira Portal browsers, 9 Organization, 16 passwords, 10 permissions, 12 administrator, 12 help desk, 13... - Page 109 Mira Connect and Mira Portal Administrator’s Guide technical, 13 room port 443, 7 duplicate, 49 Room, 21 move, 50 Sites, 17 overflow, 32 transport layer security, 7 remove, 49 visual theme, 19 volume, 31 Notify Me Via, 18 RS-232, 41 Physical Address, 18 simulate equipment, 26 Polycom Smart Sleep, 19 RealPresence Group Series, 28 Sound Reinforcement, 32 SoundStructure, 22 Symetrix power button, 42 controller number, 53 Power Off Button, 19 telnet, 29, 58 projectors, 37 Time Zone, 18 QSC core, 33 video switchers, 37 Mira Connect Administrator’s Guide 109 Version 1.06 S Y S T E M S...
Need help?
Do you have a question about the Mira Connect and is the answer not in the manual?
Questions and answers