Table of Contents
Advertisement
Advertisement
Table of Contents
Troubleshooting

Related Manuals for AGL GradeLight 3000

Summary of Contents for AGL GradeLight 3000
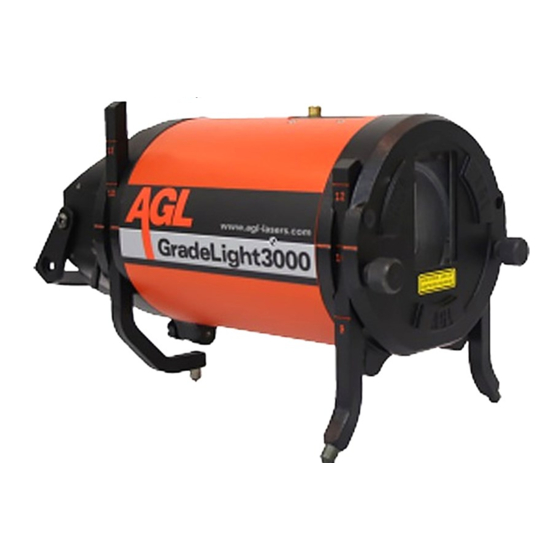
- Page 1 GradeLight 3000 Pipe Laser...
-
Page 2: Table Of Contents
Alignment Methods ....................... 21 MENU OPTIONS ....................28 Changing the Service Interval ....................28 Deleting the CHECK CAL Reminder ..................29 Changing AGL Start-up Screen to Your Company Information..........29 TROUBLESHOOTING ..................30 Using a Blower to Eliminate Refraction ................. 31 OPTIONAL EQUIPMENT .................31 CHECKING &... -
Page 3: General Information
Other features include a wide automatic self-leveling range, short length to fit tight inverts, and adjustable target with magnetic base (included in designated packages). Specifications GradeLight 3000 Self-Leveling Range +45% to -15% Grade Range +40% to -10% Grade Entry Rolling counter or digit select Grade Display 0.001%... -
Page 4: Laser Overview
Laser Overview... - Page 5 Keypad and LCD Overview Keypad Functions Power On/Off Enter digit select mode for grade Enter user settings menu Set azimuth line (left & right) Change digit positions when setting grade Set grade as rolling counter or digit select LCD Indications This display is backlit for 30 seconds when any button is pressed on the laser or remote.
-
Page 6: Power
POWER The Gradelight can be powered from the Li-Ion rechargeable battery or the alkaline battery pack. It can be used while charging – from AC using the included converter, from 12VDC using the optional Power cable, or from a vehicle (cigarette lighter) charging cable. Charging Charge before first use and when battery symbol indicates low. -
Page 7: Operation
Laser Start-Up Press On/Off button to power-up the laser. Check the following indications on the LCD: The start-up screen shows AGL. The battery capacity is displayed. Charge when there is one bar left. The laser automatically self-levels, and returns to the same grade and line as last used. -
Page 8: Entering A Grade
Entering a Grade The grade range is from +40% to -10%. Grade can be set in increments as small as .001% using the digit select or rolling counter entry method. The display lights when entering grade. The LCD is color coded to match the grade entry button: green for positive grade and red for negative grade. -
Page 9: Remote Control Overview
Remote Control Overview The remote if used primarily to move the beam left or right, within the azimuth range, and to put the laser in standby or locked mode. Since it’s an infrared line-of-site device, there should be no obstructions between it and the laser. It can be pointed at either the front side (through the pipe) or the back of the laser. -
Page 10: Adjustable Leg Set
To Automatically Center the Beam On laser keypad, press simultaneously. & On remote, press Replacing the Batteries of the Remote Control The LED on the remote will flash red when the batteries are low. To change the batteries. 1. Open the housing by removing the 6 screws. -
Page 11: Using The Target
Using the Target The target can be used for multiple pipe sizes. It features a unique design; the target panel is mounted at the front of the base, not the center. This allows easier viewing at the front of the pipe. It also has a magnetic base for attaching to trench box side wall after pipe setting. -
Page 12: Autotarget Keypad And Led Overview
Keypad and LED Overview LEFT Red LED Blinking AutoTarget has received the rotating laser beam on the left side of the reception field, and the fine auto alignment run is starting Green ON/OFF LED Solid AutoTarget is on, auto alignment is not running yet, or has just been successfully finished Green SEEK LED Blinking... -
Page 13: Autotarget Power
if battery voltage is less than 4,8V, the left red and the green ON/OFF LED lit if battery voltage is less than 4,5V only the left red lit All 4 LED's Solid lit for a second after ON/OFF button is pushed and the unit is switched off Power The Auto Target is powered by 4 AA Alkaline... -
Page 14: Autotarget Self-Alignment (Narrow)
Getting started: NOTE: Before the alignment procedure is started, ensure there is free line-of-sight between the pipe laser and the Auto Target, and that nothing moves through this area during the seeking time. Step 1: AutoTarget inside the pipe: Put the AutoTarget with or without the red target element into the pipe. Proceed to step 2. - Page 15 Once the pipe laser's vertical rotational beam hits the AutoTarget’s reception field, the LEFT red LED starts blinking. Thereafter (between 20-80 seconds – depending on the distance) the scan beam stops in the AutoTarget‘s center and switches off. The RIGHT red LED blinks shortly and the pipe laser's main laser beam switches back on and the green ON/OFF LED switches on again.
-
Page 16: Autotarget Self-Alignment (Wide)
Step 3: Self-alignment procedure: Wide Mode Switch on the AutoTarget by pressing and holding the Red SEEK button and at the same time quickly press the green ON/OFF button. After which release them both at the same time. All LEDs will blink shortly showing the current status of battery current and the green ON/OFF LED stays on along with the two outside red LED’s, this lets you know the AutoTarget is in wide mode. -
Page 17: Autotarget Troubleshooting
Step 4: Fine positioning: If you’re not satisfied with the accuracy of the self-alignment, you’re able to fine adjust the alignment of the pipelaser’s beam with the LEFT or RIGHT buttons on the AutoTarget. You may use the pipelaser’s remote or the pipelaser’s keys as well. You may now switch off the AutoTarget and replace it with a standard target. -
Page 18: Autotarget Seeking Timetable
Timetable: Narrow Mode (+/- 3°) 10ft = 2min 14sec (134 sec) 50ft = 1min 50sec (110 sec) 100ft = 1min 39sec (99 sec) 330ft = 1min 37sec (97 sec) Wide Mode (+/- 6°): 10ft = 3min 34sec (214 sec) 50ft = 3min 10sec (190 sec) 100ft = 3min (180 sec) 330ft = 2min 56sec (176sec) As shown on the table, the shorter the distance between the pipe laser and the AutoTarget,... -
Page 19: Autotarget Optional Equipment
Optional Equipment Bracket The optional bracket allows the Auto target to attach to grade rods, posts, stakes, or poles within the following dimensions. Round: Min ½” (1.3 cm) diameter Grade Rod: Max 1.5” x 2.55”” (3.7 cm x 6.5 cm) Max 2”... -
Page 20: Basic Set-Up And Operation
Basic Set-up and Operation The steps noted below are illustrated in previous sections. See next section for specific applications. 1. Attach any mounting accessories to the unit, such as the legs, trivet, handle/rod mount, etc. Place the unit in the manhole or pipe at the proper offset and elevation. 2. -
Page 21: Applications
APPLICATIONS Transfer of Elevation Using an Automatic Level 1. Mount the level on a tripod outside the manhole or open cut. Adjust it to level and point at the manhole hub. Take a reading from a rod held at the hub. This reading is sometimes called the “back- sight”... -
Page 22: Alignment Methods
(8) is over the manhole center. The transit mount is a 5/8-11 male attachment for mounting a standard transit. The AGL Special transit is mounted using an adaptor assembly. Aligning the beam with the AGL Special Transit 1. - Page 23 exactly with the line pivot LED. Repeat step 2 and 3 until the vertical crosshair is on both the forward manhole marker and the line pivot LED on the unit. 3. Align the Laser Beam to the Transit – Place a target in the ditch approximately 15’ (5m) in front of the laser.
- Page 24 3. Align Transit to Laser – Tilt the transit down and sight on the line pivot LED. On the transit, use the laser centerline knob to adjust the vertical crosshair until it is exactly aligned with the line pivot LED on the laser. Repeat steps 2 and 3 until the crosshair is on the forward manhole marker and the line pivot LED.
- Page 25 Set-up Methods These instructions describe four ways to set up: height adjustable legs, trivet, rod and crossbrace, or above ground on a tripod. Height Adjustable Legs The adjustable legs can be used to set up in a manhole base, pipe, invert, or open cut.
- Page 26 2. Attach the leg set with two side legs at the front and the centerline leg at the rear. Set all three legs so the appropriate pipe size mark is aligned with the centerline-of-beam marks beside each leg slot. 3. Slide the unit into pipe and rough level in the cross-axis direction using the cross-axis level vial indicator on the display.
- Page 27 Trivet Manhole Base Set-up Prepare the laser for use: Attach handle/rod mount, apply power, center the line adjustment, and enter desired grade. Mount the height adjustable rod (center the rod height in its adjustment range) to the trivet. (Figure J) Transfer elevation from the hub to the manhole base.
- Page 28 Above Ground Set-up Prepare laser for use: mount the sighting scope and attach to a 5/8”-11 tripod. If a dome head tripod is used the laser may be attached directly; to attach to a flat head tripod, use the adaptor. Center the line adjustment, and set grade at exactly zero.
-
Page 29: Menu Options
· When the reminder appears on the screen, it can be turned off (and the counter reset to 0 hours). · The start-u screen can be changed from “AGL” to your company information. CALIBRATION See instructions for “Adjusting Level Accuracy” later in the manual. -
Page 30: Deleting The Check Cal Reminder
Changing AGL Start-up Screen to Your Company Information If a non-AGL name is already used, follow Steps 1-2 and 5-8 to change to a different name. 1. Enter the Set Up Mode following Steps 1-3 of “Set Up Mode” in previous section. -
Page 31: Troubleshooting
TROUBLESHOOTING Indication on LCD Laser Beam Reason Remedy Flashes evenly Laser is Wait until self-leveling is leveling complete. ----- ----- ----- Pulses in Self-leveling Change position of laser in direction arrows indicate. When it 2 short flashes range is is within range, the warning will exceeded -- -- -- --... -
Page 32: Using A Blower To Eliminate Refraction
Using a Blower to Eliminate Refraction Certain conditions can cause refraction and scintillation to occur inside the pipe, with the laser dot appearing to be dancing all around the target. The laser light passes through a medium – air. Anything that disturbs the air will cause the light to scintillate (dance). -
Page 33: Checking & Calibration
±1/16 inch at 100 feet. If the marks are close enough, the beam is accurately projecting level. If they are not close enough, take it to an authorized AGL service center for calibration, or adjust the unit using the following procedure. - Page 34 Accessing Calibration through the Set Up Menu Turn the laser off, and the turn the laser on again. When the AGL start-up screen is displayed, press the + and ENT buttons simultaneously. Hold until the Set Up screen appears (after the Battery Check).
- Page 35 After a change, check the laser LCD and wait until SET appears again on the screen, and move the beam again if needed. To save the calibration (beam position), press the Lock button on the Remote (or the ENT button on the laser keypad).
-
Page 36: Safety, Care, And Handling
SAFETY, CARE, AND HANDLING Caution Use of controls or adjustments or performance of procedures other than those specified herein may result in hazardous radiation exposure. There is a purge screw inside the battery cavity, under a black decal. DO NOT OPEN! If this screw is removed, the moisture-free nitrogen purge of the unit will be lost. -
Page 37: Warranty
Products forming part of a fixed installation, such place of performance shall be the site of such installation and AGL shall have the right to charge for additional costs for such services under warranty if the site of the Product is other than where the Product was originally shipped or installed. - Page 40 Printed in USA AM1145 3/10 Specifications subject to change without notice...
Need help?
Do you have a question about the GradeLight 3000 and is the answer not in the manual?
Questions and answers