
Related Manuals for comfortel COLOUR STATION II


Summary of Contents for comfortel COLOUR STATION II
- Page 1 #8430 COLOUR STATION II #8432 COLOUR STATION WITH SINK #8435 TINT TUBE WALL CABINET For best practice on installing and maintaining your Comfortel product. Specific adjustments vary according to each model. comfortel.com.au...
- Page 2 ABOUT IMPORTANT PLEASE READ THESE SAFETY INSTRUCTIONS C O L O U R B A R A dedicated colour area GENERAL SAFETY 1. Read carefully and keep these instructions in a With our customised Colour Bar Area you can choose safe place.
- Page 3 POSITIONING: COMBO COLOUR BAR SUGGESTIONS COLOU R S TAT I O N COM BO O NE #8441 #8435 #8430 #8432 TINT TUBE COLOUR STATION COLOUR STATION WALL CABINET WITH SINK COLOU R S TAT I ON COM BO T WO #8442 #8435 #8430...
- Page 4 Colour Station must be fixed to a wall. Allow for the necessary room in front of the unit for access. FRONT VIEW SIDE VIEW Wall TOP VIEW Wall Colour Station II Colour Station II With Sink (no sink) Shows 2 x colour stations with combination of sink and no sink IMPORTANT:...
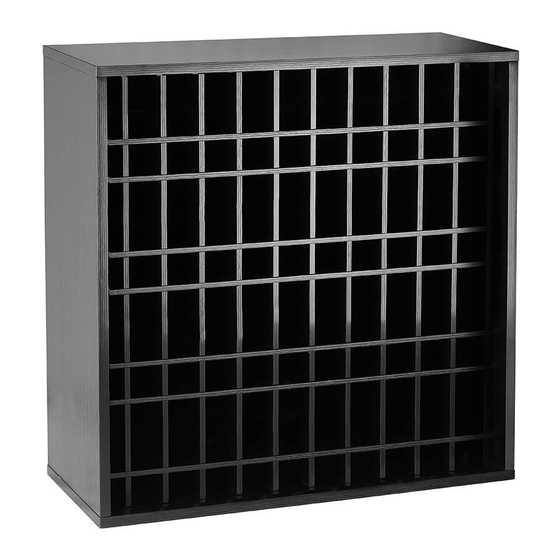
- Page 5 ASSEMBLY PARTS #8430 COLOU R S TAT ION Splashback Bench top Dowels (if present, please remove and discard - not required) Drawers Cupboard Kick board Feet x4 Lock and cam x4 Cam cover x4 L bracket x6 Screws x 24 Large screws x2 IMPORTANT IF DOWELS ARE PRESENT, PLEASE REMOVE...
-
Page 6: Installation
INSTALLATION B E N CH TOP Front view Back view PARTS INSTALL THE BENCH TOP Spashback Kick board Step 1. Use 4 x L brackets and attach using screws to attach to each Bench top Lock & cam x4 side of the cupboard. Cubboard L bracket x6 Step 2. - Page 7 INSTALLATION SINK IMPORTANT ALL PLUMBING MUST BE COMPLETED BY A LICENSED PLUMBER INSTALL THE SINK PARTS Basin Step 1. We suggest using a licenced plumber to install the sink and Bench Top plumbing. Place sink into position and secure with silicon. Cabinet Step 2.
-
Page 8: Maintenance
COLOUR STATION II #8432 COLOUR STATION WITH SINK Comfortel Furniture Pty Ltd. assumes no responsibility for any errors that may appear in #8435 TINT TUBE WALL CABINET this document nor does it make expressed or implied warranty of any kind with regard...
Need help?
Do you have a question about the COLOUR STATION II and is the answer not in the manual?
Questions and answers