
Related Manuals for Tiger 3D Printers Tiger3D XHD

Summary of Contents for Tiger 3D Printers Tiger3D XHD
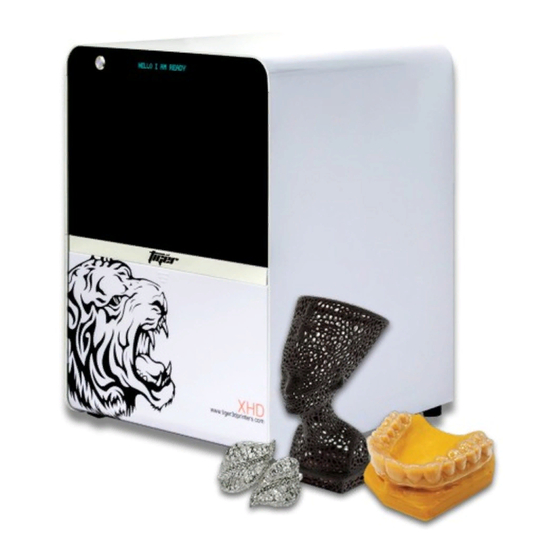
- Page 1 Tiger3D Series ™ XHD / HD / XL 3DPrinters Operators Manual Version 1.0.2 11/14/2017...
-
Page 2: Table Of Contents
Explore Endless Creativity with Tiger 3D Contents 1. Product Information ....................1-4 1.1 Regulatory Statements ......................... 1 1.2 Safety Precautions ........................2 1.3 General Information ........................3 1.4 Package Contents ........................3 1.5 Product Overview ......................... 4 2. Setting up your 3D Printer - Hardware ..............5-7 2.1 Unpacking............................. - Page 3 Explore Endless Creativity with Tiger 3D Contents 3. Using PrinterTool - Software (continued) ..............8-23 3.6 Print Mode ........................... 17-18 3.7 Advanced Settings ........................19 User Defined Supporter ......................19 Naming Files ......................... 19 Troubleshooting ........................19 How to Resolve "Fatal Error" when Installing ............19 3.8 PrinterTool Features ........................
-
Page 4: Product Information
Explore Endless Creativity with Tiger 3D 1. Product Information 1.1 Regulatory Statements FCC NOTICE This equipment has been tested and found to comply with the limits for a class “A” digital device, pursuant to Part 15 of the FCC Rules. These limits are designed to provide reasonable protection against harmful interference. -
Page 5: Safety Precautions
Explore Endless Creativity with Tiger 3D 1.2 Safety Precautions Please read through the following Safety Precautions before you begin using your printer. Use only the power adapter and accessories provided by the manufacturer for this printer. Before plugging the power adapter into an electrical outlet, verify the local power rating conforms with the specified voltage and frequency. -
Page 6: General Information
Explore Endless Creativity with Tiger 3D 1.3 General Information Product Names Tiger XHD / HD / XL Model Number (XHD) 78-5050 (HD) 78-5080 (XL) 78-5000 Build Area (mm) (XHD) 57 x 32 x 120 (HD) 80 x 45 x 120 (XL) 125 x 70 x 123 Resolution (XHD) 30. -
Page 7: Product Overview
Explore Endless Creativity with Tiger 3D 1.5 Product Overview Front View Front Panel Power Button Printer Door USB Port Storage Area Network Port Power Jack Product Label Inside Handle Picker Resin Tank Projector... -
Page 8: Setting Up Your 3D Printer - Hardware
Explore Endless Creativity with Tiger 3D 2. Setting up your 3D Printer - Hardware 2.1 Unpacking WARNING: Do not attempt to unpack or move the Tiger3D printer without assistance. Always use proper lifting techniques to avoid injury. (1) Remove the top cardboard (2) Remove the EPE inside the inner box (3) Remove the side cardboard (4) Remove the inner box... -
Page 9: Power Button Control
Explore Endless Creativity with Tiger 3D 2.3 Power Button Control To turn your printer on, press the Power button located at the top left corner of the printer. The system will begin warm up and the indicator light will turn purple. After a few seconds the indicator light will turn blue and the printer will be ready for use. The Power button is also used to select a file on a USB drive to print. Download the latest firmware from our website, or execute firmware upgrade by USB. -
Page 10: Installing The Picker
Explore Endless Creativity with Tiger 3D 2.4 Installing the Picker (1) Pick up and hold both ends of picker and (2) Pull down the top handle to lock the Picker carefully install it onto the machine. into place. To remove the Picker, lift the top handle and pull it out. -
Page 11: Using Printertool - Software
Explore Endless Creativity with Tiger 3D 3. Using PrinterTool - Software 3.1 Installing PrinterTool Software (1) Download PrinterTool.exe from www.tiger3dprinters.com/support System Requirements: - Windows OS: Windows 7 , Windows 8, Windows 10 or other updated versions - Browser: Google Chrome (2) Unzip the downloaded file (3) Click PrinterTool.exe to create shortcut of PrinterTool.exe (4) Open PrinterTool.exe 3.2 Quick access Tool Bar File Management (1) View the quick access tool bar on the top of the screen. -
Page 12: Platform Mode
Explore Endless Creativity with Tiger 3D - Software 3.3 Platform Mode The platorm mode allows you to select the printer configuration using the following drop-box. Select printer type -> Then the printers boundary will show in the preview panel. -
Page 13: Layout Mode
Explore Endless Creativity with Tiger 3D 3.4 Layout Mode - Software Object List This allows you to arrange objects in the build area. Import the STL files to be oriented in the build area. - Once the object is imported, that object will appear in the center of the build area in the viewport and will be selected. - Page 14 Explore Endless Creativity with Tiger 3D 3.4 Layout Mode - Software Object List Duplicate the selected object. Delete the selected object. Export a whole layout as an STL file. This tool is handy if you want to save the layout once it is ready to be printed. It is not required to export the layout to an STL file. You can skip this step and go directly to the Supporter Mode.
-
Page 15: Information
Explore Endless Creativity with Tiger 3D 3.4 Layout Mode - Software Information Move the object. - Select this item to enable clicking and dragging of the object around the build table. - To move a object, left click the object in the viewport and drag until it is in the desired position. Then release the mouse click. -
Page 16: Supporter Mode
Explore Endless Creativity with Tiger 3D 3.4 Layout Mode - Software (continued) Information Hint: Before you go into Supporter mode, enter into This picture shows the side view of the two identical Layout mode in preparation for the adding of the support parts. -
Page 17: Supporter Settings
Explore Endless Creativity with Tiger 3D 3.5 Supporter Mode - Software Supporter List (Continued) Modify - Enable modification of supports. - Supports can be modified with the mouse or via the Settings tab. - Clicking and dragging the top or the middle of a support, will move the top of the support across the objects surface. - While holding control + while dragging the joint of the support, the length of the joint will be altered. -
Page 18: Supporter Sections
Explore Endless Creativity with Tiger 3D 3.5 Supporter Mode - Software The supporter is made up with 3 sections : Joint, Middle, and Bottom. These sections are accessible in the interface by clicking on the corresponding sideways tab in the interface : Supporter Sections - Shape : The shape of the joint. - Radius : The radius of the joint. - Length : The length of the joint. - Contact : How far the joint should extend past its position and into the object. Supporter Settings - Joint Shapes PrinterTool incorporated 7 different shapes of the joint section. For a slight joint or stronger support, you can select the shape of the top contact between the support and the model. -
Page 19: Printertool Special Features
Explore Endless Creativity with Tiger 3D 3.5 Supporter Mode - Software PrinterTool Special Features Grid : When enabled, shown is a grid over the plate. Angle : Enables a visual indicator of the most common undercuts and overhangs. PrinterTool will show in red the areas where supports might be needed. - Hint : Use this tool to familiarize with the support structure concept. -
Page 20: Supporter Setting In Modify Mode
Explore Endless Creativity with Tiger 3D 3.5 Supporter Mode - Software Supporter Setting in Modify Mode - Support will become vertical to object. - Undo the vertical supporter. 3.6. Print Mode - Software Once your model(s) have been oriented and supported properly, click on the Print tab. -
Page 21: Print Mode
Explore Endless Creativity with Tiger 3D 3.6 Print Mode - Software (continued) Let the utility page load. Then click on the Convert button. Select the thickness you would like to slice the file. Once the file slicing and conversion are finished, click on Launch to Printing button in order to connect to the printer. Connection is also possible through an Internet browser. -
Page 22: Advanced Settings
Explore Endless Creativity with Tiger 3D 3.7 Advanced Settings - Software User Defined Supporter - You can design your supporter and put it into PrinterTool’s supporter setting drop-box. - Design a 1mm* x 1mm* shape, and save as a STL file. Naming Files - Name your file as follows : - SUPPORT_(PART)_(SHAPE) Example: SUPPORT_TOP_CIRCLE - (PART) = TOP, MID, BOTTOM, and BASE - (SHAPE) = Joint, Cross, Cone, Circle, ..etc. - Copy your file and paste it into the downloaded files folder in PrinterTool. - File : PrinterTool_version1.07\AppDirFiles - Open PrinterTool again, the new supporter will show in the drop-box. -
Page 23: Printertool Features
Explore Endless Creativity with Tiger 3D 3.8 PrinterTool Features - Software Surface Smoothing Surface Smoothing Surface smoothing from Z axis, the greater number means higher compensation from Z axis Sharpness Enabling sharpness from X and Y axis + →Sharpen an image ─ →Soften an image Resin Shrinkage Compensation Compensate resin shrinkage +0% to 9.9% →Enlarge an image -0% to -9.9% →Shrink an image Flip Image Flip image by X axis or Y axis... -
Page 24: How To Use Tiger Controller
Explore Endless Creativity with Tiger 3D 3.8 PrinterTool Features - Software (1) How to use Tiger Controller Save to Printer or Save to USB on printer (Printer’s memory capacity is 3GB) Delete file in Printer or Delete file in USB on printer Save Save as Delete Select file from PC Select file from Printer Select file from USB on printer (2) Print and Inspect WARNING : Do Not put your hand in the printer while it is printing. -
Page 25: Engineering Mode
Explore Endless Creativity with Tiger 3D 3.9 Engineering Mode - Software Test Module Action Verifying Correct Module Behavior The Z-platform moves upwards. Z-Motor Down The Z-platform moves downwards. Stop The movement stops. The cartridge moves upwards. Down The cartridge moves downwards. Cartridge Stop The movement stops. -
Page 26: Print, Record, And Update
Explore Endless Creativity with Tiger 3D 3.9 Engineering Mode - Software Advanced Settings (continued) (3) Save and go back to the Print setting. (4) Within the Speed column, select Advanced setting to implement the motion cycle. - File setting : The motion cycle setting existing in this file. - Advanced setting : The newly saved motion cycle setting. Print, Record, and Update Name: File name - SN: Serial number... -
Page 27: After Printing Is Complete
Explore Endless Creativity with Tiger 3D 4. After Printing is Complete Casting Preparation and Burn-Out process with Tiger3D Burgundy Castable Resin (1) Printing (1.2) Printing Print the model as usual. Once finished, remove the If you printed multiple models on the same plate, printed model from the picker (metal plate) using a separate the selected models from the base by cutting putty knife. -
Page 28: Casting Preparation And Burn-Out Process
Explore Endless Creativity with Tiger 3D 4. After Printing is Complete (continued) Casting Preparation and Burn-Out process with Tiger3D Burgundy Castable Resin (3) Drying Using compressed air, dry the model to a matte finish look. This will normally take a 1-2 minutes. If the surface of the model appears too shiny after cleaning, additional time in the denatured alcohol soak may be needed. - Page 29 Explore Endless Creativity with Tiger 3D 4. After Printing is Complete (continued) Casting Preparation and Burn-Out process with Tiger3D Burgundy Castable Resin (5) Support Removal The PrinterTool software includes different types, sizes and shapes of supports. Supports can be easily removed by hand, otherwise, use pliers or knives remove smaller or more delicate areas.
-
Page 30: Cleaning Picker And Tank
Explore Endless Creativity with Tiger 3D 4.2. Cleaning Picker and Tank (1) Cleaning Picker Use a putty knife or similar object to scrape away the excess printed model resin from the picker. If any greasy residue persists, use a soft cloth dipped in alcohol to rub and clean the surface until the grease is removed. -
Page 31: Appendix
Explore Endless Creativity with Tiger 3D Appendix 1. Specifications Printer Specifications 78-5050 78-5080 78-5000 Category Item TigerXHD TigerHD TigerXL Max. Building Size (mm) 57x32x120 80x45x120 125x70x123 Printing Area XY Resolution 41.5 5 ~ 200 Z - Axis Layer Thickness 405nm LED Lighting Wavelength Specification... -
Page 32: Appendix 2. Resin Curing Time
Explore Endless Creativity with Tiger 3D Appendix 2. Resin Curing Time Tiger3D Burgundy 78-5002 Tiger3D Burgundy 78-5002 is a Photopolymer resin suitable for direct investment casting in jewelry.The resin resembles normal casting wax and is specifically formulated for producing investment casting. Tiger3D Orange 78-5003 Tiger Orange 78-5003 is a Photopolymer resin suitable for direct investment casting in jewelry. The resin resembles normal casting wax and specifically formulated for producing investment casting in accurate patterns. -
Page 33: Appendix 3. Printing Parameter
Explore Endless Creativity with Tiger 3D Appendix 4. Tiger Settings for Burgundy & Smart-Res Resin SETTINGS 25 nm thick(um) 50 nm thick(um) 30 nm thick(um) 40 nm thick(um) CURING TIME S slow slow slow slow SPEED GAP AD MM BASE LAYERS BASE CURING TIME S BUFFER LAYERS SETTINGS...
Need help?
Do you have a question about the Tiger3D XHD and is the answer not in the manual?
Questions and answers