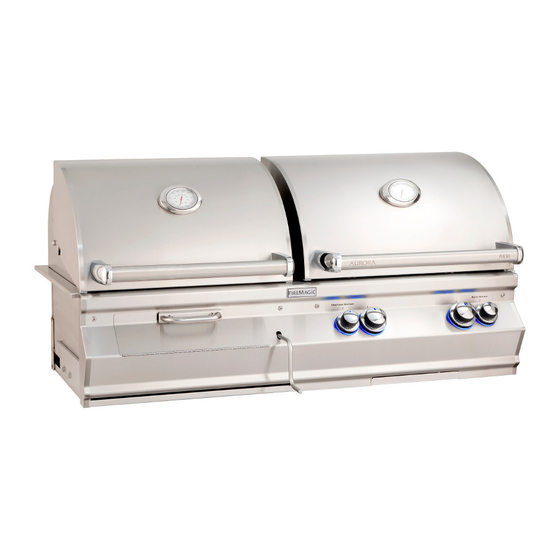
FireMagic Aurora Quick Start Manual
Built-in outdoor combo grill
Hide thumbs
Also See for Aurora:
- Quick start manual (2 pages) ,
- Quick start manual (2 pages) ,
- Quick start manual (2 pages)
Advertisement
Quick Links
IMPORTANT: You must read the installation and owner's manual provided with the grill.
1-Safety
INSTALLER: Leave these instructions with consumer.
CAUTION: WHEN INSTALLING THE UNIT, YOU MUST BE AWARE OF THE ENCLOSURE REQUIREMENTS; YOU MUST VENT THE UNIT
IN ACCORDANCE TO YOUR OWNER'S MANUAL. FAILURE TO DO SO MAY RESULT IN A FIRE OR EXPLOSION CAUSING
PROPERTY DAMAGE, BODILY INJURY, OR DEATH.
This grill must be installed in accordance with local codes and ordinances, or, in the absence of local codes, with either the latest National Fuel Gas Code (ANSI
Z223.1/NFPA 54), and Natural Gas and Propane Storage and Handling Installation Code (CSA-B149.1).
This appliance and its individual shutoff valves must be disconnected from the gas-supply piping system when testing the system at pressures in excess of ½ psig.
This appliance must be isolated from the gas-supply piping system by closing its dedicated manual shutoff valve during any pressure testing of the gas-supply
system at pressures up to and including ½ psig.
This grill is designed for outdoor use only. DO NOT use this grill inside a building, garage, enclosed area, or under overhead combustible construction.
DO NOT use this grill in or on a recreational vehicle or boat.
A minimum 5 foot clearance is required between the countertop and the overhead construction.
Installation must be performed by a qualified professional service technician.
Installation must be performed by a qualified professional service technician.
2-Unpacking
Carefully unpack the grill, removing all packing material and protective fi lm (including the
clear fi lm on the drip tray). Verify that all parts have arrived undamaged by consulting the
parts list in the owner's manual. Remove foam packed hardware from oven area. (See
Fig. 2-1.)
Consult the parts list in the owner's manual. If any parts are missing or damaged,
immediately contact the Fire Magic dealer before beginning installation.
3-Installation
Location
Refer to the INSTALLATION REQUIREMENTS section of your grill owner's manual
for complete details.
CAUTION:
Wind blowing into or across the rear oven lid vent (Fig. 3-1)
can cause poor performance and/or dangerous overheating.
Orient the grill so that the prevailing wind blows toward the
front of the grill (Fig. 3-2).
CAUTION:
To prevent dangerous overheating, the rear of the unit must have a
minimum clearance of 4" from any backsplash/non-combustible wall.
Connect Gas supply
These quick start instructions assume a natural gas or household propane confi gured unit. See main instructions for propane cylinder units.
Note:
This section is only an overview of installation to the gas supply. Refer to the grill owner's manual for complete grill installation details.
Run the attached fl ex connector routed under the middle of the grill to the gas stub. Turn OFF the gas supply at the source. Then connect the fl ex connector to
the gas supply (Fig. 3-3). Use a pipe joint compound resistant to all gasses on all male fi ttings except fl are fi ttings.
Turn all burner control knobs to the OFF position. Turn the gas supply on. Then carefully check all gas connections for leaks with a brush and half-soap/half-water
solution before lighting. NEVER USE A MATCH OR OPEN FLAME TO TEST FOR LEAKS.
The control panel must be fl ush with the enclosure face as shown in Fig. 3-4.
Proper grill airfl ow must be maintained as shown in Fig. 3-5. Do not block. It is not necessary to remove the control panel or knobs for installation.
Top View
REV 1 - 1705310825
CONSUMER: Retain for future reference.
To gas
system
Required shut-off valve (shown in-line)
Shut-off valve (shown in-line)
must be within 6 feet of the unit
OFF
must be within 6 feet of theunit
Countertop
Gas inlet pipe
Flex
Adapter
Cut-out
connector
Fig. 3-3
Built-in Outdoor
Combo Grill
Quick Start Guide
INCORRECT
Rear oven lid vent
YOU MUST PROTECT
REAR OVEN VENT FROM
PREVAILING WIND
Hanger
Countertop
Overhang
Flush-mounted
control panel
Lift out foam packed hardware
Fig. 2-1
CORRECT
PLACE GRILL SO PREVAILING
WIND BLOWS TOWARD FRONT
OF GRILL
Fig. 3-1
IDEAL
Maintain proper ventilation
Fig. 3-4
Remove plastic
zip-ties
Fig. 3-2
airfl ow
Fig. 3-5
L-C2-479
Advertisement

Subscribe to Our Youtube Channel
Summary of Contents for FireMagic Aurora
- Page 1 Built-in Outdoor Combo Grill Quick Start Guide IMPORTANT: You must read the installation and owner’s manual provided with the grill. 1-Safety INSTALLER: Leave these instructions with consumer. CONSUMER: Retain for future reference. CAUTION: WHEN INSTALLING THE UNIT, YOU MUST BE AWARE OF THE ENCLOSURE REQUIREMENTS; YOU MUST VENT THE UNIT IN ACCORDANCE TO YOUR OWNER’S MANUAL.
- Page 2 Note: For infrared burner equipped grills, 4-Grill Setup see detailed instructions included in your owner's manual. Parts Placement Checklist Place the following items according to their position and orientation in Fig. 4-1: Flavor grids, cooking grids, backburner cover (if equipped), and Fig.


Need help?
Do you have a question about the Aurora and is the answer not in the manual?
Questions and answers