
Subscribe to Our Youtube Channel
Related Manuals for SAF-HOLLAND SK RB 9022 K

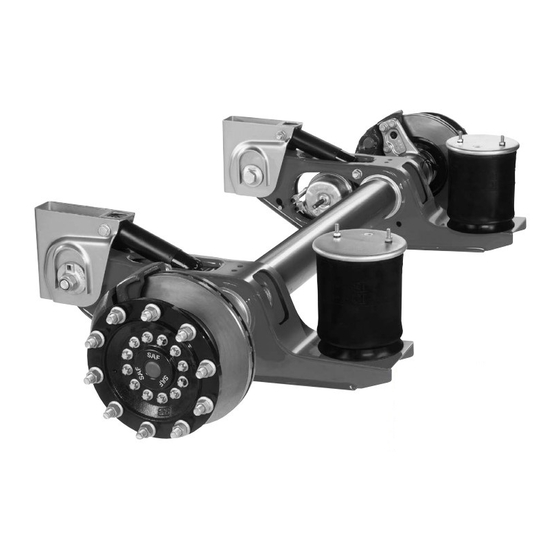
Summary of Contents for SAF-HOLLAND SK RB 9022 K
- Page 1 Maintenance and Repair Manual for SAF Disc Brakes SK RB 9022 K/SK RB 9019 K with KNORR brake calliper SK 1000 ET 120 Edition 01/2006 Service...
-
Page 2: Saf Axle Identification
Vehicle information Manufacturer..........................Address............................Body type............................Chassis no............................Year of manufacture ........................Registration date........................... Spare parts service for SAF axles and suspension systems When ordering spare parts, quote correct axle identification serial no., refer to the axle type plate. Please enter the vehicle identification figures in the type plates shown below so that correct information is available... -
Page 3: Table Of Contents
A) General safety instructions B) Maintenance instructions Maintenance instructions for SAF axles SK RB 9022 K / 9019 K – SK 1000 ET 120 Maintenance schedule for SAF axles SK RB 9022 K / 9019 K – SK 1000 ET 120... -
Page 4: Notes
NOTIZEN / NOTES / NOTE... -
Page 5: A) General Safety Instructions
A) General safety instructions Please observe the following safety instructions in order to maintain the operational and road safety of your SAF axles and suspension systems: The wheel contact surfaces between the wheel disc and wheel hub and the wheel nut contact surface at the wheel disc must not be additionally painted. -
Page 6: B) Maintenance Instructions
B) Maintenance instructions SK 1000 Disc / ET 120 SK RB 9022 K / 9019 K - SK 1000 ET 120 Periodic checks After first Maintenance intervals 5,000 km every every every Mileage intervals > 150,000 km 30,000 km 75,000 km... -
Page 7: Sk Rb 9022 K / 9019 K - Sk 1000 Et 120
B) Maintenance instructions SK 1000 Disc / ET 120 SK RB 9022 K / 9019 K - SK 1000 ET 120 Hub Unit Lubricant specifications: Hub Unit maintenance free. Tappet boots and brass bushes: Inspect for signs of wear at each brake disc change SAF Part No. -
Page 8: Brake Testing (Fault-Finding Procedure)
B) Maintenance instructions Brake testing Fault-finding procedure Disc brake Lift vehicle, turn wheel by hand Does wheel turn freely? Running Residual pressure clearence OK? in brake cylinder? (see page 19) Running Check upline Uneven brake clearence OK? brake devices Check adjuster pad wear? (see page 19) and replace,... -
Page 9: Adjuster Check
B) Maintenance instructions Adjuster check Remove cap. Caution! Do not overload or damage the hexagon drive (8 mm) of the adjuster. Do not use an open-ended spanner. With an SAF ratchet wrench on the hexagon drive of the adjuster, turn the drive in anti-clockwise direction for 2 or 3 clicks. Apply the brakes 5-10 times (approx. -
Page 10: Brake Pad Check
B) Maintenance instructions Brake pad check Caution! Observe the wear limits of the brake pads. Check the thickness of the brake pads for compliance with the legal requirements at regular intervals, but at least every three months, depending on the operation of the vehicle. A = Minimum residual lining thickness 2 mm B = Total lining thickness of new pads 21 mm When the residual lining thickness is A ≤... -
Page 11: Special Notes
B) Maintenance instructions Special notes Storage instructions During storage outdoors, ensure that moisture cannot enter the inside of the brake cal- liper through the brake cylinder connection. Painting instructions During painting work, all rubber parts must be covered as otherwise the rubber will become brittle and thus be damaged. - Page 12 C) Spare part illustrations SK 1000 Disc / ET 120 SK RB 9022 K / 9019 K - SK 1000 ET 120 Torque wrench settings Use a torque wrench. Wheel nuts: U-bolts: Shock absorber: The use of impact wrenches Spigot-hub-centred fixing:...
-
Page 13: Sk Rb 9022 K / 9019 K - Sk 1000 Et 120
C) Spare part designation SK 1000 Disc / ET 120 SK RB 9022 K / 9019 K - SK 1000 ET 120 Item Parts designation Item Parts designation Axle beam assembly 59/60 Brake calliper assembly including items 61/62, 65, 66, 70, 81 Axle nut, RH, W.A.F. -
Page 14: D) Installation Instructions
D) Installation instructions Repairing the brakes Remove the brake calliper. Park the vehicle on level, solid ground and chock the wheels to prevent the vehicle from rolling away. Lift the axle using a jack. Loosen the wheel nuts and remove the wheel. Remove the cap. - Page 15 D) Installation instructions Check the brake calliper for free and easy movement. Back off the tappets on the adjuster until the boots are visible. Perform a visual inspection of the boots and all seals. Screw in the tappets again completely. Replacing the brake disc Unscrew bolts M 18 x 1.5 from the wheel flange and remove the wheel flange.
- Page 16 D) Installation instructions Brake disc Brake disc diameter Permissible wear, see table in chapter “Maintenance instructions”. The brake disc may only be cleaned using a dry cleaning agent. Inspecting the brake disc Inspect the braking surface of the brake disc carefully for serviceability. –...
- Page 17 D) Installation instructions Installing the Hub Unit Emery the seating surfaces of the Hub Unit on the stub shaft down to the bare metal and coat with SAF fitting paste (SAF Part No. 4 387 0015 06). Coat the hub unit bearing surfaces with SAF fitting paste and push onto the stub shaft.
- Page 18 D) Installation instructions Bolting on the brake calliper Position the brake calliper and screw in M 16 x 1.5 x 55 collared bolts (tightening torque 290 Nm). Coat ABS sensor (see arrow) all around with copper paste and install in the sensor holder. Push in the ABS sensor until it contacts the exciter.
- Page 19 D) Installation instructions Installing the brake pads Note: Before installing the brake pads, the brakes must be completely backed off with the SAF ratchet wrench (SAF Part No. 3 434 3327 00). Clean the brake pad slots. Push the brake calliper towards the outside of the vehicle and insert the outer brake pad.
-
Page 20: Replacing The Tappets With Tappet Boots
D) Installation instructions Replacing the tappets with tappet boots 66.1 Note: Depending on the space available for installation, it may be easier to remove the brake calliper for replacement of the tappets. Back off the tappets (66.1) with the adjuster until the boot can be 66.1 reached. -
Page 21: Installing The Tappets With Tappet Boots
D) Installation instructions Installing the tappets with tappet boots 66.2 66.1 With brake calliper installed on axle: Grease threads with white grease (SAF Part No. 4 387 0016 00). Back off the threaded tubes. Install a new tappet bush (66.2) on the threaded tube. Push tappet with boot (66.1) onto the end of the threaded tube. -
Page 22: Sealing The Brake Calliper Bearing With "Seal Kit For Sliding Guide
D) Installation instructions Sealing the brake calliper bearing with “seal kit for sliding guide” Remove the brake calliper. Remove ring (80.5). Pull out guide bush (80.2). 80.2 80.5 Lever out boot (80.4) with a screwdriver. 80.4 Clean the boot and inspect for corrosion. Insert a new boot (80.4) into the sleeve (arrow) of the puller, SAF Part No. -
Page 23: Repairing The Brake Calliper Bearing With "Guide And Seal Kit
D) Installation instructions Repairing the brake calliper bearing 80.3/81.2 with “guide and seal kit” Remove the brake calliper. Remove guide bush and boot (see page 20: “Replacing the tappets with tappet boots”). Replacing the brass bush Pull out brass bush (80.3) with puller/pusher, SAF Part No. 4 434 1064 00. -
Page 24: Replacing The Brake Calliper
D) Installation instructions Press the new guide sleeve together at the collar and insert into the 70.3 bore from the inside of the brake calliper. Push guide sleeve (70.3) into the bore until the collar of guide sleeve (70.3) engages positively in the shoulder of the bore (arrows). Caution! On no account should the mineral oil-based white grease (SAF Part No. -
Page 25: Installing The Brake Calliper
D) Installation instructions Installing the brake calliper When selecting the replacement brake calliper, observe the corres- ponding part number and the rating plate (see arrow, upper figure) on the brake calliper. Note: The rating plate of the replacement brake calliper is blue. Remove the plastic cap in the vicinity of the bore for the hex. -
Page 26: Replacing The Brake Calliper Carrier
D) Installation instructions Replacing the brake calliper carrier Remove the brake calliper. Unscrew hexagon head bolts and remove brake calliper carrier (61/62) from the axle. 61/62 Clean the mounting surface on the axle. Bolt on a new SAF brake calliper carrier with new hexagon head bolts to the SAF specifications. -
Page 27: Overview Of Hub Unit Components
D) Installation instructions Overview of Hub Unit components Hub Unit Hub Unit Hub cap Axlenut, RH / LH thread Wheel flange Brake disc Brake calliper... -
Page 28: E) Service Tools
E) Service tools 1. Axle nut wrench W.A.F. 85 SAF Part No. 2 012 0023 01 2. Wheel hub puller SAF Part No. 4 434 3822 00 3. Installation drift for tappet with boot SAF Part No. 4 434 1062 00 4. - Page 29 E) Service tools 5. Puller / pusher for brass bush SAF Part No. 4 434 1064 00 6. Wedge fork for tappet with boot SAF Part No. 4 434 1065 00 7. Caulking tool for brass bush SAF Part No. 4 434 1066 00 8.
- Page 30 E) Service tools 9. SAF ratchet wrench SAF Part No. 3 434 3327 00...
-
Page 31: F) Tightening Torque In Nm
E) Service tools The following tightening torques are only valid if no other values are given in the axle maintenance chart. Torque wrenches settings, impact wrench not permissible. Thread Material W.A.F. 10,9 12,9 W.A.F. 13 M 8 x 1 M 10 W.A.F. - Page 32 Soforthilfe im Pannenfall NonStopService 24 Support in the case of service · Im Servicefall wählen Sie bitte immer die Rufnummer Ihres Heimatlandes. · In the case of service please always dial the number of your own country. Inland Vom Ausland home country from abroad 03 62 27 23 21...
Need help?
Do you have a question about the SK RB 9022 K and is the answer not in the manual?
Questions and answers