Table of Contents

Related Manuals for ZWO ASIAIR


Summary of Contents for ZWO ASIAIR
- Page 1 ASIAIR User Manual ASIAIR Manual Version 1.1 Sep, 2018 The information in this manual belongs to ZWO Co., Ltd. and is subject to change without notice. Please download the latest version on our official website: https://astronomy-imaging-camera.com.
-
Page 2: Table Of Contents
3.3 First Use ....................5 Start DSO Imaging ................... 6 4.1 External device connection ..............6 4.2 ASIAIR App connection and setup ............8 4.3 Image preview function ..............10 4.4 Focus ....................13 4.5 Finding the target ................14 4.6 Plate Solving .................. -
Page 3: Instruction
Congratulations and thank you for buying ZWO ASIAIR! This manual will give you a brief introduction to your ASIAIR. Before using the ASIAIR, please take some time to read it thoroughly and if you have any other questions, feel free to contact us at info@zwoptical.com. -
Page 4: What Is In The Box Instruction
ASIAIR User Manual 2 What is in the box Instruction 2.1 Schematic 2.2 List Name unit Note ASIAIR body ZWO ASIAIR Quick Guide 5V power cable Peak value 3A USB-RS232 serial cable SD Card 32GB, Samsung SD Card Reader 12V-5V DC Converter... -
Page 5: Asiair Brief Introduction
ASIAIR User Manual 3 ASIAIR Brief Introduction The ASIAIR is a lightweight wireless astrophotography control unit that enables all the essential features of deep space imaging through the accompanying application, including (but not limited to and with more features under development): wireless control, equatorial control, focus, capture and preview, automatic guiding, plate solving, sequence etc. -
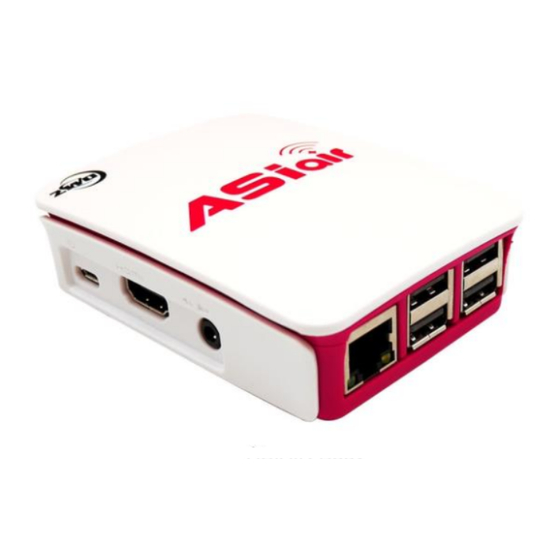
Page 6: External View
ASIAIR User Manual 3.1 External View ASIAIR has an SD card slot. We have pre-installed an SD card at the factory and the ASIAIR is ready to use. Simply connect your devices and power on. Additionally, there are several other interfaces besides the USB interface and power port. -
Page 7: First Use
Power Supply We recommend using a 12V power supply, please use the 12V-5V DC adapter and power cord that is included with the ASIAIR. If you need to use a 5V power supply, be sure the power supply can supply 2.5A@5V. -
Page 8: Start Dso Imaging
4 Start DSO Imaging 4.1 External device connection SD card The ASIAIR has a 32GB SD boot card installed by default (25G left can be used for image storage) External device connection The ASIAIR is connected to the equatorial mount via a USB-RS232 and... - Page 9 ASIAIR User Manual Before using the ASIAIR, it is necessary to align the polar axis on the equatorial mount. The accuracy of the polar axis calibration will affect the accuracy of the guiding and the GoTo. Most of the equatorial mount's sync function is equivalent to a one-star calibration, so in general, you don't need to perform one or more star calibrations in advance.
-
Page 10: Asiair App Connection And Setup
After the ASIAIR is powered up, wait for about 15 seconds before connecting to the ASIAIR hotspot via the mobile app. The ASIAIR starts up as a 5G WiFi hotspot by default, so make sure your phone or tablet supports 5G WiFi, otherwise you won't be able to find the ASIAIR device on the network. - Page 11 CPU performance will drop. At this time, you need to try to open the case to cool the ASIAIR down. When it is below 80 degrees, please feel free to use it normally.
-
Page 12: Image Preview Function
ASIAIR User Manual Click the X in the upper right corner or click the left area on the image to return to the preview interface. 4.3 Image preview function The function list of preview interface is opened as follows: After setting the camera related exposure, gain and BIN parameters, click the start button (3) to start a single exposure. - Page 13 ASIAIR User Manual Note: The pictures taken in the preview interface are just previews and will not be saved by default unless you click the Save button (5). Name Function Note Function Switch Switch between preview, focus, and Autorun Pixel merge settings, all the cameras support...
- Page 14 Sensor size, gain, temperature, cooling Info Display specification power, camera status Histogram Contains Max, Min, Avg, Std values Information Congratulations! It is your first image taken with the ASIAIR! The picture may look blurry because it is out of focus.
-
Page 15: Focus
For the first image, the telescope will not be focused properly. We recommend using the maximum BIN value and 1s exposure to focus the star. The ASIAIR auxiliary focus function is divided into coarse adjustment and micro adjustment. Switch to the focus adjustment interface (1), click the start button (3), and the image will start to continuously refresh. -
Page 16: Finding The Target
GoTo to find the target. Note: The control of the Equatorial Mount is supported by the Plus/Pro version of SkySafari 5/6. SkySafari connects to the ASIAIR via WiFi. The ASIAIR connects to the equatorial mount via serial cable or Ethernet. This allows SkySafari to fully control and operate the equatorial mount. - Page 17 Click the connect button. After connecting to the mount, you can control the mount and GoTo. Take M8 for example, choose the target and click GoTo. After the Equatorial finishes slewing to M8, switch to the ASIAIR Application to take a single preview image.
-
Page 18: Plate Solving
ASIAIR User Manual 4.6 Plate Solving Because the equatorial mount itself and the polar axis have errors, usually the images we take after GoTo are not the targets we want to capture, especially with the wide range of GoTo. The function of the analysis is to obtain the correct coordinate position of the equatorial mount according to the image we have taken. - Page 19 ASIAIR User Manual We recommend using 1s or 2s exposure, BIN4 (the highest BIN value supported by the camera), to capture the image to be plate solved, so the resolution is the fastest. It will take a few seconds to calculate the analysis results, if there is a cloud in the sky may affect the analysis speed and results.
-
Page 20: Setting Up The Equatorial Mount
This chapter focuses on the equatorial setup. Click on the icon of the equatorial mount to enter the equatorial setup. The ASIAIR controls the equatorial mount through the INDI protocol, so all equatorial mounts that support the INDI protocol are supported by ASIAIR. -
Page 21: Guiding
After clicking the serial port, it will switch to the network, and input the IP address and port to identify the network control (please ensure that ASIAIR and controlled equatorial device are on the same network). You can adjust the Baud Rate of your mount. - Page 22 ASIAIR User Manual Click the floating window to enter the guiding interface. The guiding interface is shown below...
- Page 23 ASIAIR User Manual The guiding interface is divided into 10 areas, which are: Name Function Note After data is deleted, Recorded vector data for right ascension Calibration data it needs to be declination correction recalibrated. Image refresh Preview image in real time...
- Page 24 ASIAIR User Manual The normal operation steps of the guiding are as follows: 1. Set the exposure time (usually 1s or 2s) and gain (gain setting is in guide camera settings interface). Click the refresh button (1) to open the preview.
-
Page 25: Autorun
4.9 Autorun The ASIAIR will continue to capture and guide, even when you turn off your phone or tablet. Select Autorun (1) to enter the Autorun shooting interface. Click (2) to enter the... - Page 26 Click the image button (3) to view the captured images. These image files are stored in the ASIAIR SD card, you can delete them in full, select batch delete, or delete singles. The status icon (4) shows the status of the scheduled execution.
-
Page 27: Transferring The Images
During the operation of this method, pay attention to the front and back of the SD card. The detailed steps are: A Unplug the SD card from ASIAIR, insert the card reader, and then insert the card reader into the computer USB interface;... -
Page 28: Backing Up And Restoring The Sd Card
1 ASIAIR file system backup A Download, install and run the latest version of Win32 Disk Imager. B Remove the SD card from ASIAIR, insert it into the card reader, and plug the card reader into the computer USB port. - Page 29 BOOT partition. 5.2 ASIAIR system restore When ASIAIR cannot be started due to an SD card failure, you need to restore the img file which was backed up in the previous step to your new SD card.
- Page 30 ASIAIR User Manual Backup of ASIAIR SD Card Restore of ASIAIR SD Card...
-
Page 31: Mac
ASIAIR User Manual 5.2 Mac It is recommended to use Apple Pi-Baker for ASIAIR system backup and restore. The operating guide is included on this download page and is easy to complete. 5.3 Linux Backup and restore under Linux system, you can use the "dd" command.
Need help?
Do you have a question about the ASIAIR and is the answer not in the manual?
Questions and answers