Table of Contents
Advertisement
Quick Links
Advertisement
Table of Contents

Summary of Contents for RV Wifi RV Wi-Fi+
- Page 1 Installation Guide and User Manual 2018...
- Page 2 Welcome Congratulations on This purchase will give you greater freedom to enjoy your your purchase of an travelling without sacrificing the lifestyle that the internet RV Wi-Fi Router. provides. The great features that are included in this unit are: • Wi-Fi for your RV;...
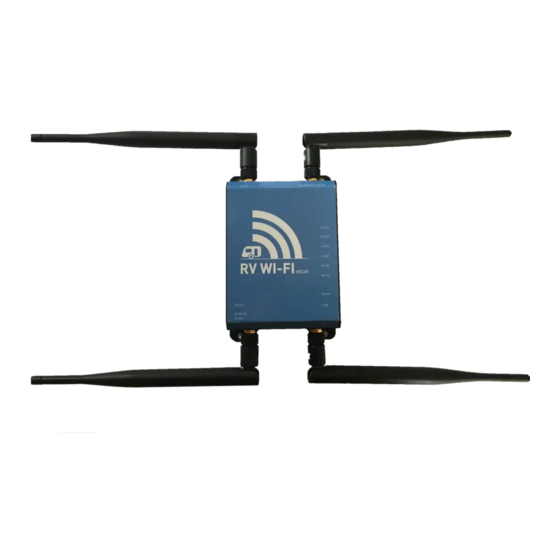
- Page 3 What makes up your RV Wi-Fi+? 1. RV Wi-Fi+ Router There are fi ve components: 3. Power Adapter 2. Telstra Sim 4. Internal Antennas (4 included ) 5. External Antenna/bracket...
- Page 4 Installing your RV Wi-Fi+ In most cases, your manufacturer will install your RV Wi- Fi for you. But if you are looking at installing yourself, please follow the steps below. There are two methods available: • An external antenna fitted to the outside of the RV. •...
- Page 5 To external antenna Insert Full Sized Sim card as shown To external antenna To external antenna...
- Page 6 Installing your RV Wi-Fi+ without the external antenna Set up for use with NO external antenna Choose a position for RV WI-FI+ Router adjacent to a 12v power point. Screw the four black antenna into the four points - Wi-Fi/ 4G/ 3G/ Wi-Fi.
- Page 7 Turn on the device/s that you wish to connect to the Internet. Click on the ‘Settings’ or equivalent page on your device. Click on the ‘Wi-Fi’ heading and choose the wifi to work RV WIFI abc123 NOTE: “abc123” varies on each unique router.
- Page 8 Setting your Wi-Fi+ Password. This process is recommened to provide security with your internet use. Open the web/internet browser on your device and enter the address http://10.0.1.1 into the ‘search’ bar, where you would normally type in for example: www.google.com.au. http://10.0.1.1 You are about to enter the username and password.
- Page 9 Select/click on the following: ‘Network’. ‘WiFi’. Click on ‘Edit’...
- Page 10 Setting your Wi-Fi+ Password. Go to the ‘Interface Confi guration’ Section. • Click on ‘Wireless Security’.
- Page 11 • Click on drop down menu next to ‘Encryption’. • Click on ‘WPA-PSK/WPA2-PSK Mixed Mode’. Next to the ‘Key’ drop down box, click on the double green arrows. This shows what the current WiFi password is set to. Delete the password, either by backspacing or use the delete button.
-
Page 12: Warranty Registration
How to Activate the Telstra Pre-Paid Service The orange Telstra satchel contains your Telstra Sim Card. You need to activate this and add credit to it to fi nish the set up stage of your RV Wi-Fi unit. You must use a FULL SIZED SIM CARD. Once your SIM card is inserted. -
Page 13: Factory Reset
Need help? For help with your RV Wi-Fi unit please go to: www.rvwifi .com.au/contact-2 and a service agent will be in touch. Factory Reset WARNING: This procedure will reset all of the settings applied to this router, back to original factory settings, and your passwords will be forgotten. - Page 14 Select/click on the following: • System. • Backup/fl ash fi rmware. • Perform Reset. Select/ click ‘OK’ button.
- Page 15 Frequently asked questions Telstra: www.telstra.com.au/coverage- What do I do if I can’t connect to the networks/our-coverage Wi-Fi? Optus: www.optus.com.au/shop/mobile/ There are a number of causes that may have network/coverage made this happen. Vodafone: www.maps.vodafone.com.au/ Your Wi-Fi may have been accidently VHAMap/apps/public-vf deleted during the set up phase.
- Page 16 www.rvwifi .com.au...

Need help?
Do you have a question about the RV Wi-Fi+ and is the answer not in the manual?
Questions and answers