Table of Contents
Advertisement
Advertisement
Table of Contents

Subscribe to Our Youtube Channel
Related Manuals for Propel Trampolines 9 Station Swing Set

Summary of Contents for Propel Trampolines 9 Station Swing Set
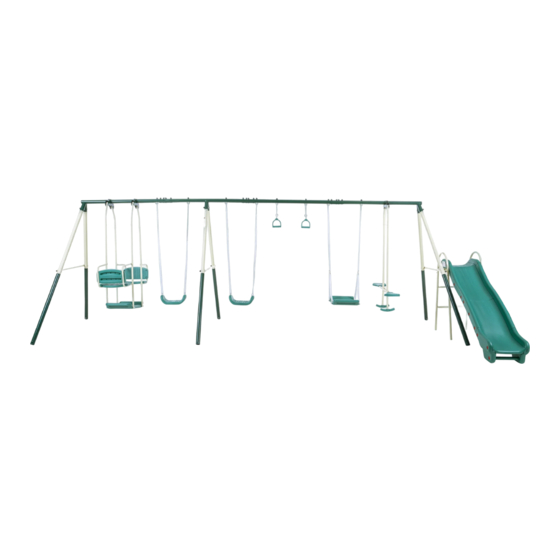
- Page 1 9 Station Swing Set User Manual For model: P9-SS Assembly, Installation, Care, Maintenance, and User Instructions WARNING READ THESE MATERIALS PRIOR TO ASSEMBLING AND USING THIS SWING SET. Failure to assemble and use this swing set as specified in this manual will automatically void the...
-
Page 2: Liability Disclaimer
Do Not return this product to the store. Instead, please visit our website at www.PropelTrampolines.com where you will find our current contact information. Our friendly customer service staff can help you with any problems or questions that may arise during the assembly, installation, use, maintenance, or obtainment of replacement parts for your Swing Set. -
Page 3: Before You Begin
BEFORE YOU BEGIN Thank you for purchasing a Propel Swing Set. This swing set comes equipped with warnings and instructions for its proper assembly, care, maintenance, and use. This information must be read by all supervisors and users before any person is allowed to use it. - Page 4 Operating Instructions Warning 1. Observing the following statements and warnings reduces the likelihood of serious or fatal injury. 2. Adult supervision is recommended for children of all ages, at all times while the swing set is being used. 3. Do not allow children to walk close to, in front of, behind, or between moving items. 4.
- Page 5 and settle, and should be periodically refilled to maintain at least a 9-inch depth. b. Use a minimum of 6 inches of protective surfacing for play equipment less than 4 feet in height. If maintained properly, this should be adequate. (At depths less than 6 inches, the protective material is too easily displaced or compacted.) NOTE: Do not install home playground equipment over concrete, asphalt, or any other hard surface.
-
Page 6: Parts List
Parts List (1) Angled Leg Bracket (2) Straight Leg Bracket (4) Frame Leg Bracket (3) Top Frame Braces Brace Has two square crimps Has two punched rectangular holes (5) Top Rail A (6) Top Rail B Has one square crimp (7) Top Rail C (8) Top Rail D (9) Lower Frame Leg Pole x6... - Page 7 (27) Teeter Totter Foot Rest (29) Teeter Totter Top (26) Teeter Totter Bracket x3 (28) Teeter Totter Seat x2 Bracket x3 (30) Carriage and Glider Rod (31) Carriage and Glider Base (32) Gymnast Bars (33) Swing Seat x2 (34) A& B Carriage Seat Brace x4 each (35) Carriage Arm Rest x4 (36) Carriage Seat x4...
-
Page 8: Important Assembly Information
(66) Swing Seat Chains (67) Glider Chains (68) Teeter Totter Seat Supports (69) 1/4” Nylon Nut ASSEMBLY INSTRUCTIONS IMPORTANT ASSEMBLY INFORMATION • The following tools are included: Phillips Screwdriver, regular screwdriver, 4mm Allen wrench, 5mm Allen wrench and 10mm / 13mm wrench. •... -
Page 9: Frame Assembly
Frame Assembly Read and understand all assembly instructions before beginning the assembly process. Step 1- Select Top Rail A (5) and insert the narrow end into Top Rail B (6). The Rectangle slots need to be down on all top rail sections. Step 2 - Place Angled Leg Bracket (1) on the end of Top Rail A (5) (make sure the leg slots are angled out away from the swing set). - Page 10 Step 5 – Bolt on the Angled Leg Brackets (1) and the Straight Leg Bracket (2). Use 5/16” x 2” Bolt (39) with 5/16” Curved washer (55). Use 5/16” Thru Nut (58) with 2/5” Curved Washer (54) to fasten the leg braces to the frame. Repeat this step on the other angled leg brace and the straight leg brace.
- Page 11 Step 7 – Attach the Lower Frame Leg Poles (9) and Leg Braces (11) (12) to the Upper Frame Legs. Start on the side with the Top Rail A (has the two square crimps). Slide the Lower Frame Leg Poles (9) into the upper frame leg. Align the holes. Insert 5/16” x 2” Bolt (39) with a 5/16”...
-
Page 12: Accessory Assembly
Accessory Assembly Read and understand all assembly instructions before beginning the assembly process. Step 1 – Attaching the swings. First insert one end of the Swing Seat Chain (66) into the swing seat (33). Fasten it to the seat by using 5/16” Washer (64), 5/16”, Nylon Nut (61)and cap (47). - Page 13 Step 3 – Attach the Glider Chains (67) to the Glider Base (31) by first inserting a Carriage and Glider Rod (30) into the glider base holes. Then put the one end of the Y from the chain on the rod and the other end on the same side on the other rod. Fasten them onto the rods by using two 5/16”...
- Page 14 Then insert the Carriage and Glider Rods (30) into the Carriage and Glider Base (31) holes. Bolt on the Carriage Seat Brace (34) to the Carriage Base by using two 5/16” Washer (64), 5/16” Nut (51), and Cap Nut (53). NOTE: Make sure the square notches are facing in on the Carriage Seat Braces.
- Page 15 Join Carriage Seat Brace (part 34 A and 34 B)(34) together by inserting them into each other then attaching them with 1/4”x 11/16” Bolt (62) and the 1/4” Thru Nut (60). Insert 2 Brace Spacers (48) into the top of the Carriage Brace Holes. Slide it into the Teeter Totter Bracket and align the holes.
- Page 16 Attach the Carriage Arm Rests (35) to the Carriage Seat Braces. Align the Carriage Arm Rests with the squared notch on the inside of the Carriage Seat Braces. Fasten them to the Braces with 1/4”x 11/16” Bolt (62) and 1/4” Washer (59). Finally attach the Carriage Seat (36) to the Carriage Arm Rests.
- Page 17 Step 5 – Attaching and Assembling the Teeter Totter. First attach the Teeter Totter Bracket (26) to the single square crimp on Top Rail D. Do this by putting Teeter Totter Bracket (26) on the bottom side of the frame, then fasten it on with the Teeter Totter Top Bracket (29), 5/16”...
- Page 18 Insert 2, 5/16” x 1/2" Brace Spacers (52) into the sides of the Teeter Totter Seats Supports (68). Align the brace spacer and Teeter Totter Seat Supports with the holes on the Teeter Totter Brace. Fasten the supports to the brace by inserting the J bolt (45) into the support bar with two holes and then insert the 1/4”...
- Page 19 Finally attach the Teeter Totter Foot Rest (27) to the bottom of the braces. Use the 1/4” x 3/4” Screws (50) to screw them to the braces. Step 6 – Assembling the slide. Put the Slide Bottom B (16) on the right side of the bottom piece (the bottom piece has the rectangular posts and round posts).
- Page 20 In the bottom hole on the Slide Bottom insert the Slide Bottom Rail Bar (23) and fasten to the slide bottom with the Slide Plugs (37). (Flip the side onto its other side and repeat Step 6) Step 6 – Assembling the slide ladder. Take the Ladder Braces (19) and attach the Ladder Steps (24) to them.
- Page 21 Attach the Ladder Legs (21) to the ladder braces by inserting them into the ladder brace and then attaching them with 1/4”x 11/16” Bolt (62) and the 1/4” Thru Nut (60). Attach the ladder to the main frame by lining up the holes on the Ladder Brace with the holes on the Leg Brace for the ladder that is attached to the swing set legs.
- Page 22 Finally attach the slide to the ladder. Slide the Slide Support Bar (22) into the two grooves under the slide. Set the slide and support bars onto the ladder and line up the holes on each side. Fasten the slide to the ladder using the 1/4” x 2” Bolt for Slide Rail (25), 1/4” Washer (59), and 1/4”...
-
Page 23: Care And Maintenance
Many factors such as soil types influence the effectiveness of this product. Using an anchor kit is not an insurance policy and will not add additional warranty benefits to your Swing Set. Propel Trampolines and its retailers/affiliates will not be held responsible for damages to persons or property as a result of the failure of this product. - Page 24 • Use equipment only as intended. • Do not use equipment if you are wearing inappropriate items, such as but not limited to, loose fitting clothing, hood and neck drawstrings, scarves, cord-connected items, capes, and ponchos. These items can cause death by strangulation. •...
-
Page 25: Replacement Parts
removed for the cold season. f. Rake and check depth of loose fill protective surfacing materials to prevent compaction and to maintain appropriate depth. Replace as necessary. 2. Twice a month during play season: a. Tighten all hardware b. Check all protective coverings on bolts, pipes, edges, and corners. Replace if they are loose, cracked, or missing. - Page 26 For more information or to order any of these accessories, please visit our website at www.PropelTrampolines.com. MY SWING SET INFORMATION In the event you need to contact customer service, such as to ask questions, order replacement parts, or file a warranty claim, you will be asked to provide some basic information about your swing set.
-
Page 27: Limited Warranty
Propel Trampolines is not responsible or liable for indirect, special, or consequential damages arising out of, or in connection with the use or performance of this product. Propel is not responsible for other damages with respect to any economic loss, loss of property, loss of revenue or profits, loss of enjoyment or use, cost of removal or installation, and any other consequential damages. -
Page 28: Warranty Registration
Propel Trampolines Warranty Department 41 East 400 North #324 Logan, UT 84321 www.propeltrampolines.com V1.5 - © 2017 Propel Trampolines - Printed in China Page 28...
Need help?
Do you have a question about the 9 Station Swing Set and is the answer not in the manual?
Questions and answers