Table of Contents
Advertisement
Quick Links
Advertisement
Table of Contents

Related Manuals for Philips Norelco SW9700


Summary of Contents for Philips Norelco SW9700
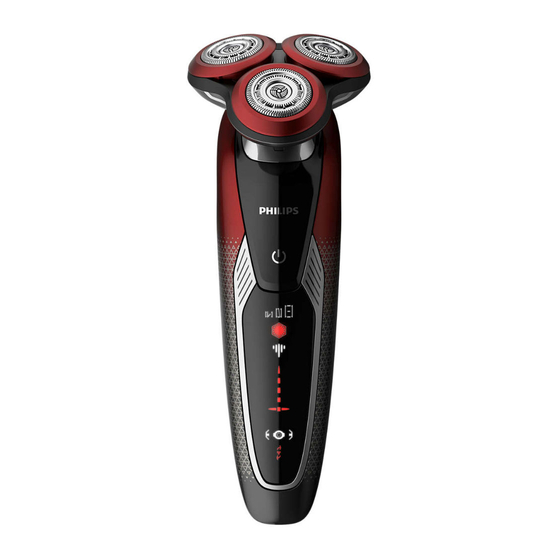
- Page 1 SW9700 Tripleheader shaver © & ™ Lucas lm Ltd. © Disney...
- Page 3 English 4...
-
Page 4: Important Safety Instructions
English IMPORTANT SAFETY INSTRUCTIONS When using an electrical product, basic precautions should always be followed, including the following: Read all instructions before using this product. DANGER To reduce the risk of electric shock: - Do not reach for a corded product that has fallen into water. - Page 5 - Use this product for its intended household use as described in this manual. Do not use attachments not recommended by Philips North America LLC. - Never operate this product if it has a damaged power cord or charging plug,...
- Page 6 English - Always check cutters and combs before using the product. Do not use the product if cutters or combs are damaged, as injury may occur. - Always attach plug to product first, then to outlet. Be certain plug is inserted firmly into shaver up to mark indicated on plug.
-
Page 7: Table Of Contents
English Contents Important safety instructions _________ General description (Fig. 1)___________ Introduction_______________________ The display________________________ Charging__________________________ Using the shaver___________________ Using the click-on attachment________ Travel lock________________________ Cleaning and maintenance___________ Replacement______________________ Storage___________________________ Accessories_______________________ Assistance________________________ Disposal__________________________ Full Two-Year Warranty_____________ 45-Day money-back guarantee ______... - Page 8 English...
-
Page 9: General Description (Fig. 1)
14 Small plug 15 Power plug Introduction Congratulations on your purchase and welcome to Philips Norelco! To fully benefit from the support that Philips Norelco offers, register your product at www.norelco.com/register. The display Note: Remove any sticker or protective foil... - Page 10 English Start-up sequence When you press the on/off button for the very first time, all display indications light up in sequence. The shaver now contains enough energy for one shave. Charging Quick charge: When the battery is empty and you connect the shaver to an electrical outlet, the lights of the battery charge indicator light up red one after the other repeatedly.
- Page 11 English Battery fully charged Note: This shaver can only be used without a cord. When the battery is fully charged, all lights of the battery charge indicator light up red continuously. Note: When you press the on/off button during or after charging, you hear a sound to indicate that the shaver is still connected to the power outlet.
- Page 12 English Personal comfort settings The shaver has a feature that allows you to personalize your settings. Depending on your personal shaving needs, choose between three settings, from low to high: comfort, dynamic or efficiency. When you press the button on the left or right of the display, the segment of the personal comfort settings bar that lights up shows the currently selected setting.
- Page 13 English Replacement reminder For maximum shaving performance, replace the shaving heads every year. The shaver is equipped with a replacement reminder which reminds you to replace the shaving heads. The replacement reminder lights up and the arrows flash to indicate that you have to replace the shaving heads (see ‘Replacing the shaving heads’).
-
Page 14: Charging
English Charging - Charging, recharging, or using the product at temperatures below 40°F (4.5°C) or higher than 95°F (35°C) adversely affects lifespan of the battery. - Do not charge the shaver in a pouch or travel case. - The power plug transforms 100-240V AC to less than 24V DC. -
Page 15: Using The Shaver
- Use your new shaver exclusively for 3 weeks to fully enjoy the closeness of a Philips Norelco shave. - At first you may not get as close a shave as you expect, or your face may even become slightly irritated. - Page 16 Philips Norelco shaving system. - If you are still not convinced after 21 days, Philips Norelco will refund you the full purchase price as long as the request is received within 45 days of purchase.
- Page 17 English Dry shaving Switch the shaver on. 2 Stretch your skin with your free hand so blades can lift and cut whiskers. Gently press shaver to skin so the floating heads can follow the contours of your face. Note: Do not press too hard. Too much pressure can pinch the skin into the combs.
-
Page 18: Using The Click-On Attachment
English 5 Move the shaving heads over your skin in circular movements to catch all hairs growing in different directions. Exert gentle pressure for a close, comfortable shave. Note: Do not press too hard, this can cause skin irritation. Note: Rinse the shaving unit regularly to ensure that it continues to glide smoothly over your skin. -
Page 19: Travel Lock
English Using the precision trimmer attachment You can use the trimmer to groom your beard, sideburns and moustache. Attach the trimmer to the shaver ('click'). 2 Switch on the shaver. 3 Hold the trimmer perpendicular to the skin and move it downwards while exerting gentle pressure. -
Page 20: Cleaning And Maintenance
English Deactivating the travel lock 1 Press the on/off button for 3 seconds. - While you deactivate the travel lock, the indications on the display light up briefly. When the travel lock is deactivated, the travel lock symbol flashes and the shaver switches on. - Page 21 English Cleaning the shaver under the tap Clean the shaver after every shave for optimal performance. Always check if the water is too hot, to prevent burning your hands. Never dry the shaving unit with a towel or tissue, as this may damage the shaving heads. While rinsing the shaving unit, water may drip out of the base of shaver.
- Page 22 English 5 Rinse the shaving head holder under a warm tap. 6 Carefully shake off excess water and let the shaving head holder air dry completely. 7 Attach the shaving head holder to the bottom part of the shaving unit (‘click’). Cleaning the precision trimmer attachment Never dry the trimmer with a towel or tissue, as this may damage the trimming teeth.
-
Page 23: Replacement
Replacing the shaving heads For maximum shaving performance, replace the shaving heads once a year. Replace damaged shaving heads immediately. Always replace the shaving heads with original Philips Norelco shaving heads only (see 'Accessories'). Replacement reminder The replacement reminder indicates that the shaving heads need to be replaced. - Page 24 English 5 Place the new shaving heads in the shaving head holder. Note: Make sure the notches on both sides of the shaving heads fit exactly onto the projections in the shaving head holder. 6 Place the retaining ring on the shaving head and turn it clockwise to reattach the retaining ring.
-
Page 25: Storage
English 8 To reset the replacement reminder, press and hold the on/off button for 7 sec. approx. 7 seconds. This product has no other user-serviceable parts. For assistance call 1-800-243-3050. Storage Store the shaver in the travel case. Note: Always let the shaver dry completely before you store it in the travel case. -
Page 26: Accessories
Replacement parts and accessories may be purchased at a store near you or on our website www.philips.com/store. The following accessories are available: - SH90 Philips Norelco shaving heads - RQ111 Philips Norelco SmartClick beard styler - RQ585 Philips Norelco SmartClick cleansing... -
Page 27: Full Two-Year Warranty
Full Two-Year Warranty Philips North America LLC warrants this new product (except cutters and combs) against defects in materials or workmanship for a period of two years from the date of purchase, and agrees to repair or replace any defective product without charge. -
Page 28: 45-Day Money-Back Guarantee
Shaver, the shaver should be used exclusively for 3 weeks. This allows your hair and skin enough time to adapt to the Philips Norelco Shaving System. If, after that period of time, you are not fully satisfied with your Philips Norelco Men’s Shaver, send the product back... - Page 29 We cannot be responsible for lost mail. The product must be postmarked no later than 45 days after the date of purchase. Philips reserves the right to verify the purchase price of the product and limit refunds not to exceed suggested retail price.
- Page 32 Manufactured for: Philips Personal Health a division of Philips North America LLC P.O. Box 10313, Stamford, CT 06904 USA This symbol on the product’s nameplate means it is listed by Underwriters’ Laboratories, Inc. Norelco and Tripleheader are registered trademarks of Philips North America LLC.
Need help?
Do you have a question about the Norelco SW9700 and is the answer not in the manual?
Questions and answers