Table of Contents
Advertisement
Quick Links
ATTENTION: Please Read this cover letter
BEFORE installing the Classic-SL
For help with the Classic, Classic Lite or Classic-SL please see
our how to videos and extended documentation. Please visit
this website: www.midnitesolar.com/classic
Before calling tech support, we recommend visiting this
website for some of the most common issues.
DANGER OF DEATH TO YOUR CLASSIC
Warning with Tigo modules Solar Mode must not be used or the Classic will not survive.
MidNite does not recommend the use of Tigo Module Optimizers with the Classic. If
Tigo modules must be installed Legacy P&O MUST be used.
When the Classic is used with Wind or Hydro a Clipper type device will most likely be
needed to protect against over voltage. A battery based diversion load WILL NOT keep
the Classic safe from over voltage. High input voltage is recorded and over voltage is not
covered under warranty.
Never hook a Pump or other load to the Input side of the Classic. If a Load must be
hooked to the input side of the classic the load and Classic need to have blocking diodes
on them.
Advertisement
Table of Contents

Related Manuals for MidNite Classic 150-SL


Summary of Contents for MidNite Classic 150-SL
- Page 1 Warning with Tigo modules Solar Mode must not be used or the Classic will not survive. MidNite does not recommend the use of Tigo Module Optimizers with the Classic. If Tigo modules must be installed Legacy P&O MUST be used.
-
Page 2: Classic Sl Owner's Manual Rev E
Classic SL owner’s manual REV E 2056 Never Parallel 2 Classics onto one PV array. If 2 Classic’s have to be paralleled for wind or hydro (NOT SOLAR) there must be blocking diodes on each Classic. For Larger systems with Large inverters and or multiple inverters (like the Radian or XW+ for example) it is important to use appropriate sized cables and bus bars or damage to the inverters or charge controllers can occur. - Page 3 Classic SL owner’s manual REV E 2056 This Manual covers models Classic 150-SL, 200-SL & 250- P a g e 1 0 - 0 0 1 - 3 R E V : E...
-
Page 4: Table Of Contents
CAN/CSA C22.2 No. 107.1: 2001/09/01 Ed: 3 (R2006) MidNite Solar Inc. reserves the right to revise this document and to periodically make changes to the content hereof without obligation or organization of such revisions or changes unless required to do so by prior arrangement. -
Page 5: Scope
Introduction The MidNite Classic SL charge controller was designed as a SOLAR only charge controller. The Classic 150-SL, 200-SL and 250-SL are designed to work with 12, 24, 36, 48, 60 and 72 volt battery banks. - Page 6 Classic SL owner’s manual REV E 2056 This Manual covers Classic 150-SL, Classic 200-SL and the Classic 250-SL. It covers the installation, wiring and use of the Classic charge controller. WARNING Warnings signs identify conditions or practices that could result in personal injury or loss of life.
- Page 7 Classic SL owner’s manual REV E 2056 DC and Battery-Related Installation Requirements: All DC cables must meet local and national codes. Shut off all DC breakers before connecting any wiring. Torque all the Charge Controller’s wire lugs and ground terminals to the specs found on page 21. ...
-
Page 8: Classic Sl Power Graphs & Sizing The Solar Array
Classic SL owner’s manual REV E 2056 Classic SL Power Graphs & Sizing the Solar Array Table 1 Table 2 Table 3 P a g e 1 0 - 0 0 1 - 3 R E V : E... - Page 9 A typical solar module around 250 watts will be a 60 cell module so it’s open circuit voltage will be about 37 volts. So for a Classic 150-SL you could put 3 in series, A Classic 200-SL you could put 4-5 in series and a Classic 250-SL you could put 5-6 in series.
-
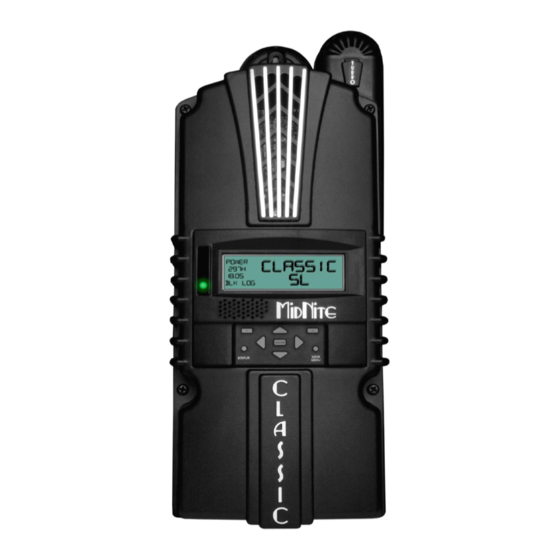
Page 10: Unpacking The Classic Sl
Classic SL owner’s manual REV E 2056 Unpacking the Classic SL When you receive your Classic you will want to unpack it and make sure everything is there and in good shape. Refer to Figure 1 Included in the Classic package should be: Classic charge controller *Knock out covers 3 screened *Parts bag with stickers, Terminal block cover and silicone grease... -
Page 11: Mounting The Classic Sl
The Classic is designed to be directly mounted onto the MidNite Solar E-Panel. The Classic can also accommodate other installation methods as well. Mount in an upright position out of direct sunlight when possible. For your convenience the Classic has four one inch knock outs that are pre cast. - Page 12 Nipple, locknuts and bushings that come with every E-Panel Figure 4 Figure 5 Classic mounted to the side of a MidNite Solar E-Panel 12 | P a g e 1 0 - 0 0 1 - 3 R E V : E...
-
Page 13: Wiring The Classic Sl
WARNING: Shock hazard. Disconnect the batteries and input power before opening the Classic front cover. ALWAYS use proper Over current devices and disconnects on the PV+ and Battery + at the Classic (MidNite DC breakers work well for both). WARNING to comply with Australian/New Zealand code: Any connection to the Classic SL will require double/reinforced insulated wire. - Page 14 Classic SL owner’s manual REV E 2056 The Classic SL should be wired by a qualified professional and needs to meet all applicable electrical codes. Always make sure all source and battery circuits are de-energized and wait 5 minutes before working on the wiring in the Classic. The Classic has 2 common neutral (negative) terminals. Therefore, only one neutral conductor is required to run from the E-Panel and terminate on either (or both) common neutral terminal.
- Page 15 Classic SL owner’s manual REV E 2056 Diagram 1 Explanations 10 = Solar Modules (PV) 11 = DC Combiner (Like our MNPV6 or MNPV12 for example) 12 = MNSPD300-DC (Surge protection) 13 = MNSPD300-AC (Surge protection) 14 = MNSPD300-DC (Surge protection) 15 = DC breaker for the Inverter (Also serves as a disconnect for the Inverter) 16 = DC breaker for the PV into the Classic (Also serves as a disconnect for the Classic) 17 = DC breaker for the Battery into the Classic (Also serves as a disconnect for the Classic)
- Page 16 Classic SL owner’s manual REV E 2056 Diagram 1 16 | P a g e 1 0 - 0 0 1 - 3 R E V : E...
-
Page 17: Dc Terminal Connector
The Classic's DC terminal connector is located on the circuit board as shown in figure 17. The connector will take up to a #4 AWG. #4 AWG THHN when installed in the Classic and MidNite E-Panel is rated for over 100 amps and is therefore suitable for the highest power available from the Classic 150-SL. After installing the wires for the last time snap in the blue cover that is included in the parts bag. -
Page 18: Current Rating
The USB cable, BTS cable and auxiliary input/output cables should run in a different conduit to preserve their signal. When installing the Classic in a MidNite E-Panel, it is acceptable to run all wiring through the same knockout hole. It is legal to run signal and power wires together as long as all wiring is listed for the highest voltage to be encountered. -
Page 19: Battery Temperature Compensation
Classic SL owner’s manual REV E 2056 Battery Temperature Compensation A remote battery temperature sensor (BTS) can be purchased separately. This sensor raises or lowers charge voltage based on temperature. Connect BTS to the BATT TEMP jack. (Refer to Battery Temperature Sensor Installation 20) The Battery temperature menu appears as T-Comp in the BATTERY MENU. - Page 20 Classic SL owner’s manual REV E 2056 Figure 8 Insert BTS to the jack labeled BATTERY TEMP on the control board. Figure 9 20 | P a g e 1 0 - 0 0 1 - 3 R E V : E...
-
Page 21: Chassis Grounding
Classic SL owner’s manual REV E 2056 Chassis Grounding In all installations the Classic chassis should be connected to ground. For systems with a battery breaker sized 60 amps and smaller, 10 AWG (6 mm ) copper is generally sufficient. For systems with a battery breaker sized 100 amps and smaller, 8 AWG (10 mm ) copper is required. -
Page 22: Dc Gfp (Ground Fault Protection)
Classic SL owner’s manual REV E 2056 DC GFP (Ground Fault Protection) The Classic has internal ground fault protection (GFP) built in. Since 2008, the NEC requires a DC-GFP on all PV systems in the USA. The built in DC-GFP eliminates the need to purchase and install an external DC-GFP. -
Page 23: Disabling Gfp
Classic SL owner’s manual REV E 2056 Disabling GFP The GFP feature should only be disabled to operate the Classic in an ungrounded power system or in systems where GFP is not required. Press Main Menu Scroll to the right or left until TWEAKS is highlighted and press ENTER ... -
Page 24: Resting
Classic SL owner’s manual REV E 2056 Float A Float cycle follows after the Absorb cycle is completed; Float is displayed on the screen. Battery voltage is held at the float voltage set point. Equalize The Equalization function can be manually initiated or can be set up to Auto Equalize. The intent of an Equalization charge is to bring all battery cells to an equal voltage by a controller deliberate overcharge. -
Page 25: Current Limit
Classic SL owner’s manual REV E 2056 battery manufacturer. To adjust these voltages follow the steps below. Press Main Menu to enter the Main Menu Scroll right or left until Charge is highlighted and push the Enter button ... -
Page 26: Setting The Date And Time
Classic SL owner’s manual REV E 2056 Scroll to the right and highlight the current Mode than use the up and down arrows to set the mode you want. Take note of the Right soft key most modes have some set points that can be adjusted. ... -
Page 27: Troubleshooting / Faqs
Classic SL owner’s manual REV E 2056 Troubleshooting / FAQs How do I do a software *Note this only works on the Classics with Displays not a Classic Lite with the Factory Restore on my MNLP (LED Panel) Classic or Classic SL? *Warning this will erase ALL settings. - Page 28 Classic SL owner’s manual REV E 2056 Classic will not power *Check for reverse polarity on the Battery positive and negative terminals on on. No Fans or life on the blue terminal block power up. *Check for voltage on the Battery positive and negative terminals on the blue terminal block, if less than 10v charge the battery or find the bad connection Classic Display is blank *Check that the blue display cable is plugged into the top jack on the main...
- Page 29 Classic SL owner’s manual REV E 2056 How do I verify Follow *You should first go to the Main menu and then into the “Temps” menu and Me is working properly? verify all controllers are seeing the Battery Temp from the one with the BTS plugged in.
- Page 30 Classic SL owner’s manual REV E 2056 Classic goes to Float to *Make sure End Amps is not set to high causing the Classic to go to Float (End early Amps is in the Charge menu and the way it works is if the charge current falls below the End Amps setting AND the Classic is in Absorb the Classic will go to Float.
- Page 31 Classic SL owner’s manual REV E 2056 My Classic says “Set *Verify you are not setting the date and time with the local app without time date and time” on the sync off in the tweaks menu display *If not using the local app to set the time then verify that time sync is ON in the tweaks menu.
- Page 32 Classic SL owner’s manual REV E 2056 My Classic Lite has the *This indicates wrong code, If you recently updated code you may have left hand 3 LEDs updated with the wrong model code. Look at the inductor stickers they will blinking on the LED have the model of classic on them also so you can verify and re update with panel...
- Page 33 “Magnum” Battery temp with a new sensor sensor can I replace it with a Midnite blue one? How can I verify that all *If you unplug the battery temp sensor and use a flat bladed screw driver to my fans work on My...
- Page 34 Classic SL owner’s manual REV E 2056 My Label is gone or I *You can remove the cover and look at the stickers on the big yellow inductors mixed up my covers on the left side of the circuit board how do I know what *You can press the status button several times and the Classic will say model Classic I have?
-
Page 35: Electrical Specifications
Classic SL owner’s manual REV E 2056 Electrical Specifications Model Classic150-SL Classic200-SL Classic250-SL Operating Volts in 150VDC 200VDC 250VDC Max Hyper VOC 150+battery 200+battery 250+battery *Battery Charge Volts 12-93 volts 12-93 volts 12-93 volts 96a at 12v battery 74a at 12v battery 60a at 12v battery **Absolute Current 94a at 24v battery... -
Page 36: Specifications Mechanical
Classic SL owner’s manual REV E 2056 Specifications Mechanical Figure 13 36 | P a g e 1 0 - 0 0 1 - 3 R E V : E... -
Page 37: Classic Breaker Sizing
Classic SL owner’s manual REV E 2056 Classic Breaker sizing Table 7 37 | P a g e 1 0 - 0 0 1 - 3 R E V : E... - Page 38 Classic SL owner’s manual REV E 2056 38 | P a g e 1 0 - 0 0 1 - 3 R E V : E...
- Page 39 Classic SL owner’s manual REV E 2056 39 | P a g e 1 0 - 0 0 1 - 3 R E V : E...
- Page 40 Classic SL owner’s manual REV E 2056 40 | P a g e 1 0 - 0 0 1 - 3 R E V : E...
- Page 41 Classic SL owner’s manual REV E 2056 Table 8 41 | P a g e 1 0 - 0 0 1 - 3 R E V : E...
- Page 42 “Sing” this is usually not very loud and will do no harm. MNGP – Midnite Graphical interface Panel. This is the graphical display included with the standard Classic controller. Mode – This menu lets you turn the charging ability of the controller On / Off as well as lets you select the DC input source.
- Page 43 Classic SL owner’s manual REV E 2056 Mod Bus – a standard protocol used for communications. We have published our protocol to allow users to interface with the Classic. See www.midnitesolar.com for our Mod Bus protocol. Pwr Save – Allows you to adjust the time the Backlight stays on. Resting –...
Need help?
Do you have a question about the Classic 150-SL and is the answer not in the manual?
Questions and answers
I just had a generator installed into my MidNite inverter. The display field for MPPT no longer shows me the percentage charge in my batteries? How do I reset it? Thank you