Advertisement
Quick Links
Advertisement

Related Manuals for Optus fetch

Summary of Contents for Optus fetch
- Page 1 Quick Start Guide...
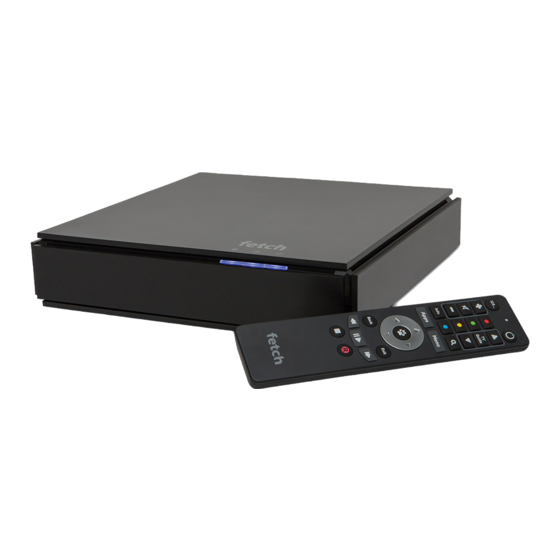
- Page 3 Make sure you have these items handy What we’ve sent you: A. Fetch box B. Ethernet Cable (3m) G. 2 x AAA Batteries (You’ll receive 3 of these if you’ve ordered a Power Line Adaptor – 1 x 3m & 2 x 1.5m) H.
- Page 4 There are 3 different ways you can connect your Top Tip: Using an Ethernet Cable or a pair Fetch box to the internet – that’s via Ethernet Cable of Powerline Adaptors will help you get the direct to your modem, using a pair of Power Line most out of your connection.
- Page 5 4 Grab the other PLA (C) and plug it into the power using existing electrical wiring - super handy hey! point nearest to your TV (K) and Fetch box (A). 1 If you already have a pair of PLAs continue onto 5 Finally, plug one end of the second Ethernet Step 2 (below).
- Page 6 1 Unplug your existing TV Antenna Cable from the back of your TV (K). Now plug it into the port labelled ‘ANTENNA’ on the back of your Fetch box (A). The other end stays connected to the Antenna Socket in the wall.
- Page 7 Fetch remote control (H). STEP 5 Time to switch it on! Source 1 Use your Fetch remote (H) to turn on your Fetch box (A). 2 Switch on your TV (K) with your TV remote (K). HDMI 1 3 Using your TV remote, press the ‘AV SELECT’,...
- Page 8 2 Once the app has finished downloading its time all up (depending on your broadband speed). to pair it with your Fetch box. To do this grab your Fetch remote (H), go to the ‘MAIN MENU’ then 2 During this time you’ll be prompted to enter your to ‘MANAGE’, ‘SETTINGS’...
-
Page 9: Help And Support
FAQs below or visit Cable is plugged into the ‘ANTENNA’ port on optus.com.au/fetch/userguide your Fetch box and the other end into the wall. If you still need a hand, feel free to give our Then run another full channel scan by going Technical Support Team a call on 1300 760 013. - Page 12 YES04156/1417716 (12/17)
Need help?
Do you have a question about the fetch and is the answer not in the manual?
Questions and answers