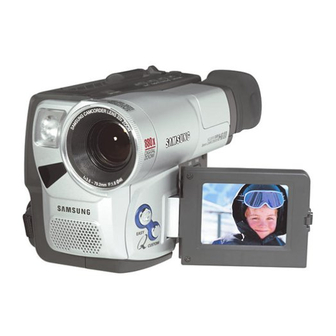
Samsung SCL860 Owner's Instruction Book
8mm color lcd
Hide thumbs
Also See for SCL860:
- Service manual (95 pages) ,
- Owner's instruction manual (76 pages) ,
- Owner's instruction book (76 pages)
Table of Contents
Advertisement
ENGLISH
Video Camcorder
8mm
COLOR LCD
SCL810/L860/L870
Hi
SCL810/L860/L870
Owner's Instruction Book
Before operating the unit, please read
this instruction book thoroughly, and retain it for future
reference.
Videocámara
8mm
PANTALLA LCD DE COLOR
SCL810/L860/L870
Hi
ELECTRONICS
Manual de instrucciones del usuario
Antes de utilizar la videocámara, lea completamente el
presente manual de instrucciones, y consérvelo para futuras
consultas.
ESPAÑOL
SCL810/L860/L870
AD68-00607D
Advertisement
Table of Contents

Related Manuals for Samsung SCL860


Summary of Contents for Samsung SCL860
-
Page 1: Video Camcorder
ENGLISH Video Camcorder COLOR LCD SCL810/L860/L870 SCL810/L860/L870 Owner’s Instruction Book Before operating the unit, please read this instruction book thoroughly, and retain it for future reference. Videocámara PANTALLA LCD DE COLOR SCL810/L860/L870 SCL810/L860/L870 ELECTRONICS Manual de instrucciones del usuario Antes de utilizar la videocámara, lea completamente el presente manual de instrucciones, y consérvelo para futuras... -
Page 2: Table Of Contents
Ver una imagen fija...29 Búsqueda de imágenes...29 Filmación avanzada Lejos y Cerca ...30 Zoom Digital ...31 modo EASY (para principiantes) ...33 CUSTOM-Creacion de sus ajustes de grabación personalizados ...34 DIS (Estabilizador digital de imagen, sólo en SCL860/L870) ...35 Enfoque Manual/automático...36 BLC...37 ESPAÑOL... - Page 3 DSE (Digital Special Effects) in CAMERA mode...40 Setting and Recording DATE/TIME...42 Selecting and Recording a Title ...44 Fade In and Out ...46 PIP (SCL860/L870 only)...47 Snap Shot (SCL860/L870 only)...48 White Balance ...49 Demonstration ...50 Setting the Date/Title Color ...51 Lighting Techniques...52 Playing back a Tape To watch with LCD ...53...
-
Page 4: Notices And Safety Instructions
Notices regarding rotation of LCD screen Please rotate the LCD screen carefully as illustrated. Unintended rotation may cause damage to the inside of the hinge that connects the LCD screen to the Camcorder. 1) LCD screen closed. 2) Standard recording by using the LCD screen. - Page 5 2) If the “DEW( )” protection feature is activated, leave the camcorder in a dry, warm room with the cassette compartment opened and the battery removed. 3) If the “DEW( )”...
- Page 6 To preserve battery power, keep your camcorder turned off when you are not operating it. When your camcorder is in CAMERA mode, if it is left in STANDBY for more than 5 minutes without operation, it will automatically turn off to protect against unexpected battery discharge.
- Page 7 (see page 62) 5 minutes off timer in STANDBY mode To protect against tape and head-drum wear, your camcorder will automatically turn off if it is left in STANDBY mode without operation for more than 5 minutes. Avisos e instrucciones de seguridad 1) La pantalla LCD se fabrica utilizando tecnología de alta precisión.
-
Page 8: Getting To Know Your Camcorder
Getting to Know Your Camcorder Features Your camcorder has many features for recording and playing back. Snap Shot (SCL860/L870 only) The Snap Shot function lets you record an object at a standstill for a limited time in Camera mode. (see page 48) -
Page 9: Front View/Side View/Rear View
8. MIC REW works in PLAYER mode. MIC works in CAMERA mode. (see page 55) 9. Remote Sensor 3. PLAY/STILL (LIGHT) (SCL860/L870 only) (see page 54) 10. LCD (see page 26) PLAY/STILL works in 11. CUSTOM PLAYER mode. CUSTOM works in CAMERA LIGHT works in CAMERA mode. -
Page 10: Vista Frontal/Vista Lateral/Vista Trasera
Getting to Know Your Camcorder Side View 24. BLC 23. FADE 20. SPEAKER 22. LCD Open 14. MENU ON/OFF (see page 26) 19. DSE (see page 40) MENU ON/OFF works in DSE works in CAMERA and CAMERA and PLAYER mode. - Page 11 35. Compartimiento de la batería (Consulte la página 19) 36. BATTERY EJECT 37. SNAP SHOT/D.ZOOM SNAP SHOT funciona en el modo CAMERA. (sólo SCL860/ L870, Consulte la página 48) D.ZOOM funciona en el modo CAMERA. (sólo SCL810, Consulte la página 32) 38.
-
Page 12: Osd (On Screen Display)
Z.RTN TITLE CINEMA TAPE! VOLUME Temporizador de filmación automático. (sólo SCL860/L870) (Consulte la página 15) (30 segundos o END). Fecha (Consulte la página 42) Indica la fecha de la filmación. a. Posición del zoom (Consulte la página 30) Indica la posición del zoom. - Page 13 Indica que el zoom digital está funcionando. Filmación instantánea (Consulte la página 48) Indica el tiempo que queda de filmación instantánea. u. Retorno a cero (sólo SCL860/L870) (Consulte la página 55) Indica que está activado el retorno a cero. v. PB DSE (ver pag. 56) Muestra que el modo PB DSE esta activo.
-
Page 14: Accessories Supplied With The Camcorder
10. USB Cable Optional Accessories 12. S-VIDEO cable. (see page 54) Note: Optional accessories may be included with the camcorder, depending on the country in which it is purchased. Conozca su videocámara Accesorios suministrados con la videocámara Asegúrese de que recibe con su videocámara los siguientes accesorios. -
Page 15: Remote Control (Scl860/L870 Only)
WAIT-10S/SELF-END: wait 10 seconds, followed by recording until you press the START/STOP button again. Conozca su videocámara Mando a distancia (sólo SCL860/L870) Descripción de partas 1. Iniciar/Parar (Consulte la página 23) 2. Temporizador Automático 3. Imagen Fija (Consulte la página 55) -
Page 16: Preparing
It is very important to adjust the hand strap for better recording. The hand strap enables you to: - Hold the camcorder in a stable, comfortable position. - Press the Zoom and the red Record button without having to change the position of your hand. -
Page 17: Lithium Battery Installation
AC power adapter is removed. The lithium battery for the camcorder lasts about 8~10 months under normal operation from the time of installation. When the lithium battery becomes weak or dead, the date/time indicator flashes for about 5 seconds when you set the power switch to CAMERA. -
Page 18: Connecting The Power Source
The LCD monitor is turned on automatically when it’s opened more than 30 degrees. Note: If the adapter is used next to a TV or the camcorder, it may cause the TV or camcorder to emit noise. Move the adapter away from the TV, camcorder or the antenna cable. -
Page 19: To Use The Battery Pack
AC cord and connect the AC cord to a wall socket. 3. Connect the DC cable to the DC jack of the camcorder. 4. Turn off the camcorder power, and the recharging indicator will start blinking and begin recharging. Blinking once a second : Indicates less than 50% has been charged. -
Page 20: Using The Battery Pack
(fire or flames, for example). Do not connect +/- of the battery pack. Configuración de la videocámara Uso de la batería Tabla de tiempo de grabación contínuo basada en el modelo Modelo SCL860/L870 LCD ON, LCD ON, LCD OFF, Tipo de EVF OFF... -
Page 21: Battery Level Display
25°C(77°F). As the environmental temperature and conditions may be different when you actually use the camcorder, the remaining battery time may not be the same as the approximate continuous recording times given in these instructions. -
Page 22: Inserting And Ejecting A Cassette
ENGLISH Preparing Inserting and Ejecting a Cassette There are several cassette types, depending on: Color system used Recording/playback time. Inserting and Ejecting a Cassette Check to see if the battery pack is in place or AC adapter is connected. 1. Press the EJECT button. The compartment opens automatically. -
Page 23: Making Your First Recording
Make sure the battery level indicates that there is enough remaining power for recording. (see page 21) We recommend that beginners, who are using the camcorder for the first time, switch the EASY mode on. a. To start recording, press the red START/STOP button. -
Page 24: Basic Shooting
When Recording stops, STANDBY should be displayed on the LCD. When a cassette is loaded and the camcorder is left in STANDBY mode for over 5 minutes without being used, it will turn off automatically. To use it again, push the red START/STOP button or set the power switch to OFF and then back to CAMERA. -
Page 25: Hints For Stable Image Recording
1. Hold the camcorder firmly with the hand strap. (see page 16) 2. Place your right elbow against your side. 3. Place your left hand under the camcorder to support it. Do not touch the built-in microphone. 4. Choose a comfortable, stable position for the shots. -
Page 26: Adjusting The Lcd
ENGLISH Basic Shooting Adjusting the LCD Your camcorder is equipped with a 2.5 inch color Liquid Crystal Display (LCD) screen, which allows you to view recording or playback directly. Depending on the conditions in which you are using the camcorder (indoors or outdoors for example), you can adjust:... -
Page 27: Adjusting Focus Of The Viewfinder
ENGLISH Basic Shooting 9. Turn the UP/DOWN dial to adjust the LCD color setting. 10. Press ENTER. For further adjustment, repeat steps 7, 8, 9. 11. Press the MENU ON/OFF button to end the setting. Note: If you do not press a button within 30 seconds, the setting will disappear. -
Page 28: Playing Back A Tape On The Lcd
LCD. To stop the PLAY operation, press the Note: You can also monitor the picture on a TV screen, after connecting the camcorder to a TV or VCR. (see page 53) Filmación básica Reproducción de la cinta en LCD Puede reproducir las imágenes filmadas en el monitor LCD. -
Page 29: Adjusting The Lcd During Play
Speaker. Volume of the Speaker is controlled by the UP/DOWN dial tab on the camcorder. If you close the LCD monitor, the LCD monitor and Speaker are turned off. If the speaker does not work properly,... -
Page 30: Advanced Recording
ENGLISH Advanced Recording Zooming In and Out Zoom works in CAMERA mode only. Zooming is a recording technique that lets you change the size of the subject in the picture. For more professional looking recordings, do not use the zoom function too often. You can also choose from two zoom speeds to suit different needs : Gradual zoom (9~12 seconds from TELE/WIDE to... -
Page 31: Digital Zoom
Digital Zoom works in CAMERA mode only. Zooms more than 22x are performed digitally. The picture quality deteriorates as you go towards the “T” side. We recommend that you use the DIS (SCL860/L870) feature with the DIGITAL zoom for picture stability. (see page 35) 1. - Page 32 ENGLISH Advanced Recording Setting the DIGITAL ZOOM ON/OFF (SCL860/L870 only) The DIGITAL ZOOM feature is explained on page 31. 1. Set the power switch to CAMERA mode. (see page 18) 2. Press the MENU ON/OFF button. The MENU list will appear.
-
Page 33: Easy Mode (For Beginners)
However, the Date/Time will only be seen if it has been previously set. (DIS ( ) will be displayed on SCL860/L870 only) 3. Press the START/STOP button to start recording. Recording will begin using the basic automatic environment settings. -
Page 34: Custom-Creating Your Own Customized Recording Settings
ENGLISH Advanced Recording CUSTOM - Creating your own customized recording settings You can customize the settings and save them for future use. The CUSTOM function only operates in CAMERA mode. 1. Set the power switch to CAMERA mode. (see page 18) 2. -
Page 35: Dis (Digital Image Stabilizer, Scl860/L870 Only)
3. The MENU ON/OFF function will not operate in EASY mode. Filmación avanzada DIS (Estabilizador digital de imagen, sólo en SCL860/L870) La función DIS sólo funciona en modo CAMERA. La función de compensación de temblor de la mano, denominada DIS (Estabilizador digital de la imagen) compensa cualquier ligero temblor o movimiento de la mano que soporta la videocámara (dentro de unos... -
Page 36: Mf/Af (Manual Focus/Auto Focus)
Manual Focusing In the following situations, you should obtain better results by adjusting the focus manually. a. A picture containing several objects, some close to the camcorder, others further away. b. A person enveloped in fog or surrounded by snow. -
Page 37: Blc
ENGLISH Advanced Recording 4. Turn the UP/DOWN dial up or down until the object is focused. 5. You will obtain a sharp picture after zooming out. 6. To return to AF(Auto Focus), press the MF button again. Note: The MF function will not operate in EASY mode. -
Page 38: Program Ae (Automatic Exposure)
ENGLISH Advanced Recording PROGRAM AE (Automatic Exposure) The PROGRAM AE function works in the CAMERA mode only. The PROGRAM AE modes allow you to adjust shutter speeds and aperture to suit different recording conditions. They give you creative control over the depth of the field. There are 6 automatic exposure modes. - Page 39 ENGLISH Advanced Recording Setting the PROGRAM AE(Automatic Exposure) mode 1. Set the power switch to CAMERA mode. (see page 18) 2. Press the P.AE button, the ( symbol will be displayed. 3. Press the P.AE button until the appropriate symbol is displayed. No Display : Full Auto mode.
-
Page 40: Dse (Digital Special Effects) In Camera Mode
Hay varios modos DSE. (SCL810: 8 modos, Nota : La función DIS y PIP no funcionarán en el modo DSE. (sólo SCL860/L870) La funcion DSE no funciona en EASY. ESPAÑOL SCL860/L870: 10 modos) 1. - Page 41 ENGLISH Advanced Recording Selecting and recording DSE effects 1. Set the power switch to CAMERA mode. (see page 18) 2. Press the DSE button, GHOST or SEPIA will be displayed. 3. Keep pressing the DSE button, until the desired mode is displayed. 4.
-
Page 42: Setting And Recording Date/Time
ENGLISH Advanced Recording Setting and Recording the DATE/TIME Setting and recording the date/time feature works in the CAMERA mode only. You can record the date/time on your tapes, so you will know when it was made. The date and time are recorded whenever they are displayed on the viewfinder or LCD. - Page 43 4. Press the START/STOP button to record the DATE/TIME on your recording. Note: If your date and time settings are not maintained in the camcorder, it means the installed LITHIUM BATTERY is discharged. (see page 17) You cannot conceal the recorded date or time during playback.
-
Page 44: Selecting And Recording A Title
Selecting and recording a TITLE is possible in the CAMERA mode only. The TITLE feature allows you to select a preset title stored in the camcorder’s memory. You can also select the language of the titles. Selecting a Language and Setting a Title Selecting a language is possible in STANDBY in CAMERA mode only. - Page 45 8. Turn UP/DOWN dial to whichever TITLE you desire. 9. Press ENTER. The selected title will appear on the screen for 2 ~ 3 seconds and will disappear. At the same, the camcorder will return to the menu mode. Recording a Title Note: Make sure that you have selected a TITLE.
-
Page 46: Fade In And Out
ENGLISH Advanced Recording Fade In and Out The FADE function works in CAMERA mode only. You can give your films a professional look by using special effects such as fading in and out at the beginning or end of a sequence. -
Page 47: Pip (Scl860/L870 Only)
EASY or REC mode. PIP function will not operate in DSE mode. Filmación avanzada PIP (Imagen a Imagen, solo SCL860/L870) La función PIP (Imagen a Imagen) labora en combinación con la función ZOOM DIGITAL usando una pantalla pequeña, super impuesta para mostrar una imagen que es más amplia que la imagen que está... -
Page 48: Snap Shot (Scl860/L870 Only)
ENGLISH Advanced Recording Snap Shot (SCL860/L870 only) With the SNAP SHOT feature, your camcorder functions like a regular film camera, allowing you to take single still pictures. The SNAP SHOT function operates in the CAMERA mode. 1. Set the power switch to CAMERA mode. -
Page 49: White Balance
ENGLISH Advanced Recording White Balance WHITE BALANCE is a recording function that preserves the unique color of the object in any recording condition. You may select the appropriate WHITE BALANCE mode to obtain good quality color of the image. AUTO: This mode is generally used to control the WHITE BALANCE automatically. -
Page 50: Demonstration
Advanced Recording Demonstration Demonstration automatically shows you the major functions that are included with your camcorder so that you may use them more easily. The DEMO function is only available in CAMERA mode when tape is not in the camcorder. -
Page 51: Setting The Date/Title Color
ENGLISH Advanced Recording Setting the Date/Title Color 1. Set the power switch to CAMERA mode. (see page 22) 2. Press the MENU ON/OFF button. The MENU list will appear. 3. Turn the UP/DOWN dial to D/TITLE COLOR...WHITE. 4. Press ENTER. A list of available colors will appear. -
Page 52: Lighting Techniques
ENGLISH Advanced Recording Lighting Techniques When you use your camcorder, there are only two possible recording environments. You will be recording outdoors (Normal recording or through an ND(Neutral Density) filter). You will be recording indoors (Video light recommended or required). -
Page 53: Playing Back A Tape
The yellow plug: Video The white plug: Audio(L) Connecting to a TV which has no Audio and Video input jack You can connect your camcorder to a TV through a VCR. Set the input selector on the VCR to LINE. - Page 54 It is best to turn the built-in speaker off when your camcorder is connected to the TV. The system (Hi8/8mm) is selected automatically, depending on the tape format. This camcorder does not support LP recording and playback. Reproducir una cinta Notas: SCL810/L860/L870 disponen de un sistema de audio monaural.
-
Page 55: Various Functions In Player Mode
Ver una imagen STILL (Pausa en la reproducción) PLAY/STILL Nota: La videocámara se parará Localizar una escena (búsqueda de imágenes) Retorno a cero (sólo SCL860/L870) La función ZERO RETURN funciona en STOP del modo PLAYER. Puede avanzar o rebobinar automáticamente al 0:00:00... -
Page 56: Adjusting The Lcd
Please refer to pages 40 and 41. Note: The GHOST, STROBE, NEG., MIRROR, MOSAIC, CINEMA and 16:9(WIDE) effects will not operate when your camcorder is in PLAYER mode. Pressing the DSE button will scroll through the available settings. Stop at the one you require. -
Page 57: Multi Playback (Using A Pal60 System)
ENGLISH Playing back a Tape This Camcorder can convert an NTSC tape recorded in the SP mode to the “PAL60” format, allowing you to view it on a PAL TV which has Vertical sync adjustment circuitry for 60Hz. “PAL60” is a special output signal format with which a PAL TV can be used to view a tape recorded by an NTSC recorder. -
Page 58: Usb Interface (Scl870 Only)
You can easily transfer a still image from a camera, tape, memory to a PC without additional add-on cards via a USB connection. If you transfer data to a PC, you need to install the software (Driver, Editing software) supplied with the camcorder. System Requirements CPU : Intel ®... -
Page 59: Installing Usb Media 2.0 Program
ENGLISH USB interface (SCL870 only) Installing USB Media 2.0 Program Do not connect the camcorder to PC before installing the program. If another camera or scanner is connected, please disconnect it in advance. This explanation is based on Windows How to install the program 1. - Page 60 4. La ventana que aparece a continuación muestra la carpeta de instalación del programa. El programa se instala por defecto en la siguiente carpeta: C:\Archivos de programa\ Samsung\USB Media 2.0 Haga clic en para cambiar de carpeta. 5. Conecte la videocámara al ordenador.
- Page 61 Notes If you disconnect the USB cable from the PC or the camcorder while transferring, the data transmission will stop and the data may be damaged. If you connect the USB cable to a PC via a USB HUB or simultaneously connect the USB cable along with other USB devices, the camcorder may not work properly.
-
Page 62: Maintenance
2. Keep the camcorder in a ventilated, dry and warm place. 3. Do not keep the camcorder in a place where the temperature often changes, such as in a car. 4. Keep the camcorder in a stable place. -
Page 63: Using Your Camcorder Abroad
Each country or area has its own electric and TV color system. Before using your camcorder abroad, check the following: Power sources You can use your camcorder in any country or area that uses 100V to 240V, 50/60 Hz. Use a commercially available AC plug adapter, if necessary, depending on the power used. -
Page 64: Troubleshooting
TAPE! slow the camcorder. the tape is protected If you want to record, slow PROTECTION! from recording. D.EMG slow the camcorder has C.EMG some mechanical R.EMG fault. L.EMG moisture condensation see page 67. slow has formed in the camcorder. -
Page 65: Checking
ENGLISH Troubleshooting Checking If you run into any problem using the camcorder, use the following table to troubleshoot the problem. If these instructions do not allow you to solve the problem, take a note of: The model and serial number marked on the bottom of the camcorder. - Page 66 The contrast between the subject when you record a bright and the background is too great for subject against a dark the camcorder to operate normally. background (candle flame, Make the background bright to for example). reduce the contrast or use the BLC function while you are recording.
-
Page 67: Moisture Condensation
ENGLISH Troubleshooting Moisture Condensation If the camcorder is brought directly from a cold place to a warm place, moisture may condense inside the camcorder, on the surface of the tape, or on the lens. In this condition, the tape may stick to the head drum and be damaged or the unit may not operate correctly. -
Page 68: Specifications
Mini jack, 7.7 dBs, imp.: less than 820 ohms External mic Monaural ø3.5 (SCL860/L870) General Power requirement DC 8.4 V (1.5 A) Power consumption SCL810 : 5.4 W, SCL860/L870 : 5.9 W *Recording, LCD ON Built-in mic Condenser mic, omni-directional Built-in speaker Dynamic, 0.5 W standard... -
Page 69: Index
ENGLISH Index - A - ABROAD ...63 EASY ...33 AC POWER ADAPTER...18 EJECT ...22 ADJUSTING...26 ENTER ...26 AF ...36 EXTERNAL MIC ...68 AUDIO ...53 AUTO FOCUSING...36 AUTO MODE ...38 FADE IN ...46 AUTO POWER OFF ...24 FADE OUT ...46 FAR ...36 - B - FF (FAST FORWARD) ...55 BATTERY ...19... - Page 70 ENGLISH Index - O - STANDBY...18 START/STOP ...23 OPERATION MODE...13 STILL...55 OSD ...12 STOP ...54 STROBE...40 - P - SYSTEM...68 S-VIDEO ...54 PIP...47 PLAY ...54 PLAYER...54 PORTRAIT MODE...38 TAPE COUNTER...13 POWER CONSUMPTION ..68 TAPE EJECT...22 POWER REQUIREMENT...68 TAPE END...64 POWER SWITCH...18 TIME...42 PROGRAM AE...38 TITLE ...44...
- Page 71 ENGLISH THIS CAMCORDER IS MANUFACTURED BY: ELECTRONICS *Samsung Electronics’ Internet Home Page United States http://www.samsungusa.com United Kingdom http://www.samsungelectronics.co.uk France http://www.samsung.fr Australia http://www.samsung.com.au Germany http://www.samsung.de Sweden http://www.samsung.se Poland http://www.samsung.com.pl Canada http://www.samsungcanada.com Panama http://www.samsung-panama.com Spain http://www.samsung.es ESTA VIDEOCÁMARA HA SIDO FABRICADA POR: ELECTRONICS *Samsung Electronics’...