Table of Contents
Advertisement
Quick Links
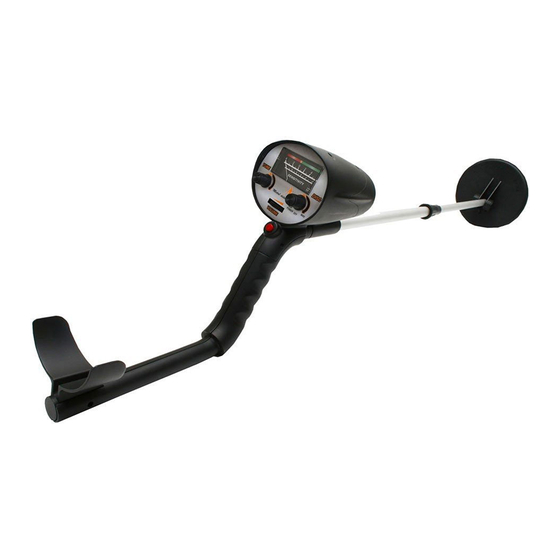
METAL DETECTOR
DENVER MET-100
Instruction Manual
"CAUTION: Before starting to use the metal detector please familiarize yourself with your
country's local laws and regulations on where you're allowed to use the metal detector
and for which findings you're allowed to keep and for which findings you must turn in to
the authorities. Also take most care not to use the metal detector in any area which might
contain dangerous items such as explosives from a war or powercables or gaslines or
Advertisement
Table of Contents

Related Manuals for Denver MET-100


Summary of Contents for Denver MET-100
-
Page 1: Metal Detector
METAL DETECTOR DENVER MET-100 Instruction Manual “CAUTION: Before starting to use the metal detector please familiarize yourself with your country’s local laws and regulations on where you’re allowed to use the metal detector and for which findings you’re allowed to keep and for which findings you must turn in to the authorities. - Page 2 any other dangerous items.”...
-
Page 3: Specification
The Metal Detector is a versatile and easy-to-use metal detector. It has higher sensitivity and has the ability to differentiate the ferrous metals and nonferrous metals. It is suitable for beginners. Please read the manual carefully before using the unit. CONTENTS Specification Assembly... - Page 4 Figure.1 Align the threaded bolts at the handle bottom, with the knobs under the control box, lock it with the bolts (Figure.2). Figure.2 Turn the stem’s lock nut clockwise until it loosens, lengthen or shorten the stem so when you stand upright with your detector in your hand, the search coil is level with and about 1/2 inch above the ground with your arm relaxed at your side.
-
Page 5: Panel And Controller
Figure.4 Batteries Please use six AA alkaline batteries. Press the “key” on the battery compartment in the direction of the arrow, pull out the battery compartment cover (Figure.5). Note: the UP words is engraved on the battery compartment, don’t mistake the direction. Figure.5 Insert six pcs AA batteries into the compartment as indicated by the polarity symbols marked inside the compartment (Figure.6). -
Page 6: Quick Start
The Panel Controller (Figure.7) Figure.7 Power off: Power on/off power supply. The same knob with the DISC. Turn DISCRIMINATION knob until red LED lights shortly up and then set to NORMAL TUNE: It is cooperated with the Red Tuning Button, and adjust balance to “0” ... - Page 7 detector properly. Lay the search coil properly, keep the angle between search coil and aluminum stem is about 140°.Please note not to mistake it (Figure.8) Figure.8 Place the detector on a wooden or plastic table. Let the search coil exceeds the ...
- Page 8 Figure.10 Adjust the Volume potentiometer, let you can hear the light hum tone, don’t adjust it too loud. Once you adjust the “DISC” button, you should adjust the balance over again. In general, you should only press the Red Button to let the detector return to the balance state.
- Page 9 Figure.11 Let other nonferrous metals approach the search coil, the meter pointer will deflect to the right, and the sound will turn louder. (Figure.12) Figure.12 6. Discriminate silver Set the “DISC” knob to “MAX”. Adjust the balance to let the meter pointer ...
-
Page 10: Field Operation
Figure.14 Discriminate different metals approximately We take nickel coin and pull tab as an example to explain the approximate discrimination method. Set the DISCRIMINATION to about “12:00” position (Figure.15). Adjust the balance to let the detector sound a hum tone, and the show is “0” Figure.15 Let the iron nail, nickel coin and pull tab approach the search coil slowly, the ... - Page 11 of electrical equipments that will bring interference signals, so it’s not fit for using the detector. Field detection is more complicated, the composition of the detected regional soil, the component, size, shape and the oxidation degree of the underground metals will all affect the detection results.
- Page 12 Right Wrong Figure.16 Figure.17 Move slowly in left to right motions close over ground until display dial shows reading. (Either to left/red side or to right/green side).Reading to left/red side, means smaller iron article, for example iron nail. Reading to right/green, means other metal (could be coin or gold ring) but can also be big iron article.
- Page 13 better detection result. Caution Before detection every time, you should press Red Button to adjust balance, let the detector be in most sensitive state. But when detecting, you should not press the Red Button. The volume just be adjusted to let you could hear the sound, not adjust it too louder.
-
Page 14: Troubleshooting Guide
Trouble Shooting Guide SYMPTOM SOLUTION No power Be sure that the polarity of batteries is installed correctly. Replace the batteries. The unit is silent when turns on, and the The balance has a deviation. Press the meter pointer doesn’t move, it seems Red Button, and adjust the TUNE knob to there is no electricity. - Page 15 ALL RIGHTS RESERVED, COPYRIGHT DENVER ELECTRONICS A/S Electric and electronic equipment contains materials, components and substances that can be hazardous to your health and the environment, if the waste material (discarded electric and electronic equipment) is not handled correctly. Electric and electronic equipment is marked with the crossed out trash can symbol, seen below.
Need help?
Do you have a question about the MET-100 and is the answer not in the manual?
Questions and answers