Advertisement
Quick Links
Advertisement

Related Manuals for Johnny Loco Cargo Coupé


Summary of Contents for Johnny Loco Cargo Coupé
- Page 1 Assembly manual cargo coupé...
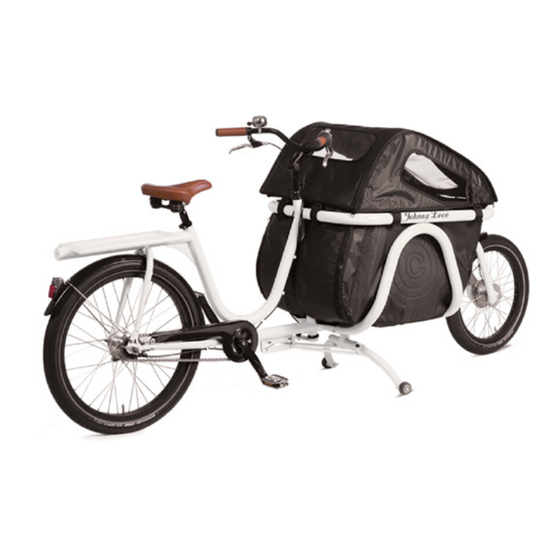
- Page 2 Assembly of the Cargo Coupé bike This manual will guide you through the assembly of the Cargo Coupé bike from 85% to 100% assembled. This will be done in the following steps: Assembly of the handlebar Assembly of the kickstand Assembly of the box frame Assembly of the soft pod Required tools for assembly:...
- Page 3 Assembly of the kickstand Position the center part of the kickstand as shown in the image. Make sure the connection plates are orientated in the same direction as in the picture. Important! If connection plate orientation is the other way around the kickstand will not function as designed.
- Page 4 Assembly of the frame identical The box consists of two tubes running along the top and two tubes connecting top and bottom. The tubes for the top construction are different for left and right. Connect the top and side tubes make sure the position- ing edge of the top tube fits in the hole in the side tube.
- Page 5 After all connections are proper the center connection can be tightened. Installing the floor The flooring of the box consists of a alloy floor board. This needs to be connected with 4 Allen bolts to the bike frame, with the curved side to the front of the bike. Important! Put grease on all bolts and insert all bolts before tightening.
- Page 6 Assembly of the soft pod The soft pod consists of a center piece and two side pieces. Inside and outside are different. The inside is a soft mate- rial, the outside a waterproof tarp. For extra protection the floor of the pod is also constructed with the smooth plastic sheet material.
- Page 7 Installing the seats Adjust the frame of the seats as displayed. When in posi- tion thighten the adjust ment screws To accomodate larger children the position of hte seat can be changed. Tip: A seat without canvas can function as a support for childseat.
- Page 8 Assembling the roof The roof consists of four parts, the center piece, the two sides and the roof frame. Inside and outside of the roof are made from different ma- terials. Make sure to put the soft side on the inside and the smooth watertight side on the outside.
- Page 9 The roof can now be placed on the soft pod. Slide the roof frame into the sleeves on the side of the pod. Attach the sides of the roof to the Velcro connection straps of the pod as shown in the picture. When parking in bad weather and strong wind it is rec- ommended to attach all straps.
Need help?
Do you have a question about the Cargo Coupé and is the answer not in the manual?
Questions and answers