Vapotherm Precision Flow Quick Reference Manual
Hide thumbs
Also See for Precision Flow:
- Operating instructions manual (32 pages) ,
- Instructions for use (2 pages) ,
- Instructions for use manual (32 pages)
Advertisement
Table of Contents
DISPOSABLE PATIENT CIRCUIT
•
Attach High or Low Flow Vapor Transfer Cartridge to Disposable Water Path
•
Attach patient delivery tube to Disposable Water Path
•
Open door and install Disposable Water Path into docking station
•
Hang sterile water bag
•
Wipe water spike with alcohol pad and insert into sterile water bag
•
Allow a minimum of 200ml of water to fill into the Disposable Patient Circuit
•
Precision Flow is ready for start up
START UP AND ADJUSTING PARAMETERS
•
Install oxygen sensor
•
Install gas inlet filters on back with filter bowls vertical (glass side down).
•
Attach air & O₂ hoses. Plug in power cord.
•
Rotate the blue Setting Control Knob to illuminate display
•
Press in Setting Control Knob to select the parameter and rotate to adjust
the value
•
Press and release (do not hold) the Run/Standby button once to start.
A GREEN light indicates RUN mode (AMBER light indicates STANDBY mode,
No Flow)
•
Green light will stop flashing once temperature is reached
CONNECT TO PATIENT
•
The flashing green LED becomes steady when the set variables are reached.
•
Place the cannula on the delivery tube
•
After cannula is attached, it is ready to be placed on patient
BATTERY BACK-UP MODE
•
To activate the internal backup battery mode, the Run/Standby LED must
be green before disconnecting the power cord.
•
The unit will enter into battery mode and will maintain flow and oxygen
percentage for at least 15 minutes.
•
The battery icon will flash.
SHUT DOWN MODE
•
Press the Run/Standby button. Unit will enter Standby mode.
•
Clamp the water inlet tube and disconnect it by pulling out the spike.
•
Open the door, remove the Disposable Patient Circuit (includes delivery
tube & cartridge) by sliding it upwards out of the docking station
•
Discard all disposables according to hospital guidelines.
•
Disconnect unit from AC power.
Technical Support
VAPOTHERM, INC.
22 Industrial Drive
T: +1 (603) 658-5121 International
Exeter, NH 03833
855 557 8276 Domestic
T: 603-658-0011
ts@vtherm.com
USA
May be patented. www.vtherm.com/patents
3006001 Rev. D
Q U I C K R E F E R E N C E G U I D E
Q U I C K R E F E R E N C E G U I D E
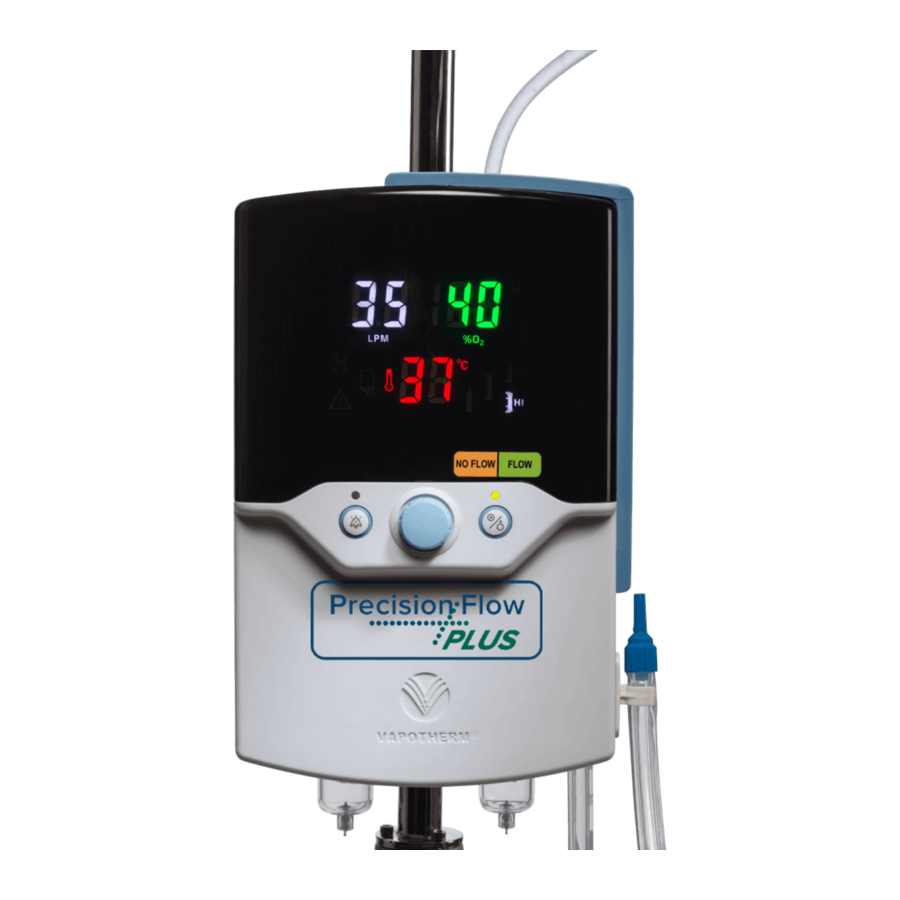
Blocked tube
General fault
Water out
Alarm mute
LED
Alarm mute
button
Setting Control
Knob
This guide provides you with basic instructions on how to set up and operate the
Precision Flow.™ Before operating the Vapotherm Precision Flow,™ please review the
Operators Instruction Manual which can be found at our website www.vtherm.com
Battery low or
charging
(not
indicative of charge)
level)
Disposable
Water Path
faulty or absent
Low Flow Vapor
Transfer Cartridge
High Flow
Vapor Transfer
Cartridge
Vapor Transfer
Cartridge fault
(Low
flow & High flow)
Gas supply fault
Run/Stop
Status LED
Run/Standby
button
Advertisement
Table of Contents

Related Manuals for Vapotherm Precision Flow


Summary of Contents for Vapotherm Precision Flow
- Page 1 This guide provides you with basic instructions on how to set up and operate the T: 603-658-0011 ts@vtherm.com Precision Flow.™ Before operating the Vapotherm Precision Flow,™ please review the Operators Instruction Manual which can be found at our website www.vtherm.com May be patented. www.vtherm.com/patents...
- Page 2 ALARM ICON INDICATES CAUSE ACTION ALARM ICON INDICATES CAUSE ACTION Malfunction of sensor or Internal component Cannot be corrected by user: Cartridge and/or RUN mode: faulty Disconnect patient. Remove disposable control system failure disconnect patient. Shut off unit, DPC not sensor or cartridge patient circuit.
Need help?
Do you have a question about the Precision Flow and is the answer not in the manual?
Questions and answers