Table of Contents
Advertisement
Advertisement
Table of Contents

Subscribe to Our Youtube Channel
Related Manuals for SD Biosensor SD Gluco Navii


Summary of Contents for SD Biosensor SD Gluco Navii
- Page 3 Thank you for purchasing the SD Gluco Navii™ Blood Glucose Monitoring System. This manual provides important information to help you to use the system properly. Before using this product, please read the following contents thoroughly and carefully. Please note that the following procedures are provided only as an example to help your facility establish its own policy and procedures.
-
Page 4: Table Of Contents
TABLE OF CONTENTS Important Safety Precautions Precautions & Limitations Interfering Substances Before you begin Intended Use Test Principle Alternative Site Testing Meter Setup / Programming Performing a Blood Glucose Test Test Results Using the Meter Memory to Review Results Maintenance Screen Messages and Troubleshooting Warnings, Precautions and Limitations System Specifications... -
Page 5: Important Safety Precautions
IMPORTANT SAFETY PRECAUTIONS READ BEFORE USE Users need to adhere to Standard Precautions when handling or using this device. All parts of the glucose monitoring system should be considered potentially infectious and are capable of transmitting blood-borne pathogens between patients and healthcare professionals. -
Page 6: Precautions & Limitations Interfering Substances
PRECAUTIONS & LIMITATIONS INTERFERING SUBSTANCES Interfering substances depend on the concentration. The interfering substances listed below may produce elevated glucose test results (at or above the concentration levels noted). Regulatory Requirements The Clinical Laboratory Improvement Amendments (CLIA) has classified tests of blood glucose as tests that are waived. -
Page 7: Before You Begin
BEFORE YOU BEGIN Severe dehydration and excessive water loss may cause readings which are lower than actual values. If the patient is suffering from severe dehydration, consult a healthcare professional immediately. If the patient’s blood glucose results are lower or higher than usual, and they do not have any symptoms of illness, repeat the test. -
Page 8: Test Principle
THE PRINCIPAL SD GlucoNavii™ test strip is designed with an electrode that measures glucose levels. Glucose in the blood sample mixes with reagent on the test strip which causes a small electric current. The amount of current that is created depends on how much glucose is in the blood. - Page 9 What is AST? Alternative site testing (AST) means that people use parts of the body other than fingertips to check their blood glucose levels. The GlucoNavii™ system allows you to test on the finger, palm and forearm. What’s the advantage of AST? Fingertips feel pain more readily because they are full of nerve endings (receptors).
-
Page 10: Meter Setup / Programming
METER SET UP / PROGRAMMING STEP-1 : Setting the Audible Beep 1. With the meter turned on, press the ON/OFF button for 3 seconds, the display for setting the audible beep will appear (Note the small on the lower right area of screen). - Page 11 STEP-2 : Setting the Hypo Warning NOTE • You can set the GlucoNavii™ meter to let you know when the result indicates a possible low blood glucose (hypoglycemia) level. • You can also select what blood glucose level, the warning will be indicated, i.e 60, 70, 80 mg/dL.
- Page 12 Setting the DATE - “DISPLAY FORMAT” 2. Next will appear the setting to choose the display for month and day format. The me- ter can display the month and day in either a Month/Day (m-d) format or a Day/Month (d-m) format. Set the preferred format on the display by pressing either the left or the right button.
- Page 13 Setting the TIME - “FORMAT” 1. Next will appear the display for setting clock to the 12 or 24 Hour format. The meter can display the time in either the 12h format (i.e. AM/PM) or the 24h format. Set the preferred format on the display by pressing either the left or the right button and confirm your selection by pressing the ON/OFF button.
- Page 14 Setting the TIME - “MINUTE” 3. Next will appear the setting display for MINUTE. Set the correct minute on the dis- play by pressing either the left or the right button. Confirm your selection by pressing the ON/OFF button. STEP-4 : Post-Meal Alarm You can use GlucoNavii’s post-meal alarm function to remind you to test your blood glucose after meal.
- Page 15 STEP-5 : Setting the Test Reminder Alarm GlucoNavii™ includes an alarm function to remind you to test your blood glucose. Up to 4 reminder alarms may be set. 1. After Post-meal alarm setting the display for setting the first alarm will appear. 2.
- Page 16 3. If you select the alarm “ON” feature in first alarm mode, the clock will begin to blink. Set the correct hour and minute you want to be reminded to test for by pressing either the left or the right button. Confirm the selection by pressing the ON/OFF button. 4.
-
Page 17: Performing A Blood Glucose Test
PERFORMING A BLOOD GLUCOSE TEST NOTE • Always wash hands with warm, soapy water. Rinse and dry them before testing. 1. Remove a new test strip from vial. Be sure to tightly close vial cap after removing test strip. 2. There are two ways to turn the meter on. The first method is to press the ON/OFF button. - Page 18 NOTE • You do not have to mark a result. If you do not wish to track Pre-meal or Post-meal results simply perform your test after inserting the test strip and ob- serving the “flashing blood drop” • If you perform the pre-meal test while the post-meal alarm setting is on, then the Post-meal mark will appear automatically on your LCD when you test within following period: from 30 minutes to 130 minutes after your pre-meal test.
-
Page 19: Test Results
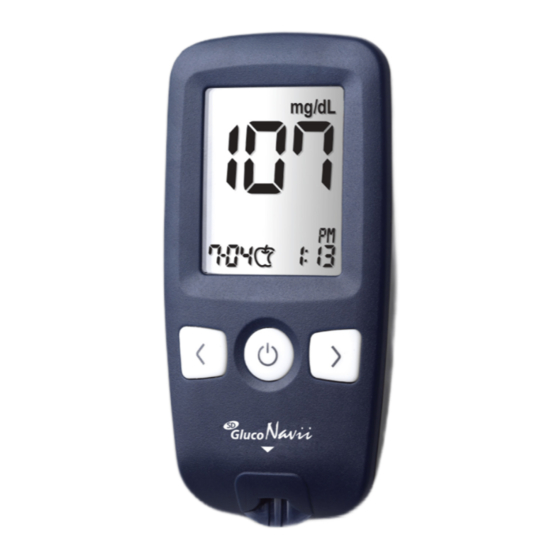
Your Test Results 1. After 5 seconds from applying blood into strip, you will receive a result. Displayed results using the GlucoNavii™ range from 20mg/dL to 600mg/dL. DISPLAY FOR NORMAL RESULT 2. If your blood glucose is above 600 mg/dL, you will receive a “HI” indication on the display. -
Page 20: Using The Meter Memory To Review Results
USING THE METER MEMORY TO REVIEW RESULTS 1. Turn the meter on, press the LEFT button to review in sequence from the most recent test result to the last test result stored. 2. Turn the meter on, press the RIGHT button to review 7,14 and 30 day averages of test result stored. - Page 21 3. If there are no stored test results, the following display will appear for 1 sec., and then the meter will display strip stand-by state automatically. • METER MEMORY. The GlucoNavii™ has the ability to store 400 results in its memory.
-
Page 22: Maintenance
FREQUENCY OF TESTING Work with your healthcare professional to decide when and how often to test. This will depend on such things as age, type of diabetes, and medications. It is important to make testing part of your daily routine. MAINTENANCE / QUALITY CONTROL 1. - Page 23 How Do I Use the SD Glucose Meter Check Strip? 1. Insert the SD Glucose Check Strip (‘Check Strip’ printed handle facing up) into test strip slot. The meter turns on automatically. 2. If SD Glucose Check Strip is inserted properly, the meter will automatically start and will count down from 5 to 1.
- Page 24 2. Performing a Control Solution Test To perform a control solution test you will need the meter, a new test strip and control solution Level M and/or Level H. The expected control level range is printed on the test strip vial label. (Follow your facilities guidelines to determine if M and/or H Lev- el controls are to be used).
- Page 25 2) Shake the control solution bottle and discard the first drop of solution. Gently squeeze the bottle to form one small drop. Bring the drop to the edge of the strip, and allow the strip to automatically draw the control solution into the yellow window. When control solution is applied to the test strip, the meter counts down from 5 to 1 on the display.
- Page 26 CAUTIONS 1. Meter • Keep the test strip slot free of dust. • Protect the meter from humidity. • The carrying case is designed to let you store a variety of supplies you may need and helps to protect your meter. •...
- Page 27 3. Control Solution • Store the SD Glucose Control Solution in 46-86°F(8-30°C) environment. • Do not refrigerate or freeze Control Solution. • Do not use SD Glucose Control Solution that has passed the expiration date. • SD Glucose Control Solution can be used for 3 months after opening the bottle. Write the opened date on the bottle when first opened.
-
Page 28: Screen Messages And Troubleshooting
SCREEN MESSAGES AND TROUBLESHOOTING Low Battery Replace Battery At this time, battery is Battery power is very low. Replace the getting low but you can still battery immediately. If you press the perform about 50 tests. ON/OFF button, the battery icon will Replace the battery soon. - Page 29 Internal Error Message Strip Error Turn off the meter. Then turn on the Defective test strip, used test strip or meter again. If there is still an error the test strip is damaged or inserted message, please contact your supplier. improperly.
-
Page 30: Warnings, Precautions And Limitations
WARNINGS, PRECAUTIONS AND LIMITATIONS • Never make significant changes to your diabetes control program or ignore physical symptom without consulting your healthcare professional. • Severe dehydration (excessive water loss) may cause false low results. If you believe you are suffering from dehydration, consult your healthcare professional right away. •... -
Page 31: System Specifications
• Externally taken drugs L-dopa, dopamine, methyl-dopa, acetaminophen, and ibuprofen will not interfere with SD GlucoNavii™ blood glucose results when taken at therapeutic concentrations. • Do not use SD GlucoNavii™ meter to test neonates or infants. It has not been validated for neonatal or infant use. - Page 32 1. Method Comparison The accuracy of the SD GlucoNavii™ blood glucose monitoring system was assessed by comparing blood glucose results obtained by patients with those obtained using a YSI Model 2300 STAT Plus glucose analyzer(reference), a laboratory instrument. 2. User Performance Evaluation System Accuracy (from layman) Diabetes experts have suggested that glucose meters should agree within 15 mg/dL of a laboratory method when the glucose concentration is lower than 75 mg/ dL, and...
- Page 33 3. Precision Precision results indicate that on average you can expect that maximum 3.6% variation from testing across a 50.4-319.8 mg/dL glucose range. The table shows coefficient of variation (CV%) values for five glucose levels that cover the glucose range typical of persons with diabetes.
-
Page 34: Training Tools
Attachment 1: TRAINING CHECKLIST SD GlucoNavii™ Blood Glucose Monitoring System Training Checklist Use the following checklist to assess the operators understanding and knowledge of the GlucoNavii™ Blood Glucose Meter System. - Page 35 Attachment 2: TRAINING QUIZ SD GlucoNavii™ Blood Glucose Monitoring System Complete the following questions to assess your understanding about using the SD GlucoNavii™ Blood Glucose Monitoring System to perform blood/glucose tests on residents.
- Page 39 NOTES _____________________________________________________ _____________________________________________________ _____________________________________________________ _____________________________________________________ _____________________________________________________ _____________________________________________________ _____________________________________________________ _____________________________________________________ _____________________________________________________ _____________________________________________________ _____________________________________________________ _____________________________________________________ _____________________________________________________ _____________________________________________________ _____________________________________________________...
- Page 40 GlucoNavii™ Distributed by: MAXPERT Medical Expert Products for Expert Care 866.231.1222 www.maxpertmedical.com...
Need help?
Do you have a question about the SD Gluco Navii and is the answer not in the manual?
Questions and answers