Studer Vista Operating Instructions Manual
Compact remote sw version 5.0
Hide thumbs
Also See for Vista:
- Operating instructions manual (713 pages) ,
- Product information (98 pages)
Table of Contents
Advertisement
Quick Links
Advertisement
Table of Contents

Related Manuals for Studer Vista


Summary of Contents for Studer Vista
- Page 1 Vista Compact Remote SW Version 5.0 Operating Instructions...
- Page 2 • Only use attachments/accessories specified by the manufacturer. • Use only with the cart, stand, tripod, bracket or table specified by the manufacturer, or sold with the apparatus. When a cart is used, use cau- tion when moving the cart/apparatus combination to avoid injury from tip-over. • Refer all servicing to qualified service personnel. Servicing is required when the apparatus has been damaged in any way, such as the power supply cord or plug is damaged, liquid has been spilled or objects fallen into the apparatus, the apparatus has been exposed to rain or moisture, does not operate normally, or has been dropped. Note: It is recommended that all maintenance and service on the product should be carried out by Studer or its authorised agents. Studer cannot accept any liability whatsoever for any loss or damage caused by service, maintenance or repair by unauthorised personnel. WARNING: To reduce the risk of fire or electric shock, do not expose this apparatus to rain or moisture. Do not expose the apparatus to dripping or splashing and do not place objects filled with liquids, such as vases, on the appara- tus. • No naked flame sources, such as lighted candles, should be placed on the apparatus. • Ventilation should not be impeded by covering the ventilation openings with items such as newspapers, table cloths, curtains etc. WARNING: Do not use this apparatus in very dusty atmospheres, or in atmospheres containing flammable gases or chemicals.
- Page 3 Safety Information • Protective Earth (Ground): Green/Yellow (US: Green or Green/ Yellow) • Neutral: Blue (US: White) • Live (Hot): Brown (US: Black) As the colours of the wires in the mains lead may not correspond with the coloured markings identifying the terminals in your plug, proceed as follows: • The wire which is coloured Green and Yellow must be connected to the terminal in the plug which is marked with the letter E or by the earth symbol. • The wire which is coloured Blue must be connected to the terminal in the plug which is marked with the letter N. • The wire which is coloured Brown must be connected to the terminal in the plug which is marked with the letter L. Ensure that these colour codes are followed carefully in the event of the plug being changed • This unit is capable of operating over a range of mains voltages, as marked on the rear panel.
- Page 4 Safety Information Conforming to this directive will minimise the risk of hearing damage caused by long listening periods. A simple rule to follow is: The longer you listen, the lower the average volume should be. Please take care when working with your audio system –...
- Page 5 Installation General Installation Instructions Please consider besides these general instructions also any product-specific instructions in the “Installation” chapter of this manual. Unpacking Check the equipment for any transport damage. If the unit is mechanically damaged, if liquids have been spilled or if objects have fallen into the unit, it must not be connected to the AC power outlet, or it must be immediately disconnected by unplugging the power cable.
- Page 6 Installation / EMC Class I Equipment (Mains Operation) Should the equipment be delivered without a matching mains cable, the latter has to be prepared by a trained person using the attached female plug (IEC 320 / C13 or IEC 320 / C19) with respect to the applicable regulations in your country.
- Page 7 EMC / Maintenance / ESD • Use a system grounding concept that satisfies the safety requirements (class I equipment must be connected with a protective ground conduc- tor) and that also takes into consideration the EMC require ments. When deciding between radial, surface, or combined grounding, the advantages and disadvantages should be carefully evaluated in each case.
- Page 8 ESD / Repair • When performing a repair by replacing complete assemblies, the removed assembly must be sent back to the supplier in the same packing material in which the replacement assembly was shipped. If this should not be the case, any claim for a possible refund will be null and void. • Unpacked ESD sensitive components should only be handled in ESD protected areas (EPA, e.g.
- Page 9 Repair / Disposal SMD Components Studer has no commercially available SMD components in stock for service purposes. For repair, the corresponding devices have to be purchased locally. The specifications of special components can be found in the service manual. SMD components should only be replaced by skilled specialists using appro- priate tools.
- Page 10 Any changes or modifications not expressly approved by the manufacturer could void the user’s authority to operate the equipment. Also refer to relevant information in this manual. CE Declaration of Conformity Studer Professional Audio GmbH, CH-8105 Regensdorf, declare under our sole responsibility that the product Studer Vista Compact Remote (from serial no. 1000),...
- Page 11 Under these conditions the unit or system starts and works without any prob- lem. Beyond these specifications, possible problems are described below. Ambient Temperature Units and systems by Studer are generally designed for an ambient tempera- ture range (i.e. temperature of the incoming air) of +5 °C to +40 °C. When rack mounting the units, the intended air flow and herewith adequate cooling must be provided. The following facts must be considered: • The admissible ambient temperature range for operation of the semicon-...
- Page 12 Appendix evaporation (sublimation) may be expected; otherwise the system must be heated and dried while switched off. A system without visible internal formation of ice or condensation should be heated up with its own heat dissipation, as homogeneously (and subsequently as slow) as possible;...
- Page 13 Appendix Appendix 2: Mains Connector Strain Relief For anchoring connectors without a mechanical lock (e.g. IEC mains connec- tors), we recommend the following arrangement: Procedure: The cable clamp shipped with your unit is auto-adhesive. For mounting please follow the rules below: • The surface to be adhered to must be clean, dry, and free from grease, oil, or other contaminants.
- Page 14 The following Terms and Conditions grant the right to use all programs of Studer that are part of the System and/or its options at the time of its delivery to the Customer, as well as the installation software on the original data disk and the accompanying documentation (‘License Material’).
- Page 15 Reverse engineering is only permitted with the express consent of Studer. The consent of Studer can be obtained but is not limited to the case in which the interface software can not be provided by Studer. In any case Studer has to be informed immediately upon complete or partial reverse engineering.
-
Page 16: Table Of Contents
Vista Compact Remote CONTENTS Introduction ...............................4 Hardware description..........................4 Buttons and desk controls ...........................6 Connectors ..............................9 Illumination ..............................10 Applications ..............................10 Operation modes ............................. 11 „With Desk“ .............................12 „With Desk + Core“ ..........................17 „With Core“ ..............................20 „Offline“ ..............................23 Operation .................................24 Strip Setup ..............................24 Navigation ..............................26... - Page 17 Vista Compact Remote 4.14 Signaling ..............................33 4.15 Talkback ..............................33 4.16 User Keys ..............................33 4.17 User\Vista Settings ...........................34 Specifications ..............................34 SW v5.0 Document generated: 17.10.13...
- Page 18 Vista Compact Remote Document generated: 17.10.13 SW v5.0...
-
Page 19: Introduction
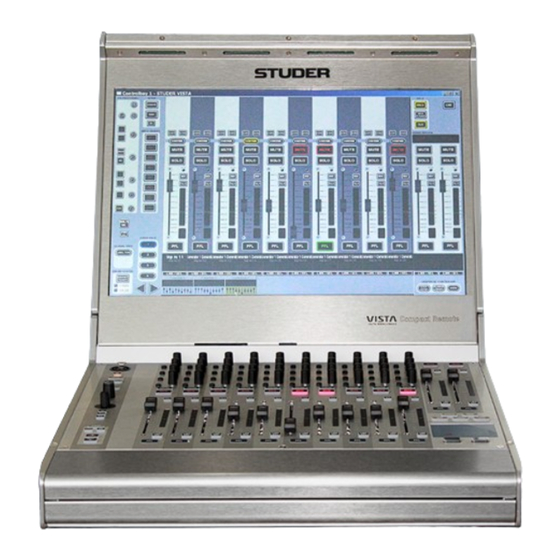
12-fader box. It runs the Virtual Vista software – exactly the same software application that can be used for offline editing and online control of Vista consoles on a laptop computer. As it runs the Virtual Vista application, it is nothing else than a hardware... - Page 20 Vista Compact Remote The main operation-element is the foldable 19“ touch screen. All navigation and control buttons available with the Virtual Vista applica- tion can be operated via the touch screen, instead of using the touch pad or a mouse.
-
Page 21: Buttons And Desk Controls
Compact Remote will close the Virtual Vista application and shut the OS down and then the power down the unit. VIRTUAL Navigates to the main screen of the Virtual Vista application to show the desk emulation, therefore making all audio parameters accessible on the touch screen. - Page 22 Vista Compact Remote Channel strip Four Vistonics rotaries and push-butttons are mapped to the parameters that are shown in the Virtual Vista (touch sceen) on the corresponding channel strip. Note : The Vistonics rotaries and push-buttons also control the mapped parameters even if the parameters are not shown on the touch screen –...
- Page 23 CHANNEL PATCH Navigates to the Channel Patch page on the GC. The touchpad as well as the left- and the right mouse button allow cursor control and navigation on the GC- and Virtual Vista screen . SW v5.0 Document generated: 17.10.13...
-
Page 24: Connectors
RS422 port (e.g. for ProBel and other third party protocol control) WLAN WLAN antenna sockets MADI MADI (for PFL- and monitoring signals , for Vista 5 and Vista 9 only) CR OUT • 6 × XLR (CR monitoring outputs, for Vista 5 and Vista 9 only) TB MIC OUT • 1 × XLR (TB mic out socket - straight through from front panel input) HEADPHONE • Headphone output There is an additional USB port, next to the keyboard in the slide-in drawer. -
Page 25: Illumination
It can be used with all types of Vista consoles. It can also be used as a remote control for the all-in-one Vista 1 console. In addition it may also be used as a completely stand-alone controller for Vista SCoreLive based systems, should the control surface not be available –... -
Page 26: Operation Modes
C: drive. Identical SW versions required ! The Compact Remote and the Vista desk must run the same Version of Vista - respectively Virtual Vista software. If started online with non-identical SW versions, the following error message appears and Virtual Vista will not start. -
Page 27: With Desk
Vista Compact Remote „With Desk“ This operation mode describes how the Compact Remote is connected to a Vista desk, so that it can work online with the desk. SW v5.0 Document generated: 17.10.13... - Page 28 When the Compact Remote is online with a desk, the Virtual Vista which runs on the Compact Remote allows to remote-control the desk. Therefore it gets connected to the Vista application that runs on the desk and allows the Compact Remote to remote control all audio parameters. It is important to understand that the Vista application on the desk “is”...
- Page 29 Vista Compact Remote GC (Graphical controller or “Main screen”) Therefore it is clear, that also all GC functionality of the Vista desk needs to be remote controlled from the Compact Remote. This is achieved by actu- ally not showing the Virtual Vista’s GC but by displaying the desk’s GC via a remote desktop connection.
- Page 30 Remote is needed, also the MADI connection from the system rack to the Compact Remote is necessary. The network connection to the Vista desk can also be established via wireless LAN; in this case a wlan router needs to beconnected on the Vista desks side. Document generated: 17.10.13 SW v5.0...
- Page 31 <- IP Address of desks network port – where the Compact Remote is connected to RemoteControlPort=9000 RemoteControlRole=Remote RemoteControlBackupPath=C:\Backup\VirtualVista RemoteControlBackupInterval=20 The following entries in the Vista desk’s D950system.ini file are required to Ini file on Vista desk configure the system for this operation mode : ; ******** Emulation / RemoteControl (VirtualVista) *************************** EmulationEnabled=No...
-
Page 32: With Desk + Core
If desk redundancy needs to be achieved with the Compact Remote, it also needs to be connected to the DSP engine, in addition to its network connection to the Vista desk. This way it is capable to continue a mixing session in case of a desk failure. - Page 33 „Core“ online status is grey. As long as the Vista desk is running properly, the desk is also controlling the dsp engine (Core). If the Vista desk has a problem and stops running properly, the user will be able to press “Connect to Core”, which forces the DSP engine to dis-...
- Page 34 [TcpIpAddr] ScoreIp2=192.168.2.60 <-here the ip address of the bridge card port needs to be configured The following entries in the Vista desk’s D950system.ini file are required to Ini file on Vista desk configure the system for this operation mode : ;...
-
Page 35: With Core
Since there is no Vista desk around, the Virtual Vista running on the Compact Remote will act as the Vista desk. In this mode it will start its own GC screen and will control all audio and monitoring parameters directly. - Page 36 Note: “Offline”, as indicated in the startup window actually always refers to the status of the Compact Remote in regard to the Vista Desk. Therefore the startup window also indicates the status “offline”, even though the Compact Remote is “online” with a dsp engine.
- Page 37 Vista Compact Remote The following entries in the Compact Remote’s D950system.ini file are Ini file on Compact Remote required to configure the system for this operation mode : ; ******** General System Info ************************************************ IsBridgeActive=Yes <-needs to be set to “Yes”...
-
Page 38: Offline
Preparing a Session For this process, it is recommended that an exisiting production title has been copied from the Vista desk via the backup procedure. Such a backup can eas- ily be „restored“ onto the Compact Remote via the restore procedure (File\ Restore Backup). -
Page 39: Operation
Compact Remote is based on operation of the Virtual Vista. In this chapter, mostly operation instructions which don’t apply to operating Virtual Vista on a normal computer or laptop (not on a Compact Remote) are listed : Strip Setup When the Compact Remote is online with a desk, it can have it’s own strip... - Page 40 Virtual Vista was configured during the setup process and stored in it’s D950system.ini file. This configuration can be changed at any time, and the Virtual Vista’s desk size adapted to the currently required size. (A restart of the Virtual Vista is necessarry after the ini file has been changed) Grand Masters The Compact Remote’s Grand Master channel strips are located on the two...
-
Page 41: Navigation
Navigation To navigate between the different faderbays and controlbay of the Virtual Vista, the touch screen must be used . By selecting a bay, the Compact Remote maps the corresponding hardware controls (faders, rotaries and buttons) to this selected bay. -
Page 42: Copy And Paste
Vista Compact Remote Copy and Paste When copying channel parameters into the clipboard, the clipboard library window on the GC is automatically opened. This can have a disturbing effect – since the Compact Remote switches from the Virtual to GC view ! Therefore it is advised that after pressing a copy button, a few seconds should be waited until the GC view is shown, and then immediately the „VIRTUAL“... -
Page 43: Monitoring
Because a mixing session can be taken-over and fin- ished with the Compact Remote in case of a failure of the Vista desk, it is also necessarry to have a redundant source of the monitoring output signals. - Page 44 Difference between Vista5 and Vista9 monitoring MADI signal The order of monitoring signals in the MADI signal of a Vista 9 is as follows Where as the order of monitoring signals in the MADI signal of a Vista 5 is...
- Page 45 Vista Compact Remote All monitoring and talkback controls can simply be operated by using the touch screen. Please note that when the Downmix-setup button is pressed, the view must be changed to the GC, in order to see the downmix dialog window.
-
Page 46: Tips And Tricks
Vista Compact Remote Tips and tricks PFL via IEM On rehearsals or when mixing in the auditorium in general, it might be useful to listen to the PFL bus on headphones. Instead of connecting the MADI cable from the system rack to the Compact Remote, a wireless InEar transmitter and receiver could be used to transport the PFL signal from the system rack to wherever the Compact Remote is in the auditorium. -
Page 47: Functional Differences Between Compact Remote And Desk
Compact Remote itself. It is not possible to copy parameters from the Desks channels and paste it into a channel of the Virtual Vista – or vice versa. Also parameters from the channel setting library can only be pasted to the desk and not to the Virtual Vista. -
Page 48: Library Events
This functionality will be implemented in a future SW release. 4.16 User Keys User Keys on the channel strips (Usr 1, Usr 2) can only be used on the Vista Desk, and not on the Virtual Vista. Document generated: 17.10.13... -
Page 49: Uservista Settings
User\Vista Settings Please note that all the settings in the menu „User\Vista Settings“ which are made when a Virtual Vista is online with a Desk, are not synchronised between Virtual Vista and Desk. Therefore these settings can differ between Virtual Vista and Desk. - Page 50 Vista Compact Remote Document generated: 17.10.13 SW v5.0...
- Page 51 Prepared and edited by Copyright by Studer Professional Audio GmbH Studer Professional Audio GmbH Technical Documentation Order no. 5026124 (1013) Riedthofstrasse 214 CH-8105 Regensdorf - Switzerland http://www.studer.ch Subject to change Studer is a registered trade mark of Studer Professional Audio GmbH, Regensdorf...
Need help?
Do you have a question about the Vista and is the answer not in the manual?
Questions and answers