JVC KS-FX490 Service Manual
Hide thumbs
Also See for KS-FX490:
- Instructions manual (33 pages) ,
- Service manual (57 pages) ,
- Instructions manual (83 pages)
Advertisement
Quick Links
Download this manual
See also:
Instruction Manual
QQ
3 7 63 1515 0
SERVICE MANUAL
5
2003
49845
TE
L 13942296513
1
Precautions . . . . . . . . . . . . . . . . . . . . . . . . . . . . . . . . . . . . . . . . . . . . . . . . . . . . . . . . . . . . . . . . . . . . . . . . . . . . 3
2
Disassembly method . . . . . . . . . . . . . . . . . . . . . . . . . . . . . . . . . . . . . . . . . . . . . . . . . . . . . . . . . . . . . . . . . . . . 4
3
Adjustment. . . . . . . . . . . . . . . . . . . . . . . . . . . . . . . . . . . . . . . . . . . . . . . . . . . . . . . . . . . . . . . . . . . . . . . . . . . . 19
4
Description of major ICs . . . . . . . . . . . . . . . . . . . . . . . . . . . . . . . . . . . . . . . . . . . . . . . . . . . . . . . . . . . . . . . . . 23
www
.
http://www.xiaoyu163.com
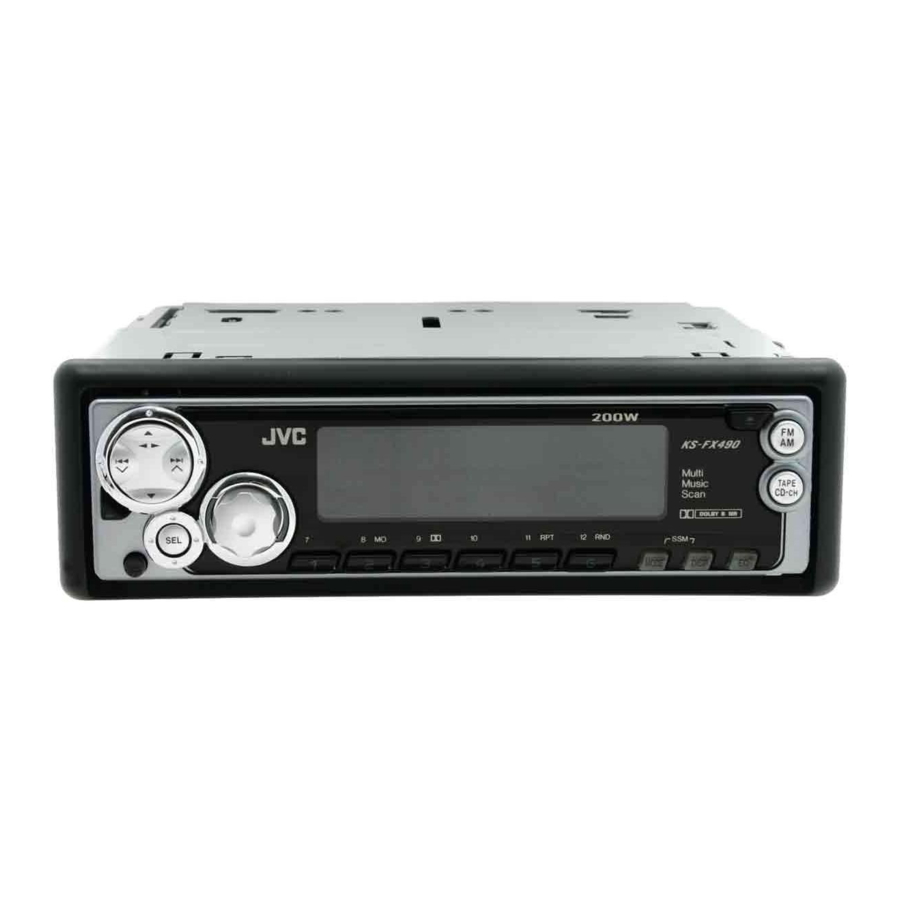
CASSETTE RECEIVER
KS-FX490
S
TABLE OF CONTENTS
x
ao
u163
y
i
COPYRIGHT © 2003 VICTOR COMPANY OF JAPAN, LTD.
http://www.xiaoyu163.com
2 9
8
Q Q
3
6 7
1 3
1 5
co
.
9 4
2 8
0 5
8
2 9
9 4
2 8
Area Suffix
J ------ Northern America
m
9 9
9 9
No.49845
2003/5
Advertisement

Related Manuals for JVC KS-FX490


Summary of Contents for JVC KS-FX490
- Page 1 3 7 63 1515 0 SERVICE MANUAL CASSETTE RECEIVER 49845 2003 KS-FX490 L 13942296513 Area Suffix J ------ Northern America TABLE OF CONTENTS Precautions ................3 Disassembly method .
- Page 2 http://www.xiaoyu163.com 3 7 63 1515 0 SPECIFICATION AUDIO AMPLIFIER Maximum Power Output Front 50 W per channel SECTION Rear 50 W per channel 19 W per channel into 4 Ω, 40 Hz to 20 000 Hz at no more Continuous Power Output (RMS) Front than 0.8 % total harmonic distortion.
- Page 3 http://www.xiaoyu163.com SECTION 1 3 7 63 1515 0 Precautions Safety Precautions Burrs formed during molding may be left over on some parts of the chassis. Therefore, pay attention to such burrs in the case of preforming repair of this system. L 13942296513 u163 (No.49845)1-3...
-
Page 4: Disassembly Method
http://www.xiaoyu163.com SECTION 2 3 7 63 1515 0 Disassembly method Main body 2.1.1 Removing the front panel assembly (See Fig.1) (1) Push the detach button in the lower left part of the front Front panel assembly panel assembly and remove the front panel assembly in the direction of the arrow. - Page 5 http://www.xiaoyu163.com 2.1.4 Removing the heat sink 3 7 63 1515 0 (See Fig.5) • Prior to performing the following procedure, remove the front panel assembly. (1) Remove the two screws C and screw D attaching the heat sink on the left side of the main body, and remove the heat sink.
- Page 6 http://www.xiaoyu163.com 2.1.7 Removing the cassette mechanism assembly 3 7 63 1515 0 (See Fig.8) • Prior to performing the following procedures, remove the front Cassette mechanism assembly panel assembly, bottom cover, front chassis assembly, heat sink, rear panel and main board. (1) Disconnect the wire from the connector CN402 on the mecha board.
- Page 7 http://www.xiaoyu163.com 2.1.9 Removing the front board 3 7 63 1515 0 (See Figs.10 to 12) • Prior to performing the following procedures, remove the front panel assembly. Rear cover (1) Remove the four screws L attaching the rear cover on the back side of the front panel assembly.
- Page 8 http://www.xiaoyu163.com Cassette mechanism assembly 3 7 63 1515 0 REFERENCE: Prior to performing the following procedures, turn the mode gear on the bottom of the body until the respective part comes to the EJECT position (Refer to Fig.1). Mode gear Fig.1 2.2.1 Removing the cassette guide (See Fig.2)
- Page 9 http://www.xiaoyu163.com 2.2.3 Removing the cassette hanger assembly / cassette holder 3 7 63 1515 0 (See Fig.4 to 7) (1) Check the mode is set to EJECT. Push down the front part Cassette holder assembly of the cassette holder and move in the direction of the ar- row to release the joint c.
- Page 10 http://www.xiaoyu163.com 2.2.4 Removing the side bracket assembly 3 7 63 1515 0 Side bracket assembly (See Fig.8 to 10) Joint i (1) Remove the screw A attaching the side bracket assembly. (2) Detach the front side of the side bracket assembly upward and pull out forward to release the joint i and j in the rear.
- Page 11 http://www.xiaoyu163.com 2.2.5 Removing the pinch arm (F) assembly 3 7 63 1515 0 (See Fig.11 and 12) (1) Remove the polywasher and pull out the pinch arm (F) as- sembly. (2) Remove the compulsion spring. 2.2.6 Removing the pinch arm (R) assembly (See Fig.11 and 12) (1) Remove the polywasher and pull out the pinch arm (R) as- sembly.
- Page 12 http://www.xiaoyu163.com 2.2.8 Removing the head / tape guide 3 7 63 1515 0 Flywheel assembly (F) Belt (See Fig.16 and 17) REFERENCE: It is not necessary to remove the slide chassis assembly. (1) Remove the band attaching the wire to the head. (2) Remove the two screws B, the head and the head support spring.
- Page 13 http://www.xiaoyu163.com 2.2.10 Disassembling the flywheel assembly (F) 3 7 63 1515 0 FFC pad (See Fig.19 and 20) (1) Push and turn counterclockwise the spring holder (F) to re- lease the three joints p on the bottom of the flywheel. (2) The spring holder (F), the TU spring and the friction gear play come off.
- Page 14 http://www.xiaoyu163.com 2.2.13 Removing the gear base arm / gear base link assembly 3 7 63 1515 0 (See Fig.23 to 25) (1) Move the gear base arm in the direction of the arrow. Gear base arm (2) Insert a slotted screwdriver to the gear base spring under Joint t Joints s the gear base arm, and release the gear base arm upward...
- Page 15 http://www.xiaoyu163.com 2.2.15 Removing the mode gear 3 7 63 1515 0 Mode gear Mode switch actuator (See Fig.26 and 29) (1) Remove the polywasher on the bottom and pull out the mode gear. 2.2.16 Removing the mode switch actuator (See Fig.26, 27 and 29) (1) Pull out the mode switch actuator at the bottom.
- Page 16 http://www.xiaoyu163.com 2.2.19 Removing the gear base assembly / take up gear / reflector gear 3 7 63 1515 0 (See Fig.30 to 32) (1) Push in the pin d’ of the gear base assembly on the upper Slot e' side of the body and move the reflector gear toward the bottom, then pull out.
- Page 17 http://www.xiaoyu163.com 2.2.21 Removing the side bracket assembly 3 7 63 1515 0 Side bracket assembly (See Fig.33 to 37) Boss g' (1) Remove the eject cam plate spring. (2) Push the joint f’ through the slot to remove the load rack downward.
- Page 18 http://www.xiaoyu163.com 2.2.22 Removing the main motor assembly / sub motor assembly 3 7 63 1515 0 (See Fig.38 to 40) (1) Remove the belt at the bottom. Main motor (2) Remove the polywasher and pull out the mode gear. assembly (3) Pull out the reduction gear (B).
- Page 19 http://www.xiaoyu163.com SECTION 3 3 7 63 1515 0 Adjustment Test instruments required for adjustment Standard volume position (1) Digital oscilloscope (100MHz) Balance and Bass, Treble volume, Fader : Center (Indication "0") (2) Frequency counter meter Loudness, Dolby NR, Sound, Cruise : Off (3) Electric voltmeter Volume position is about 2V at speaker output with following con- (4) Wow &...
- Page 20 http://www.xiaoyu163.com Information for using a car audio service jig 3 7 63 1515 0 (1) We're advancing efforts to make our extension cords common for all car audio products. Please use this type of extension cord as follows. (2) As a U-shape type top cover is employed, this type of extension cord is needed to check operation of the mechanism assembly after disassembly.
- Page 21 http://www.xiaoyu163.com Arrangement of adjusting & test points 3 7 63 1515 0 Cassette mechanism (Surface) Motor assembly Tape speed adjust Azimuth screw A (Forward) Playback head Azimuth screw B (Reverse) L 13942296513 Head section view Playback head Azimuth screw B Azimuth screw A (Reverse) (Forward)
- Page 22 http://www.xiaoyu163.com 3 7 63 1515 0 Item Conditions Adjustment and Confirmation methods S.Values Adjust 1. Head Test tape: Head height adjustment azimuth SCC-1659 Adjust the azimuth directly. When you adjust the height A line adjustment VT703 (10kHz) using a mirror tape, remove the cassette housing from the mechanism chassis.
-
Page 23: Description Of Major Ics
http://www.xiaoyu163.com SECTION 4 3 7 63 1515 0 Description of major ICs 4.1 AN80T05 (IC901) : Regulator • Pin layout & Block diagram Reference Voltage ASO & Peak Current Protection Thermal Protection Drive Drive Drive Drive Drive MODE2 MODE1 L 13942296513 5.6V 8.7V 8.7V... - Page 24 http://www.xiaoyu163.com 4.2 CXA2560Q (IC401) : Dolby B type noise reduction system with play back equalizer amp. 3 7 63 1515 0 • Pin layout & Block diagram 7k/12k PBFB2 MSMODE 100k OFF/B PBRIN2 DRSW 300k MS MODE BIAS PBGND TAPESW MUTE PBFIN2 MUTESW...
- Page 25 http://www.xiaoyu163.com 4.3 HD74HC126FP-X (IC801) : Buffer 3 7 63 1515 0 • Pin layout • Pin function Input Output Note: H:High level L:Low level X:Irrelevant Z:Off(High-impedance) State a 3-state input • Block diagram Output Input Output L 13942296513 Sample as Load Circuit 1 Output Sample as Load Circuit 1 Output...
- Page 26 http://www.xiaoyu163.com KIA7810PI (IC902) : Regulator 3 7 63 1515 0 • Pin layout 1 2 3 • Block diagram 1 INPUT 3 OUTPUT L 13942296513 2 GND u163 1-26 (No.49845) http://www.xiaoyu163.com...
- Page 27 http://www.xiaoyu163.com 4.7 LC75873NW (IC601) : LCD Driver 3 7 63 1515 0 • Pin layout • Block diagram VDD1 COMON SEGMENT DRIVER DRIVER VDD2 CLOCK SHIFT REGISTOR GENERATOR ADDRESS DETECTOR L 13942296513 • Pin function Pin No. Pin name Description 79,80 S1/P1 to S4/P4 O Segment outouts for displaying the display data transferred by serial data input.
- Page 28 http://www.xiaoyu163.com LA47505 (IC301) : Power amp. 3 7 63 1515 0 • Block diagram Protective circuit Stand by Switch L 13942296513 Ripple Mute Filter circuit protective circuit Muting & On Time Control Circuit u163 1-28 (No.49845) http://www.xiaoyu163.com...
- Page 29 http://www.xiaoyu163.com • Pin layout 3 7 63 1515 0 • Pin function Pin No. Symbol Function AC CONT1 Header of IC GND1 Power GND OUTFR- Outpur(-) for front Rch STBY Stand by input OUTFR+ Output (+) for front Rch Vcc1/2 Power input OUTRR- Output (-) for rear Rch...
- Page 30 http://www.xiaoyu163.com 4.9 UPD178078GF-618 (IC701) : System CPU 3 7 63 1515 0 • Pin layout • Pin functions Pin No. Symbol Function PS1(on) ACC ON/OFF detection signal input PS2(stop) Memory ON/OFF detection signal input POWER POWER ON/OFF control output STAND BY Stand-by position detection signal input TAPE IN Cassette tape inside signal...
- Page 31 http://www.xiaoyu163.com 3 7 63 1515 0 Pin No. Symbol Function IF count input VDDPLL OSC INPUT FM/AM local osc input NO USE PLL disable & Pull down to GND GNDPLL Connect to ground AM E.OUT AM error output FM E.OUT FM error output IC(VPP) SETTING TO WRITE FOR FLASH...
- Page 32 http://www.xiaoyu163.com 4.10 TEA6320T-X (IC161) : E.volume 3 7 63 1515 0 • Pin layout OUTRR OUTLR OUTRF OUTLF Vref MUTE CD-CH TAPE TUNER • Block diagram VOLUME 2 MUTE 0 to 55 dB FUNCTION BALANCE ZERO CROSS FENDER REAR POWER DETECTOR SUPPLY VOLUME 1...
- Page 33 http://www.xiaoyu163.com 3 7 63 1515 0 L 13942296513 u163 (No.49845)1-33 http://www.xiaoyu163.com...
- Page 34 http://www.xiaoyu163.com 3 7 63 1515 0 L 13942296513 u163 VICTOR COMPANY OF JAPAN, LIMITED AV & MULTIMEDIA COMPANY MOBILE ENTERTAINMENT CATEGORY 10-1,1chome,Ohwatari-machi,Maebashi-city,371-8543,Japan (No.49845) Printed in Japan http://www.xiaoyu163.com...
-
Page 35: Schematic Diagrams
KS-FX490 3 7 63 1515 0 SCHEMATIC DIAGRAMS CASSETTE RECEIVER KS-FX490 CD-ROM No.SML200305 Area Suffix J -------------- Northern America L 13942296513 Contents Block diagram Standard schematic diagrams Printed circuit boards 2-5 to 7 u163 No.49845SCH COPYRIGHT 2003 VICTOR COMPANY OF JAPAN, LTD. -
Page 36: Safety Precaution
KS-FX490 3 7 63 1515 0 Safety precaution Burrs formed during molding may be left over on some parts of the chassis. Therefore, pay attention to such burrs in the case of preforming repair of this system. L 13942296513 u163 http://www.xiaoyu163.com... - Page 37 KS-FX490 3 7 63 1515 0 Block diagram L 13942296513 u163 http://www.xiaoyu163.com...
- Page 38 KS-FX490 3 7 63 1515 0 Standard schematic diagrams Main amp section QAU0281-001 A.GND QNB0100-002 2.7k 1/50 E.CLK 2.7k 1/50 E.DATA 4.7uH IC161 TEA6320T-X CH.L C167 TAPE.L A.GND 0.033 TU.L 2SB709A/R/-X 2SB624/4/-X 2.2/50 0.001 TU.R C177 TAPE.R 0.033 UN2211-X CH.R...
- Page 39 KS-FX490 3 7 63 1515 0 CJ321 QNN0489-001 IC301 LA47505 C362 0.022 R333 R334 R323 R324 R353 R354 C361 0.022 R343 R344 R331 C332 0.22 C313 C314 0.47/50 R351 C352 0.22 0.47/50 R341 C342 0.22 R321 C322 0.22 C167 0.033...
- Page 40 KS-FX490 3 7 63 1515 0 LCD & Key control section LCD1 LCD1 QLD0257-001 EN601 QSW0976-001 ENC2 ENC1 R652 L 13942296513 R651 C608 C609 0.01 0.01 KEY1 R604 R603 R602 R601 KEY2 1.8k 1.2k KEY0 S605 S604 S603 S602...
- Page 41 KS-FX490 3 7 63 1515 0 IC602 CN601 RPM6938-SV4 QNZ0006-001 ACC5V R660 REMOCON R661 ENC2 LCDCE R662 3.3k LCDDA R663 3.3k R653 R654 LCDCL R664 3.3k Main amp KEY2 section KEY1 L 13942296513 CN701 KEY0 COM1 COM2 COM3 IC601...
- Page 42 KS-FX490 3 7 63 1515 0 Head amp section R401 CN403 QGF1219F1-10S 0.015 C411 L 13942296513 22/16 C409 0.015 C410 CN401 QGB1214K1-18S u163 http://www.xiaoyu163.com...
- Page 43 KS-FX490 3 7 63 1515 0 Q403 2SB1322/RS/-T Q402 UN2211-X IC401 CXA2560Q R418 L 13942296513 R416 1.5M IC402 LB1641 C422 C425 0.01 C424 TAPE SIGNAL Main amp section CP401 u163 http://www.xiaoyu163.com...
- Page 44 KS-FX490 3 7 63 1515 0 Printed circuit boards Main board Forward side C901 IC901 CJ321 B402 CN901 D901 C315 B401 C302 B204 CP401 B102 C907 C905 B101 C902 B201 R901 C917 C314 B203 B151 B154 C912 C916 C352...
- Page 45 KS-FX490 3 7 63 1515 0 Main board Reverse side C901 CJ321 R914 IC901 R912 R913 R344 R354 B800 L901 CN901 D901 J801 C361 C302 R324 R334 C304 C315 B801 C362 Q321 Q331 R903 CP401 R901 C314 R902 C905...
- Page 46 KS-FX490 3 7 63 1515 0 Front board Forward side LCD1 S614 IC602 D620 D602 D603 D605 R614 S605 R604 D604 D619 D601 R603 R602 S604 S615 S613 D606 D616 D617 D610 D611 D613 D612 S603 D609 S608 D615...
- Page 47 KS-FX490 3 7 63 1515 0 < M E M O > L 13942296513 u163 2-11 http://www.xiaoyu163.com...
- Page 48 KS-FX490 3 7 63 1515 0 L 13942296513 u163 VICTOR COMPANY OF JAPAN, LIMITED AV & MULTIMEDIA COMPANY 10-1,1Chome,Ohwatari-machi,Maebashi-city,371-8543,Japan Printed in Japan (No.49845SCH) 2003/05 http://www.xiaoyu163.com...
-
Page 49: Parts List
KS-FX490 3 7 63 1515 0 PARTS LIST [ KS-FX490 ] * All printed circuit boards and its assemblies are not available as service parts. Area suffix J -------------- Northern America L 13942296513 - Contents - Exploded view of general assembly and parts list (Block No.M1) Cassette mechanism assembly and parts list (Block No.MP) - Page 50 KS-FX490 3 7 63 1515 0 Exploded view of general assmbly and parts list Block No. L 13942296513 u163 http://www.xiaoyu163.com...
- Page 51 KS-FX490 3 7 63 1515 0 General assembly Block No. [M][1][M][M] Symbol No. Part No. Part Name Description Local Symbol No. Part No. Part Name Description Local GE40107-002A HEAT SINK GE30912-002A REAR BRACKET -------------------- MECHA QYSDST2606Z SCREW 2.6mm x 6mm...
- Page 52 KS-FX490 3 7 63 1515 0 Cassette mechanism assembly and parts list Block No. CDS-802JE3 L 13942296513 u163 http://www.xiaoyu163.com...
- Page 53 KS-FX490 3 7 63 1515 0 Cassette mechanism Block No. [M][P][M][M] Symbol No. Part No. Part Name Description Local Symbol No. Part No. Part Name Description Local 2-1031-7030-C2S SCREW (x2) X-0802-1009S MAIN CHASSIS AS X-0802-1002S SLIDE CHASSIS A X-0802-1003S...
- Page 54 KS-FX490 3 7 63 1515 0 Grease point 1/2 FG-84M MEA-512R MEN-223 SW-902 CFD-409 CFD-250H EP-56 SW-474B L 13942296513 u163 http://www.xiaoyu163.com...
- Page 55 KS-FX490 3 7 63 1515 0 Grease point 2/2 L 13942296513 u163 http://www.xiaoyu163.com...
- Page 56 KS-FX490 3 7 63 1515 0 Electrical parts list Main board Symbol No. Part No. Part Name Description Local Block No. [0][1][0][0] QERF1HM-104Z E CAPACITOR 0.1uF 50V M Symbol No. Part No. Part Name Description Local NCS31HJ-102X C CAPACITOR...
- Page 57 KS-FX490 3 7 63 1515 0 Symbol No. Part No. Part Name Description Local Symbol No. Part No. Part Name Description Local C904 QERF1AM-227Z E CAPACITOR 220uF 10V M R708 NRSA63J-332X MG RESISTOR 3.3kΩ 1/16W J C905 QERF1CM-106Z E CAPACITOR...
-
Page 58: Front Board
KS-FX490 3 7 63 1515 0 Front board Symbol No. Part No. Part Name Description Local Block No. [0][2][0][0] R635 NRSA02J-182X MG RESISTOR 1.8kΩ 1/10W J Symbol No. Part No. Part Name Description Local R636 NRSA02J-182X MG RESISTOR 1.8kΩ 1/10W J... - Page 59 KS-FX490 3 7 63 1515 0 Symbol No. Part No. Part Name Description Local C415 NCB31EK-103X C CAPACITOR 0.01uF 25V K C416 QFVD1HJ-104Z MF CAPACITOR 0.1uF 50V J C417 QFVD1HJ-104Z MF CAPACITOR 0.1uF 50V J C418 NDC31HJ-221X C CAPACITOR...
- Page 60 KS-FX490 3 7 63 1515 0 Packing materials and accessories parts list Block No. A3 A4 A5 A6 L 13942296513 A8 A9 A10 A11 u163 3-12 http://www.xiaoyu163.com...
- Page 61 KS-FX490 3 7 63 1515 0 Packing and accessories Block No. [M][3][M][M] Symbol No. Part No. Part Name Description Local GET0120-001A INST BOOK ENG FRE SPA GET0120-002A INSTALL MANUAL ENG FRE SPA LVT0717-002B TROUBLE SHOOTIN BT-51018-3 WARRANTY CARD BT-52006-2...
Need help?
Do you have a question about the KS-FX490 and is the answer not in the manual?
Questions and answers