Table of Contents

Related Manuals for TMB ProPlex IQ ONE 4

Summary of Contents for TMB ProPlex IQ ONE 4
- Page 1 IQ One RDM Capable Bidirectional Ethernet-DMX Nodes ANUAL TMB 24/7 Technical Support US/Canada: +1 818.794.1286 Toll Free: 1 877.862.3833 (877.TMB.DUDE) UK: +44 (0)20.8574.9739 Toll Free: 0800.652.5418 e-mail: techsupport@tmb.com...
-
Page 2: Table Of Contents
ABLE OF ONTENTS 1. BEFORE BEGINNING ....................3 Unpacking Instructions Safety Instructions Power Requirements 2. INTRODUCTION ......................Description IQ One RackMount Overview IQ One Mini Overview IQ One Optical RackMount Overview 3. SETUP ......................... 6 Fuse Replacement Ethernet Connector Fibre Optic Connector Mounting/Rigging (Mini) 4. -
Page 3: Before Beginning
1. B EFORE EGINNING NPACKING NSTRUCTIONS Upon receipt of the unit, carefully unpack the carton and check the contents to ensure that all parts are present and in good condition. Notify the shipper immediately and retain packing material for inspection if any parts appear to be damaged from shipping or if the carton itself shows signs of mishandling. -
Page 4: Introduction
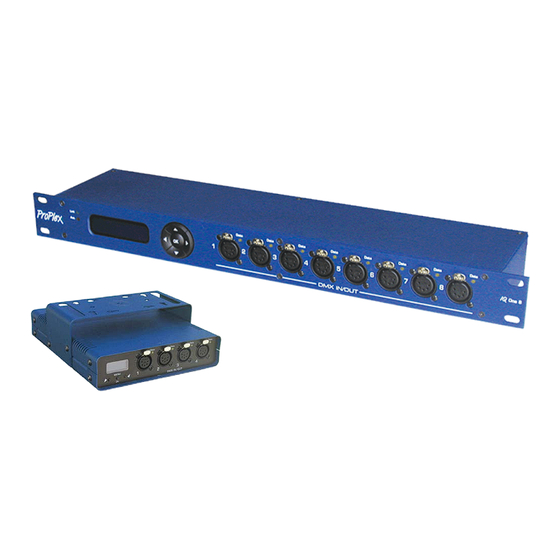
2. I NTRODUCTION ESCRIPTION ProPlex IQ One bidirectional Ethernet-DMX are available in both RackMount and Mini tour-ready enclosures. RackMount models include the IQ One 4, IQ One 8, and IQ One 8 Optical and convert between Ethernet and 4 or 8 universes of DMX as well as bidirectional Art-Net /sACN to DMX via Neutrik OpticalCon. The IQ One Mini 4-way converts between Ethernet and 4 universes of DMX in a compact, versatile Mini enclosure. -
Page 5: Iq One Mini Overview
IQ O VERVIEW IQ O PTICAL OUNT VERVIEW ProPlex IQ One user manual version 1.6.8 122216... -
Page 6: Setup
3. S ETUP EPLACEMENT Disconnect the power cord before replacing fuse. Always replace with the appropriate fuse.. The fuse for this fixture is located on the back of the unit. ProPlex IQ devices use a 1A, 250V, 5x20mm (0.2x0.8 in.) cylindrical fuse. To replace fuse: 1. -
Page 7: Mounting/Rigging (Mini)
– P OUNTING IGGING NCLOSURES Orientation ProPlex Mini units may be mounted in any position, using the standard yoke. Always make sure there is adequate room for ventilation. Rigging – Always consult a certified rigging specialist before suspending any device overhead. -
Page 8: Configuration Using Control Panel Display
To access the ProPlex IQ configuration page, enter device IP address (default 2.1.1.10) in any web browser. To change any of the parameters, adjust corresponding field and press SET button near it to apply new value. ONFIGURATION USING CONTROL PANEL DISPLAY Navigation through the menu is done using the 4-direction keypad with central key as OK (confirm) key. -
Page 9: Iq Menu Tree
IQ M To enter Main menu, press OK key. Select sub-menu with Left/Right keys and confirm with OK. To exit menu, press Right until “EXIT” appears, then and press OK. < ROUTING SETUP > < PROTOCOL SETUP > < LOAD CONFIG > <... -
Page 10: Routing Setup
OUTING ETUP To change DMX routing settings, set individual port directions (IN or OUT) and select Art-Net universe for each port. Art-Net universe is displayed in two formats – decimal and hexadecimal (hex value is in brackets). Use Left/Right to select port. To edit, press OK. Left selects direction field, right selects universe field. Up/Down changes values. -
Page 11: Appendix
ProPlex IQ Ethernet to DMX nodes can be configured and monitored via two methods: ProPlex IQ RDM Manager software and via a web browser. The ProPlex IQ RDM Manager software is available as a free PC download from www.tmb.com . This software includes a full suite of configuration and monitoring features, and makes managing multiple nodes on a network extremely easy. -
Page 12: Rdm Functionality
(2) years from the date of original sale by TMB. TMB’s warranty shall be restricted to the repair or replacement of any part that proves to be defective and for which a claim is submitted to TMB before the expiration of the applicable warranty periods. -
Page 13: Return Procedure
Please send returned merchandise prepaid and in the original packing. Freight call tags will not be issued for shipping the product to TMB, but TMB will pay the freight for return to the customer. Clearly label package with a Return Merchandise Authorization Number (RMA #). Products returned without an RMA # will delay service. -
Page 14: Technical Specifications
ECHNICAL PECIFICATIONS ProPlex IQ ONE 4 ProPlex IQ ONE 8 ProPlex IQ ONE 8 ProPlex IQ ONE Mini Model: Optical Part Number PPIQA415RD PPIQA815RD PPIQA845RDO PRIQA415MD Ethernet Ports DMX Ports DMX Connectors Neutrik XLR5 Female (NC5FAV) DMX Port Isolation Optical, up to 1000V...
Need help?
Do you have a question about the ProPlex IQ ONE 4 and is the answer not in the manual?
Questions and answers