Advertisement
Table of Contents
- 1 Instruction Manual
- 2 Table of Contents
- 3 General Information and Safety Instructions
- 4 User Safety
- 5 Parts List
- 6 Assembly Instructions
- 7 Use of the Adjustment Knob
- 8 Exercise Guidelines
- 9 Suggested Stretches
- 10 Training Zones
- 11 Exercise Phase
- 12 Different Types of Grips
- 13 Digital Monitor
- 14 Warranty Information
- Download this manual
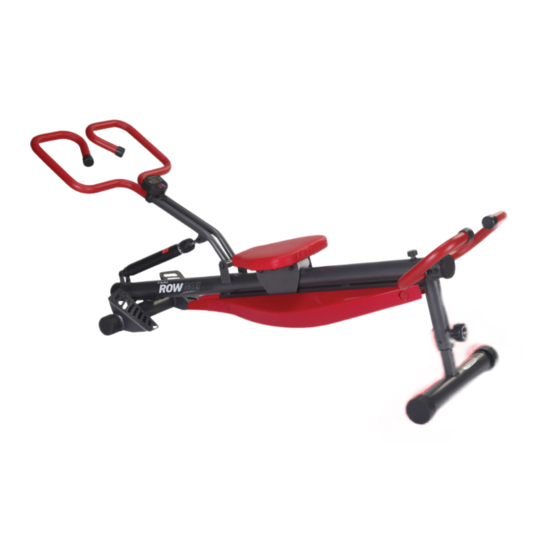
ALL ROUND EXERCISER
S002104
Instruction Manual
WARNING: To ensure your safety, please do not attempt to use this
product without reading this instruction manual carefully. Failure to
comply with this warning may result in injury or property damage.
•
Only use this product on a solid, flat level surface.
•
The Action Row Go has a maximum user weight of 150kg.
•
Do now allow more than one person on the product at any time.
•
This product is designed for domestic use only, it is not intended
use in commercial training environments.
For parts and service enquiries, please contact Action Spares on
1800 465 070 or e-mail service@actionspares.com.au
Advertisement
Table of Contents

Related Manuals for Action Row GO S002104

Summary of Contents for Action Row GO S002104
-
Page 1: Instruction Manual
• Only use this product on a solid, flat level surface. • The Action Row Go has a maximum user weight of 150kg. • Do now allow more than one person on the product at any time. •... -
Page 2: Table Of Contents
Contents General Information and Safety Instructions User Safety Parts List Assembly Instructions Use of the Adjustment Knob Exercise Guidelines Suggested Stretches Training Zones Exercise Phase Different Types Of Grips Digital Monitor Warranty Information S002104 Action Row Go... -
Page 3: General Information And Safety Instructions
Safe Disposal Of Product And Packaging UNPACKING Unpack the unit where it will be used. Place the Action Row Go carton on a level flat surface. When unpacking the unit, remove any packaging materials from the interior. Keep the original packaging carton and materials in a safe place. - Page 4 Keep the Action Row Go indoors, away from moisture and dust. Always use the Action Row Go on a flat level surface with at least 2.5m diameter of clear space surrounding the unit.
-
Page 5: User Safety
If dizziness, nausea, chest pains, or any other abnormal symptoms are experienced while using this product, stop the workout at once and consult a physician immediately. Before using the Action Row Go, please consult your physician if you have suffered with, WARNING! or currently have any of the following conditions: •... -
Page 6: Parts List
Wrench for nuts Allen wrench Screw A Screw B Screw C Screw D Nut No. 1 Nut No. 2 Nut No. 3 Adjustment knob Safety stopper Seat mount Pulley A Pulley B Large Caps B Large Caps C S002104 Action Row Go... -
Page 7: Assembly Instructions
(7) to main support bar. For safety purposes, please ensure you lock the seat by adjusting the knob (22). STEP 2 Using screw D (18), place the front frame (2) and screw to main support. Do the same for the back frame (3) and secure using the adjustment knob (22). S002104 Action Row Go... - Page 8 Using screw C (17), attach the piston (4) to the main support. Again for your safety, please ensure the piston is attached securely and placed in the correct position. STEP 4 Take screw D (18) and assemble the main handles x 2 (5) and digital monitor (6) to the main support. S002104 Action Row Go...
- Page 9 Now that the handles are secure, using screw A (15) attach handle to the main support. Now using screw C (17) attach the top part of the piston to the handles. STEP 6 Next, using screw B (16) x 2, attach the back handles (8) x 2 to main support. S002104 Action Row Go...
- Page 10 Now place the small caps (11) x 4 and stoppers (23) onto the handles. Your Action Row Go should now be assembled. Please ensure that all screws are tightened securely and all parts have been correctly attached before you begin your workout.
-
Page 11: Use Of The Adjustment Knob
If you would rather the seat to be fixed during your workout, simply pull the knob out towards you and twist until it reaches the locked (red) position. Release the knob to secure the position. S002104 Action Row Go... - Page 12 Use of the Adjustment Knob (cont) BACK FRAME To adjust the height of the Action Row Go, simply turn the knob counter-clockwise, pull it towards you and adjust rower to desired level. Release the adjustment knob so that the bolt is inserted in the hole and turn it once again clockwise to tighten the leg base.
-
Page 13: Exercise Guidelines
After a few months of regular exercise, you may complete up to five workouts each week, if desired. Remember, the key to success is to make exercise a regular and enjoyable part of your everyday life. S002104 Action Row Go... -
Page 14: Suggested Stretches
Sit with the soles of your feet together and your knees outward. Pull your feet toward your groin area as far as possible. Hold for 15 counts, then relax. Repeat 3 times. Stretches: Quadriceps and hip muscles. S002104 Action Row Go... -
Page 15: Training Zones
BLUE ZONE on recovery days, or when you’re working to improve your running or walking technique, recovering from injury, or just starting out. Your body should feel warm; your heart rate and respiration should increase and you may sweat. S002104 Action Row Go... -
Page 16: Exercise Phase
After the finish phase, extend your arms forward and pull the seat forward using your legs. Repeat this sequence, moving through all three phases with a smooth, fluid motion. Remember to breathe normally as you row; never hold your breath. S002104 Action Row Go... - Page 17 Push yourself back up through your hands to the start position. AB CURLS Using the back handles, place both hands on the bars and your knees on the seat. Slide the seat up and down to complete the motion. S002104 Action Row Go...
- Page 18 Using the back handles place your hands on the bars and keep your legs at a 90 degree angle. Slowly bend your elbows to lower body towards the floor and push yourself back up to complete the exercise. S002104 Action Row Go...
-
Page 19: Different Types Of Grips
Different Types Of Grips The Action Row Go offers a total body workout and is an all round exerciser. By simply moving your hand grips whilst using the machine, you could be targeting different muscle groups which will improve your workout and help build your fitness levels. -
Page 20: Digital Monitor
Press the red button repeatedly until you see the function you want to display on the screen, or select SCAN mode so that the functions appear on the screen continuously. The screen will turn off automatically if Action Row Go is not used for 4 minutes. OFF: To reset all counters to 0, hold down the red button for four seconds. - Page 21 Use only batteries of the same or equivalent type as recommended. • Always remove exhausted or dead batteries from the product and do not dispose of batteries in fire, • batteries may explode or leak. Do not short circuit the supply terminals. • S002104 Action Row Go...
-
Page 22: Warranty Information
Congratulations on your purchase! This Action Row Go is warranted to be free from defects in material and workmanship under normal use and service conditions for a period of 12 months from the date of purchase of this article. Evidence of unfair usage or incorrect adjustment by the owner will void this promise. - Page 23 9:00am – 4:30pm Monday to Friday (excluding Public Holidays) 9:00am – 3:00pm Saturday This product is warranted and distributed by: Action Sports of 48B Egerton St, Silverwater NSW, 2128 Phone: (02) 8799 3500 © 2017 Action Sports Equipment Pty Ltd.
Need help?
Do you have a question about the Row GO S002104 and is the answer not in the manual?
Questions and answers