Table of Contents
Advertisement
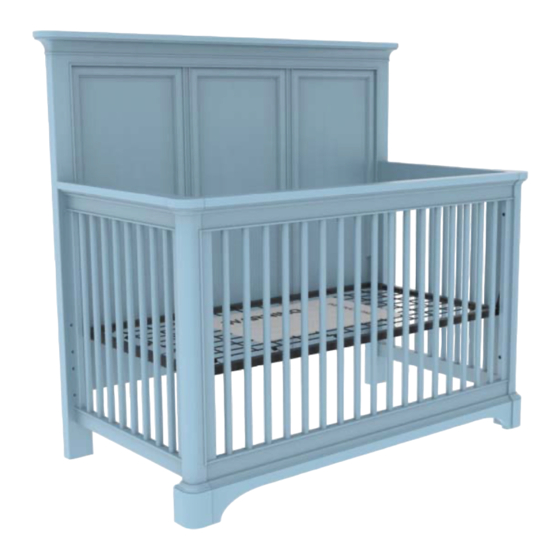
Built to Grow Crib Assembly Instructions
IMPORTANT - RETAIN FOR FUTURE REFERENCE - READ CAREFULLY
Model Number:
584-x3-50 BTG CRIB
536-x3-50 BTG CRIB
537-x3-50 BTG CRIB
560-x3-50 BTG CRIB
Your little one will sleep securely in this Stanley Furniture Crib. Proper assembly
will ensure every effort has been made to design this crib with your baby's safety in
mind. It is certified to meet all safety guidelines established by ASTM International
and the CPSC-Consumer Product Safety Commission.
Thank you for purchasing a Stanley Furniture Crib. If you find that you are missing
a part or if a part is defective in any way, contact your Stanley Furniture retailer for
assistance.
Advertisement
Table of Contents

Related Manuals for Stanley Furniture 584-x3-50 BTG

Summary of Contents for Stanley Furniture 584-x3-50 BTG
- Page 1 It is certified to meet all safety guidelines established by ASTM International and the CPSC-Consumer Product Safety Commission. Thank you for purchasing a Stanley Furniture Crib. If you find that you are missing a part or if a part is defective in any way, contact your Stanley Furniture retailer for assistance.
- Page 2 DO NOT use crib if any parts are missing , damaged or broken. Con- tact your dealer or write to Stanley Furniture, 200 North Hamilton St, No. 200, High Point, NC 27260 for replacement parts and instruc onal literature if needed.
- Page 3 Identifying the Parts The crib illustrations in these instructions are generic in nature. The crib you have purchased may not look like the ones illustrated; however, they all assemble in the same manner. Mattress Spring Platform Left Crib End Right Crib End Footboard Headboard...
- Page 4 Identifying the Hardware Identify the hardware included using the illustrations below 8 Connector Bolts 8 Connector Bolts 2” (1/4” x 20 thread) 3/4” (1/4” x 20 thread) 2 Metal Locator Pins 2 Allen Wrenches 1 Wrench 4 Caps 8 Cap Nuts 8 Lock Washers 4 Metal Brackets with Studs...
- Page 5 Crib Assembly NOTE: Read all instructions before assembling crib. KEEP INSTRUCTIONS FOR FUTURE REFERENCE. Attached to the mattress platform is a sleeve to store the instruction booklet. After assembly is complete, return this instruction booklet to the sleeve for future reference.
- Page 6 Attaching the End Sections Step 1: Using (4) 2” (1/4” x 20 thread) connector bolts, insert the bolts Headboard from the back of the crib head- End Rail board and tighten with the provid- ed wrench. See Fig 1a. ...
- Page 7 Attaching “L” Metal Bracket to Mattress Platform Step 2: Attach metal “L” brackets to the crib mattress platform as shown Fig Using (8) cap nuts and (8) lock washers, attach the “L” br ackets to each end of the mattress platform Figure 3.
- Page 8 Attaching the Mattress Platform Step 3: Attach the mattress platform in the desired position. (Before inserting the bolts, make Headboard sure the instruction holder and the warning label are facing up and readable as shown in Fig 5 and the mattress platform is level. ...
- Page 9 Attaching the Footboard Step 4: Insert the two metal locator pins in the crib end posts at this time. Figure 7a. Attach the footboard by align- Attach the footboard using ing the footboard with the met- metal locator pin. al locator pins.
- Page 10 Inspect the crib once again to assure that all bolts are tight and that no hardware is missing. (if you have missing hardware, contact Stanley Furniture immediately for replacement and do not use the crib until the new hardware arrives).
- Page 11 Cleaning: Mix together a mild solution of gentle dishwashing liquid and water, apply to the crib sur- face using a soft clean cloth lightly dampened in the solution. Rinse with clear water again using a soft clean cloth, then dry all surfaces thoroughly with a dry cloth. NO ABRASIVE CLEANERS, SCOURING PADS, STEEL WOOL OR COURSE RAGS SHOULD BE USED TO CLEAN THIS FINE FURNITURE.
- Page 12 Lowering the Spring Mattress Steps to lower the mattress: Loosen the (4) 2” (1/4”x20 thread) bolts attaching the footboard as shown Fig. 10a. Loosen the (4) 3/4” (1/4”x20 thread) bolts attaching the Mattress Platform. Remove the crib footboard at this time. ...
- Page 13 Accessories and Options Toddler Bed Conversion Kit is available as an option to convert the Built to Grow Crib to a tod- dler bed. Contact your Stanley Furniture dealer to purchase this item. Full Size Bed Conversion With Metal Bed Frame is available as an option using a metal bed frame.
- Page 14 Converting to a Full Size Bed Step 1: Disassemble the crib or toddler/day bed. Using the wrench provided remove the components in the following order: Loosen footboard bolts & mattress platform bolts. Remove the footboard Remove the mattress platform ...
- Page 15 Stanley Furniture Company 200 North Hamilton St No. 200 High Point, NC 27260 For parts, contact your Stanley Furniture dealer. For additional consumer information call our Customer Service Department at: 1-(800) 659-7297Mon.-Fri., 8am-5pm Eastern Standard Time 091215...
Need help?
Do you have a question about the 584-x3-50 BTG and is the answer not in the manual?
Questions and answers