Table of Contents
Advertisement
Quick Links
Download this manual
See also:
Instruction Manual
B e c a u s e R F L ™ a n d H u b b e l l ® h a v e a p o l i c y o f c o n t i n u o u s p r o d u c t i mp r o v e me n t , we r e s e r v e t h e r i g h t t o c h a n g e d e s i g n s a n d s p e c i fi c a t i o n s wi t h o u t n o t i c e .
RFL Electronics Inc.
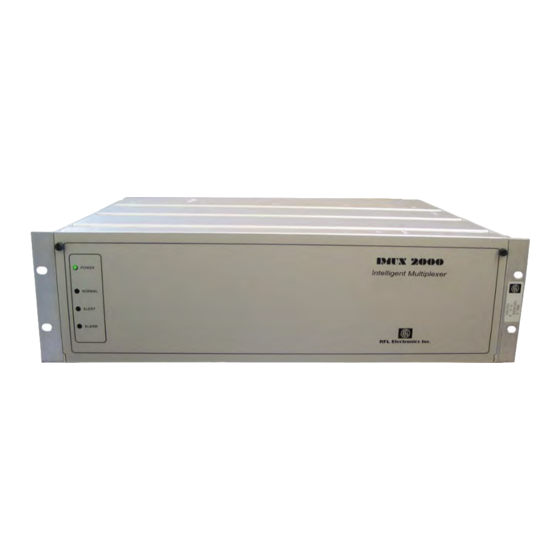
IMUX 2000
SNMP Access Gateway
User's Manual
RFL Electronics Inc.
353 Powerville Road
Boonton Township, NJ 07005
(973) 334-3100
Publication No. MC2000SNMP
Printed In U.S.A.
Revised August 10, 2009
Advertisement
Table of Contents

Subscribe to Our Youtube Channel
Related Manuals for RFL IMUX 2000

Summary of Contents for RFL IMUX 2000
- Page 1 RFL Electronics Inc. IMUX 2000 SNMP Access Gateway User’s Manual RFL Electronics Inc. 353 Powerville Road Boonton Township, NJ 07005 (973) 334-3100 Publication No. MC2000SNMP Printed In U.S.A. Revised August 10, 2009 B e c a u s e R F L ™ a n d H u b b e l l ® h a v e a p o l i c y o f c o n t i n u o u s p r o d u c t i mp r o v e me n t , we r e s e r v e t h e r i g h t t o c h a n g e d e s i g n s a n d s p e c i fi c a t i o n s wi t h o u t n o t i c e .
- Page 2 B e c a u s e R F L ™ a n d H u b b e l l ® h a v e a p o l i c y o f c o n t i n u o u s p r o d u c t i mp r o v e me n t , we r e s e r v e t h e r i g h t t o c h a n g e d e s i g n s a n d s p e c i fi c a t i o n s wi t h o u t n o t i c e .
-
Page 3: Table Of Contents
TABLE OF CONTENTS - SNMP ACCESS GATEWAY USER’S MANUAL CHAPTER 1 - PRODUCT OVERVIEW Figure 1. - SNMP Access Gateway Connectivity Overview 1.1 - - Introduction 1.2 - - IMUX 2000 Information CHAPTER 2 - INSTALLATION 2.1 - Mounting - Power Input Figure 2. - Page 4 Table of Contents CHAPTER 5 - USE OF THE SETUP MENU 5.1 - Networking 5.1.1 - Network Access Enabled 5.1.2 - Get IP Address 5.1.3 - IP Address 5.1.4 - Network Mask 5.1.5 - Default Router 5.1.6 - FTP AutoDelete 5.1.7 - SNMP Manager Setup 5.1.8 - SNMP Trap Setup 5.1.9 - SNMP Community Setup...
- Page 5 Table of Contents CHAPTER 11 - PROGRAMMING DATA ALARMS 11.1 - Alarms are the same as Events 11.2 - Alarm Actions 11.3 - How Data Alarms Are Set Up 11.4 - Defining Data Alarms 11.5 - Field Section 11.6 - Operators for Formulas 11.7 - Macro Section 11.8 - Data Alarm Section 11.9 - End Section...
- Page 6 Table of Contents CHAPTER 14 - APPLICATION NOTES APP NOTE A. USE OF IP RESTRICTIONS APP NOTE B: MONITORING RS232 LEVELS AS ALARMS Figure 8. Schematic for Sensor Inputs Figure 9. Illustration of Connecting for Monitoring RS232 Control Lines APP NOTE C: IMUX TRAP MESSAGES C.1 Trap Format C.2 Trap Codes C.3 Trap Configuration Information...
-
Page 7: Chapter 1 - Product Overview
Chapter 1 - Product Overview Chapter 1 - Product Overview - Introduction The SNMP Access Gateway monitors serial (RS232) data streams for alarm conditions, and provides notification of alarm conditions by audible alarm, pager messages and SNMP traps. The SNMP Access Gateway may be used to provide legacy (non-network) equipment with the ability to generate SNMP traps when alarm conditions occur. -
Page 8: Imux 2000 Information
1.2 - - IMUX 2000 Information When used with the IMUX 2000 the SNMP Access Gateway connects to the remote port of the IMUX using port 1. Port 2 is used as a craft interface to both the IMUX and SNMP Access Gateway. A serial cable is supplied for connection from I/O 1 to the REMOTE port on the IMUX CM3R. -
Page 9: Chapter 2 - Installation
- Power Input The SNMP is powered through the IMUX 2000 chassis motherboard. The SNMP Access Gateway uses a maximum power input of approximately 5 watts, so the maximum current from the IMUX 2000 power supply is about 1 amp. MA810... -
Page 10: Serial Ports
Chapter 2 - Installation 2.3 - Serial Ports The I/O 2 serial port is configured as a DTE port using a male, DB-9 connector. The I/O 1 serial port is configured as a DTE port using an RJ-12 connector which is similar to that used on the COM ports of an IBM-compatible personal computer. -
Page 11: Front Panel Items
Chapter 2 - Installation 2.5 - Front Panel Items The front panel of the SNMP Access Gateway module has two push-buttons and 8 LED indicators representing status information about the SNMP Access Gateway. The reset (RST) button (S2) is used to reset the SNMP Access Gateway. After the RST button is held in for about 5 seconds, the SNMP Access Gateway will start sounding its audible alarm. - Page 12 Chapter 2 - Installation Each RS-232 port has two LEDs associated with it. The left LED is a received data (RXD) LED. The right LED is a transmitted data (TXD) LED. The TXD LED is normally on and green. The RXD LED is off when no cable is connected to the serial port, and on when a cable is connected.
-
Page 13: Chapter 3 - Basic Setup For Operation
Chapter 3 - Basic Setup for Operation Chapter 3 - Basic Setup for Operation 3.1 - Network Setup As with all TCP/IP- or SNMP-based devices, the SNMP Access Gateway requires an IP address to be assigned to each unit in order to send and receive TCP/IP or SNMP data. The SNMP Access Gateway may operate with either a statically or dynamically allocated IP address. -
Page 14: Connections
Chapter 3 - Basic Setup for Operation 3.3 - Connections A connection may be made to the SNMP Access Gateway via a network connection. When a connection is made, the user is provided with a menu from which the desired mode of the connection is established. The user may select to enter a command processor mode of operation, or may select a pass-through mode of operation. -
Page 15: Chapter 4 - Command Control
Chapter 4 - Command Control Chapter 4 - Command Control 4.1 - Command Processor Mode The command processor may be accessed from a network connection. A user enters command processor mode from the main menu by selecting the ‘0’ option. SNMP Access Gateway Model Version 1.00 0. -
Page 16: General Commands
Chapter 4 - Command Control COLDSTART Clear events file, all settings to default Other commands HELP Show list of commands PING Ping an IP Address for testing Pseudo-SNMP Commands Get the value of an object with a specific object ID GETNEXT Get the value of the next object after an object ID GETX... -
Page 17: Events
Chapter 4 - Command Control password settings, event (alarm) definition settings, alarm action settings, and other settings. See Chapter 5 - Use of the SETUP Menu for further details of the use of the SETUP command. 4.2.5 - EVENTS The EVENTS command is used to view the current status of the events (alarms), view the contents of the events log file, clear contents of the events log file, view the current active alarm actions, acknowledge alarms, and view the history log of alarm actions. -
Page 18: Getnext
Chapter 4 - Command Control 4.3.2 - GETNEXT The GETNEXT command is used with an object ID, and the value returned is the object ID and value of the object which follows the object ID included with the GETNEXT command. 4.3.3 - GETX The GETX command is used without an object ID, and the value returned is that of the last object retrieved by pseudo-SNMP. -
Page 19: Chapter 5 - Use Of The Setup Menu
Chapter 5 - Use of the SETUP Menu Chapter 5 - Use of the SETUP Menu Upon selecting ‘Enter Command Mode’ from the main SNMP Access Gateway menu, the password prompt as shown below is presented for entry of the Command Mode Password. Command Processor Password: ---- Command Password Accepted Upon entry of a valid password the Command Mode Prompt (a ‘greater than’... -
Page 20: Ip Address
Chapter 5 - Use of the SETUP Menu assignment for the unit IP Address. STATIC implies that the IP address is manually entered and in this mode the BOOTP/DHCP sequence is not initiated or allowed by the SNMP Access Gateway. 5.1.3 - IP Address By pressing the Menu Letter of this option a prompt is presented for entry of the Static IP address. -
Page 21: Snmp Community Setup
Chapter 5 - Use of the SETUP Menu D. This selection enables/disables sending traps relating to SNMP Access Gateway contact closures and data alarms. The default is ‘Y’. 5.1.9 - SNMP Community Setup Selecting the Menu Letter of this option presents the following submenu for specifying SNMP Community Names. Whenever you do an SNMP operation, whether a SET or a GET, the community name needs to be included as part of that operation. -
Page 22: Passwords
Chapter 5 - Use of the SETUP Menu 1200 2400 4800 9600 G. 19200 Selection [G]? Setup: Serial Ports: I/O 1 W,P,S A. 8,N,1 B. 7,E,1 C. 7,O,1 D. 7,N,1 Selection [A]? DTR Low Except When Pass-Through Active [N]? This last option turns on or off DTR handshaking with the device connected to I/O port 1 or 2 that one is accessing directly. -
Page 23: Upload New Alarm File
Chapter 5 - Use of the SETUP Menu 2. Sensor 2 smoke Closed 3 (T)1,(P)2 3. Sensor 3 flood Closed 3 (T)1,(P)3 4. Sensor 4 famine Closed 3 (T)1,(P)4 5. Sensor 5 pestilence Closed 3 (T)1,(P)5 6. Sensor 6 layoffs Closed 3 (T)1,(P)6 Selection? -
Page 24: Alarm Evaluator Enabled
Chapter 5 - Use of the SETUP Menu equalfour_1=lastdigit="4" greatfour=all,1,T1,A1hours greatfour_1=lastdigit>"4" lessfour=all,1,T1,A1hours lessfour_1=lastdigit<"4" notfour=all,1,T1,A1hours notfour_1=lastdigit!"4" [end] 5.4.4 - Alarm Evaluator Enabled Selecting the Menu Letter of this option enables/disables the operation of any existing alarm file loaded into the memory. 5.4.5 - Store Data Record Events Selecting the Menu Letter of this option enables/disables the storage in the Events file of ‘Data’... -
Page 25: Traps
Chapter 5 - Use of the SETUP Menu 5.5.1 - Traps Selecting the Menu Letter of this option presents a set of options to define the ‘payload’ variable which is included in all SNMP traps when sent. The current trap configuration is illustrated at the top of this menu. The default configuration is shown below. -
Page 26: System Date/Time
Chapter 5 - Use of the SETUP Menu Pager Message - In the case of an Alphanumeric pager this entry contains an optional text message which is included in the pager message whenever an alarm is sent to this pager. In the case of a numeric pager, this is the number which is transmitted as the message to the numeric pager. -
Page 27: Operational Settings
Chapter 5 - Use of the SETUP Menu 5.7.2 - Operational Settings Selecting the Menu Letter of this option presents the following submenu for setting several general operational settings of the SNMP Access Gateway. Setup: General Settings: Operational Settings A. Escape Character [27] B. -
Page 28: Chapter 6 - Pass Through Mode
Chapter 6 - Pass-Through Mode Chapter 6 - Pass Through Mode Pass-through mode may be accessed from a network connection. A user enters pass-through mode from the main menu by selecting either the ‘1’ or ‘2’ option. The ‘1’ option provides pass-through access to serial port I/O 1, and the ‘2’... - Page 29 Chapter 6 - Pass-Through Mode In pass-through access mode, each character the user inputs by network connection is passed to the serial I/O port, and each character which is received by the serial I/O port is passed through to the network connection. During this time, the data from the port is NOT processed by the event and alarm evaluator, so no alarm records are detected during this pass-through access.
-
Page 30: Chapter 7 - Console Mode
Chapter 7 - Console Mode Chapter 7 - Console Mode When the serial I/O ports are in console mode, characters which are received on one serial I/O port are sent out the other serial I/O port. This allows the SNMP Access Gateway to be placed in-line between two piece of equipment (such as a control console and a piece of equipment, hence the console mode name), and monitor the data flow between the devices for alarm conditions. -
Page 31: Chapter 8 - Management Information Base (Mib)
Chapter 8 - Management Information Base (MIB) Chapter 8 - Management Information Base (MIB) The following illustrates the SL-60 MIB in tree format. The function of each of these objects is explained in the chapter following this one. This MIB is supplied on a disk with your unit in ASN.1 format. The various object Ids are listed out with their complete prefixes omitted. - Page 32 Chapter 8 - Management Information Base (MIB) 6.2.1.1 - snmpMgrIndex 6.2.1.2 - snmpManagerIp 6.2.1.3 - snmpManagerName 6.3 - snmpTrapsAutoRepeatTime 6.4 - snmpSendTestTrap 7 - ftpsetup 7.1 - ftpAutoDelete 8 - events 8.1 - eventsControl 8.1.1 - storeDataEvents 8.1.2 - storeAlarmEvents 8.1.3 - storeResetEvents 8.1.4 - storeCommandLog 8.1.5 - storeSensorEvents...
- Page 33 Chapter 8 - Management Information Base (MIB) 9.2.1.1 - pagerTableIndex 9.2.1.2 - pagerType 9.2.1.3 - pagerPhonenumber 9.2.1.4 - pagerID 9.2.1.5 - pagerDialDelay 9.2.1.6 - pagerHangupDelay 9.2.1.7 - pagerMessage 9.2.1.8 - pagerSendId 9.2.1.9 - pagerSendReason 9.2.1.10 - pagerMaxAttempts 9.2.1.11 - pagerAttempts 9.2.1.12 - pagerAttemptDelay 9.2.1.13 - pagerRepeat 9.2.1.14 - pagerRepeatDelay...
- Page 34 Chapter 8 - Management Information Base (MIB) 11.4.1.5 - connectionsPTTimelimit 12 - alarmhistory 12.1 - actionQueue 12.1.1 - actionCount 12.1.2 - actionTable 12.1.2.1 - actionTableEntry 12.1.2.1.1 - actionTableIndex 12.1.2.1.2 - actionAcked 12.1.2.1.3 - actionReason 12.1.2.1.4 - actionReasonID 12.1.2.1.5 - actionReasonLevel 12.1.2.1.6 - actionType 12.1.2.1.7 - actionTypeID 12.1.2.1.8 - actionRepeatTime...
-
Page 35: Chapter 9 - Snmp Configuration And Control
Chapter 9 - SNMP Configuration and Control Chapter 9 - SNMP Configuration and Control The following section describes in detail the contents of the custom SNMP Access Gateway MIB, including notes about how these MIB object may be used. 9.1 - productIds Items this section... - Page 36 Chapter 9 - SNMP Configuration and Control numberPorts This integer is the number of serial ports found installed in the SNMP Access Gateway unit. the standard SNMP Access Gateway this will be 2. portSetupTable This table is used to retrieve and set the serial port settings, for the baud rate, word length and parity.
- Page 37 Chapter 9 - SNMP Configuration and Control snmpSendTestTrap When this object is set to any value, then the SNMP Access Gateway sends a ‘test’ trap by sending trap managers snmpManagerTable. This test trap may be used to assure that the proper SNMP managers are set up in smpManagerTable, that each...
- Page 38 Chapter 9 - SNMP Configuration and Control dataAlarmName This object is a text string which is the name associated with the data alarm, as defined in the alarms configuration file. dataAlarmCounter This integer current count received alarm records which match the data alarm equation corresponding to this data alarm.
- Page 39 Chapter 9 - SNMP Configuration and Control dataAlarmString This text string object contains the last data record which was received which matched the data alarm equation associated with this data alarm. Since data records may be received after a data alarm initiates actions,...
- Page 40 Chapter 9 - SNMP Configuration and Control sensorAlarmCounter This read-only object holds the number of seconds that sensor alarm been active state. For a contact closure input this counter is the number of seconds that the contact closure has been sensed in the (opened or closed) active state.
- Page 41 Chapter 9 - SNMP Configuration and Control pagerDialDelay This integer is the number of seconds that the SNMP Access Gateway waits for modem carrier after dialing the pagerPhonenumber when the pager is in alphanumeric mode, or the number of seconds the SNMP Access Gateway...
- Page 42 Chapter 9 - SNMP Configuration and Control trapAlarmName When the trapAlarmName object is set to 0, then the name associated with the alarm (sensor, data alarm) which caused the trap to be issued is not included trap alarm string. When trapAlarmName object is set to 1, then the name associated with the alarm which caused the trap to be issued is included in the trap alarm string.
- Page 43 Chapter 9 - SNMP Configuration and Control modemParity This integer controls parity modem port. Values are 1 - 7 bits, even parity, 2 - 7 bits, odd parity, and 3 - 8 bits, no parity. value of 3 would normally be used with the SNMP Access Gateway.
- Page 44 Chapter 9 - SNMP Configuration and Control connectionsAddress This object holds the IP address of the remote end of a connection. If the connection is a modem connection, this will show object 0.0.0.0. connectionsCmdActive This object shows if any command connection is active.
- Page 45 Chapter 9 - SNMP Configuration and Control historyReasonID This integer object indicates the identifier for the reason why the action was taken as shown in the actionReasonID object. historyReasonLevel This integer object indicates the alarm level for the reason why the action was taken as shown in the actionReasonLevel object.
-
Page 46: Chapter 10 - Using Ftp
A new software application may be loaded into the SNMP Access Gateway by loading a file named ‘NEWAPP’ into the SNMP Access Gateway. Only an application program file made available by RFL should ever be loaded into the SNMP Access Gateway as an application file. Other files will not properly execute, and will thus result in the SNMP Access Gateway simply entering load mode, awaiting the loading of a valid application. -
Page 47: Chapter 11 - Programming Data Alarms
Chapter 11 - Programming Data Alarms Chapter 11 - Programming Data Alarms Data Alarms (or Alarm Formulas) are formulas set up to define what record(s) constitute an alarm condition. Alarm Formulas can be defined to activate upon the receipt of a single record, or only after X number of matching records have been received within X duration. -
Page 48: Field Section
Chapter 11 - Programming Data Alarms areacode=64,3 localprefix=63,3 anyphrase=*,10 [macros] Outgoing= Incoming=intrunk=”DN====” LongDistance=onefield=”1” [dataalarms] TollFraud1=all,1,P12B1S3C1256,2Hours TollFraud1_1= areacode=”900” or (longdistance=FALSE and localprefix=”976”) TollFraud2=12,20,T12,1Hours TollFraud2_1=Outgoing=FALSE and duration<”00:00:01” [end] This sample alarm text file shows the definition of Fields, Macros, and Data Alarms. In all cases, the above text entry is not case sensitive, except for the literal text specified for record matching (if you say xyz=”cat”... -
Page 49: Macro Section
Chapter 11 - Programming Data Alarms 11.7 - Macro Section Macros are similar to alarm formulas, in that they are designed to test conditions against an incoming record. Before the evaluation of any alarm formulas, all defined macros are evaluated against the incoming record, resulting in a TRUE or FALSE evaluation of each macro. -
Page 50: End Section
Chapter 11 - Programming Data Alarms - Only Port 1 ports=1 ports=12 - Ports 1 and 2 - Ports 1 and 2 ports=all threshold - This entry specifies how many matching records must be received before the alarm action is initiated. -
Page 51: Chapter 12 - Use Of The Events Command
Chapter 12 - Use of the EVENTS command Chapter 12 - Use of the EVENTS Command The EVENTS command enters a menu which allows you to view and control matters relating to existing or past Event (Alarm) conditions. Within this section you can view the current condition of sensor inputs and serial alarm parameters, records of all past events, and view and clear currently outstanding alarm conditions. -
Page 52: Acknowledge Active Alarms
Chapter 12 - Use of the EVENTS command 12.4 - Acknowledge Active Alarms Selecting the Menu Letter of this option acknowledges any and all alarms currently in the queue for alarm notification. These are alarms for which the associated alarm actions are in the Action Queue for handling, whether in progress or not. -
Page 53: Clear Action History
Chapter 12 - Use of the EVENTS command 01: 04/08 12:01 equalfour Trap 02: 04/08 12:01 greatfour Trap 03: 04/08 12:00 greatfour Pager OK 04: 04/08 12:00 equalfour Buzzer 05: 04/08 11:59 greatfour Trap 06: 04/08 11:59 greatfour Trap 07: 04/08 11:59 equalfour Trap... -
Page 54: Chapter 13 - Resetting The Snmp Access Gateway
Chapter 13 - Resetting the SNMP Acess Gateway Chapter 13 - Resetting the SNMP Access Gateway There are several methods for resetting the SNMP Access Gateway to various degrees. The RST (RESET) button is located on the front panel. The RST button “reboots” the SNMP Access Gateway when you press the button for three seconds. -
Page 55: Chapter 14 - Application Notes
SNMP Access Gateway. This section may be frequently updated as new articles are written covering various subjects. Inquire with RFL Technical Support regarding ensuring you have all current Application Notes for use of the SNMP Access Gateway. -
Page 56: App Note A. Use Of Ip Restrictions
App Note A: Use of IP Restrictions App Note A. Use of IP Restrictions IP Restrictions can be established to limit which IP Addresses are allowed access to the SNMP Access Gateway. The IP Restrictions menu can be found in the Networking section of the SETUP menu. By using this menu you can enter in IP addresses into a table to specify which addresses are allowed access and which addresses are denied access to the unit. -
Page 57: App Note B: Monitoring Rs232 Levels As Alarms
App Note B: Monitoring RS232 Levels as Alarms App Note B: Monitoring RS232 Levels as Alarms The following diagram shows the circuit design of the Sensor Inputs. This design allows these inputs to be used either as a dry contact closure input, or as an analog input. 100K 4.7K 100pF... -
Page 58: App Note C: Imux Trap Messages
App Note C: IMUX TRAP Messages App Note C: IMUX TRAP messages C.1 Trap Format The gateway has been designed to work specifically with all versions of CM-4 software. RS232 trap messages are created by the IMUX and sent to the SAG. This allows the gateway to generate SNMP traps as a result of a message from the IMUX. -
Page 59: Trap Codes
App Note C: IMUX TRAP Messages C.2 Trap Codes The table provided below lists all of the possible traps from the system.. Alarm numbering begins at 100 and is structured as follows: SOURCE DESCRIPTION O/VIEW VARBIND Variable Value Range STATUS Interface ALERT AT CHANNEL CARD # CRITICAL... -
Page 60: Chapter 15 - Warranty Information
Except where noted, all RFL Electronics Inc. products come with a one-year warranty from date of delivery for replacement of any part which fails during normal operation. RFL will repair or, at its option, replace components that prove to be defective at no cost to the Customer. -
Page 61: Chapter 16 - Canadian Dept. Of Comm. Notice
Chapter 16 - - Canadian Dept. of Comm. Notice Chapter 16 - Canadian Dept. of Comm. Notice NOTICE: The Canadian Department of Communications Label identifies certified equipment. This certification means that the equipment meets certain telecommunications network protective, operational and safety requirements. The Department does not guarantee the equipment will operate to the user’s satisfaction. - Page 62 Chapter 16 - - Canadian Dept. of Comm. Notice Avertissement. - L’utilisateur ne doit pas tenter de faire ces raccordements lui-meme; il doit avior recours a un service d’inspection des installations électriques, ou a electricien, selon le cas. L’indice de charge (IC) assigné a chaque dispositif terminal indique, pour éviter toute surcharge, le pourcentage de la charge totale qui peut etre raccodée a un circuit téléphonique bouclé...
Need help?
Do you have a question about the IMUX 2000 and is the answer not in the manual?
Questions and answers