Advertisement
Quick Links
• READ ALL INSTRUCTIONS BEFORE ASSEMBLY AND USE OF GATE.
• KEEP INSTRUCTIONS FOR FUTURE USE.
www.regalo-baby.com
Regalo International, LLC.
3200 Corporate Center Drive, Suite 100 / Burnsville, MN 55306, USA
866.272.5274 (U.S. only) or 952.435.1080
Made in China
Play Yard & Safety Gate
OWNER'S MANUAL MODEL:
2 in 1
1360, 1360DS
Advertisement

Related Manuals for Regalo 1360

Summary of Contents for Regalo 1360
- Page 1 2 in 1 Play Yard & Safety Gate 1360, 1360DS OWNER’S MANUAL MODEL: • READ ALL INSTRUCTIONS BEFORE ASSEMBLY AND USE OF GATE. • KEEP INSTRUCTIONS FOR FUTURE USE. www.regalo-baby.com Regalo International, LLC. 3200 Corporate Center Drive, Suite 100 / Burnsville, MN 55306, USA 866.272.5274 (U.S.
-
Page 2: Before Using Product
Before Using Product Read and follow all instructions carefully to ensure that your gate is properly installed. Improper installation could result in the gate becoming unstable or dislodged from the doorway. Always make sure the gate panels are securely attached before using. The safety of your child is your responsibility. Please keep these instructions for your reference. - Page 3 WARNING • To prevent serious injury or death, securely install gate or enclosure and use according to manufacturer's instructions. • Children have died or been seriously injured when gates are not securely installed. ALWAYS install and use gate/enclosures as directed using all required parts.
-
Page 4: Before Assembly
PROPRIETARY AND CONFIDENTIAL MOUNT, WALL, DIMENSIONS & TOLERANCES PER ASME Y14.5-2009 THE INFORMATION CONTAINED IN THIS DRAWING UNITS : INCHES IS THE SOLE PROPERTY OF REGALO INTERNATIONAL .XXX : ±.005 GATE SIDE / CARLSON PET PRODUCTS. ANY REPRODUCTION .XX : ±.01... - Page 5 Option A: Installing Your Gate Between Two Walls STEP 1 Unfold the gate frame at each pivoting joint by loosening each cap. STEP 2 Determine the size of your opening. If you need to remove panels from your gate simply unhook the upper and lower knobs between the panels. If you are adding panels, hook together opposite panel ends;...
-
Page 6: Mounting Locations
PROPRIETARY AND CONFIDENTIAL DIMENSIONS & TOLERANCES PER ASME Y14.5-2009 THE INFORMATION CONTAINED IN THIS DRAWING UNITS : INCHES IS THE SOLE PROPERTY OF REGALO INTERNATIONAL .XXX : ±.005 / CARLSON PET PRODUCTS. ANY REPRODUCTION .XX : ±.01 IN PART OR AS A WHOLE WITHOUT THE WRITTEN .X : ±.1... - Page 7 STEP 5 Use a Phillips/cross-head screwdriver to fix the wall mounting bracket to the wall. Repeat for all four brackets. STEP 6 Rotate wall mounting bracket to the locked position. Repeat step for remaining wall mounting brackets. I F I &...
- Page 8 PLAST DIMENSIONS & TOLERANCES PER ASME Y14.5-2009 THE INFORMATION CONTAINED IN THIS DRAWING UNITS : INCHES IS THE SOLE PROPERTY OF REGALO INTERNATIONAL .XXX : ±.005 / CARLSON PET PRODUCTS. ANY REPRODUCTION .XX : ±.01 IN PART OR AS A WHOLE WITHOUT THE WRITTEN .X : ±.1...
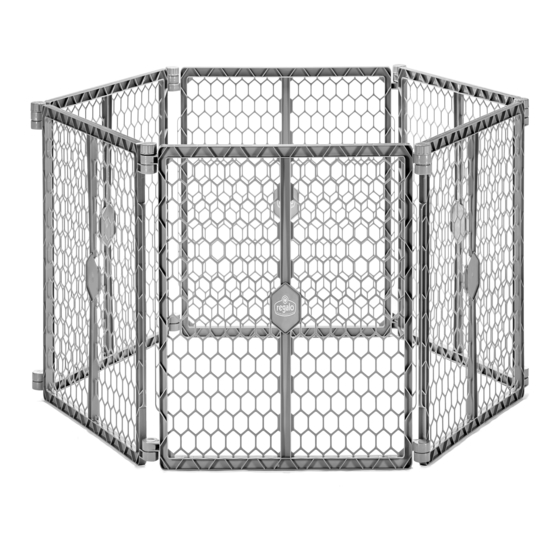
- Page 9 Option B: Installing Your Gate as a Freestanding Enclosure STEP 1 Unfold the gate frame at each pivoting joint by loosening each cap. STEP 2 Position the play yard into your desired configuration, then join the free ends of the play yard together at the plastic joints. English...
- Page 10 STEP 3 Tighten the locking knobs to secure your play yard into your desired configuration. NOTE: When adding or removing additional panel units to the configuration, panels must be added or subtracted in sets of two for the freestanding enclosure to function properly. English...
-
Page 11: Care And Maintenance
Regalo International, LLC, will replace or repair it at Regalo’s option. PROOF OF PURCHASE REQUIRED. - Page 12 Regalo International, LLC. 3200 Corporate Center Drive, Suite 100 Burnsville, MN 55306, USA 866.272.5274 (U.S. only) or 952.435.1080 20180427ET...
Need help?
Do you have a question about the 1360 and is the answer not in the manual?
Questions and answers