Table of Contents
Advertisement
Quick Links
Advertisement
Table of Contents

Related Manuals for Castle group Sonus Range GA116L


Summary of Contents for Castle group Sonus Range GA116L
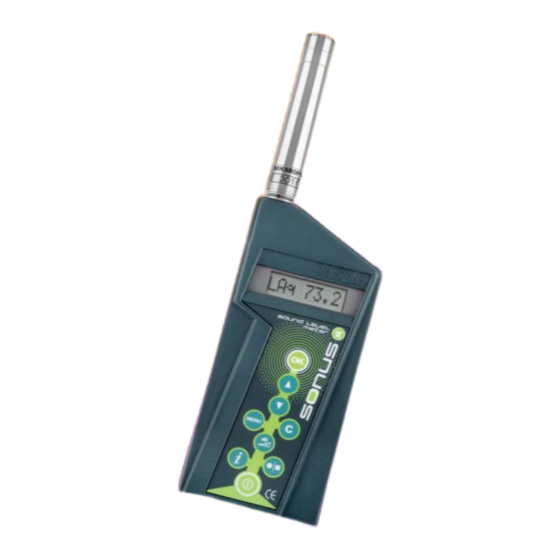
- Page 4 Castle Sonus Range Sound Level Meter & Dose Meter Operating Manual www.castlegroup.co.uk...
- Page 5 Scarborough North Yorkshire YO11 3UZ, UK Copyright © Castle Group Ltd 2012 All rights reserved. No part of this publication may be reproduced, stored in a retrieval system or transmitted, in any form or by any means, electronic, mechanical, photocopying, recording or otherwise, without the prior permission of the copyright holder.
- Page 6 Competent Persons training course for the Noise at Work Regulations. You can visit www.castletrainingacademy.com to find out more. Castle Group has become the leading supplier of solutions for health and safety, environmental compliance and plant maintenance and monitoring, with an ever expanding offer comprising equipment for sale or rent, residential or in-house training courses, consultancy services and equipment calibration.
- Page 7 To ensure continued precision performance of your instrument have it checked and serviced at regular intervals. Contacting Castle Group This manual contains complete operating instructions for the Castle Sonus Meter, read it carefully and you will quickly become familiar with your instrument and its operation.
-
Page 8: Table Of Contents
Contents CHAPTER 1 ..................1 Introduction ............................1 Sonus Variations ........................2 Sonus L............................2 Sonus E ............................. 3 Sonus I ............................3 Sonus B ............................. 3 CHAPTER 2 ..................4 Microphone ............................4 Microphone Types ........................4 Free Field ..........................4 Pressure ........................... - Page 9 Keypad Layout – GA257L & GA257B ................. 17 Powering Your Sonus Meter ..................... 18 Switching Your Sonus Meter On/Off ................19 CHAPTER 5 ..................20 Main Menu Navigation ....................... 20 Models GA116I, GA216I, GA116B, GA216B, GA257B ......21 Calibration [CAL <OK] ....................21 Exposure Time [ET <OK] ...................
- Page 10 Equivalent Continuous Sound Level ................61 Maximum Sound Pressure Level ................62 Peak Level ..........................62 Daily Personal Noise Exposure Level ............... 63 Noise Dose ........................... 64 Noise Dose per Hour ...................... 65 Pascal Squared Hours ....................65 Sound Exposure Level ..................... 66 Percentiles ...........................
- Page 11 Microphone [GA116I, GA116L] ..................81 Microphone [GA116E] ......................82 Microphone [GA216I, GA216B, GA216L, GA257B, GA257L] ...... 83 Typical Microphone Self Generated Noise Level ............. 84 Maximum SPL at the Microphone for No Damage ..........84 Calibration Reference Conditions ................... 84 Display ............................
- Page 12 Dose ............................101 Dynamic Range ........................101 Equivalent Continuous Sound Level (Leq) ..............102 Exchange Rate ........................102 Fast Fourier Transform (FFT) ..................104 Feedback ..........................104 Frequency (Hz) ........................104 Frequency Weighted Filter ....................105 Frequency Band Filter ......................108 Hearing Protection ......................
- Page 13 Table of Figures Figure 1 – Frequency Weighting Curves .................. 9 Figure 2 – Keypad Layout (Sound Meter) ................16 Figure 3 – Keypad Layout (Dose Meter) ................17...
- Page 14 Castle Group Ltd If you want to keep up to date with the latest in health and safety, you should attend a Castle FREE seminar. These are run around the country and cover a wide range of topics. Packed with the latest information and...
- Page 15 HEALTH AND SAFETY Compliance with legislation and mitigation of claims is really what health and safety is about for most companies. That is how we are set up to help you; Our training courses are all geared to that end as is any equipment we might supply or rent to you.
- Page 16 MAINTENANCE AND DIAGNOSTICS Production plant needs maintenance and if this can be done only when needed, then cost savings can be huge. Condition monitoring offers the ability carry out predictive maintenance so shut-down is only when you plan it and only when it’s needed. It is very simple to work out if this is the right approach for your business, so give us a call on 01723 584250 so we find out how much you could save! •...
- Page 17 In-house and Bespoke Training The benefits of in-house training can be extensive. Training can be tailored to your company, the timing can be made to suit your needs, you get to keep your staff on-site and you can train many people at one go! You can pick any of our standard courses, a shortened version as an awareness session or a toolbox talk, or you can design your own course covering a large range of topics.
- Page 18 Equipment Types Covered • Air quality meters • Air sampling pumps • Air sampling calibrators • Anemometers • Audiometers • Balances/Scales • Barometers • Dosemeters • Electrical test equipment • Force meters • Gas Detectors • Hygrometers • Light meters •...
- Page 19 Castle Rent Rental is a great way to have the use of measurement equipment without having to own it – especially is capital budgets are tight or it tax is an issue. If you need a short term solution, additional equipment to boost your capabilities or if contract-based tax deduction is important, then Rental could well be the way to go.
-
Page 20: Chapter 1
Chapter 1 Introduction Thank you for purchasing your product from Castle Group Ltd. The Sonus range of pocket sound level meters brings simplicity and power to the worlds of Noise at Work and Environmental sound monitoring. From a basic sound pressure meter to full data logging, combined sound and dose-meter, the range of systems covers a wide diversity of applications. -
Page 21: Sonus Variations
Sonus Variations Sonus L GA116L – Class 1, Ln’s, User Selectable Modes GA216L – Class 2, Ln’s, User Selectable Modes Available in either class 1 or class 2, this top of the range model is a Noise at Work and Environmental Sound Meter boasting a combined Integrating Sound Level Meter and Dose Meter with full data logging capability. -
Page 22: Sonus E
Sonus E GA116E – Class 1, Ln’s, Available in class 1 only, this top of the range model boasts an ultra low noise floor allowing extremely quiet noise to be measured and recorded. This model also features dual measurement capability meaning two versions of applicable parameters can be measured simultaneously. -
Page 23: Chapter 2
Chapter 2 Microphone Measurement microphones by the very nature of their manufacture are precision components that are easily damaged through incorrect use. Great care must be taken when using the instrument to ensure the longevity of the microphone. Please note that depending on your instrument model, it may be supplied with a protective white plastic cap covering the end of the microphone. -
Page 24: Microphone Sensitivity
Any change in this measurement chain will require a new certifiable calibration. Castle Group Ltd offers a complete calibration service offering either a full UKAS calibration or a standard NPL traceable calibration which can be supplied with or without a test report. -
Page 25: Pre-Amplifier Removal And Fitting
Pre-Amplifier Removal and Fitting Models GA116L, GA116E, GA116I & GA216L-P To attach the pre-amplifier, position the orientation key on the pre-amplifier which is identified with a RED mark, with the RED identification mark on the instrument and gently push the pre-amplifier into the connector. To remove, gently pull the pre-amplifier stem away from the instrument body. -
Page 26: Chapter 3
Chapter 3 Measuring Sound Always calibrate your instrument prior to, and after taking measurements using a known sound source such as the Castle GA607 sound level calibrator. The type of microphone supplied with your instrument is Free Field and requires an incidence angle of 0°, therefore whilst measuring always point your Sonus Pocket Meter directly towards the noise source being measured. -
Page 27: Reflections
Reflections The sound level meter operator and the sound level meter itself can interfere with the measurements being made, reflecting the noise signal. The instrument case for the Sonus range of sound level meters has therefore been designed to minimize reflections whilst also being of rugged construction. To minimize reflections from the operator hold the sound level meter at arm’s length, mount the sound meter on a suitable tripod (adapter required) or use a microphone extension cable (if applicable). -
Page 28: Frequency Weighting Filters
Frequency Weighting Filters Frequency Weightings are where the Sound Pressure Level (SPL) is modified by use of filtering. All Sonus Pocket Meters use electronic frequency weighting filters between the standardised frequencies of 10Hz and 20,000Hz. Depending on your instrument type (see Technical Specifications for further details), the following standardised frequency weightings are available: - ‘A’... -
Page 29: Overload And Under Range Conditions
Overload and Under Range Conditions Overload Condition An overload condition occurs when the peak signal starts to exceed the signal handling capability of the pre-amplifier circuitry. If the noise source exceeds the linear operating range of the range selected by 0.5dB then an overload condition occurs and an overload indicator is displayed on your meter. -
Page 30: Under Range Condition
Under Range Condition An under range condition occurs when the noise source is more than 0.1dB below the bottom of the range selected, at which point an under range indicator will flash on the display of your meter. In such circumstances it is highly recommended to change to a higher range with a higher sensitivity (i.e. -
Page 31: Measuring Ranges
Measuring Ranges The Sonus instrument range has been specifically designed to utilise only three measuring ranges. The three available ranges ensure complete accuracy throughout the entire dynamic range whilst ensuring the instrument remains low power to maximise operational life from one 9V (PP3) battery. The measuring display ranges available are as follows: - Model 116L (dB) Model 216L (dB) -
Page 32: Lock Keypad - Ga257B And Ga257L
Lock Keypad – GA257B and GA257L The GA257B and GA257L instruments operate on a fixed range and therefore it is not possible to change the measuring range. The range key described on the previous page is therefore not needed on these models and is therefore fitted with a dedicated instrument Lock Key. -
Page 33: Chapter 4
Chapter 4 Getting Started All models of the Sonus range of instruments have two modes of operation referred to as: - • Stop Mode • Record Mode Whilst the instrument is in Record Mode the noise activity is analysed and all parameters available on your instrument are calculated. -
Page 34: All Models
All Models Changing the settings of your instrument and performing a calibration are all found under the Main Menu. MENU To activate the Main Menu press the Key on your instruments keypad. Use the Up and Down Arrow Keys to scroll through the available options. -
Page 35: Keypad Layout - Ga116, Ga216 All Models
Keypad Layout – GA116, GA216 All Models Up Arrow Down Arrow Cancel Main Menu Measuring Range Stop / Record Information Power On / Off Figure 2 – Keypad Layout (Sound Meter) Page 16... -
Page 36: Keypad Layout - Ga257L & Ga257B
Keypad Layout – GA257L & GA257B Up Arrow Down Arrow Cancel Main Menu Lock Keypad Stop / Record Information Power On / Off Figure 3 – Keypad Layout (Dose Meter) Page 17... -
Page 37: Powering Your Sonus Meter
Powering Your Sonus Meter Your Sonus meter can be powered from either one 9V (PP3) battery and Models ‘L’ and ‘E’ instruments can also be powered using an external 12V DC Power Supply which can be purchased separately if required (PSU3:SONUS). The battery compartment is located on the bottom left hand side of your instrument. -
Page 38: Switching Your Sonus Meter On/Off
Switching Your Sonus Meter On/Off To turn on your instrument press and hold the Power On/Off key approximately one second. Your meter will display the start-up screen and initialise any saved settings. Once the start-up sequence is complete the instrument is placed in Stop Mode and the parameter sound pressure level is displayed. -
Page 39: Chapter 5
Chapter 5 Main Menu Navigation MENU The Main Menu is activated by pressing the MENU Key once. MENU Pressing the Key again will return the instrument to the last parameter display screen unless multiple screens have been accessed in which case the sound pressure level parameter screen will be displayed. -
Page 40: Models Ga116I, Ga216I, Ga116B, Ga216B, Ga257B
Models GA116I, GA216I, GA116B, GA216B, GA257B Display Description Instrument CAL <OK Calibrate Instrument ET <OK Set Exposure Time GA116I/GA216I/GA257B GA116I/GA116B WTG <OK Set Frequency & Time Weightings EXCH <OK Set Exchange Rate GA116I/GA257B CRIT <OK Set Criterion Level GA116I/GA257B THR <OK Set Threshold Level GA116I/GA257B LOCK <OK... - Page 41 The calibration will be performed at the selected level e.g. 94.0dB but may be changed in 0.1 or 1 dB steps using the following keys: - Calibration Level Adjustment (dB) +0.1 -0.1 -1.0 / +1.0 Ensure the calibrator is attached to the microphone by gently inserting the microphone into the cavity of the calibrator.
-
Page 42: Exposure Time [Et
Exposure Time [ET <OK] It is possible to select alternative exposures of an employee in hours and minutes. Exposure Time is used in the calculation of Lep,d. If a value of 00:00:00 is entered for ET then the Measurement Run Time period is used in the calculation instead. -
Page 43: Exchange Rate [Exch
Exchange Rate [EXCH <OK] In the MENU display screen use the arrow keys as required until the following is displayed: - EXCH <OK Press and the instrument will display the currently selected Exchange Rate, indicated with an asterisk *. 3dB * Scroll through the available options using the ... -
Page 44: Criterion [Crit
Criterion [CRIT <OK] In the MENU display screen use the arrow keys as required until the following is displayed: - CRIT <OK Press and the instrument will display the currently selected Criterion Level, indicated with an asterisk *. 85dB * Scroll through the available options using the ... -
Page 45: Threshold [Thr
Threshold [THR <OK] It is possible to select a threshold level for the lower limit of noise levels which are used to measure dose. In the MENU display screen use the arrow keys as required until the following is displayed: - THR <OK Press and the instrument will display the currently selected Threshold... -
Page 46: Display Contrast [Cont
Display Contrast [CONT <OK] Select to adjust the contrast level of your instrument. In the MENU display screen use the arrow keys as required until the following is displayed: - CONT <OK Press and the instrument will display the following or to cancel and return to the Sound Pressure Level display screen: - CONT ADJ... -
Page 47: Models Ga116L, Ga216L, Ga116E, Ga257L
Models GA116L, GA216L, GA116E, GA257L Display Description Instrument Calibrate Instrument SETUP Change Instrument Settings MODE Set Operating User Mode GA116L/GA216L LOGS View Saved Log DELETE Delete Saved Log DEFAULTS Reset to Default Settings LOCK Lock Instrument Keypad GA116L/GA216L/GA116E Calibration [CAL] It is recommended that the instrument’s calibration is checked and adjusted where necessary with a calibrator before readings being taken. - Page 48 Calibration Level Adjustment (dB) +0.1 -0.1 -1.0 / +1.0 Ensure the calibrator is attached to the microphone by gently inserting the microphone into the cavity of the calibrator. A certain amount of resistance should be felt whilst inserting the microphone as the o-ring seal on the calibrator forms a seal around the microphone.
-
Page 49: Instrument Settings [Setup]
Instrument Settings [SETUP] In the menu display screen use the arrow keys as required until the following is displayed: - SETUP Press to enter the SETUP sub menu page. Depending on your instrument model, the following Setup options are available: - Instruments GA116L, GA216L, GA116E, GA257L Display Description... -
Page 50: Frequency Weighting [Freq Wgt]
Frequency Weighting [FREQ WGT] Om model ‘L’ instruments the frequency weighting of the instrument can only be changed if the instrument has the User Mode set to ALL. See User Mode for further details. Channel 1 is always ON and fixed to ‘A’ Weighting. Channel 2 can either be ‘A’, ‘C’... -
Page 51: Time Weighting [Time Wgt]
Time Weighting [TIME WGT] On Model ‘L’ instruments the time weighting of the instrument can only be changed if the instrument has the User Mode set to ALL. See User Mode for further details. Channel 1 is always ON and can be either Slow, Fast or Impulse time weighted. Channel 2 can also independently be either Slow, Fast or Impulse time weighted and can be switched OFF either by User Mode selection or selecting only ‘A’... - Page 52 If only Channel 1 is selected then only the following Time Weighting options will be available: - Display Description Channel 1 = FAST Time Weighting Channel 1 = SLOW Time Weighting Channel 1 = IMPULSE Time Weighting Press to confirm a change and the instrument will briefly display: - DONE Or press to cancel and return to the Sound Pressure Level display screen.
-
Page 53: Recording Interval Period [Interval]
Recording Interval Period [INTERVAL] If an interval period is selected then the instrument will record data at each interval period selected from the log start time. Example:- If a log interval of 1 second is selected and the start time of the log is 10:00:00 then the instrument will log data at 1 second interval periods from the start time: - 10:00:01... - Page 54 Scroll through the available Interval Periods using the arrow keys: - Display Description Intervals OFF – Cumulative Data Only 1 second interval period * 10 second interval period * 1 minute interval period * 5 minute interval period 10 minute interval period 15 minute interval period 30 minute interval period...
-
Page 55: Display Contrast [Contrast]
Display Contrast [CONTRAST] Select to adjust the contrast level of your instrument. The selected contrast level is remembered on model ‘L’ and ‘E’ instruments. In the SETUP display screen use the arrow keys as required until the following is displayed: - CONTRAST Press and the instrument will display the following or... -
Page 56: Percentiles [User Ln]
Percentiles [USER Ln] Model ‘L’ and ‘E’ instruments have one user selectable percentile level and two fixed percentile levels. Percentile is commonly abbreviated to Ln where n denotes the actual dB (A Weighted) level exceeded n% of the time, example L99. -
Page 57: Criterion Level [Crit]
Criterion Level [CRIT] In the SETUP display screen use the arrow keys as required until the following is displayed: - CRIT Press and the instrument will display the currently selected Criterion Level, indicated with an asterisk *. 85dB* Scroll through the available options using the ... -
Page 58: Threshold [Thr]
Threshold [THR] In the SETUP display screen use the arrow keys as required until the following is displayed: - Press and the instrument will display the currently selected Threshold Level, indicated with an asterisk *. -10dB * Scroll through the available options using the arrow keys: - Display -10dB -5dB... -
Page 59: Exchange Rate [Exch]
Exchange Rate [EXCH] In the SETUP display screen use the arrow keys as required until the following is displayed: - EXCH Press and the instrument will display the currently selected Exchange Rate, indicated with an asterisk *. 3dB* Scroll through the available options using the ... -
Page 60: Record Timer [Timer]
Record Timer [TIMER] The Record Timer is a user selectable time that will govern the recording length after a recording has started. For example if the Record Timer is set to 00:01:00 (hh:mm:ss) then the instrument will automatically end the recording after a period of 1 minute. -
Page 61: Current Date [Date]
Current Date [DATE] In the SETUP display screen use the arrow keys as required until the following is displayed: - DATE Press and the instrument will display the following date entry screen using the following format (dd:mm:yy): - 25:06:11 The adjustable figure flashes, this always starts with the DAY figure. -
Page 62: Real Time Clock [Time]
Real Time Clock [TIME] In the SETUP display screen use the arrow keys as required until the following is displayed: - TIME Press and the instrument will display the following time entry screen using the following 24 hour format (hh:mm:ss): - 18:05:09 The adjustable figure flashes, this always starts with the HOUR figure. -
Page 63: User Mode [Mode]
User Mode [MODE] The option to set a User Mode is only available on GA116L and GA216L instruments. Selecting a User Mode is a quick and straightforward way to correctly set your instrument up for taking measurements. Parameters are only displayed and recorded where required. -
Page 64: View Saved Logs [Logs]
View Saved Logs [LOGS] Select this option to view saved logs on your instruments display. Only cumulative information is available to view on the instrument, if you wish to view this and recorded interval data then download the data via a USB port into the supplied software dBdataPro-LITE or dBdataPro if registered. -
Page 65: Delete Saved Logs [Delete]
Delete Saved Logs [DELETE] This option is only available if the instrument has saved logs. Take extreme caution when deleting logs as they cannot be recovered. In the MENU display screen use the arrow keys as required until the following is displayed: - DELETE Press... -
Page 66: Set Instrument Defaults [Defaults]
Set Instrument Defaults [DEFAULTS] In the MENU display screen use the arrow keys as required until the following is displayed: - DEFAULTS Press and the instrument displays the followings: - CONFIRM? Press to confirm or to cancel and return to the parameter display screen. -
Page 67: Keypad Lock [Lock]
Keypad Lock [LOCK] In the MENU display screen use the arrow keys as required until the following is displayed: - LOCK Press and the following is displayed: - LOCK? Press to confirm, the instrument is placed in Lock mode and the instrument displays the battery status. -
Page 68: Chapter 6
Chapter 6 Stop / Record Mode All models of the Sonus range of instruments have two modes of operation referred to as: - • Stop Mode • Record Mode Whilst the instrument is in Record mode the noise activity is analysed and all parameters available on your instrument are calculated. -
Page 69: Model 'L' & 'E' Instruments
Model ‘L’ & ‘E’ Instruments On ‘L’ & ‘E’ model instruments whilst in Stop mode only the parameter name and value are displayed. To enter Record mode press the STOP / RECORD Key on your instruments keypad and the following is briefly displayed: - REC MODE Data is automatically reset when a recording begins. -
Page 70: All Models
All Models On all instruments in either Stop or Record mode it is possible to quickly view information and settings of your instrument. Press the key once to access the information screen. Use the or arrow keys to scroll through the available list. Pressing the key again returns to the previous screen. -
Page 71: Model 'L' Instruments - Information Screen
Model ‘L’ Instruments – Information Screen Display Description Instrument BAT Battery capacity remaining MODE:ALL Indicates the current User Mode GA116L/GA216L Show the Frequency and Time CH1: A,F Weightings for Channel 1 Show the Frequency and Time Weightings for Channel 2 CH2: C,S (Can be OFF and User Mode dependent) -
Page 72: Model 'E' Instruments - Information Screen
Model ‘E’ Instruments – Information Screen Display Description BAT Battery capacity remaining CH1: A,F Show the Frequency and Time Weightings for Channel 1 Show the Frequency and Time Weightings for Channel 2 CH2: C,F (Can be OFF) Show the User Selectable Percentile Level INT:OFF Show the Selected Recording Interval Period TMR: OFF... -
Page 73: Reset Data
Reset Data On all instruments it is possible to manually reset all current parameter data and status flags. When the instrument is first switched on all data is automatically reset. Models ‘I’ & ‘B’ Whilst in Stop or Record mode, press the key to display the following: - CONFIRM? Press... -
Page 74: Chapter 7
Chapter 7 Parameters On all instruments whilst in Stop or Record mode it is possible to change the parameter display screen. Scroll through the available parameter screens using the arrow keys: - Available Parameters - Models ‘I’ & ‘B’ GA116I GA216I Sound Pressure... - Page 75 The table below is a breakdown of all the possible display parameters with a brief description. Please see the previous tables to determine which parameters your instrument displays. Display Description Frequency and Time Weighted Sound Pressure Level. LAF = A Weighted, Fast LAF 93.7 LCF = C Weighted, Fast LAS = A Weighted, Slow...
-
Page 76: Available Parameters - Model 'L
Available Parameters - Model ‘L’ Parameter Instrument Sound Pressure - Channel 1 Sound Pressure - Channel 2 (Can be OFF and User mode dependent) Leq - Channel 1 Leq - Channel 2 (Can be OFF and User mode dependent) GA116L / GA216L Max rms Level - Channel 1 (User mode dependent) GA116L / GA216L... - Page 77 The following table is a breakdown of all the possible display parameters with a brief description. Please see the previous tables to determine which parameters your instrument displays. Display Description Frequency and Time Weighted Sound Pressure Level. LAF = A Weighted, Fast LAS = A Weighted, Slow LAI = A Weighted, Impulse LCF = C Weighted, Fast...
-
Page 78: Available Parameters - Model 'E
Available Parameters - Model ‘E’ Parameter Sound Pressure - Channel 1 Sound Pressure - Channel 2 Leq - Channel 1 Leq - Channel 2 Max rms Level - Channel 1 Max rms Level - Channel 2 Peak Level - Channel 2 Lep,d Dose Dose per Hour... - Page 79 The following table is a breakdown of all the possible display parameters with a brief description. Please see the previous tables to determine which parameters your instrument displays. Display Description Frequency and Time Weighted Sound Pressure Level. LAF = A Weighted, Fast LAS = A Weighted, Slow LAI = A Weighted, Impulse LCF = C Weighted, Fast...
-
Page 80: Parameter Explanations
Parameter Explanations Below are brief descriptions of the parameters available on all Sonus sound level instruments. Refer to the glossary for more information if required. Sound Pressure Level The instantaneous Time and Frequency weighted rms sound pressure level in decibels. Depending on the instrument model the Time and Frequency Weighting may both be changed. -
Page 81: Maximum Sound Pressure Level
The parameter Leq with applied ‘A’ weighting is essential for Noise at Work assessments and many other applications. An example screen display may be: - LAq 74.1 Frequency Weighting Maximum Sound Pressure Level This is maximum sound pressure level in decibels measured over the recording period. -
Page 82: Daily Personal Noise Exposure Level
Daily Personal Noise Exposure Level This is more commonly known as Lep,d or Lex and is expressed in decibels. The Lep,d represents the total noise received by an employee over the working day and is therefore not only a function of the noise level but also of the time the employee is exposed to it. -
Page 83: Noise Dose
Noise Dose This is more commonly known as Dose and is expressed as a percentage. The Noise Dose represents the total noise received by an employee over the working day and is therefore not only a function of the noise level but also of the time the employee is exposed to it. -
Page 84: Noise Dose Per Hour
Other countries may use different Criterion levels and Exchange Rate values for their legislation. The Threshold is the sound level at below which the Dose is not accumulated. The threshold level is determined by ( Criterion – Selected Threshold value). Therefore if the criterion is 85 and the selected threshold value is -10 then Dose is only accumulated from noise levels greater than 85 - 10 or 75 decibels. -
Page 85: Sound Exposure Level
Sound Exposure Level This is more commonly known as LAe or previously SEL and is expressed in decibels. It is the sum of the ‘A’ weighted sound exposure over the recording period but normalised to one second. It is very useful for many applications including noise events such as an airplane fly over a train pass by and many other environmental applications. -
Page 86: Chapter 8
Chapter 8 Downloading Saved Recordings Models ‘L’ and ‘E’ As standard all model ‘L’ and ‘E’ instruments are shipped with Castle’s noise analysis software dBdataPro – LITE. The full version of the software is available by purchasing a license key, consult your software user manual or contact Castle for further details. -
Page 87: Chapter 9
Chapter 9 Accessories Available Accessories GA607 Dual Level Calibrator (Class 1) GA601 Single Level Calibrator (Class 2) PC007 dBdataPro Noise Analysis Software ZL1107-02 USB Download Cable (1.8m)* KA020 Weatherproof System* MW402 Weatherproof Microphone Housing* PSU3:SONUS Power Supply* ZL1094-01 Microphone Extension Cable (1m) ZL1064-01 AC Output Cable (1m)* KG205... -
Page 88: Chapter 10
Chapter 10 Technical Specification The individual characteristic applies to each instrument unless specifically worded otherwise. Instrument Standards GA116I, GA116L IEC 61672-1 : 2002 Class 1 Group X BS EN 61672-1 : 2003 Class 1 Group X IEC 61252 : 1993 BS EN 61252 : 1997 + A1:2001 GA116E IEC 61672-1 : 2002 Class 1 Group X... -
Page 89: Measurement Parameters
Measurement Parameters GA116I Lp, Leq, Lmax, Cpeak, LE, Pa h, Lep,d, Noise Dose, Noise Dose Per Hour, Measurement Run Time, Overload GA116L Lp, Leq, Lmax, A Peak, Cpeak, Zpeak, LE, Pa h, Lep,d, Noise Dose, Noise Dose Per Hour, L10, L90, L(user), Measurement Run Time, Overload, Interval Duration GA116E Lp, Leq, Lmax, Apeak, Cpeak, Zpeak, LE, L10, L90, L(user), Measurement... -
Page 90: Time Weighting
Time Weighting GA116I SLOW and FAST according to IEC 61672-1 Class 1 GA116L, GA116E SLOW, FAST and IMPULSE according to IEC 61672-1 Class 1 GA216I, GA216B SLOW and FAST according to IEC 61672-1 Class 2 GA216L SLOW, FAST and IMPULSE according to IEC 61672-1 Class 2 GA257L SLOW and FAST according to IEC 61672-1 Class 2 GA257B... -
Page 91: Peak Frequency Weighting
Peak Frequency Weighting GA116I C weighted to IEC 61672-1 Class 1 GA116L, GA116E A, C and Z weighted to IEC 61672-1 Class 1 GA216I, GA216B C weighted to IEC 61672-1 Class 2 GA216L, GA21L-P, GA257L A, C and Z weighted to IEC 61672-1 Class 2 GA257B Z weighted to IEC 61672-1 Class 2 Typical Electrical Self Generated Noise Level... -
Page 92: Linear Operating Range: (Iec 61672:2002)
Linear Operating Range: (IEC 61672:2002) Model ‘L’ Instruments Test start point for frequencies 31.5Hz, 1kHz, 4kHz and 8kHz: GA116L GA216L Display Range Start Point (dB) Display Range Start Point (dB) 30 – 100 dB 74.0 35 – 100 dB 74.0 50 –... - Page 93 A Weighted – GA216L Frequency (Hz) Display 31.5 1000 4000 8000 Range (dB) (dB) (dB) (dB) 35 – 100 dB 35.0 – 60.6 35.0 – 100.0 35.0 – 100.0 35.0 – 100.0 50 – 120 dB 50.0 – 80.6 50.0 – 120.0 50.0 –...
-
Page 94: Model 'E' Instruments
Model ‘E’ Instruments Test start point for frequencies 31.5Hz, 1kHz, 4kHz and 8kHz: Display Range Start Point (dB) 20 – 90 dB 74.0 40 – 110 dB 94.0 60 – 130 dB 114.0 A Weighted Frequency (Hz) Display 31.5 1000 4000 8000 Range... -
Page 95: Model 'I' & 'B' Instruments
Model ‘I’ & ‘B’ Instruments Test start point for frequencies 31.5Hz, 1kHz, 4kHz and 8kHz: Display Range Start Point (dB) 35 – 100 dB 74.0 55 – 120 dB 94.0 75 – 140 dB 114.0 A Weighted Frequency (Hz) Display 31.5 1000 4000... -
Page 96: Total Measuring Range
Total Measuring Range The difference between the lowest possible measurement on the most sensitive range and the highest level on the least sensitive range at a frequency of 1kHz. GA116E A Weighted 22.0 – 130.0 (dB) C Weighted 22.0 – 130.0 (dB) Z Weighted 24.0 –... -
Page 97: Peak Operating Range @ 1Khz
Peak Operating Range @ 1kHz GA116E 20 – 90 dB 30.0 – 93.0 (dB) 40 – 110 dB 50.0 – 113.0 (dB) 60 – 130 dB 70.0 – 133.0 (dB) GA116L 30 – 100 dB 40.0 – 103.0 (dB) 50 – 120 dB 60.0 –... -
Page 98: Acoustic Frequency Range
Acoustic Frequency Range Microphone Frequency Range (Hz) ACO 7146A 10 to 20000 ACO 7052 20 to 8000 Electrical Characteristics Frequency Range (Hz) 1 to 20000 Reference Points Model E Description Value Sound Pressure Level 94.0dB Range 40 - 110 Frequency 1kHz Model L Description... -
Page 99: Electrical Signal Input
Electrical Signal Input Electrical signals can be applied to the Castle Sonus range of sound level meters by removing the acoustical microphone and replacing with a dummy microphone having a series capacitance of 19pF ±2%. The BNC termination is then used to interface with a suitable signal generator with an output impedance of 600Ω... -
Page 100: Microphone [Ga116I, Ga116L]
Microphone [GA116I, GA116L] ACO ½“ Electret Condenser Microphone Cartridge Type 7146A. Microphone reference point is the centre of the diaphragm. Type MK80 (ACO 7146A) Specification Diameter (inch) Response Type Free-Field Polarization (V) Frequency Range (Hz) 10 - 20000 Sensitivity (mV/Pa) 25.0 Sensitivity (dB re 1V/Pa) -32.0 ±1.5dB... -
Page 101: Microphone [Ga116E]
Microphone [GA116E] ACO ½“ Electret Condenser Microphone Cartridge Type 7146. Microphone reference point is the centre of the diaphragm. Type MK75 (ACO 7146) Specification Diameter (inch) Response Type Free-Field Polarization (V) Frequency Range (Hz) 10 - 20000 Sensitivity (mV/Pa) 50.0 Sensitivity (dB re 1V/Pa) -26.0 ±1.5dB Capacitance (pF) -
Page 102: Microphone [Ga216I, Ga216B, Ga216L, Ga257B, Ga257L]
Microphone [GA216I, GA216B, GA216L, GA257B, GA257L] MK79 ACO ½“ Electret Condenser Microphone Cartridge Type 7052. Microphone reference point is the centre of the diaphragm. Type MK79 (ACO 7052) Specification Diameter (inch) Response Type Free-Field Polarization (V) Frequency Range (Hz) 20 - 8000 Sensitivity (mV/Pa) 25.0 Sensitivity (dB re 1V/Pa) -
Page 103: Typical Microphone Self Generated Noise Level
Typical Microphone Self Generated Noise Level Model Level (dBA) 7146 17.0 7146A 17.0 7052 18.0 Maximum SPL at the Microphone for No Damage ACO 7146 ACO 7146A ACO 7052 146.0 dB 146.0 dB 146.0 dB Calibration Reference Conditions Models ‘I’ & ‘B’ Model ‘L’... -
Page 104: Display
Display Digital 1 x 8 alphanumeric, digit size 7mm x 5mm Liquid Crystal Display Display Refresh Rate 250ms Detector Characteristics RMS and Peak Warm up time < 2 minutes Environmental Stabilization Time 30 minutes Operating range Class 1: -10°C to +50°C Class 2: 0°C to +40°C Warning: DO NOT subject the instrument to temperatures greater than 70°C or less than -20°C for any length of time. -
Page 105: Effects Of Vibration
Effects of Vibration From 20Hz to 1kHz at 1ms no noticeable effect. Magnetic Field No noticeable effect. Radio Frequency Fields The Sonus Pocket meter range falls into classification X for the susceptibility to Radio Frequency Fields. Operator Presence in Free Field: No noticeable effect when operator standing more than 2m behind the instrument. -
Page 106: Batteries
Manufacturers Data Uncertainty figures for all manufacturers’ data are under review at the time of going to print. Please contact Castle Group Ltd for up-to date information. Case Reflections Stalk length 62mm from top of case body to base of microphone... -
Page 107: Output Socket
Output Socket GA116I Wiring Configuration Both AC and DC outputs require load impedance's to exceed 10kΩ, however load impedance's > 100KΩ are recommended. Output Socket Pin Number Description Ground DC Output AC Output External View AC Output Vout ≈ 16.4mV rms at 94.0dB The output is un-weighted and not affected by the measurement range. -
Page 108: Ga116L, Ga116E, Ga216L, Ga257L
GA116L, GA116E, GA216L, GA257L Wiring Configuration The AC output (pins 5 & 6) require the load impedance to exceed 10kΩ, however load impedance's > 100KΩ are recommended. Output Socket Pin Number Description USB VCC USB D- USB D+ USB Ground Analogue Ground AC Output Digital Ground... -
Page 109: Ec Declaration Of Conformity
EC Declaration of Conformity The CE marking of this Castle Product indicates compliance with the EMC Directive. Castle Group Ltd declares that the: - • GA116, GA216, GA257 Pocket Sound Level Meters have in accordance with the following Electromagnetic Compatibility Directives: - •... -
Page 110: Chapter 11
Chapter 11 Function Equations The following tables describes mathematically how the functions available on the range of Sonus Pocket Meters are calculated. All calculations displayed are subject to rounding and/or truncation and are based on the equations from the IEC standard 61672-1 where applicable. Function Equation ... - Page 111 Function Equation ⌠ ξ ξ ⌡ − ⋅ ⋅ 20 log CeqT ⌠ ...
- Page 112 Function Equation ⌠ t ( ) ⋅ ⋅ ⋅ 10 log ⌡ − ⋅ ⋅ 10 log AeqT ExposureTime ⋅ ⋅...
- Page 113 Function Equation ⋅ Dose Dose Noise Dose Using Exposure ET is the Exposure Time in hours Time MT is the Log Length (Measurement period) in hours Dose DoseHour LogLength Noise Dose Log Length is the Measurement period in hours per Hour Dose is the calculated Noise Dose determined over the Log Length (Measurement period)
- Page 114 Function Equation Ρ Cpeak 20log Cpeak Peak sound Pressure Level is the maximum C-weighted sound pressure value in Cpeak C-weighted Pascal’s is the reference sound pressure of 20µPa Ρ Zpeak 20log Zpeak ...
-
Page 115: Chapter 12
Chapter 12 Glossary A-weighting See ‘Frequency Weighted Filter’. Action Values The Control of Noise at Work Regulations 2005 stipulates the following action values: - Lower Action Values (LAV) • A daily or weekly personal noise exposure (Lep,d) of 80dB (A-weighted) •... -
Page 116: Ambient Noise
It is intended to be used in an area with a very low ambient noise level such as an audiometric booth and all tests should be conducted in accordance with the standard BS EN ISO 8253-1. Castle Group Ltd offers a range of audiometers and audiometric booths which can be found at www.castlegroup.co.uk Background Noise This is the unwanted part of a measurement for a measured signal which is caused by noise. -
Page 117: Criterion Duration (Tc)
Criterion Duration (T The Criterion Duration is the time required for a constant sound level that is equal to the Criterion Level to produce a Noise Dose of 100%. Typically the Criterion Duration is 8 hours. For example, if: - Criterion Sound Level = 85dB Criterion Duration = 8 Hours Then a sound level of 85dB for an 8 hour period will produce a Noise Dose of... -
Page 118: Decibel (Db)
Decibel (dB) dB is simply an abbreviation for the term decibel and one decibel is one tenth of a Bel. The unit Bel is named after the scientist Alexander Graham Bell, but is not widely used. A decibel value is dimensionless and is therefore not a value of the measured quantity;... - Page 119 It is worth noting that a doubling or halving of the sound pressure causes a 6dB change in the sound pressure level. Example: - If the sound pressure doubles in value as an example from 1Pa to 2Pa then the sound pressure level will increase by 6dB: - ...
-
Page 120: Digital Signal Processor (Dsp)
Digital Signal Processor (DSP) A digital signal processor is form of microprocessor with an optimized architecture required for the very fast mathematical processes used in digital signal processing. The tremendous mathematical processing power available allows for much greater accuracy in the computed results than any other method. Most modern Castle instruments implement the use of digital signal processors. -
Page 121: Equivalent Continuous Sound Level (Leq)
Equivalent Continuous Sound Level (L Leq is the constant sound level over a given time that has the same sound energy of the varying noise source over the same time period. It can be measured using ‘A’, ‘C’ or ‘Z’ frequency weighting LAeq, LCeq, LZeq. Time (minutes) See ‘Function Equations’... - Page 122 Noise Exposure Limits (Criterion Level = 75dB) Max Permitted 3dB Exch Rate 4dB Exch Rate 5dB Exch Rate Daily Duration Allowable Level Allowable Level Allowable Level (Hours) (dB) (dB) (dB) 0.25 Noise Exposure Limits (Criterion Level = 80dB) Max Permitted 3dB Exch Rate 4dB Exch Rate 5dB Exch Rate...
-
Page 123: Fast Fourier Transform (Fft)
Fast Fourier Transform (FFT) The French mathematical physicist Jean Baptiste Joseph Fourier found that it was possible to represent any waveform in the time domain as a sum of infinitely many sine and cosine terms. FFT analysis can be performed on certain sound meter instrumentation and is where the instrument takes the time varying input signal and displays the calculated frequency spectrum. -
Page 124: Frequency Weighted Filter
The audible hearing frequency range over which a normal human ear can detect is approximately 20Hz to 20kHz. The range usually decays with age and generally this is of the higher frequencies. If the level of a signal is sufficient and is of a frequency below 20Hz then it is generally felt and not heard. - Page 125 This frequency weighting is commonly used for peak sound levels plus entertainment and machinery noise. D-Weighting This frequency weighting is intended to adjust the signal frequency spectrum to match the sensitivity of an average human ear for sound pressure levels between approximately 50 and 90dB.
- Page 126 Frequency Weighting Table The following table shows the weighting required across the audible frequency range: - Frequency Weighting Response (dB) Nominal Frequency (Hz) -70.4 -14.3 12.5 -63.4 -11.2 -56.7 -8.5 -50.5 -6.2 -44.7 -4.4 31.5 -39.4 -3.0 -34.6 -2.0 -30.2 -1.3 -26.2 -0.8...
-
Page 127: Frequency Band Filter
Frequency Band Filter A frequency band is all the frequencies between an upper and lower frequency limit. When a signal is passed through a frequency band filter the signal remains unaltered for the selected frequency band whilst all other frequencies are filtered out. - Page 128 Ear Plugs: These can be either disposable or re-useable and are made from a variety of materials. Disposable plugs can be manufactured from glass down, plastic coated glass down and wax impregnated cotton. Re-usable plugs can be made from permanent moulded plastic, paste filled rubber and paste filled plastic.
- Page 129 Unit Octave Band Levels 125 250 500 Ear muff, mean attenuation Standard Deviation Assumed protection Corrected level Levels at ear Predicted level of noise with 81 dBA protection 4dB correction 85 dBA In accordance with the Control of Noise at Work Regulations 2005, the predicted level of noise with hearing protection must be increased by 4dB, therefore the quotable predicted noise level taking into account the worn hearing protection is 85dBA.
-
Page 130: Leq
Therefore as (LCeq – LAeq) = 0.2 − − ⋅ − − 103.4 103.2 PNR = 21.7 dB To find the A-weighted level at the ear subtract the PNR from LAeq: - A-weighted level at ear = LAeq - PNR A-weighted level at ear = 103.2 –... -
Page 131: Maximum Rms Level (Lmax)
The minimum rms level is widely recognised as LAmin, LCmin or LZmin depending on the frequency weighting selected and is measured in decibels (dB). Maximum rms Level (L This is the highest root-mean-square sound pressure level measured over the measurement time period. The maximum rms level is widely recognised as LAmax, LCmax or LZmax depending on the frequency weighting selected and is measured in decibels (dB). -
Page 132: Noise Dose
Noise Dose This is the amount of noise a person is subject to over a work shift and is expressed as a percentage. The noise dose is calculated using the criterion level (LC), criterion duration (TC) which is 8 hours, exchange rate (Q) and the total measurement time (T). ... -
Page 133: Noise Floor
Noise Floor This is the lowest sound pressure level that the meter can display on its operating range. The instrumentation itself by its very nature of operation has some internal electrical noise which can be minimised only. The electrical noise therefore contributes to the noise floor on the lower ranges of the instrumentation. -
Page 134: Percentile Sound Levels
Percentile Sound Levels This is the sound pressure which has been subject to the A-weighting frequency filter and Fast response time weighting that is exceeded for n percent of the time. Percentile levels are used greatly when measuring environmental noise and referred to as Ln. -
Page 135: Peak Level
Peak Level The peak level is the crest of the signal or sound pressure wave. The figure below shows the peak level and its corresponding rms level: - peak Time Peak levels are commonly measured incorporating the C-weighted and Z- weighted frequency weighting filters and can be much higher than the rms sound pressure level. -
Page 136: Residual Noise
Residual Noise This is the ambient noise remaining under normal conditions when any specific noise sources under investigation (for assessing the likelihood of complaints) are suppressed to a degree such that it does not contribute to the ambient noise. See also ‘Ambient Noise’. Root Mean Square (rms) The abbreviated term rms is identified from the expanded term root mean square, also known as the quadratic mean. -
Page 137: Sound Exposure Level (Lae)
Sound Exposure Level (L Like sound exposure it is a measure of the total A-weighted sound energy of the sound produced over a specified period of time, however it is expressed in dB. The sound exposure level is used to describe the amount of noise from a single event such as an aircraft flying overhead or a train pass by. -
Page 138: Sound Pressure Level (Lp)
Sound Pressure Level (Lp) Like sound pressure this is the difference between the ambient sound pressure and the instantaneous sound pressure caused by a noise source, however the sound pressure level is expressed in decibels (dB). 20log ... -
Page 139: Time Weighting
Time Weighting This refers to a special filter that applies an exponentially decaying weighting factor to the signal. Several rates are available:- Slow-Weighting The rise and fall times applied for Slow Weighting are both 1 second. Fast-Weighting The rise and fall times applied for Fast Weighting are both 125m seconds. Impulse-Weighting The rise and fall times for Impulse Weighting are 35m Seconds and 1.5 seconds respectively. -
Page 140: Chapter 13
In the event of a fault occurring, during the warranty period, the instrument should be returned to Castle Group Ltd, in its original packaging, or to an authorized agent. Please enclose a clear description of the fault or symptom. -
Page 141: Trouble Shooting Guide
Trouble Shooting Guide Question Answer Check that there is a battery fitted to the instrument and of correct polarity. My instrument will not turn on? Check that the battery is not flat. What is the white plastic cap This is a protective cover for the sensitive fitted microphone. -
Page 142: Instrument Disposal
To find the nearest UK waste recycling point in your area, enter your postcode in the website www.recycle-more.co.uk For more information please contact your local authority, the dealer where you purchased your product or Castle Group Ltd Page 123... -
Page 143: Disclaimer
Castle Group Ltd assumes no responsibility or liability for any injury, loss or damage incurred as a result of misinterpreted or inaccurate information. Any documentation supplied with your product is subject to change without notice. - Page 144 Index AC Output ................... 88, 89 Accessories ....................68 Action Values ................... 96 Ambient Noise ..................97 Audio Frequency Range ................97 Audiometer ....................97 Auto Shut Down ..................18 Background Noise ..................97 Battery Level Indicator ..................18 Low Warning ..................18 Type ......................
- Page 145 dBdataPro - LITE ..................67 DC Output ....................88 DC Power Supply ..................18 Decibel ..................... 99 Defaults ....................47 Delete Logs ....................46 Digital Signal Processor ................101 Disclaimer ....................124 Disposal of Instrument ................123 Doppler Effect ..................101 Dose ....................
- Page 146 Getting Started Models ALL ................... 15 Models I & B ..................14 Models L & E ..................14 Glossary ....................96 Hearing Protection ................. 108 Hearing Protection Calculation HML Method ..................110 Octave Band Analysis Method ............109 SNR Method ..................111 Impulse Weighting ..................
- Page 147 Exposure Time .................. 23 Frequency Weighting ............... 23 Keypad Lock ..................26 Navigational Structure ..............21 Threshold ..................26 Time Weighting ................23 Models L, E Calibration ..................28 Delete Saved Logs ................46 Instrument Settings ................30 Criterion ..................38 Date ....................
- Page 148 Pre-Polarised ..................4 Microphone Sensitivity ................5 Microphone Types Free Field .................... 4 Pressure....................4 Random Incidence ................4 Operation ................... 112 Removal ....................5 Microphone Extension Cable Attaching ....................6 Removing ....................6 Minimum rms Level (Lmin) ..............111 Mode ......................
- Page 149 Parameters Changing ....................55 Explanations ..................61 Daily Personal Noise Exposure Level (Lep,d) ........63 Equivalent Continuous Sound Level (Leq) ........61 Maximum Sound Pressure Level ............62 Noise Dose ..................64 Noise Dose per Hour ................ 65 Pascal Squared Hours ............... 65 Peak Level..................
- Page 150 Model E Identifying ..................50 Model L Identifying ..................50 Models I, B Identifying ..................49 Record Timer .................... 41 Reset ....................49, 54 Residual Noise ..................117 rms ......................117 Root Mean Square (rms) ................ 117 Set Defaults ....................47 Slow Weighting ..................
- Page 151 Models I, B Identifying ..................49 Switching Your Sonus Meter Off .............. 19 Switching Your Sonus Meter On .............. 19 Technical Specification AC Output ..................... 88 Acoustic Frequency Range ..............79 Battery Life ................... 87 Calibration Reference Conditions ............84 DC Output ....................
- Page 152 User Mode ....................44 View Logs ....................45 View Settings .................... 51 Warranty ....................121 Weighting Frequency Weighting ................9 Time Weighting ..................8 White Noise .................... 120...
Need help?
Do you have a question about the Sonus Range GA116L and is the answer not in the manual?
Questions and answers