Advertisement
Quick Links
Advertisement

Summary of Contents for edesix videobadge VB-200 Series
- Page 1 Wearable Security for Professionals VB-200 SERIES QUICKSTART GUIDE ED-006-002-03...
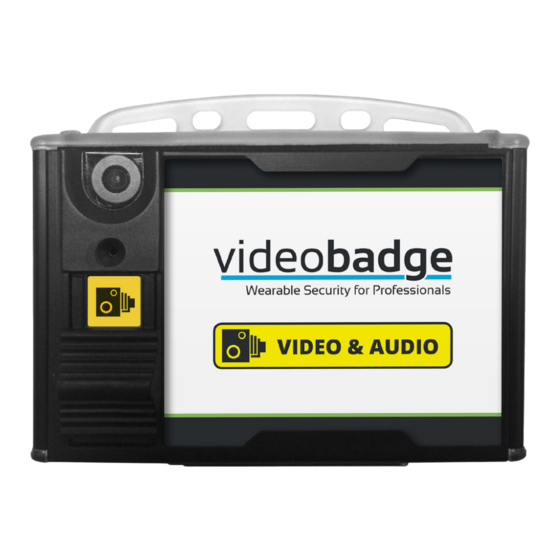
- Page 2 Wearable Security for Professionals INTRODUCTION Welcome, and thank you for choosing Edesix as your Body Worn Camera provider. This simple guide will lead you through the set-up process of your VideoBadge VB-200. Lens ID card holder Microphone Robust thumb-slider camera activation...
-
Page 3: Charging Your Device
Wearable Security for Professionals CHARGING YOUR DEVICE Upon receiving your VideoBadge, it is recommended that you fully charge the device before usage. To enable charging you will require one of the following: Solo Docking Station Connected to your laptop or PC 7 Slot Docking Station Connected to a power supply VB-200 - Quick-Start Guide - ED-006-002-03... - Page 4 Wearable Security for Professionals When charging using a Solo or 7 Slot docking station, the protective rubber port cover should be rotated as shown, and the badge securely inserted into the docking station. Rotate rubber Rotate rubber port cover port cover Laptop or PC Connected directly to your Laptop or PC VB-200 - Quick-Start Guide - ED-006-002-03...
- Page 5 Wearable Security for Professionals Once situated in the charging position, your VideoBadge will bleep to indicate charging has commenced, and the LED, as indicated, will flash green to show charging. Please note that, if this same top right LED is flashing when the VideoBadge is removed from its dock, this indicates that the VideoBadge is in power-saving mode.
-
Page 6: Configuring Your Device
Wearable Security for Professionals CONFIGURING YOUR DEVICE Prior to using your VideoBadge, your device must be configured and assigned to you. There are two ways to assign and configure a VideoBadge: Using VideoManager Using an RFID Tag Power Management Pulsing Blinking green green... - Page 7 Wearable Security for Professionals VB-200 Configuration Using an RFID Tag The power LED will flash red. The management LED will flash green. The recording LED will flash green. The device will beep at one-second intervals. Power Management Flashing Flashing green Recording Flashing green...
- Page 8 Wearable Security for Professionals USING YOUR VIDEOBADGE The Edesix VideoBadge VB-200 is intuitive and simple to use. VideoBadge VB-200 To start/stop recording To begin recording, simply slide the robust thumb Slide thumb slider button, located on the right-hand side of your slider down to badge, downwards.
- Page 9 Wearable Security for Professionals VideoBadge Status LEDs VideoBadge has three status LEDs. It is important to check the status of your VideoBadge before use. Power Management Recording VB-200 - Quick-Start Guide - ED-006-002-03...
- Page 10 Wearable Security for Professionals Power If the VideoBadge is plugged in: The device is fully charged Green If the VideoBadge is not plugged in: The device is powered up Throbbing The device is plugged in and charging Blinking The device is unplugged and is in power saving mode The VideoBadge is switched off Orange / Red If the VideoBadge is running low on batteries.
- Page 11 Wearable Security for Professionals Recording LED Green If the VideoBadge is plugged in: The VideoBadge is recording Blinking The VideoBadge is pre-recording Please note: The camera should always remain upright when capturing footage. Lastly, your VideoBadge comes equipped with a lanyard for easy wear. The lanyard should be attached to the clear mounting at the top of your VideoBadge.
-
Page 12: Regulatory Information
The products: Product Name Model Edesix VideoBadge VB-200 have been tested and found to comply with the limits for Class B digital devices, pursuant to part 15 of the FCC Rules. These limits are designed to provide reasonable protection against harmful interference in a residential installation. This equipment generates and can radiate radio frequency energy and, if not installed and used in accordance with the instructions, may cause harmful interference to radio communications. - Page 13 +44 131 510 0232 sales@edesix.com www.edesix.com Reg: SC235672 | VAT: GB 803 904 251...


Need help?
Do you have a question about the videobadge VB-200 Series and is the answer not in the manual?
Questions and answers