Table of Contents
Advertisement
Advertisement
Table of Contents

Summary of Contents for Binatone DC200
-
Page 1: User Guide
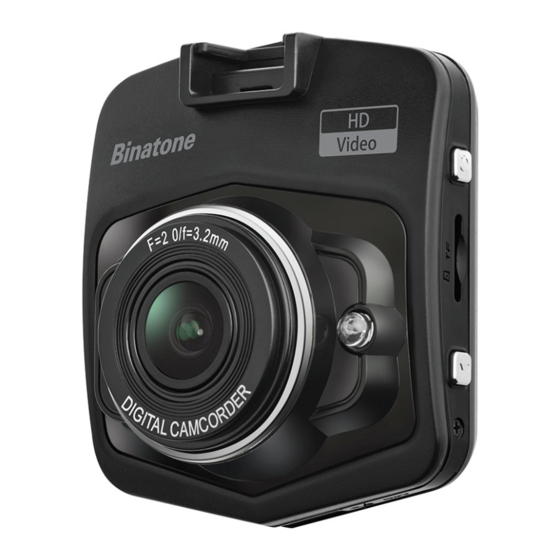
User Guide DC200 edition www.binatoneglobal.com... -
Page 2: Important
If you are adding a new SD card to the device, we recommend you format it before use. Micro SD card requirement: 4GB or above, CLASS 10 or above. Unpacking your Binatone Dash camera System In the box you will find ·... -
Page 3: Safety
SAFETY Safety Using your dash camera in the car When using your dash camera while driving it is essential that you drive with due care and attention. Never modify the settings or program your dash camera while driving. Only look at the screen when it is safe to do so. When mounting the dash camera in your car make sure that it does not obscure your view or impede the operation of any driving controls. -
Page 4: Table Of Contents
CONTENTS CONTENTS Important In the Box Safety Using your dash camera in the Car Battery Contents Quick Start Guide Position of the Controls Installing a Micro SD Card Cigarette charger Turning the Dash camera Unit On/Off System Reset Windscreen Holder Installation Starting Up Basic features Entering the Setting menus... - Page 5 CONTENTS Record Audio setting Date Stamp setting G-sensor setting Device setup Park mode setup Date/time setup Auto power off setup Screen Saver setup Beep Sound setup Language setup Frequency setup Flash setup Format Default setting Version Camera Settings Resolution setting Sequence setting Quality setting Sharpness setting...
- Page 6 CONTENTS Delete setting Protect setting Playback on PC Technical Support or contact Technical Specifications EC Declaration of Conformity Technical Help – Please contact the helpline on 0844 557 9677...
-
Page 7: Quick Start Guide
QUICK START GUIDE Quick Start Guide Please make sure that you read all of the information contained within this user guide before operating this unit. If you experience any problems, please go through the user guide before contacting the customer helpline. Position of the controls 1. - Page 8 QUICK START GUIDE Press to turn the LED light ON/OFF when the device in video mode. 2. OK Button – Press to select and enter when you setting. Press to start/stop recording (or take photograph) during the device working. 3. Menu Button – Press to enter into (or exit) the menu (or setup).
-
Page 9: Installing A Micro Sd Card
QUICK START GUIDE Installing a Micro SD Card You may install it as described below. At least 4GB microSD Switch the unit off first before installing or removing the MicroSD card. When installing it can only be fitted one way – the contacts should be facing away from you and the cut-off corner at the bottom (as shown above). -
Page 10: Turning The Dash Camera Unit On/Off
QUICK START GUIDE The adaptor is also compatible with 24V DC sources, as found in many heavy goods vehicles. Turning the dash camera Unit On/Off Your dash camera will power on and start to record automatically as soon as it is connected to power, and will shutdown automatically once it disconnect to power over 10 seconds. -
Page 11: Windscreen Holder Installation
QUICK START GUIDE Windscreen Holder Installation The Windscreen mount has a suction pad that fits to the windscreen or a flat area on the dashboard. A. Fitting to windscreen Pull the lever away from the suction pad. Place the pad on the widescreen and push the lever towards the pad until it clicks into place. -
Page 12: Starting Up
MAIN MENU Starting Up Your dash camera will power on and start to record automatically as soon as it is connected to power. You can also power it on manually: Press the On/Off button for 1 second. Your dash camera has been designed to be as simple to use as possible. The purpose of a DVR is to continually record the road ahead and to automatically record and save any incidents or accidents you might be involved in. -
Page 13: Power On/Off
MAIN MENU Power on/off Your dash camera will power on and start to record automatically as soon as it is connected to power. You can also power it on and off manually. Press the power button for 1 second to power on, press and hold the power button for 2 seconds to power off. - Page 14 MAIN MENU The higher resolution selected the more memory required to save and store lengths of video. If you want to store more video on one SD card, try reducing the resolution. Resolution Card capacity Recording time (minute) 1080FHD 1920*1080 16GB 32GB 1080P 1440*1080...
-
Page 15: Loop Recording Setting
MAIN MENU 2) Loop recording setting Press Up or Down button to select Loop recording menu, then press OK button, the following screen is displayed. Press Up or Down button to select the time per video which you want, you can select off also, then press OK button to confirm your selection and return to menu. -
Page 16: Motion Detection Setting
MAIN MENU Press Down button to select White balance menu, then press OK button, the following screen is displayed. Press Up or Down button to select the mode which you want, then press OK button to confirm your selection and return to the menu. If you selected “Auto”, device will adjust white balance based on colour’s temperature automatically. -
Page 17: G-Sensor Setting
If the G-Sensor senses one of these things, your DC200 will automatically lock and save the preceding length of video recorded so that you will have a permanent record of the event. -
Page 18: Park Mode Setup
MAIN MENU 1) Park mode setup If Park Mode is switched on, your dash camera will shut down 10 seconds after ignition turns off but as soon as any movement is sensed with any external disturbance to your vehicle, it will power up and start recording automatically. Press down button to select Park mode menu, then press OK button, and then press Up or Down button to select “On”... -
Page 19: Screen Saver Setup
MAIN MENU 4) Screen Saver setup Press down button to select Screen saver menu, then press OK button, the following screen is displayed. Press Up or Down button to select the mode which you want, then press OK button to confirm your selection and return to the menu. If you selected “Off”, screen will always display until device turn off. -
Page 20: Frequency Setup
MAIN MENU 7) Frequency setup Press down button to select Frequency menu, then press OK button, and then press Up or Down button to select light frequency “50Hz” or “60Hz” , then press OK button to confirm your selection and return to the menu. When your dash camera working under the light, please make sure what frequency of the light and set your device accordingly. -
Page 21: Version
Camera setting DC200 has been designed primarily to function as a DVR, to record the road ahead and to save any incidents or accidents you may be involved in. However, in addition to the DVR function, your DC200 can also be used to take still photographs. -
Page 22: Resolution Setting
MAIN MENU 1) Resolution setting Press down button to select Resolution menu, then press OK button, the following screen is displayed. Press down/up button to select the resolution which you want, then press OK button, the resolution will be save. The bigger resolution number means the photo quality will better than smaller one, but it need more storage space to save photo file also. -
Page 23: Sharpness Setting
MAIN MENU 4) Sharpness setting Press down button to select Sharpness menu, then press OK button, the following screen is displayed. Press Up or Down button to select which you want, then press OK button to confirm and return to the menu. “Strong”... -
Page 24: Iso Setting
MAIN MENU 6) ISO setting ISO setting controls the sensitivity of your camera's sensor to a given amount of light, but higher ISO settings affects image noise. Press down button to select ISO menu, then press OK button, the following screen is displayed. -
Page 25: Quick Review Setting
MAIN MENU If you selected “On”, means anti-shaking function was opened, you will be able to take a high quality image when the device shaking. 9) Quick Review setting Press down button to select Quick Review menu, then press OK button, the following screen is displayed. -
Page 26: Playback Setting
MAIN MENU Playback setting Press Lock button twice during the device standby in Video mode, switch device to Playback mode, the following screen is displayed. 1) Delete setting Press down button to select Delete menu, then press OK button, the second screen is displayed. -
Page 27: Protect Setting
MAIN MENU 2) Protect setting Press down button to select Protect menu, then press OK button, the second screen is displayed. Press Up or Down button to select the menu what you want to do and then press OK button, the third screen is displayed. Press Up or Down button to select the menu what you want to do. -
Page 28: Technical Support Or Contact
MAIN MENU Technical Support or contact If you have a technical problem with your device please contact the helpline on 0844 557 9677 or for more information regarding you product go to www.binatoneglobal.com Note: Calls cost 7p per minute plus your telephone company's access charge. Technical Help –... -
Page 29: Technical Specifications
TECHNICAL SPECIFICATIONS Technical Specifications Product dimension 7.1*6.2*3.1cm Weight 2.4’’ LCD TFT screen Display screen Lens view angle 120 degree Option language English only Video file format Image file format JPEG Extensible memory Micro SD card slot Capacity Max. 32 GB class10 (Not included) Microphone Built-in Cigarette charger... -
Page 30: Ec Declaration Of Conformity
EC DECLARATION CONFORMITY BINATONE TELECOM PLC 1 Apsley Way London NW2 7HF,United Kingdom. Tel: +44(0) 20 8955 2700 Fax: +44(0) 20 8344 8877 e-mail: binatoneuk@binatonetelecom.co.u ________________________________________ EC Declaration of Conformity We the manufacturer / Importer : Binatone Telecom Plc 1 Apsley Way London NW2 7HF, United Kingdom.
Need help?
Do you have a question about the DC200 and is the answer not in the manual?
Questions and answers
Hi, my dashcam does not turn off when car is switched off..any advice please?
The Binatone DC200 dashcam powers off automatically 10 seconds after it is disconnected from power. If it does not turn off when the car is switched off, it is likely because the car's cigarette lighter or 12V DC socket continues to supply power even when the ignition is off. In such cases, the dashcam remains powered and does not shut down automatically.
This answer is automatically generated
SD card is in but message keeps coming up “PLEASE INSERT SD CARD”
The Binatone DC200 may display "PLEASE INSERT SD CARD" even when the SD card is inserted due to the following reasons:
1. Incorrect Insertion: The SD card may not be inserted in the correct direction or fully seated in the slot.
2. Formatting Issue: If the SD card is new, it may need to be formatted before use.
3. Incompatible SD Card: The device requires a Micro SD card of 4GB or above, CLASS 10 or higher. A lower-class card may not be recognized.
4. Faulty SD Card: The SD card may be damaged or defective, preventing the device from detecting it.
To resolve the issue, ensure the SD card is properly inserted, format it if necessary, and use a compatible CLASS 10 or higher card.
This answer is automatically generated